
My Favorite Focal Lengths for Safari & Why They Work
If there’s one question I get asked constantly—whether it’s after a workshop, under a baobab tree, or in my inbox late at night—it’s this: What’s the best lens to bring on safari? And honestly, I get it. We’ve all been there, staring at our gear shelf, panicking the night before a flight to Africa, trying to decide what makes the cut.
After years of shooting in some of the most remote corners of Africa, from the blazing heat of Namibia to the lush floodplains of Botswana, I’ve come to appreciate one truth: there is no perfect focal length. But there are focal lengths that work better than others depending on how you like to shoot, what your subject is, and how mobile you need to be.

The 100-500 RF is one of my favorite “all in one” lenses.
If I Had to Choose Just One Lens...
Let’s start here, because this is where most people are. You’re not packing a full kit. Maybe it’s your first safari. Maybe you’re traveling light. Or maybe you just want simplicity. In that case, my honest answer is: go for a superzoom.
Something like the Canon RF 100-500mm, Sony 200-600mm, or Sigma 60-600mm if you’re on a budget.
Yes, they come with compromises. They’re not as fast as primes, and sometimes the sharpness at the long end is a notch below the best glass. But you know what they offer? Versatility. And when you’re out in the field, that matters more than people think.
On one game drive in Khwai, we went from photographing a fish eagle on the top of a dead tree (full 500mm) to shooting elephants crossing the road 10 meters in front of us. Without a zoom, you’d either miss the moment or spend precious seconds changing gear. Superzooms let you stay in the moment.
I’ve guided photographers with only one body and a 100-500mm, and they came home with incredible images. Don’t feel like you need a truckload of equipment to make magic.

A zoom means sometimes zooming out - like here, shot with 100-500 at 100mm.
My Ideal Setup (And Why It Works)
Of course, if you’ve got more experience—or if you’re like me and spend months in the bush—then you might want to build a dual-body setup that covers more ground.
Right now, my go-to kit is:
Canon R5 + RF 100-300mm f/2.8
Canon R3 + EF 600mm f/4 (with 1.4x extender when needed)
This combo covers everything I need. The R5 gives me incredible resolution for wide scenes or animals in context. That 100-300mm lens is insanely sharp and fast, perfect for low light or fast-moving animals at mid-range. I use this combo when I want storytelling images—a lion framed by a sunset, a herd of buffalo disappearing into the bush.

Canon 100-300 f/2.8 is becoming on of my all-time favorite lenses.
The R3, on the other hand, is my go-to for action. It’s blazing fast and almost psychic when it comes to autofocus. With the 600mm f/4 on it, I can isolate subjects beautifully—especially birds or more skittish predators. The bokeh is creamy, the subject pops, and I don’t need to crop much thanks to the native reach.
A good example: we spotted wild dogs hunting in the early morning in Savuti. They were darting between vehicles and clumps of brush. I had no time to think. The R3 and 600mm combo let me lock on to a dog mid-sprint, even with the background chaos. Would a zoom have helped me frame better? Maybe. But I would have missed focus. Trade-offs are always there.
📷 Curious what else I carry on safari? Check this out!
What You Should Consider
When choosing your focal lengths for safari, think about:
Subject distance. If you’re heading to parks like Etosha or the Central Kalahari, animals can be far. In places like South Luangwa, you’ll often be very close.
Shooting style. Do you like intimate portraits or environmental shots?
Weight and mobility. Are you shooting handheld or from a bean bag on a vehicle?
Light conditions. A faster lens (f/2.8 or f/4) can be a game-changer in early mornings or late evenings.
Also, don’t forget to match your gear to your own physical comfort and confidence level. A 600mm on a crop sensor can feel like a telescope. It’s not always fun to handhold.

The 600 f/4 is a phenomenal lens but not necessarily the most practical to handle around.
You don’t need the most expensive setup to take great safari images. Some of my favorite shots were taken with humble gear, simply because I was in the right place at the right time and ready. Whether you're packing a single lens or two high-end bodies, the goal is the same: to tell stories through your images.
If you’re still unsure what to bring on your next trip, feel free to reach out. I love talking gear (maybe too much).
📅 Want to join one of my guided photo safaris in 2026?
Featured Articles

Best Camera Settings for Wildlife Photography in 2025
There’s a moment on every safari - usually when I’m tracking something fast and elusive, like a orix or a leopard that won’t sit still - when I catch myself doing something I swore I’d stop: lowering my ISO to “save the shot.”
Spoiler alert: I usually end up ruining the image.
Over the years, I’ve had to unlearn a lot of habits I picked up early on in wildlife photography. Chief among them? Being scared of high ISO. I used to treat anything over ISO 1600 like it was toxic. But 2025 me? I’ll happily shoot at ISO 20,000 if that’s what the scene demands - and more importantly, if it lets me keep the shot.
Let’s talk about it.
Why Camera Settings Matter More Than Ever in 2025
Wildlife photography isn’t just about having the right lens or the biggest sensor. It’s about decision-making. Split-second, gut-level decisions about exposure, sharpness, depth of field. And today, with the tech we’ve got in our hands, the margin for error has never been more forgiving. But only if we use it right.
The settings that worked 10 years ago aren’t necessarily the best today. Our sensors are better. Our post-production tools are borderline wizardry. And the most important setting - by far, in my opinion - is shutter speed.
Shutter Speed: Freeze First, Worry Later
This is my golden rule: sharp noise beats blurry perfection every single time. Especially in wildlife. If your lion’s eye is tack sharp but the ISO is 6400? That’s a keeper. If your lion’s ear is soft because you shot at 1/100 instead of 1/250? That’s a lost shot, no matter how low the noise.
My Minimum Shutter Speeds in 2025:
Large mammals (walking): 1/500
Fast action or running: 1/1600–1/2500
Birds in flight: 1/3200–1/4000 (sometimes even 1/5000)
Still animals in shade: I’ll sometimes go down to 1/250 or lower—but only in super low light and with still subjects
The funny thing is, I used to be way more conservative with shutter. I thought 1/500 was “fast enough”. These days, I crank that shutter. I don’t care if my ISO spikes a bit. Why? Because noise reduction is insane now. Especially if the file is properly exposed - meaning, there is still plenty of signal on the sensor beyond the noise floor.

ISO in 2025: Stop Being Scared of It
I can’t say this enough: today’s noise reduction tools are mind-blowing. If you’re still babying your ISO, you’re living in 2016. I recently shot a herd of springboks in the Central Kalahari - backlit, dusk, ISO 20,000+. In Lightroom, I used the new AI Denoise (no more DNG creation!) and honestly? The final image looked cleaner than ISO 3200 files I shot and processed five years ago. Capture One has made massive strides too, even though these days Adobe has some edge. I compared both in this post → Capture One vs Lightroom: A Wildlife Photographer’s Honest Take.
I don’t even consider ISO a “quality dial” anymore. It’s a flexibility dial. I use it to keep my shutter speed and aperture where they need to be. Noise is the least of my concerns—especially now that I know I can clean it up without wrecking details.
Aperture: Know Your Lens, Know Your Subject
This one’s a bit more stable year over year, but in 2025, I’m finding myself more intentional with depth of field. Used to stay wide open all the time but I slightly change that recently.
Here’s my approach these days:
f/2.8 or f/4 is great for subject separation, but risky if you’re not parallel to the animal.
For head-on shots of moving wildlife, I’ll often stop down to f/5.6 or f/6.3 to give myself a bit more cushion, even with the fast R3 autofocus.
If I’m shooting sequences (think a lion walking toward me), I stick with f/5.6 and rely on my autofocus system (thank you R3) to track and nail it.
For wide scenes with elephants or giraffes, I’ll use f/8+ to hold some more background detail.
Bottom line: your aperture isn’t just about bokeh. It’s about nailing focus. Don’t be scared to stop down if you’ve got the light—or if you’re willing to push ISO to get it.
Auto ISO: the Secret Weapon
Let me let you in on something I wish I learned earlier: Auto ISO is a beast for fast-changing wildlife scenes.
Here’s how I run it:
Manual mode: I set shutter and aperture where I want them.
Auto ISO: I let the camera choose the ISO based on ambient light.
Max ISO limit: On the R5 and R3, I set it to 25,600.
Exposure compensation: If the scene’s too dark or too bright, I dial in + or – and keep rolling.
This setup gives me full control over the creative look of the shot (shutter and depth), while still adapting to lighting changes in real time. It’s saved my butt more times than I can count—especially with fast birds or predators darting in and out of shade.
Drive Mode, AF Setup, and Other Nerdy Stuff
I’ll keep this brief but juicy.
Drive Mode:
High-speed continuous (electronic shutter) 90% of the time.
I shoot short bursts. Spray-and-pray is overrated and it will take forever to go through all the photos.
Autofocus:
Servo/Continuous AF (AI-Servo or equivalent)
Animal eye detection ON — it’s gotten so good on the Canon R3/R5
AF method: Flexible Zone or single point, depending on the shot
Trigger servo AF with my shutter button
Back button focus set on ONE-SHOT — so it’s always there and ready when I need to use single shot AF instead of Servo.
Honestly, these AF systems are so smart in 2025 it’s almost scary. The only time I miss focus now is when I mess up, not the camera.
Here’s a full breakdown of how I set up this function:
Metering and Exposure Tips for Safari
Metering can get tricky on safari, especially with high contrast scenes. Some tips:
Expose for the highlights. Always. Blown skies or white fur (like a lion in harsh light) can’t be saved. Shadows can (to some degree).
Use the histogram. I ride that right edge without clipping.
Custom white balance if needed. But honestly? I shoot auto WB and fix it in post 99% of the time.
Pro tip: if you’re using EVF-based cameras like the R5 or R3, set the EVF to “highlight alert” or “zebra stripes” so you can see when you’re clipping. It’s saved me dozens of shots.
Bonus Settings: Things That Help in the Field
These are little tweaks that make a big difference:
Set a custom button for crop mode (1.6x crop) — perfect when your subject is distant and you don’t want to change lenses or use extenders - only if you have a high res camera.
Use voice memos if your camera allows it — I’ll tag shots with location, behavior notes, or post ideas.
Pre-load your custom modes - This means I can flip between setups in under a second.
In 2025, Prioritize Sharpness Over Clean Files
The biggest mindset shift I’ve had in the last 2 years is this: stop compromising your shutter speed just to keep ISO low. In today’s world, high ISO is not the enemy. Motion blur is. You’ve got the tools—smart cameras, powerful editing software, and AI noise reduction that honestly feels like cheating. Use them.
Take the shot. Clean it later. That’s how I shoot now. And it’s helped me bring home more keepers, more moments, and way fewer regrets.
And if you are thinking of getting a new camera, check this out first:
🦁 Coming on safari with me in 2026?
You’ll get a full field guide with settings, prep, and personalized help.
Featured Articles

Why I’m Not Upgrading My Camera — and What I’m Doing Instead
I get it. It’s tempting. A new camera body drops and the internet explodes — YouTube hands-on reviews, pixel peeping on forums, and everyone asking, “Is this finally the one that will make my images better?”
I’ve been there. As a wildlife photographer who spends months each year in raw, demanding environments it’s natural to crave the best gear. But here’s the truth: I haven’t upgraded my main cameras in over four years. And I don’t feel like I’m missing out.
In fact, I think the obsession with upgrading is distracting many photographers from what really matters: being in the field, learning, and practicing the craft.
Why I’m Still Using “Old” Gear
Let me be clear — I’m not anti-gear. I love testing new equipment. I still geek out over specs. When Canon announces something like the R5 Mark II or the R1, I’m there reading every detail, imagining what it could do in the field.
But here’s the thing…
I’m still shooting with my Canon R5 and R3. The R5 gives me detail and resolution for big landscapes or environmental portraits, while the R3 nails birds in flight and fast action with its insane autofocus speed. Together, they’ve covered 99% of what I do — and never once have I come home thinking, “This camera was the reason I missed the shot.”
Instead, if I blow a moment, it’s usually because:
I didn’t anticipate the behavior.
I was too slow to react.
I used the wrong settings.
I got lazy in composition.
None of these things would be fixed by upgrading to a newer body.
Innovation Has Slowed — and That’s a Good Thing
Remember the mirrorless boom just a few years back? Every new release felt revolutionary. Sensors, stabilization, eye autofocus — everything jumped forward in huge leaps.
Now we’re in a refinement phase. The R5 II has better noise control, pre-shoot features, some added frames per second. Useful? Sure. Essential? Not for most of us.
I’ve seen it play out over and over: a client shows up on a workshop with the newest gear but lacks the confidence to react to a leopard sprinting across the frame. Meanwhile, someone with a 5-year-old body nails it because they’ve put in the reps. They know how to read the animal. They’ve studied light. They don’t panic with fast action.
That’s what makes the difference. Not whether your camera shoots 20 vs 30 frames per second.

A Better Investment: Real-World Learning
Here’s the unpopular but honest opinion: if you’ve got 4k to spend, a new camera body is not the best use of that money.
You’ll get more value — more growth, more connection, more creative fire — by joining a workshop or a guided trip.
When you travel with someone who’s been where you want to go, something changes. You ask better questions. You get live feedback. You watch how light is used, how moments are anticipated, and how technical decisions support a story.
You get challenged, gently but persistently, to see differently.
That’s the kind of investment that stays with you. It reshapes how you approach every image you take from that moment forward.
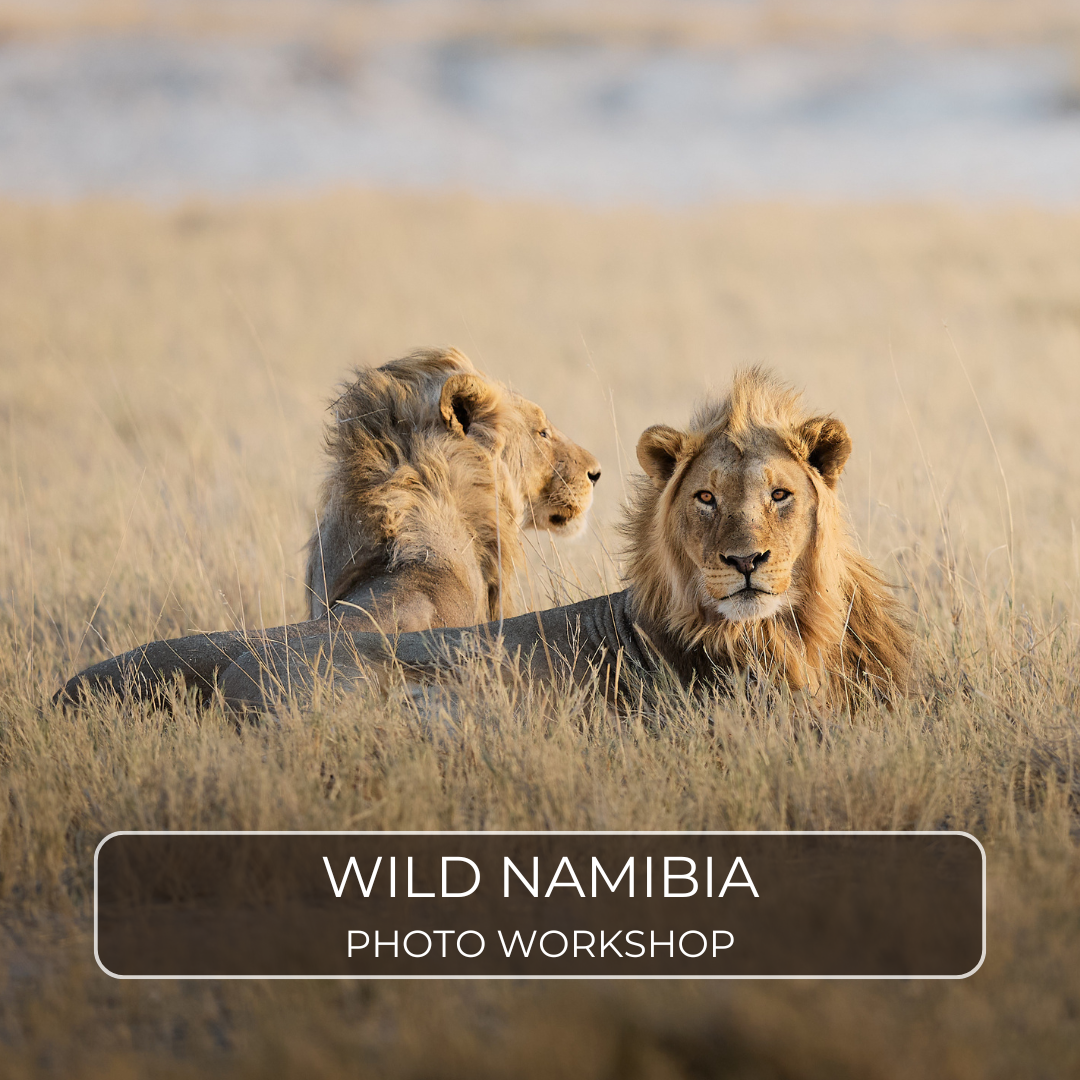
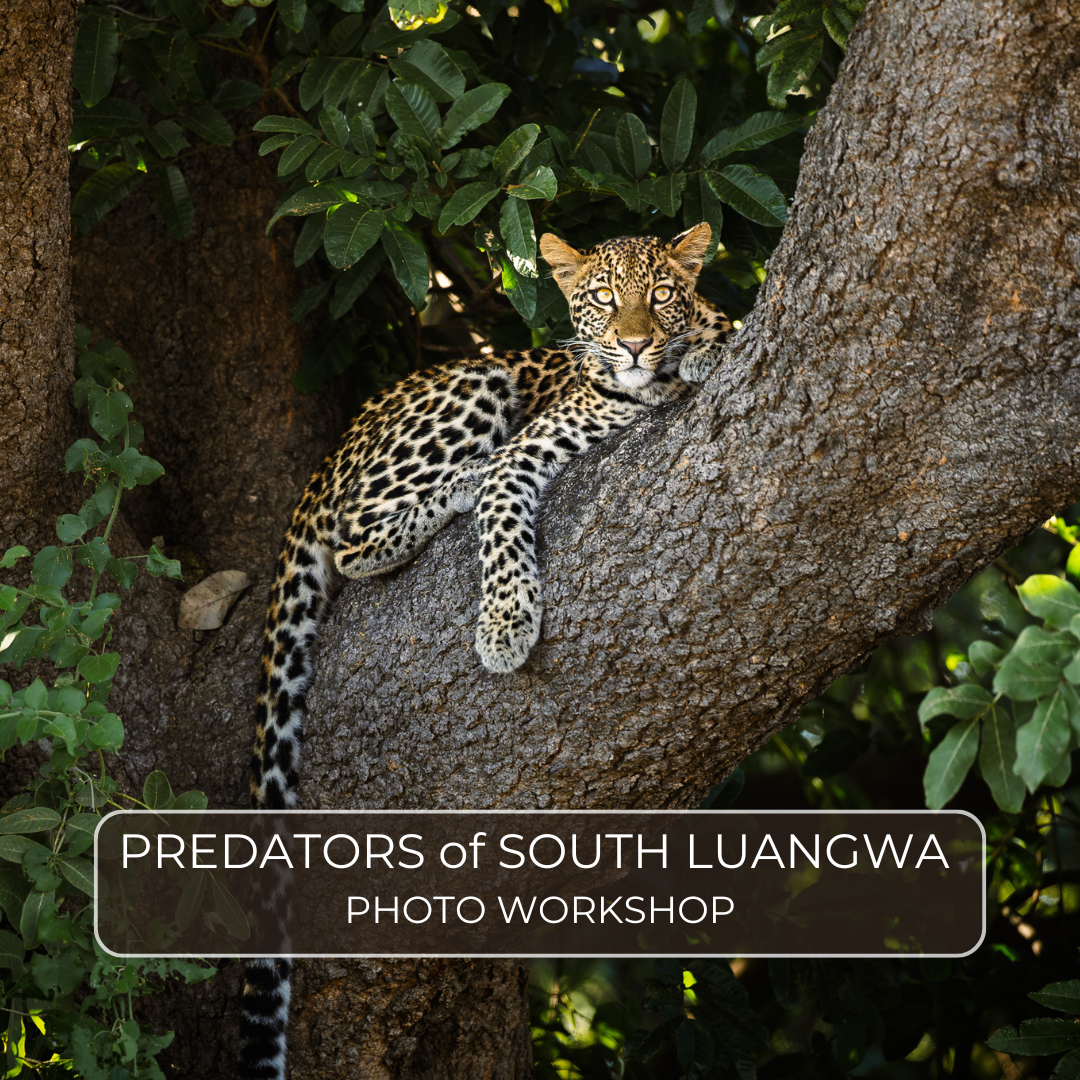
📍If This Resonates…
Spots just opened for my upcoming Namibia and South Luangwa workshops — and they’re filling faster than usual.
These trips are designed around real photographic immersion. Small groups. No rushed itineraries. Lots of time to practice, ask questions, and get out of auto-pilot mode.

When Should You Upgrade?
Let’s be fair — sometimes, a gear upgrade is the right move. Here’s when I’d consider it:
You’re still using a DSLR and struggle with moving subjects — mirrorless autofocus is a game-changer.
Your current body is unreliable or can’t handle what you throw at it (weather sealing, frame rates under 8 fps, noise getting crazy at 1600 ISO, buffer, etc.).
You truly need improved video specs for professional work.
But if you already own a mirrorless camera that works reliably, delivers decent resolution and good autofocus… pause before hitting that buy button.
Ask yourself: What’s really holding me back?

A landscape I shot with Nikon D90 and a kit lens, 2013.
It’s About How You Use the Tool
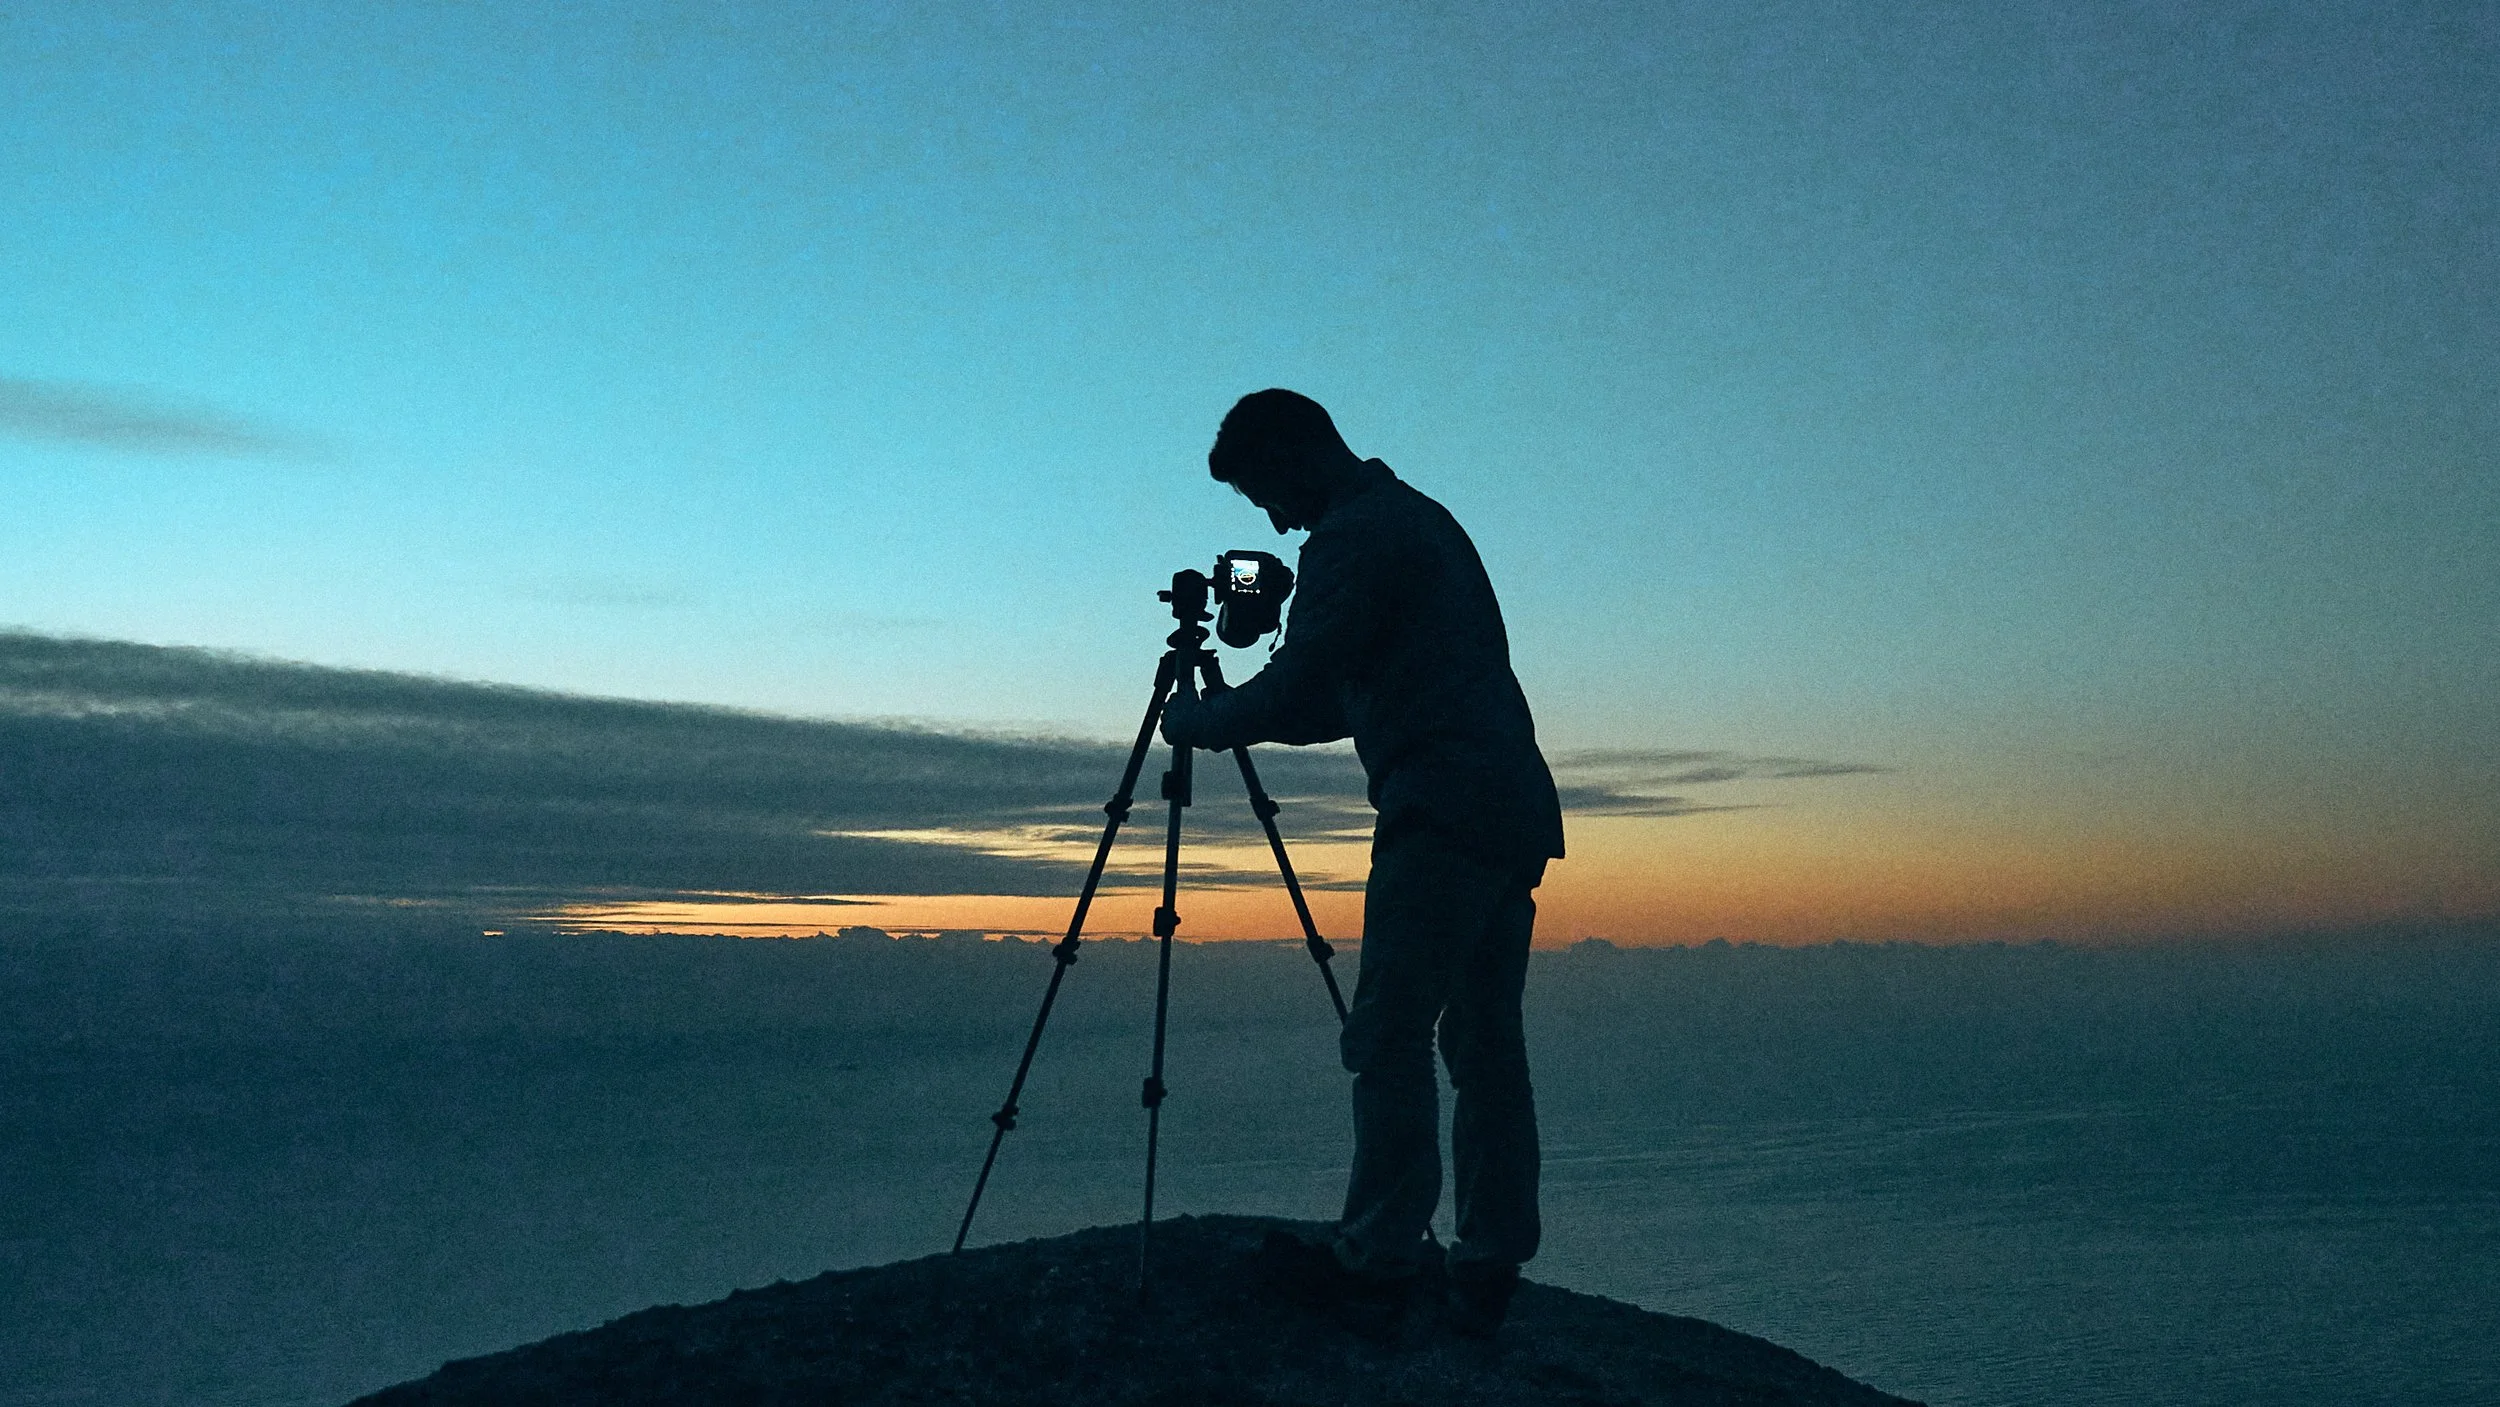
I was sitting in a hide in Slovenia when all this really clicked. I was waiting for brown bears to emerge — low light, tight quarters, no second chances. And I realized: all the tools I needed were already in my hands. No spec sheet could replace preparation, patience, and perspective.
A new camera won’t teach you to anticipate a bear stepping into golden light. It won’t teach you to hold off clicking until the composition sings.
But a workshop will.
So the next time you feel that urge to upgrade, maybe stop and ask: Am I buying a solution, or avoiding the work of becoming better with what I’ve already got?
Watch the full story here
📘 Free Wildlife Photography Guide
If you’re serious about improving — not just your gear but your skills — I’ve also put together a free 100-page PDF full of the basics I wish I had when I started.
It’s helped hundreds of photographers already. Might help you too.
Featured Articles

How to Travel with Big Lenses (And Avoid Losing Your Gear)
If you’ve ever stared at your fully packed camera bag the night before a long-haul flight—knowing there’s no way it’ll make the airline’s weight limit—you’re not alone.
I’ve been there more times than I can count. And if you’re traveling with big telephoto lenses—think 400mm f/2.8, 500mm f/4, 600mm f/4—things get even trickier.
Over the past decade, I’ve flown dozens of international routes with expensive gear. I’ve dealt with every airline mood imaginable. Some couldn’t care less if I had 22kg on my back. Others wanted to weigh my cables.
But one thing’s always been true: if you check your camera gear, you’re taking a risk.
Here’s how I carry my heavy gear—including massive lenses—without ever checking it in and without losing a single item (knock on wood).
The Golden Rule: Never Check Your Expensive Lenses
Let’s get this out of the way first.
If you value your gear—and you should—never check in telephoto lenses, especially if you’re passing through airports like Johannesburg, Addis Ababa, or Nairobi.
I’ve heard horror stories from fellow photographers. One had a checked 500mm f/4 disappear at O.R. Tambo. Another had an entire bag of gear show up in Cape Town with a broken lock and a camera body missing.
Here’s my rule: If I can’t afford to lose it, it goes in the cabin with me.
What I Travel With (Yes, It’s a Lot)
Here’s what a typical setup looks like for me on safari assignments or personal photography trips:
Canon R3 (primary body for action and low light)
Canon R5 (high-res second body)
RF 600mm f/4
RF 100–300mm f/2.8
RF 24–70 f/2.8
Canon V1 (dash cam + POV)
GoPro Hero 9
Atomos Ninja V (for screen recording)
Laptop + 2 Lacie SSDs, card readers, batteries, chargers, and a ton of accessories
Total weight? Easily 17–20kg, before even factoring in any extra accessories.
Yet somehow, it all comes with me in the cabin.
My Carry-On System: What Bags I Use
I use a two-bag system that’s been battle-tested:
🎒 Bag 1: f-stop Tilopa 50L (main carry-on backpack)
Internal ICU (Large or XL depending on the trip)
Holds my 600mm, 100–300mm, both bodies, and GoPro/Atomos
Side pouches for filters, cards, headlamp
Stays on my back at all times—no exceptions
💼 Bag 2: Large ICU used as small shoulder camera bag (personal item)
Holds laptop, hard drives, chargers, and usually my 24–105 or dash cam
Looks casual and non-threatening
Slips under the seat in front of me
💡 Pro tip: Most international airlines let you take a cabin bag AND a personal item. I make the most of that rule.
At the Check-In Counter: How to Handle Airline Weight Limits
Let’s talk about the real stress: weigh-ins.
Every photographer has had that moment. You’re in line at check-in, beads of sweat forming, wondering if this will be the airline that finally weighs your bag.
Here’s what I do:
✅ Be early but confident
Show up early. Be polite. Don’t act nervous. Airline staff are human—they’re more likely to give you a pass if you seem composed.
✅ Mention the value
If they do ask to weigh your bag, I calmly say something like:
“I’m carrying professional camera gear worth over €30,000. It can’t be checked in due to insurance reasons and risk of damage. I’m happy to show you what’s inside.”
I’ve used this line dozens of times—and every single time, they’ve let me board. Sometimes they slap a “HEAVY” sticker on it. Sometimes they don’t even flinch. But I’ve never had to leave anything behind.
Don’t Use Roller Bags for Safari Gear
You might be tempted to use a roller—like a Think Tank Airport series—but I find them impractical for Africa trips, especially safari-focused ones. Why?
They scream “heavy tech,” drawing attention at check-in
They’re harder to carry over rough terrain or load into vehicles
They often don’t look small enough for overhead compartments
Instead, a rugged hiking-style backpack like the f-stop Tilopa blends in and is easier to carry across gravel airstrips, 4x4s, and remote camps.
Tactical Tips to Shave Weight (and Stress)
If you’re still getting flagged at the counter, try these:
🪶 Wear your heaviest gear
Yes, it’s awkward. But putting some lenses or cameras in a your pockets or strapped across your shoulder magically makes your bag “lighter.” Airline staff cannot weigh what’s on you.
🧥 Use a photo vest or jacket with large pockets
You can stash chargers, hard drives, even a small lens in there. It buys you extra few kg without raising eyebrows.
🔌 Consolidate accessories
Don’t carry 3 chargers when 1 will do. Remove unnecessary battery chargers, filters, or mounting plates. All my cameras can be charged directly via USB-C so when I really need to go light I only bring a multi port usb-c charger that does it all - laptop, phone, cameras, accessories.

Flying on a small plan across the Namib desert.
What About Domestic Flights in Africa?
This is where it gets more complicated.
If you’re flying bush planes the limit drops even more, sometimes including your personal item. Here we cannot cheat and get some extra weight on board as these small planes would actually be too heavy to flight - we don’t want to put our (and others) safety at risk to carry a few extra lenses.
Here’s how I deal with it:
Book an extra seat if I absolutely have to (some photographers do this, especially for expensive charter routes)
Split gear with travel companions if flying together
Ship gear ahead to lodges if you’re working with trusted operators (rare, but possible)
Go minimal: Swap your 600mm for a 100–500mm or 200–600mm zoom if you’re just doing it for fun
Once You Land: Keeping Your Gear Safe on the Ground
Getting there is only half the battle. Once you arrive in-country, protect your gear from:
Heat: Store lenses flat in the shade. Don’t leave them in the sun.
Dust: Use drybags, neoprene covers, and avoid lens changes in open wind.
Moisture: Keep silica gel packets in your lens case and camera bag.
Theft: Lock your gear in the car if you leave it and make sure it’s not visible through windows , and never let it out of sight at gas stations.
What If You Have to Check a Bag?
Sometimes you just can’t avoid checking something—maybe it’s your tripod, gimbal, or even lens hood. In that case:
Use a Pelican case or similar with a lock
Tape over random logos and labels so it seems less serious and doesn’t scream “expensive gear inside”
Put an Apple AirTag (or similar tracker) inside
Photograph everything for insurance before you hand it over
But again: never check your camera bodies or telephoto lenses.
On location in Cape Town, SA.
Don’t Let Gear Stress Steal the Joy
I get it—traveling with big, expensive gear is nerve-wracking. You worry about weight. You worry about theft. You worry about being that guy holding up the security line. But over the years, I’ve realized this: with the right plan and attitude, you can carry everything you need—safely, confidently, and without drama. So don’t let fear stop you from bringing the lens that helps you capture magic. Just pack smart, walk tall, and know your rights.
And hey—if you see someone in a bush airport juggling a 600mm and a vlogging camera, it might be me.
Say hi. =)

Choosing the right focal length for wildlife photography
Let's talk real for a sec. I'm guilty as charged. I've been there, lying flat on my belly in the dust, telephoto lens extended like some sniper's rifle, waiting to capture that perfect, tight portrait of a leopard staring directly into the camera. You know the shot—sharp eyes, blurry background, intense gaze. Instagram gold, right? But here’s the thing: when everyone’s doing the same damn thing, your photos stop being special. They become predictable.

I'll never forget one particular trip to Etosha National Park. I had just bought my shiny new 600mm lens and trust me, I wanted to use every last euro I spent on it. So there I was, framing up tight portraits of elephants and lions, thinking I was nailing it. But then I got home and sorted through my images. Yeah, they were sharp and the animals were majestic as ever—but something felt off. They all looked the same. And honestly, boring.
Then I stumbled upon an older image I had shot years ago with a mere 24-70mm lens (yeah, "mere," because now I had this fancy beast of a lens). This shot was different—it showed a herd of zebra drinking at a waterhole together with some giraffes in the golden light of sunset. The scene was dramatic. It told a story. It wasn't just an animal portrait—it was an environmental portrait that pulled you right into the African landscape.

Want to dive deeper into how creativity shapes your wildlife images?
Here’s a look at how I approach the creative process in the field.
That moment was like a slap in the face. I realized I'd gotten lazy and fallen into a creativity trap. Social media had conditioned me into chasing "likes" rather than chasing stories. Tight portraits were winning likes but losing soul. This is where creativity goes to die.
So, here’s what I did to shake things up. Next time I was out on a safari, I challenged myself to start wide. Instead of automatically slapping on my longest lens, I began with a 100-500mm, sometimes even going wider to 35mm. My heart would sink a little, feeling guilty about leaving my 600mm unused in the bag, but that's exactly the point of the exercise. The trick is to resist that urge—just for a while—and embrace the wider view.
I was in Khwai, Botswana when I really put this exercise to the test. We came across a pride of lions with 5 or 6 cubs. My instinct screamed to zoom right in, capturing every whisker. But remembering my commitment, I stuck with a shorter lens - in this case I was on a 100-300 f2.8 - and took in the broader scene, with the mothers laying in the grass and the cubs being cubs. The wider composition told a story. It wasn't just another wildlife portrait—it was a moment frozen in time. Is that the best photo ever? No. But it’s something different, something I had to think of instead of just going auto pilot.

If you’re looking for the kind of place where wide compositions truly shine, Etosha National Park is a dream location — here’s my full photography guide.
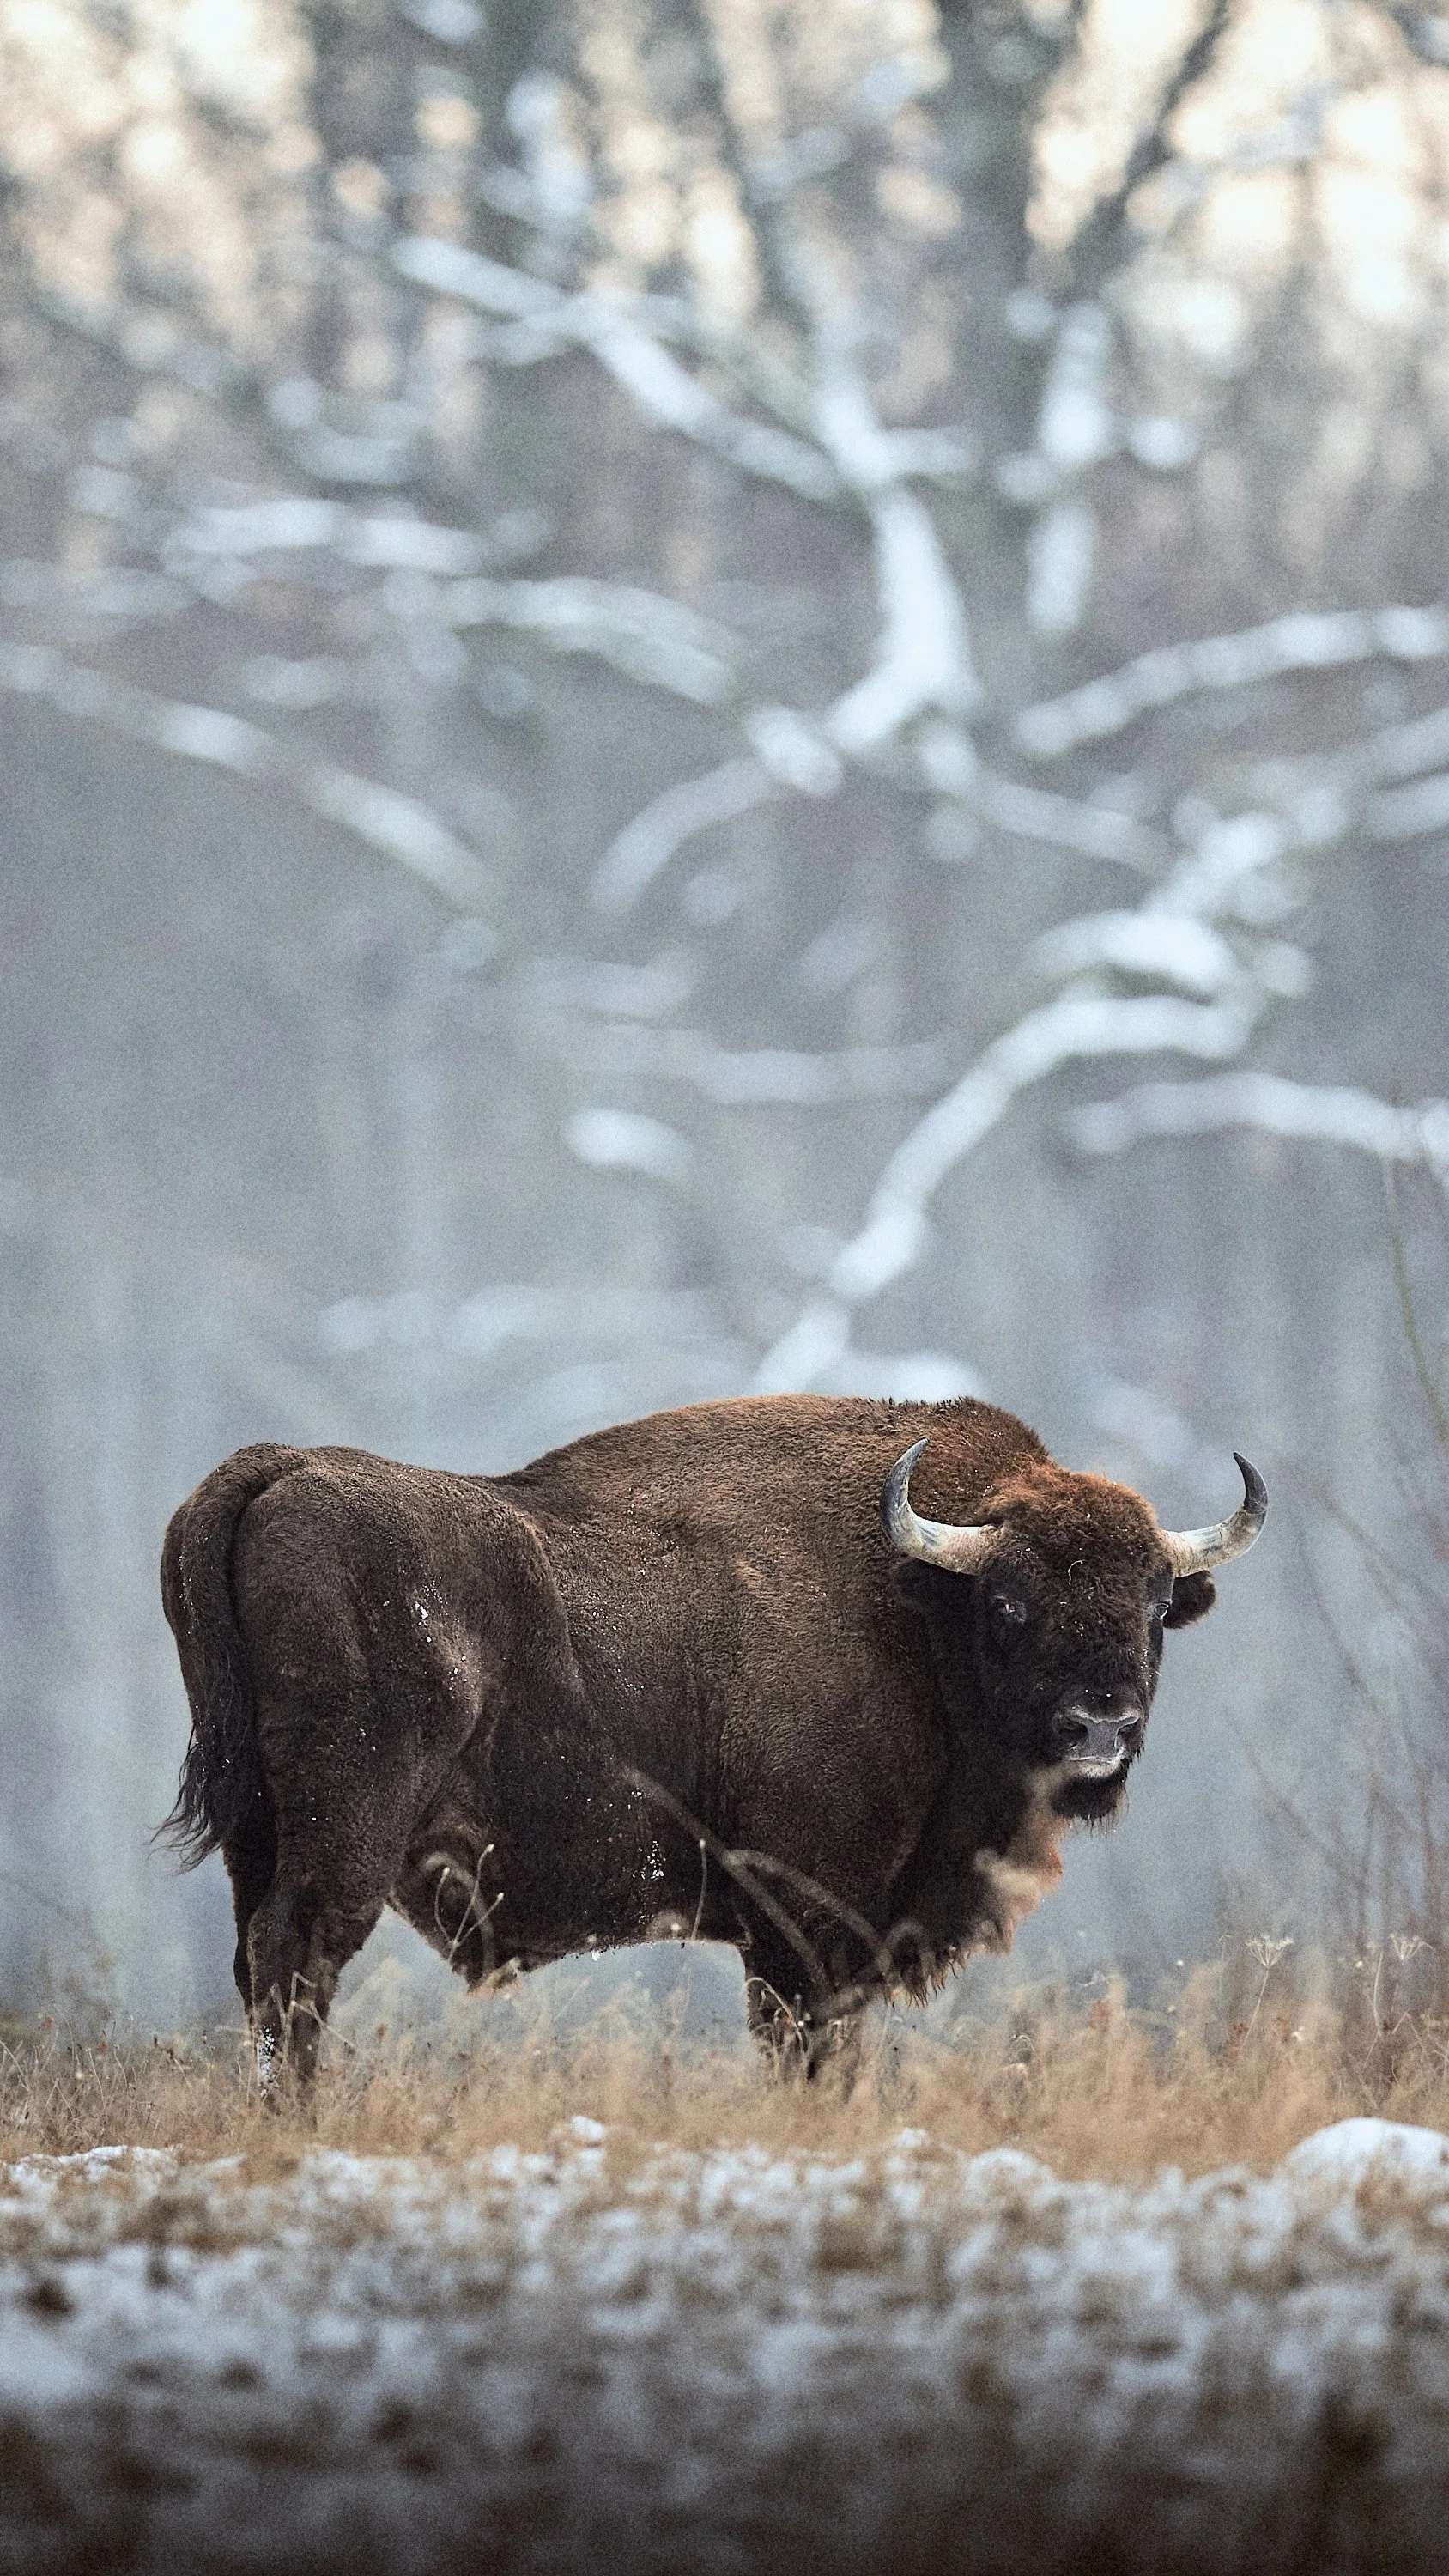
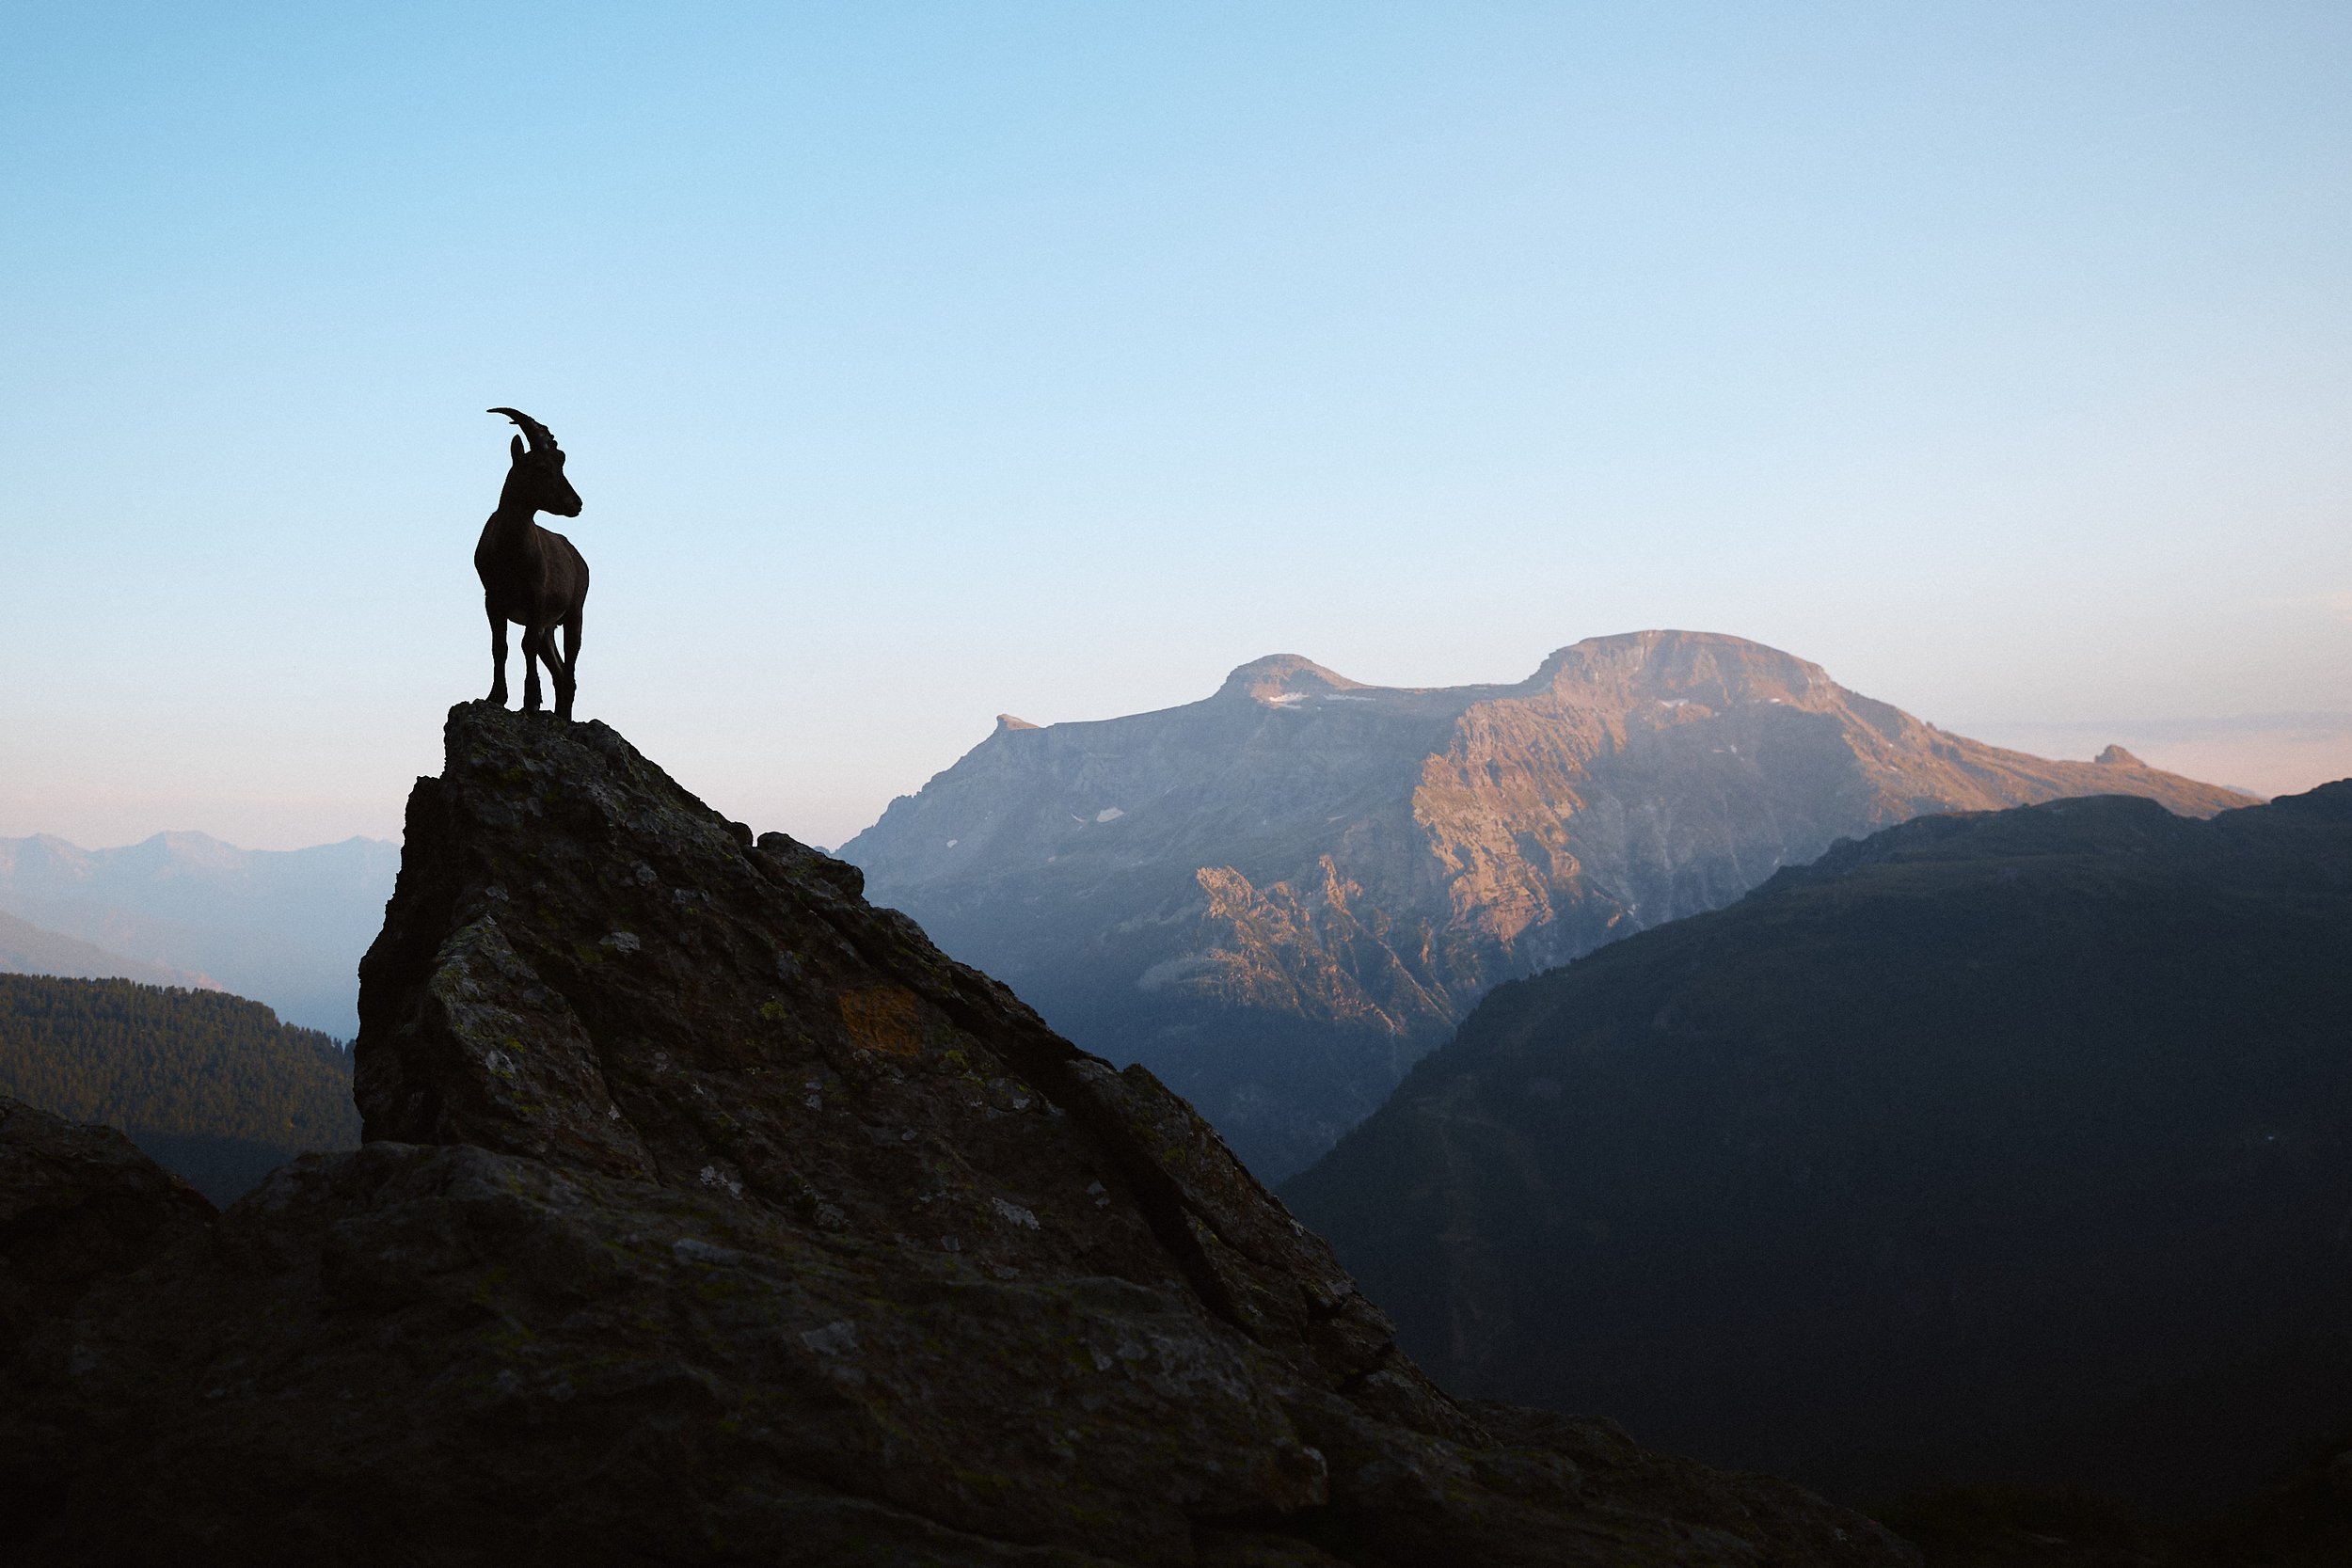
Another example is a photo of an ibex I took in my home mountains in Italy. I walked uphill for a couple hours with the 600mm on my back, but luckily that didn’t stop me from taking the shot with the 24-70mm. This image didn’t perform well when I posted it on Instagram - horizontal format??
But it looks amazing hanging on my wall, and I won’t get tired of it anytime soon.

Sometimes, choosing to shoot wide isn’t just a creative decision — it’s the ethical one.
Here are 7 rules I follow to photograph wildlife responsibly.
But here’s the good news: If the wide shot doesn't come together, it's way easier to zoom in and simplify your composition. You can't do the opposite. Starting wide and then narrowing down ensures you get the best of both worlds.
Let me give you some specific pointers I've learned from doing this exercise regularly:
Look for Layers: Include elements in your foreground, midground, and background. This creates depth and interest, guiding your viewer’s eyes through the scene.
Wait for Action: When shooting wider, patience is key. Wait for the animal to interact with its environment. A leopard climbing a tree, a herd crossing a river, or birds taking flight from an animal’s path—these moments turn good photos into epic stories.
Use Light Creatively: Wider compositions give you more room to play with dramatic lighting. Think backlit dust clouds, rays of sun filtering through trees, or stormy skies framing your subject. Great light can elevate your storytelling to another level.
Embrace the Imperfections: Wider shots won’t always be perfect. They’ll include elements you might usually avoid. But sometimes those elements—like an awkwardly placed bush or a patch of harsh sunlight—make your shot authentic and relatable.
Switch Perspectives Often: Don't stay glued to one spot. Move around, get higher, get lower, change your angle. Different perspectives can reveal entirely new stories within the same scene.

I always carry at least one wide-angle lens on safari — even when packing light. Here’s what else I bring in my 2025 safari camera kit.
Eventually, I learned to balance things out. My 600mm lens didn't become obsolete—it just stopped dominating every decision I made. I now choose lenses based on the story I want to tell, not just on habit or social media pressure.
So, next time you're out on a wildlife adventure, challenge yourself. Leave that telephoto lens in the bag at first. Start wide, embrace the environment, and tell the bigger story. Your creativity—and your portfolio—will thank you.
📸 Wide shots tell a different kind of wildlife story — one rooted in space, emotion, and atmosphere.
If that’s the kind of imagery you want to create, come explore with me in 2026.
Featured Articles

Capture One vs Lightroom: A Wildlife Photographer’s Honest Take
Alright, let me just say this upfront: I’ve used both Capture One and Lightroom for years. I’ve cussed at both. I’ve praised both. And I’ve probably switched camps a dozen times depending on which feature was working (or not working) that month. But after thousands of hours editing dusty lion shots, misty mornings in the Alps, and ISO 25000 encounters with elusive leopards, I think I can finally give you a real-world take on how these two beasts stack up—especially for wildlife photography.
I’ll break it down in a narrative way, the way you’d tell a story to a fellow photographer over a beer around the campfire. This isn’t a lab test. It’s what actually works out there in the wild.

I shot this image on Canon R3 at ISO 51200; applied noise reduction in Lightroom Classic without any external plugin.
Why I Started with Lightroom
Like most people, I started on Lightroom - I think it was 2010. Back when it was Lightroom 3 and everyone thought clarity was the coolest thing ever. I liked it because it was easy. Intuitive. I could import a card from my Nikon D90 and just get to work. For someone doing a lot of batch editing, Lightroom’s Library module was like gold.
When I started shooting wildlife more seriously, especially in Africa and the Alps, I noticed I needed a little more. I felt like I was doing the same thing over and over again, and I wasn’t really able to get my images where I wanted them to be. That’s when I started poking around with Capture One.
The Image Quality Debate: Is Capture One Really Better?
So here’s the thing. For years, I’d argue that Capture One gave me better image quality out of the box. The RAW rendering was just cleaner. Colors had more pop. Tones looked more "filmic" somehow. And for high-end wildlife prints, that mattered.
But now Lightroom has caught up. Big time.
Since around 2023, Adobe has made serious gains. Their new noise reduction model? Game changer. I tested it side by side with Topaz, DxO and Capture One's internal tools, and Lightroom's AI denoise was not only cleaner but kept more detail—without introducing those weird plasticky textures. The external plugins still have a lot of edge when it comes to also add sharpening, and might use them from time to time, but for most images I can just stay within Lightroom, batch editing and saving a lot of time.
And best of all: now they removed that annoying extra DNG step. You can now batch-denoise inside Lightroom without bloating your catalog with doubles. This used to be my biggest workflow complaint with Adobe. Gone.
For a very long time Capture One provided better color control.
📅 Interested in joining me on a real photography adventure?
Explore my upcoming trips!
Speed, Workflow & Culling: Who Wins?
If you're coming back from a 10-day safari with 20000 images, you need speed. Like, actual usable speed.
Capture One has always been more nimble in terms of preview rendering. Especially tethered or on sessions, it chews through files fast. But Lightroom Classic with GPU acceleration and smart previews has finally caught up. If your computer is even halfway decent, LR won’t slow you down.
And culling? I used to need Photo Mechanic to avoid things go crazy. But if I’m staying inside one app, Lightroom’s new filtering and keywording tools are now more powerful. Especially helpful when tagging keepers from a whole pride of lions.
AI Features: Lightroom is Taking the Lead
Here’s where things start to tip.
Lightroom’s AI masking is scary good. Want to mask the subject? One click. Sky? Boom. Background? Easy.
Capture One still relies heavily on manual masking. Yes, there is an AI masking function but I find it to be nowhere as accurate as the LR one. And while its layers are great for precision, they can slow things down when you’re editing large batches.
Also: Lightroom’s new generative remove tool? It’s like a mini Photoshop built-in. I cloned out a sensor spot on 40 images with brush strokes in under two minutes. Try doing that in Capture One without swearing.

Hippo action along the Luangwa River, Zambia. Edited with Capture One in 2022.
Color Grading: Capture One Still Rules Here
I won’t lie. Capture One’s color tools are still top of the game.
The color editor is insane. The skin tone tool—which also works wonders on lions, believe it or not—lets you unify color patches with ridiculous precision. And the advanced color wheels? So intuitive once you get used to them.
If I’m editing a portfolio shot, like that leopard in golden light that might end up as a fine art print, I’ll usually roundtrip it through Capture One.
Catalog vs Sessions: Different Strokes
I prefer sessions when I’m working on trips. Capture One makes it super easy to stay organized without polluting a master catalog.
Lightroom’s catalog is better if you want to search your entire archive. But it’s also more prone to getting bloated or crashing if you’re sloppy with backups.
🎒 Want to know what I actually use in the field? Check out this article!
Stability, Bugs & Overall UX
Capture One has been a bit crashy lately. Especially with the latest versions. On the other hand, Lightroom is smoother these days, especially when syncing across devices. I never thought I’d say that.
Also, Lightroom has better plug-in support. Whether it's export to JPEGmini, connect to Luminar, or using Excire for AI tagging—it’s all smoother in Adobe’s ecosystem.
So Which One Do I Use?
I still have both.
Yep, still can’t commit. If I’m traveling light, want to edit from a laptop or even my iPad, and need mobile access: Lightroom all the way.
If I’m home, editing a limited set of commercial images and want maximum control over colors and layers: Capture One.
But 90% of my workflow, and all my wildlife photos, these days is in Lightroom. Just because it plays better with everything, and the new AI tools save me literal hours.
You don’t need to pick one and never look back. These are tools. And like all tools, they work best when you use them for what they’re good at.
So whether you’re chasing elephants in dusty Namibia or shooting puffins on a foggy Scottish cliff, just use what lets you focus on the image.
📅 Interested in joining me on a real photography adventure?
Explore my upcoming trips!
Featured Articles


The Best Safari Camera Setup in 2025: From Budget to Pro
If you'd told me ten years ago that I'd be spending most of my time bouncing around remote corners of Africa with thousands of euros worth of camera gear rattling in the back of a dusty 4x4, I would’ve probably laughed. But here we are. After countless safaris — some solo, some guided, some sleeping in rooftop tents with hyenas pacing outside — I’ve narrowed down what really works when it comes to safari photography gear. Whether you’re just dipping your toes into wildlife photography or you’re deep into it and trying to refine your pro kit, this post is for you.

With R3+600 f4 in South Luangwa NP, Zambia 2025
Let’s break it down into real-world tiers: budget, intermediate, and pro. Because let’s face it — your camera setup needs to reflect not just your wallet, but your goals, shooting style, and the type of safari you're on.
Budget Setup: The Safari First-Timer Who Means Business
A budget setup doesn’t mean "cheap." It means smart. You're after something lightweight, versatile, and durable — because the bush doesn’t care how much you spent.
For 2025, my top recommendation in this category is the Canon R7 paired with the RF 100-400mm f/5.6-8 IS USM. The R7 has a crop sensor, which means that 400mm suddenly acts more like 640mm. That’s a big win for wildlife. It's got excellent autofocus, solid burst speed (15 fps mechanical), and it's lightweight — which your arms will thank you for after a few days of handheld tracking.
Alternative setups?
Sony a6700 + 70-350mm f/4.5-6.3 G
Nikon Z50 + 100-400mm f/4.5-5.6
What you’ll miss here is low-light performance and that creamy shallow depth of field. But the reach and versatility are hard to beat. Add a sturdy bean bag for support on vehicle doors or window sills, and you're set.
Tips learned the hard way: Always carry a lens cloth in your pocket. I once lost an entire morning’s shoot in Chobe because of a dusty back element I didn’t notice until later.

Sunset along the Chobe river, Botswana, May 2025.
📅 Want in on my next off-grid photo expedition?
Check out the upcoming trips!
Mid-Range Setup: The Enthusiast Level-Up
If you've done a few trips and want to up your game — maybe even start selling prints or pitching stories — the mid-range gear is where magic really starts to happen. Think faster autofocus, better weather sealing, and more flexibility.
My go-to recommendation here is the Canon R6 Mark II with the RF 100-500mm f/4.5-7.1L IS USM. That combo is gold. The lens is sharp across the range, and the R6 II delivers stellar image quality with great dynamic range and tracking. Bonus: it's full frame, which adds a little magic to your backgrounds.
Other killer setups?
Sony A7 IV + 200-600mm f/5.6-6.3 G OSS
Nikon Z6 II + Z 100-400mm f/4.5-5.6 VR S
With these, you can shoot low-light lions at dawn, fast-moving birds mid-flight, and everything in between. Just make sure you bring at least two extra batteries, because mirrorless bodies are hungry, especially if you shoot videos as well.
Pro Setup: The No-Compromise Rig

With R5+100-300 f2.8, South Luangwa NP.
Alright, this one’s for the hardcore. You’re either a working pro or someone who takes their craft (and their gear) very seriously. You want tack-sharp images, the best possible low-light performance, and gear that can take a beating.
My personal favorite for 2025: Canon R5 + RF 100-300 f/2.8 L IS USM, sometimes with a 1.4x TC. This setup is fast, bright, responsive, and the bokeh is just... dreamy. I then add a second body: Canon R3 + RF 600 f/4 L IS USM. This way I can leverage the flexibility and high res of the R5 for wider scenes and environmental portraits, while making the most of the R3 speed when it comes to action closeups and small birds.
Other top-tier combos?
Sony A1 + 600mm f/4 GM OSS
Nikon Z9 + 600mm f/4 TC VR S
But here’s the truth: this kind of gear is unforgiving. It’s big, it’s expensive, and if you’re not ready to manage the logistics (air travel, bush dust, vehicle mounting), it can become a burden.
📸 Want to see how I travel with big lenses?
Pro tip: Bring a second body with a zoom. If I had to go with only one lens, would probably be the 100-500mm on the R3. That way I can cover wide scenes and environmental portraits without swapping lenses.

African fish eagle, Khwai Community Concession, Botswana, May 2025.
Accessories That Matter (Regardless of Budget)
Bean Bag or Clamp Mount: Essential. Tripods are useless in a moving vehicle.
Dust protection: I pack dry bags and silicon pouches for my gear. Safari dust doesn’t play.
Power bank or solar kit: Especially for wild camping safaris. I use a Goal Zero Sherpa 100 + solar panel.
Multiple memory cards: Always rotate them and never rely on just one. CFexpress for main, SD for backup.
Microfiber cloths & blower: I bring at least three cloths, a Giottos Rocket Blower and a battery powered blower. Don’t skimp here.
🦁 Ready for your first real safari?
Avoid these 5 beginner mistakes!
Final Thoughts: Match the Gear to the Mission
In the end, the best safari setup in 2025 isn’t the most expensive one — it’s the one that fits you. Your style, your budget, your muscle memory. I’ve captured some of my favorite moments on modest gear, and some technically perfect yet soulless frames on top-tier equipment. The magic happens when your gear disappears and you’re just... there, with the animal, in the moment.
📅 Want in on my next off-grid photo expedition?
Check out the upcoming trips!
Featured Articles
Game Changer: Lightroom AI Denoise No Longer Creates DNG Files – Here’s Why That Matters
If you told me five years ago I’d be comfortably shooting wildlife at ISO 12,800, I would’ve laughed and handed you a grainy, barely-usable lion photo to prove why that was a terrible idea.
But here we are.
And let me tell you—Adobe’s latest Lightroom AI noise reduction update has been a total game changer. Not just because the results are better (they are), but because they’ve finally removed the most annoying part of the whole process:
You don’t have to create a massive DNG file anymore.
I know, it sounds small. But that one little shift? It changes everything.

Canon R5, ISO 20.000. Khwai Community Concession, May 2025.
The DNG Problem: Why Most of Us Avoided Lightroom’s Old AI Denoise
Let’s rewind for a second.
When Adobe first launched their AI Denoise tool in Lightroom, I was stoked. I ran a couple of test files through it—elephants at dusk, a leopard hiding under foliage around sunset. The results? Surprisingly good.
But then… I checked my folder.
Each denoised file was a massive DNG. Like, 150 to 250 MB per image, even if the original was a compressed RAW. And for someone who shoots thousands of photos per safari, that was a nightmare. Not only for the space required on the disk, but mostly for the workflow and folder organization.
My drives are already under siege after a two-week trip in Zambia. I don’t need another 300 GB of DNG duplicates sitting there because I wanted to reduce some noise.
So I went back to my old tricks—selective luminance NR, and when I really needed to enhance a few “hero” images I’d rather go for plugins like Topaz AI or Dxo - as LR would also create that duplicate file - or just avoiding high ISO when I could.
But this latest update? No more DNGs.
Now the AI noise reduction runs natively in Lightroom on the original file. No doubling. No extra exports. You can actually batch edit a full series of high ISO shots without wanting to throw your laptop out the window.

Canon R3, ISO 25.600. Central Kalahari Game Reserve, May 2025
So How Good Is the New Lightroom AI Noise Reduction (Really)?
Alright, let’s talk about results.
On a recent self-drive trip through Botswana - solo, dusty, and full of late golden hour action - I was constantly pushing ISO 10,000+. It wasn’t a stylistic choice; the light drops fast at sunset and I’d rather push ISO than risk motion blur from a slower shutter.
After the trip, I tested a few shots in the updated Lightroom. The denoised versions were insanely clean.
What really got me was the balance—yes, it reduced the noise, but it didn’t make the fur or feathers look plastic. Skin texture on the lions still looked natural. The background blur didn’t get mushy. Even subtle shadows under the elephant’s ear remained intact.
And I didn’t need to run them through a separate plugin, export a TIFF, or deal with weird color shifts. It was just: select all → batch denoise → done.
Game. Changer.

Canon R3, ISO 16.000. Khwai Community Concession, May 2025.
Topaz AI and DxO: Still the Kings of Detail (But Only for the Chosen Few)
Now, let’s be real here.
Lightroom isn’t the best in terms of raw performance.
If you want absolutely insane results—like pulling an underexposed ISO 25,600 file from a dark bird hide and making it look like it was shot in clean morning light—Topaz Photo AI or DxO PureRAW still have the edge.
Topaz, especially, is surgical with detail.
I once had a frame of a fish eagle taking off, shot at ISO 16,000 through heat haze. I ran it through Topaz and—somehow—it recovered feathers I didn’t even know were there. That’s wizardry.
Same with DxO. Their deep PRIME noise reduction is so clean it almost feels like cheating. And it also handles lens correction beautifully, which can help with certain long telephoto shots where edge softness creeps in.
But here’s the tradeoff: they’re slow. And you can’t batch hundreds of files efficiently.
After every safari, I have anywhere from 10.000 to 50.000+ RAW files. I’m not about to run each of those through a standalone app, wait for rendering, export to TIFF or DNG, and then import them again. That’s a Tuesday gone.
So here’s how I use them now:
Lightroom AI NR: After the first culling phase, this is for everything that’s past ISO 1600.
Topaz / DxO: For the top 1% of shots. Hero images. Portfolio work. Print-level detail. That one insane leopard image I might use on a gallery wall someday.
Why High ISO Is No Longer Scary (Seriously)
If you’re still afraid of ISO 8000, I get it. Years of muddy, crunchy, chroma-noise-ridden RAWs have left their mark.
But it’s time to let that go.
Modern sensors + modern AI noise reduction = shoot freely.
Instead of underexposing just to stay at ISO 1600, you can now expose properly (or, even better, slightly to the right), freeze action with faster shutter speeds, and let the noise fall where it may. The software will clean it up.
I still expose carefully, of course. But I no longer compromise motion sharpness or composition just to keep ISO numbers low.
A blurry photo at ISO 1600 is useless.
A tack-sharp image at ISO 10,000, even if a little noisy? Gold.
How This Affects My Field Shooting Style

At work in Khwai in May 2025 with my favorite setup - R3+600mm f/4
This update changed not just my post-processing but how I shoot in the field.
I’m no longer obsessed with riding the edge of ISO. Instead, I’m thinking:
Can I freeze the action confidently? → If not, bump ISO.
Will this look better in clean midtones vs underexposed shadows? → Expose more, clean noise later.
Am I sacrificing the moment to keep “safe” settings? → That’s a no-go.
Honestly, I now tell guests on my workshops the same thing:
“Don’t be afraid to go to ISO 8000 if it gets you a better image. We can clean it up later—but we can’t fix a blurry shot.”
And that’s the truth.
Want to see how high ISO and clean edits come together in real life? Here’s a story from the Central Kalahari that shows exactly that—where the light was tough, but the moments were gold.
Practical Tips for Using Lightroom AI Noise Reduction (Now That It’s Usable!)
Here’s how I recommend integrating this into your workflow:
Culling First, Denoise Later
Don’t waste time denoising everything. Cull your keepers first, then apply NR only to what matters.
Use Auto-Mask + AI NR Together
The AI masking tools in Lightroom now let you isolate subject/background. Apply sharpening to one, noise reduction to the other. It’s magic.
Batch by ISO Level
Select all your ISO 6400 shots, denoise as a group with the same settings. Same for ISO 10K or 12.8K.
Let it go overnight
Denoising a large amount of files can take quite a while, depending on the computer you’re working on. I would usually start the batch-adjustment in the evening once I’m done with my work and let it run overnight - everything will be ready to go the next morning!
Still Keep Topaz/DxO in Your Toolkit
For those once-in-a-lifetime shots, don’t hesitate to run them through a stronger plugin. Just not your whole trip catalog.
Final Thoughts: Small Update, Huge Impact
It’s easy to overlook software updates. Sometimes they seem like fluff.
But this one? This changed my entire workflow.
I now shoot more freely, edit faster, and spend less time wrangling bloated DNG files just to get clean results. I can confidently tell my clients their images will be sharp and clean, even when we shoot in bad light. And I can teach my workshop guests to be less afraid of their ISO dials.
So yeah, maybe it’s “just” an AI noise reduction update.
But for me? It’s one of the most important shifts in wildlife photography this year.
Ready to master wildlife photography in the field? Join me on an unforgettable workshop where we put these lessons into practice—out in the wild, where it really matters.
Featured Articles
5 Safari Photography Mistakes (and How to Avoid Them)

If you’re heading out on your first safari photography trip, this article is for you. And even if you’ve been on safari before, there’s a good chance you’re still making at least one of these common mistakes.
After years of shooting wildlife across Africa and guiding photography tours, I’ve seen the same issues come up again and again. But with a little preparation and the right mindset, you can avoid frustration and come home with stronger images.
These aren’t just about gear—they’re field-tested lessons that can truly make or break your first wildlife photography adventure.
🎯 Want a deeper dive into settings, gear, and safari-ready techniques? Download my free 100-page wildlife photography eBook here.
🎥 Prefer to watch instead? Check out the full YouTube guides and tutorials here!
1. Know Your Camera Before You Go
The biggest mistake I see? Travelers show up with a brand new camera or lens… and end up missing shots while figuring out where the settings are.
You don’t need the latest flagship body. What you need is muscle memory—knowing how to switch focus modes, shift AF points, adjust exposure, or change your frame rate without taking your eye off the viewfinder.
Spend time at home photographing moving subjects—birds, dogs, even passing cars. Practice until settings become instinctive.
2. Don’t Obsess Over Focal Length

Many first-time safari photographers think they need a 600mm or 800mm lens to get anything decent. And yes, reach helps—but some of my favorite wildlife images were captured between 100mm and 300mm.
That’s why I often recommend a versatile zoom like the Canon 100–500mm for first-timers. It’s sharp, easy to handhold, and flexible enough for both portraits and environmental compositions.
And remember—sometimes wider is better. A 200mm shot of an elephant framed against the savannah tells a deeper story than a tight crop of its eye.
🎒 Want to see exactly what I pack for long, remote safaris? Check out: What’s in My Safari Camera Bag.
3. Light Is Everything
Golden hour isn’t just a buzzword—it’s the lifeblood of great safari photography.
The first two hours after sunrise and the last two before sunset offer soft, golden light and peak animal activity. This is when you’ll capture glowing backlight, dramatic silhouettes, and beautiful animal behavior.

Midday? The light is harsh and flat. Colors are washed out, animals are usually sleeping, and the magic is missing.
Instead of chasing mediocre midday photos, use that time to:
Rest and hydrate
Clean your gear
Back up your files
Plan your next outing
Then be ready and energized when the golden light returns.
☀️ Learn more about timing your shoots perfectly in my Best Times for Safari Photography guide.
4. Think Beyond the Animal
Tunnel vision is real. It's easy to focus purely on getting a sharp, close-up portrait and forget everything else.
But truly memorable wildlife photography captures context and storytelling.
Look for:
Animal interactions—grooming, fighting, playing
Dramatic lighting—storms rolling in, dust in the air, golden backlight
Compelling backgrounds—mountains, rivers, plains
Behavior over portraits—an elephant dust bathing, lions yawning at sunset
Sometimes, a wide-angle environmental image will be far more powerful than a tight headshot.

5. Be Ready for the Unexpected
Wildlife doesn’t follow a schedule. You might drive for three hours without much action—then BOOM, a leopard crosses the road or a martial eagle dives from the sky.
That’s why I never pack my camera away during a game drive.
Tips to always stay ready:
Keep one body always ready to shoot (no lens caps!)
Use your default action settings: fast shutter, continuous autofocus
Have spare cards formatted and easy to access
Keep your batteries charged and in your pocket
Wipe your lens and viewfinder frequently
The goal is simple: be one second away from capturing the moment.
Your first safari will be unforgettable. But a little preparation can make it less stressful, more productive, and a lot more fun.
✅ Know your gear like the back of your hand
✅ Embrace flexibility over reach obsession
✅ Prioritize the golden light
✅ Tell compelling visual stories, not just take portraits
✅ Stay ready—because magic happens when you least expect it
🌍 And if you dream of joining me in Africa for hands-on workshops, learning these techniques live in the field, check out my upcoming Namibia and Botswana trips.

Featured Articles
Why I’m Bringing the Canon Powershot V1 on Safari (and How I’ll Use It)
I’m about to head back to Africa for two months of wildlife photography, filmmaking, and expedition work—and alongside my usual full-frame mirrorless setup, I’m packing something completely different: the Canon Powershot V1.
This isn’t my primary wildlife camera. It’s not even my secondary body. But for behind-the-scenes storytelling, quick vlogging, and capturing spontaneous moments during a fast-paced expedition across Botswana and Zambia, it might just become the most important camera in my bag.
Here’s exactly why I’m bringing it—and how I plan to use it during this multi-week safari adventure.
Why I Needed a Pocket-Sized Camera
On every wildlife trip, I aim to capture more than just the animals. I document behind-the-scenes footage, gear setups, roadside moments, and the daily rhythm of expedition life.
In the past, I relied on the Canon R5 or R5C to film these moments. While both produce cinematic footage, they’re heavy, setup-intensive, and often overkill for casual storytelling. Sometimes, by the time I pulled out a large camera, the moment had already passed.
This time, I needed something ultra-portable, fast, and simple—a camera that could live in my car’s door pocket or sling bag, ready at a second’s notice.
That’s where the Canon Powershot V1 comes in.

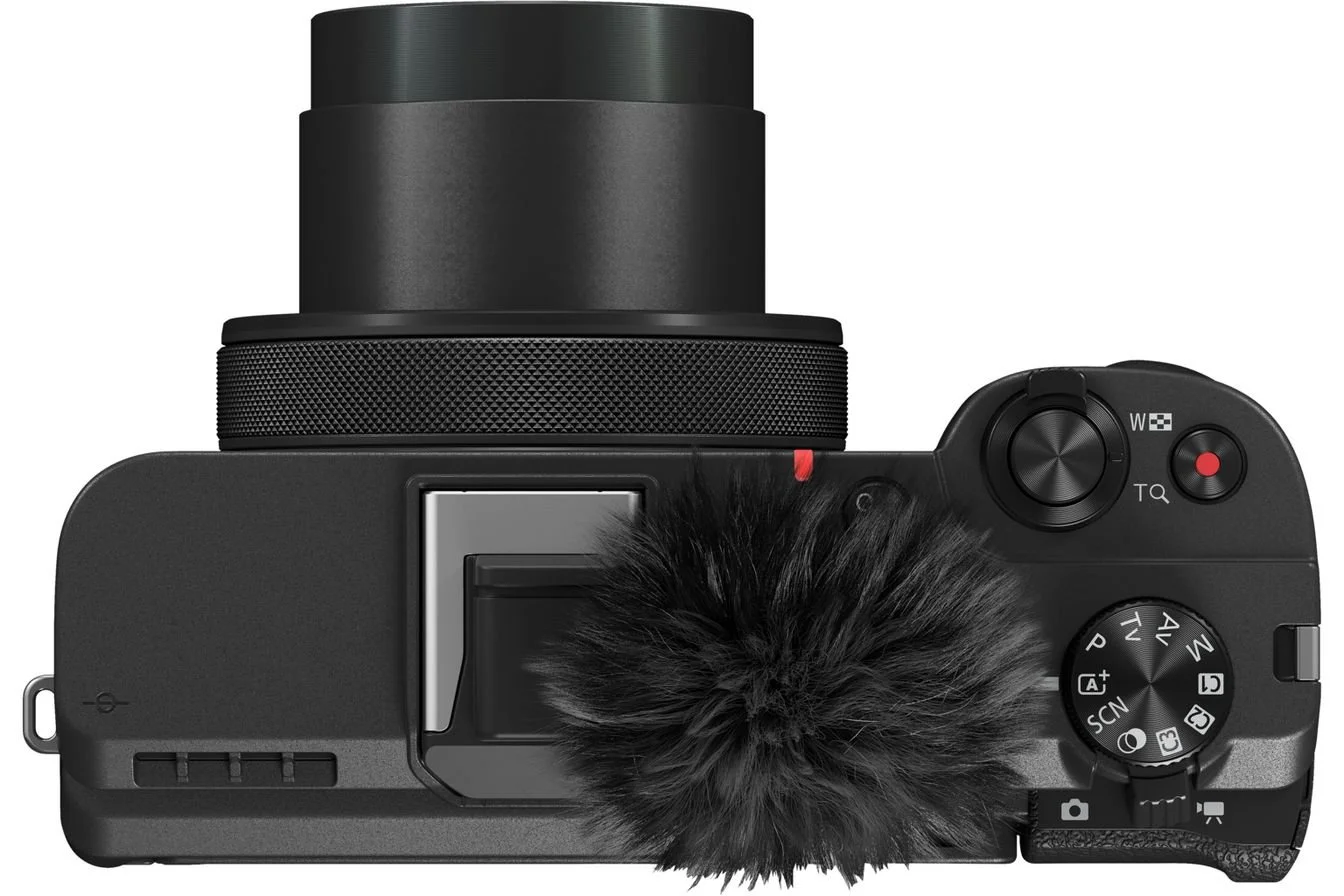
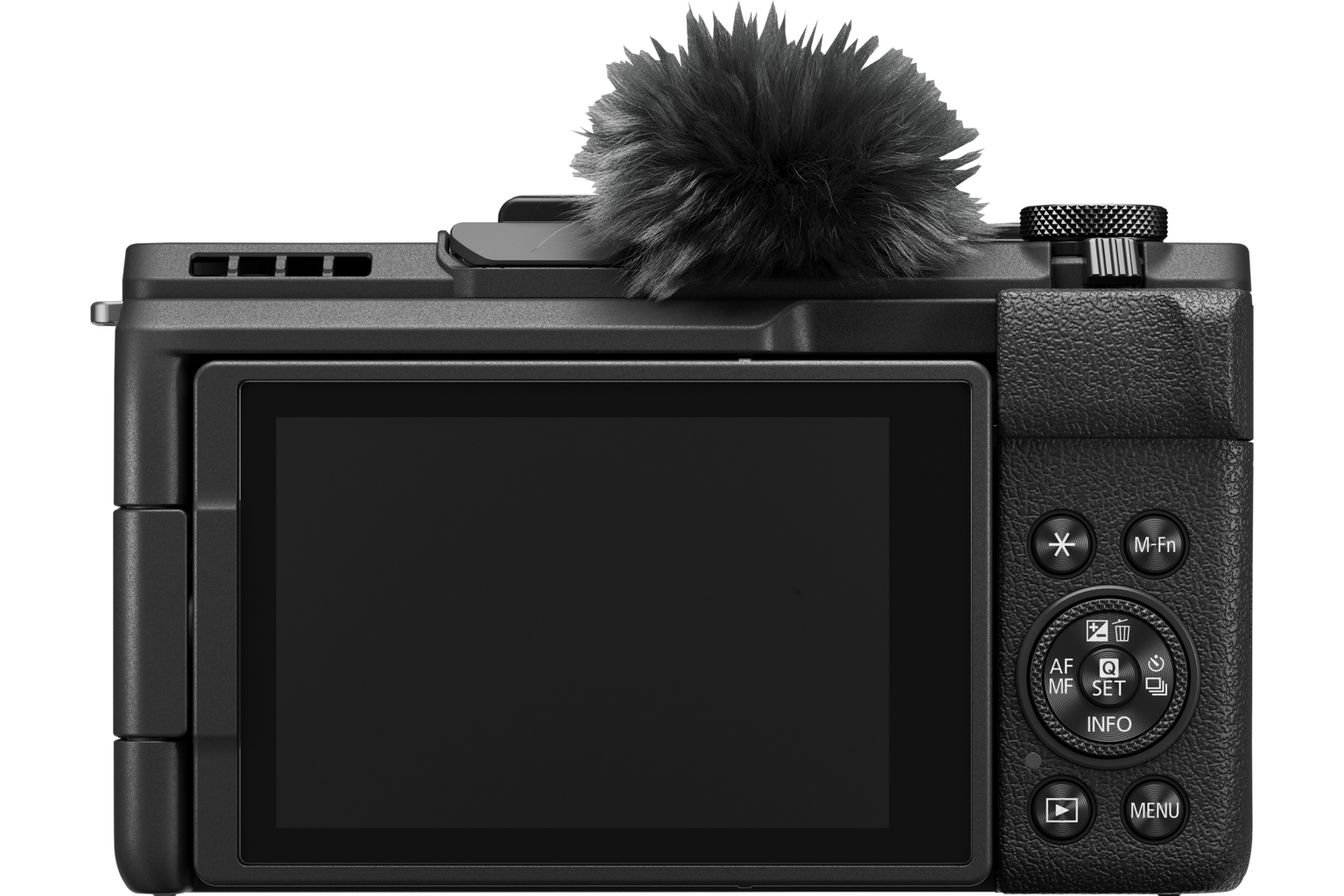
What Is the Canon Powershot V1?
Recently announced by Canon, the Powershot V1 is a compact, content-creator-focused camera designed for vloggers and filmmakers who want professional-level footage without the size and complexity of traditional setups.
Here’s why it caught my attention:
16–50mm Equivalent Zoom Lens: Versatile for capturing wide scenes, car interiors, landscapes, and spontaneous moments.
Built-in Stereo Microphones: Excellent ambient audio quality without needing external mics for casual shooting.
Flip-Out Screen: Essential for framing yourself while vlogging or filming quick updates.
4K Video with 4:2:2 10-bit C-Log 3: A huge advantage—this allows me to color match my V1 footage seamlessly with my professional Canon R5C and R5 cinema setups.
Built-In ND Filters: Extremely rare in a camera this size—perfect for controlling exposure during bright daytime filming without lugging external filters.
Internal Stabilization: Helps smooth handheld shooting or dashcam footage in rough conditions.
USB-C Charging: Ideal for travel; I can charge it in the vehicle while driving.
It’s not meant to replace a professional wildlife lens setup—but for documenting the experience, it might just be the most efficient tool I’ve ever carried.
📘 Want a deep dive into my field-tested safari gear choices? Read: The Complete Namibia Photo Guide.
How I Plan to Use the Powershot V1 on Safari
Here’s exactly how this camera fits into my workflow across two months in Botswana and Zambia:
Dashcam Recording: Mounted on my vehicle dashboard to document road journeys, off-road driving, and spontaneous roadside encounters.
Handheld Vlogging: Shooting daily field updates, campsite walkthroughs, meal setups, gear setups, and reflections at the end of long days.
Timelapse Capture: Setting up quick timelapses of sunrises over the Okavango Delta, sunset gear breakdowns, or even starry night skies from the campsites.
Quick BTS and B-Roll Shots: Filming casual camp life, spontaneous wildlife activity, or gear setup moments while my R5C and R3 focus on primary footage.
The beauty of the V1 lies in its ability to blend into the background of my day. I don’t have to stop what I’m doing to start filming—it’s always ready.
🎯 I will post a lot of BTS content on my YouTube Channel, make sure you subscribe not to miss it!
What I’ll Actually Be Filming
Expect a wide range of real-world storytelling coming from the Powershot V1:
Field Gear Setups: Practical tutorials showing how I build my safari rigs and organize photo/video gear in remote environments.
Camp Life: From coffee brewing at sunrise to setting up tents and preparing meals.
Candid Travel Moments: Encounters at local lodges, crossing river ferries, market visits, and spontaneous wildlife moments.
Wildlife Reactions: Capturing my real-time reactions when we bump into lions, elephants, or wild dogs without a long setup time.
Daily Recaps: Informal evening updates summarizing the day’s wildlife sightings, shooting conditions, and reflections.
This will allow viewers to experience the trip authentically, beyond the polished wildlife photos.
🗺️ Want a complete seasonal guide to planning your own African wildlife trip? Read: Best Time to Go on Safari.

What I’m Still Curious About
No piece of gear is perfect. Here’s what I’m eager to test once I’m deep in the field:
Stabilization Performance: Will the internal stabilization smooth out rough, bumpy off-road driving shots enough to be usable?
Battery Life: Will a pocket-sized body last through heavy shooting days without carrying half a dozen spares?
Color and Dynamic Range: Can this tiny sensor match the Canon R5C and R5 footage well enough for seamless editing across platforms?
Real-world testing will reveal whether the V1 can truly hold its own within a professional production pipeline.
A New Kind of Safari Camera?
The Canon Powershot V1 isn’t here to replace my primary bodies—but it fills a vital gap. It’s about spontaneity, speed, and storytelling.
In many ways, this camera represents a shift in how I think about travel content: low friction, ready anytime, and designed for connection, not just technical perfection.
If you’re a photographer, filmmaker, or travel content creator, there’s something powerful about having a “no-excuse” camera in your pocket—one that helps you capture the in-between moments that truly tell the story.
Featured Articles
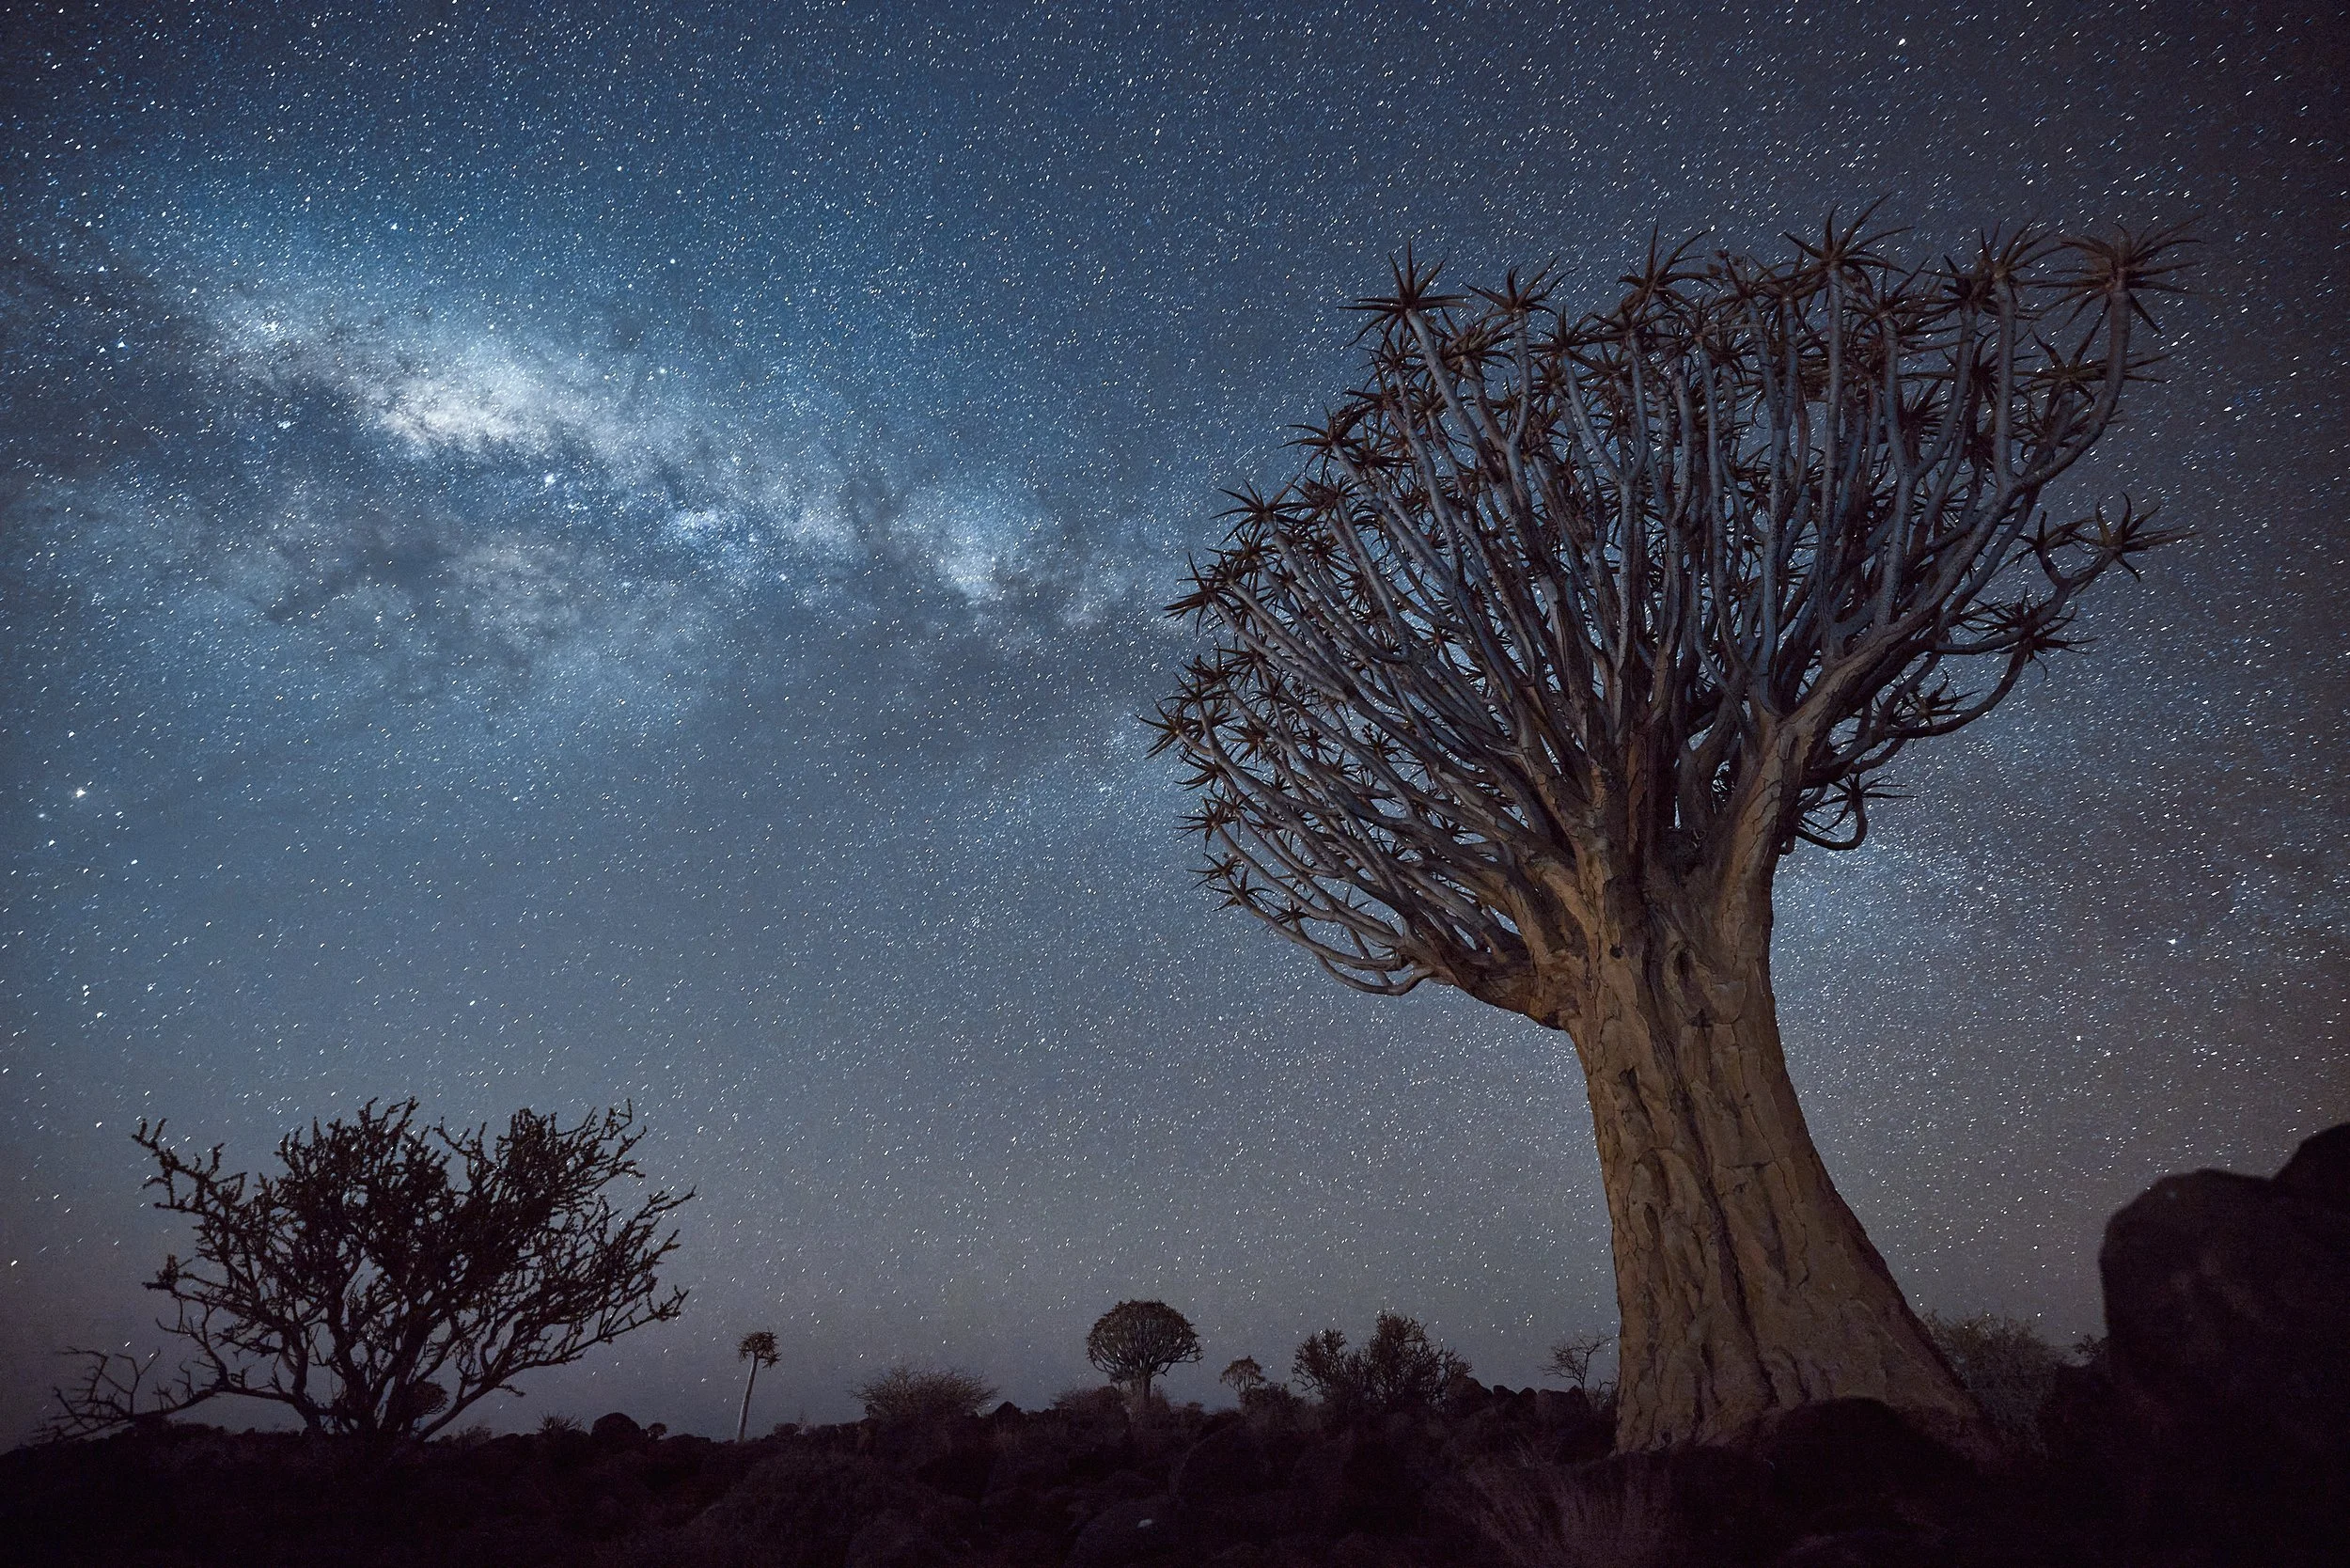
How to Photograph the Milky Way: My Complete Field Guide for Night Photography

Photographing the Milky Way is one of the most magical experiences in photography. But it’s also one of the trickiest. Between unpredictable weather, technical settings, and timing, a lot can go wrong—unless you show up well-prepared.
In this post, I’m sharing the exact process I follow to capture sharp, striking Milky Way images: from when and where to shoot, to gear selection, camera settings, and post-processing techniques. Whether you're just getting into astrophotography or looking to refine your night shooting skills, you'll find plenty of practical takeaways here.
🎁 Don’t forget to download my free photography eBook—it’s packed with gear checklists, field-tested night shooting tips, and much more.
When and Where to Photograph the Milky Way
You can’t just walk outside any night and expect to photograph the Milky Way core. It follows a seasonal cycle, and visibility depends entirely on timing, location, and light conditions.
Here's what you need to know:
Milky Way core season (Northern Hemisphere): Best visibility from March to October, peaking between May and August.
Best viewing direction: Southeast to South for northern hemisphere locations.
Ideal conditions: Zero light pollution, a new moon phase, and clear skies.
To plan effectively, I use PhotoPills, an essential app that shows the exact time and direction the core will rise and set based on your location. It even offers an augmented reality mode so you can pre-scout your compositions during the day without guesswork.
👉 Read my full guide to choosing the best time for a photography safari—similar principles apply!
Choosing the Right Location
Your location is 50% of your success in Milky Way photography. Here's how I pick my spots:
✅ Minimal Light Pollution: Use tools like Light Pollution Map or Dark Site Finder to scout areas with minimal artificial light interference.
✅ Unobstructed Views: Look for landscapes that offer clear sightlines to the southern horizon. Trees, mountains, or other objects can add interest—but you need a clear view for the core.
✅ Strong Foreground Elements: Foreground features such as rocky outcrops, lone trees, or even old ruins can turn a basic night sky shot into a compelling, story-driven image.
If you want an unforgettable destination for astrophotography, it’s hard to beat Namibia. The skies are among the darkest on Earth, and landscapes like Spitzkoppe and the Quiver Tree Forest feel otherworldly.
🚨 Want to join me under Namibia’s legendary skies? Check out my upcoming Namibia Photography Workshops here!
Planning Around the Moon and Weather
Even with perfect location and timing, cloud cover or moonlight can ruin your chances. Here's how I plan:
New Moon Phase: Aim to shoot within a few days of the new moon when the sky is darkest.
Clear Skies: Apps like Clear Outside and Windy help forecast localized cloud cover, humidity, and visibility.
Precise Timing: I cross-reference PhotoPills data for core rise times, azimuth angles, and visibility windows for my specific location.
The best results come when no moon + no clouds + dark skies align perfectly. A little patience pays huge dividends.

Gear for Milky Way Photography
Shooting stars demands gear that handles darkness, long exposures, and high ISOs well. Here's what I bring:
Camera: Any modern mirrorless or DSLR that performs well at ISO 3200–6400. I shoot with the Canon R5 because of its balance between resolution and low-light capability.
Lens: A wide, fast lens is essential. If I can I use a 20mm f 1.4, but when traveling my favorite is the Canon RF 15–35mm f/2.8—fast enough to collect light quickly and wide enough to capture sprawling skies.
Tripod: A solid, stable tripod is non-negotiable. Even the tiniest movement ruins star detail.
Headlamp with Red Mode: Essential for finding your gear and adjusting settings without blasting your vision (or your friends’) with harsh white light.
Spare Batteries and Memory Cards: Long exposures drain batteries quickly. I always carry at least three fully charged batteries.
🎥 Want to see my complete gear loadout for remote expeditions? Check out this post: What’s In My Camera Bag.

My friend Jandre Germishuizen getting ready for a Milky Way session in Spitzkoppe, Namibia. Check out his work here https://www.jandrephotos.com/about/
Camera Settings for Milky Way Photography
Getting sharp stars comes down to dialing in a few key settings:
Mode: Always shoot in Manual mode—you need full control.
Shutter Speed: Use the 500 Rule: 500 ÷ focal length = max exposure time before stars blur. (For example, at 24mm, you can expose for about 20 seconds.)
Aperture: Open it up wide—f/2.8 or faster gathers the most light.
ISO: Start between 3200–6400. Higher ISO introduces more noise but reveals more stars. Find your camera's sweet spot.
White Balance: Set around 3800–4000K for a natural, slightly cool tone—or use Auto if shooting RAW and adjust later.
Focus: Autofocus will struggle. Manually pre-focus on a distant light or use a headlamp to illuminate a foreground object.
2-Second Timer or Remote: To avoid any vibration from pressing the shutter.
👉 Learn how I configure custom shooting modes for instant action and quick adjustments here.

Post-Processing: Making Your Stars Shine
Editing Milky Way shots is about enhancing what you captured—not manufacturing fake scenes. Here's my basic workflow:
Boost the Whites: Carefully, without blowing out the highlights.
Adjust White Balance: Cooling it down a bit (~3800K) often enhances the Milky Way’s natural colors.
Add Contrast and Clarity: Use Dehaze, Blacks, and Clarity sliders to bring out the dust lanes and structure.
Use Local Adjustments: Apply selective edits to the foreground vs. the sky to balance exposure creatively.
Apply Gentle Noise Reduction: Smooth out the noise but preserve critical star detail.
For a more advanced workflow including exposure blending and stacking techniques, stay tuned for my upcoming deep-dive tutorial series.

Final Thoughts (And a Personal Note)
Milky Way photography has a steep learning curve—but once you get it right, it’s deeply rewarding. Some of my most treasured memories were built under starlit African skies, working patiently through cold nights, adjusting gear under red lights, and watching the universe reveal itself.
If your first shots don’t come out perfect, don’t get discouraged. Every attempt teaches you something—from managing conditions to fine-tuning focus and exposure.
Featured Articles

The Function Recall Button: The Fastest Way to Never Miss Wildlife Action Again
There’s nothing more frustrating than missing a once-in-a-lifetime wildlife moment because your camera settings weren’t ready. Whether it’s a bird launching into flight or a lion starting to charge, nature doesn’t wait for you to scroll through menus.
Luckily, there’s a powerful but underused feature on most modern cameras that can save your shot: the custom recall button.
This single setting allows you to pre-save your ideal action preset—shutter speed, aperture, autofocus, ISO, burst mode—and activate it instantly with the press of a button. It’s like a panic switch for fast-moving subjects.
In this guide, I’ll explain how to set it up, how I personally use it in the field, and why it’s one of the smartest tools any wildlife photographer can master.
Why This Feature Matters for Wildlife Photography
If you’ve spent time photographing wildlife, you know how quickly things can change. A peaceful scene can erupt in a second: a lion leaps, a leopard charges, or birds take flight in every direction. In those moments, there’s no time to manually change your shutter speed, switch your AF mode, or adjust your ISO.
That’s where a custom recall setup becomes invaluable.
It lets you:
Instantly trigger your “emergency action preset”
Hold the button to shoot with it
Release the button to return to your normal settings
It’s simple, smart, and designed for exactly the kind of unpredictable conditions we face in the wild.
How to Set Up a Custom Recall Button (Canon Guide)
Most modern mirrorless cameras—Canon, Nikon, Sony—support some variation of this feature. Here’s how I set it up on my Canon R5:
Step-by-Step:
Menu → Custom Functions → Customize Buttons
Choose a button that’s easy to reach without taking your eye off the viewfinder. I use the Depth of Field Preview button or a front grip button.Assign ‘Recall Shooting Func. (Hold)’
This tells the camera to activate a saved configuration only while the button is held.Press ‘Info’ to configure your preset. My setup:
Shutter speed: 1/2000 sec (to freeze fast movement)
Aperture: f/2.8
ISO: Auto
AF Mode: Servo / Continuous
Drive Mode: High-speed burst
Subject Tracking: ON
Metering Mode: Partial
Once set, this button instantly overrides your camera’s current configuration. You press, shoot, release—and your camera snaps back to its previous state.
Real-World Scenario: Why I Use It on Every Safari
Here’s a real-world example from the field.
Let’s say you’re shooting a calm scene—maybe a lion resting in golden morning light. Your settings are slow: shutter at 1/500, low ISO, wide aperture. Suddenly, an eagle dives across your field of view.
No time to change modes or scroll menus.
With your recall button:
You hold it down
Shutter jumps to 1/2000
ISO adjusts automatically
Burst mode kicks in
Servo AF locks onto the subject
You shoot the sequence. Action captured. Shot saved.
Then, just release the button, and you’re back to your original setup for the lion. It’s that seamless.
Watch the full video tutorial
Tips for Optimizing This Feature
Test your button placement. Use a location that doesn’t interrupt your shooting posture.
Customize for your subject. You can create variations: one preset for birds in flight, another for low-light action, and a third for high-contrast scenes.
Pair it with good habits. This feature works best when combined with manual mode and thoughtful exposure settings.
Some users prefer placing it on a lens function button (if supported), others on the AF-ON or top-front function buttons. Do what feels natural—muscle memory is key in fast-paced situations.
This custom recall function is a tool that every wildlife photographer should be using. It’s simple to configure, instantly responsive, and can be the difference between getting the shot—or missing it entirely.
🦁 If you haven’t started using this yet, I highly recommend experimenting with it on your next outing. Once you’ve seen how it performs in the field, you won’t want to shoot without it.
🔗 Want a deeper dive into setting up custom autofocus features? Check out this tutorial where I share my secret autofocus weapon!
Featured Articles

Why I’m Not Upgrading to the Canon R5 Mark II or R1 in 2025

The Canon R5 Mark II and Canon R1 are here. They’re fast, powerful, and packed with cutting-edge autofocus and video features. But despite all the hype—and despite using my cameras professionally every day—I’ve decided not to upgrade.
Not yet, anyway.
This isn’t because the new models aren’t incredible (they are). It’s because, right now, my gear isn’t what’s limiting my photography—and that might be true for you too.
If you're feeling that familiar pressure to upgrade, this post is for you. And if you're looking to level up your photography without spending thousands on new cameras, make sure you grab my free wildlife photography eBook—it’s packed with gear tips, real-world advice, and camera setup strategies that actually make a difference.

The R5 still delivers incredible results, even in 2025
What I’m Currently Using (And Why It Still Works)
My current setup is simple, battle-tested, and more than capable for professional wildlife work:
Canon R5 – My workhorse for high-resolution stills, hybrid video content, and travel. It offers incredible detail without overwhelming file sizes and handles challenging light remarkably well.
Canon R3 – My go-to for fast-moving wildlife, low-light situations, and harsh field conditions. Its autofocus tracking is unparalleled, and its ergonomic design allows for long shooting days without fatigue.
These two cameras have followed me through extreme environments—from the freezing altitudes of Mount Kenya to the blistering dunes of the Namib Desert—and have captured some of my most meaningful work.
What the New Cameras Actually Offer
The Canon R5 Mark II and Canon R1 introduce several impressive updates:
Canon R5 Mark II
Improved Autofocus Performance – Now closer to the elite tracking abilities of the R3.
30 fps Burst Shooting at Higher Resolution – Allowing for more frame choices in action sequences.
Advanced Heat Management for Video – Unlocks longer shooting times without overheating concerns.
Pre-Shoot Buffer Functionality – Helps capture moments even slightly before you fully press the shutter.
Canon R1
AI-Assisted Autofocus – Smarter subject detection and tracking.
Pre-Shoot Buffer Functionality – Helps capture moments even slightly before you fully press the shutter.
While these upgrades are fantastic for certain users, they don’t address any real pain points in my current workflow.
Better Gear vs. Better Results
Over a decade of professional photography has taught me one fundamental truth:
Better equipment rarely leads to better storytelling. More time in the field, better timing, and sharper observation skills do.

Canon R3 + 600mm f4
Buying the newest camera won’t get you closer to elusive predators, it won’t magically place you at the right waterhole at dawn, and it certainly won’t teach you composition. In fact, sometimes, chasing gear upgrades can be a distraction from the work that truly moves your craft forward.
Instead of upgrading bodies this year, I invested in expanding my creative reach with a more versatile lens—the Canon RF 100–300mm f/2.8.
Why I’m Not Upgrading—Yet
Let’s look deeper at why I’m staying put:
Better Autofocus?
My R5 already nails focus in nearly every situation, and the R3’s subject tracking remains world-class even with fast-moving wildlife. I rarely lose shots due to focus errors anymore.30fps Burst Speed?
Shooting 30 frames per second sounds great, but in the real world, I find that timing and anticipation create better action shots than brute force speed. I almost never exceed 15fps in my workflows.Advanced Video Features?
While the R5 Mark II boasts improved video capabilities, I rely on my Canon R5C for cinema-quality footage. It already provides better codec options and longer record times than I would gain from upgrading.Pre-Shoot Buffer?
It's a great addition for those shooting highly unpredictable moments (like kingfisher fishing strikes), but for me, it doesn’t justify a €5,000+ investment.
If you want a better look at how I approach real-world camera setups in the field, I highly recommend checking out my guide on setting up custom camera modes.
When Upgrading Does Make Sense
I'm not against upgrading—but it should be driven by clear needs, not by FOMO. Here’s when upgrading makes real sense:
You struggle with autofocus consistency – Especially for birds in flight or fast, unpredictable mammals.
You’re limited by dynamic range or high ISO performance – Shooting heavily in very low-light conditions where extra sensor performance is critical.
You're stepping into professional work – If your current body is outdated and lacks features needed for reliability or client expectations.
You need dedicated video capabilities – Especially if you’re creating serious hybrid (photo + video) projects and your gear can’t keep up.
Before you upgrade, I suggest focusing on improving your in-field experiences first. It’s the fastest way to boost your wildlife portfolio.

Canon R5 + 100-500mm RF
What I’m Focusing on Instead
Here’s where my focus (and budget) is going in 2025:
More time in the field
Nothing replaces firsthand experience. The more hours you spend observing wildlife, the more natural your compositions and reactions become.Investing in flexible lenses
Lenses like the 100–300mm f/2.8 allow me to work faster and creatively adapt without constantly switching setups.Improving my editing workflow
Polishing my RAW images efficiently lets me bring out the best in the files I already capture. Great editing often beats mediocre new files.Telling better stories
Building compelling narratives around my travels, wildlife encounters, and conservation projects matters more than minor spec bumps.
📸 Want to get more out of the gear you already own?
That’s exactly what I help photographers do on my immersive workshops. Every trip is built around learning how to see, compose, and shoot with purpose.
Before you jump into upgrading your gear, ask yourself:
“Is this upgrade really necessary—or could this investment be better spent on experiences that grow my skills and portfolio?”
It’s tempting to believe that the next camera will unlock the next level of your photography. But usually, that next level comes from time in the wild, deeper field knowledge, and sharper creative instincts.
Feautred Articles

How I Set Up My Custom Camera Modes for Wildlife Photography
Missing a perfect wildlife shot because of slow settings changes is something every photographer has experienced. Whether it's a cheetah bursting into action or a bird suddenly taking flight, you’ve got just seconds—or less—to respond.

That's where custom camera modes come in.
In this post, I’ll show you exactly how I use C1, C2, and C3 on my Canon bodies (and equivalent modes on Sony and Nikon), with real-world setups I rely on daily in the field. From fast action to low-light scenarios, these presets let me instantly switch between configurations—no menu diving, no stress.
🎒 And if you’re prepping for your next safari or just want to improve your shooting workflow, don’t forget to grab my free 100-page wildlife photography eBook—it’s packed with gear tips, settings guidance, and field-tested tricks.
Why Custom Modes Matter for Wildlife Photography
Custom modes are preset shooting configurations you can assign to your mode dial. On Canon, they’re labeled C1, C2, and C3. Nikon has U1 and U2, and Sony offers MR (Memory Recall) modes.
Once set up, these modes allow you to instantly apply a full suite of settings—shutter speed, aperture, ISO, AF mode, drive mode, and more—with just one twist of the dial. This is especially useful when:
Lighting conditions change rapidly
You’re shifting between stills and action sequences
You need to react without thinking
In fast-moving wildlife scenarios, this could be the difference between nailing a shot… or watching it vanish.
My Wildlife Photography Custom Mode Setups
Here’s how I personally configure my three core modes on my Canon R5 and R3:
🔧 C1 – General-Purpose Setup
This is my default shooting configuration—what I use for 80% of situations when I don’t need anything too specialized.
Mode: Manual
Aperture: f/2.8 (wide open for low light and subject separation)
Shutter Speed: 1/1000 sec
ISO: Auto
AF Mode: Servo with Subject Tracking
Drive Mode: High-speed continuous
It’s a balanced, flexible setup that lets me adapt on the fly. I pair this with back-button autofocus, so I can switch between tracking and single-point focus quickly depending on the moment.
🔧 Need help setting that up? Check out my guide to AF-ON customization here.
🔧 C2 – Fast-Action Setup
When I know I’m going into a high-speed situation—like birds in flight, predators chasing prey, or suddenly active herds—I switch to C2.
Mode: Manual
Aperture: f/2.8
Shutter Speed: 1/4000 sec
ISO: Auto
AF Mode: Servo with AF Expand Area
Drive Mode: High-speed burst
This setup freezes motion while the expanded AF area helps keep erratic subjects in focus, even if they’re moving unpredictably across the frame.
🔧 C3 – Low-Light Setup
For early mornings, twilight, shaded forests, or even overcast conditions, I rely on C3.
Mode: Manual
Aperture: f/2.8
Shutter Speed: 1/150 sec
ISO: 6400
AF Mode: One Shot with Single AF Point
🔧 Struggling with low light photography? Check out this video!
Why switch to One Shot? Because in low light, Servo AF tends to hunt or miss focus entirely. A single AF point locks on more reliably—especially for animals holding still or moving slowly.
This mode keeps my files clean and sharp even when light is scarce.
How to Set Up Custom Modes on Your Camera
Setting these up is simple. Here’s how to do it on most Canon cameras:
Set your camera to Manual or your preferred exposure mode
Adjust all settings exactly as you’d want them for that preset
Go to Menu → Custom shooting mode → Register settings
Choose C1, C2, or C3
Done!
On Sony, head to the MR (Memory Recall) menu. Nikon users should look for Save User Settings and assign them to U1/U2.
You can overwrite or update these settings anytime—so don’t worry about experimenting.
Why This Changes Everything in the Field
On safari, I might go from tracking a resting elephant in flat light to a hunting lion in golden hour—within minutes. Fumbling through the menu to change AF, shutter speed, and ISO? Not an option.
Using custom modes has allowed me to capture moments I would’ve missed before. These modes are an essential part of my gear now—just as important as my lenses.
If you haven’t set yours up yet, do it today. Your future self (and portfolio) will thank you.

Featured Articles

600mm vs 100-500mm: Which Wildlife Lens Should You Pack?
Choosing the right wildlife lens can feel overwhelming, especially when you're gearing up for a big trip. If you're torn between packing a 600mm prime lens or a versatile 100-500mm zoom, you're not alone. Both are phenomenal tools — but each comes with different strengths, weaknesses, and trade-offs.
In this post, we'll dive deep into the pros and cons of both lenses, real-world field performance, and which one you should prioritize based on your photography goals. By the end, you’ll know exactly which lens deserves a spot in your bag.

Why This Matters
Wildlife moments are often fast, unpredictable, and challenging to frame. Having the right focal length and setup can mean the difference between nailing the shot or missing it altogether. To make an informed decision, you need to weigh image quality, flexibility, portability, and field practicality.
If you're new to thinking about how focal length impacts your wildlife photography, make sure you check out my guide: My Favorite Focal Lengths for Wildlife in 2025 – and Why.
600mm Prime Lens: The Unbeatable Heavyweight

Pros:
Exceptional image quality: Sharpness, contrast, and color rendition are simply unmatched.
Ultimate reach: Perfect for distant wildlife, especially in wide-open areas like Etosha or the Central Kalahari.
Beautiful background separation: With a wide f/4 aperture, your subject will pop against creamy, blurred backgrounds.
Cons:
Heavy and bulky: Harder to handhold for extended periods, often requiring beanbags or tripods.
Fixed focal length: No zoom flexibility; you're stuck with the frame you get.
Expensive: A 600mm prime is a serious financial investment.
In static environments, like photographing predators at a waterhole during the dry season, the 600mm is king. But what happens when you need more adaptability?
Not familiar with safari seasons? Learn more in Best Time to Visit Africa for Photography - full article here!
100-500mm Zoom Lens: The Adaptability King

Pros:
Massive focal length flexibility: Zoom from 100mm to 500mm without switching lenses.
Lightweight and manageable: Easy to handhold for hours, even while tracking moving subjects.
Affordable compared to primes: A great way to cover a huge range without breaking the bank.
Incredible field efficiency: Perfect when animals come closer than expected or when you want to include more environment in your storytelling.
Cons:
Slightly less sharpness at 500mm: Still excellent, but doesn't match a prime's edge-to-edge sharpness.
Variable aperture: Aperture narrows as you zoom in (f/4.5-7.1 on the Canon 100-500mm), meaning less light at full zoom.
When photographing fast-moving animals, flexibility often outweighs minor image quality gains. Having a zoom lens also makes it easier to quickly adapt your framing — especially during a spontaneous moment. To maximize your action shots even further, don't miss my tip on Using Servo and One-Shot AF at the Same Time.
Real-World Field Scenarios
Let's say you're on a game drive in Botswana's Savute region. At one moment, you're photographing an elephant herd from 200 meters away — the next, a pack of wild dogs darts right past your vehicle.
With a 600mm prime, you might struggle to frame the fast-moving, close-range action without cutting off limbs or missing the shot entirely.
With a 100-500mm zoom, you can quickly pull back to 150-200mm, adjust composition, and stay in the moment.
This difference becomes even more pronounced during unpredictable events — exactly why my Safari Camera Bag always includes a zoom lens.
See my full safari packing list with explanations of all the pieces of gear I travel with!

Which Lens Should You Pack?
If you can only bring one wildlife lens, I strongly recommend a flexible zoom like the Canon 100-500mm.
Here’s why:
You’ll capture a wider variety of shots.
You’ll react quicker to fast-changing scenes.
You'll be better equipped for everything from distant cheetahs to close-up elephants.
You’ll travel lighter — especially if you're shooting handheld.
Of course, if you're building a two-lens wildlife kit, the 600mm prime remains an unbeatable tool for focused, long-range work. But if you have to choose only one lens, versatility wins.
Other excellent zoom options worth considering:
Sony 200-600mm f/5.6-6.3 G OSS — A fantastic value and reach combo.
Nikon 180-600mm f/5.6-6.3 Z — Sharp, affordable, and newly designed for mirrorless.
Sigma 150-600mm f/5-6.3 DG DN OS Sports — Budget-friendly with great image quality.
Zooms are becoming increasingly popular among ethical photographers too, because they allow you to maintain distance without stressing wildlife.

Learn more in Ethical Wildlife Photography: 7 Rules Every Photographer Should Follow.
Final Takeaway
Choosing the right wildlife lens isn’t just about sharpness or brand loyalty. It's about:
Flexibility
Field performance
Real-world shooting conditions
Your creative vision
If you're gearing up for your next adventure, my honest advice is: choose versatility first. And if you're curious about how these lenses perform across real-world safari conditions, don't miss joining me on one of my upcoming trips!
See all my upcoming trips and workshops!
Featured Articles

How I Travel With Big Lenses (Without Checking a Single Camera)
Traveling with large camera gear can be one of the most stressful parts of any wildlife photography trip. Between strict airline weight limits, the risk of theft, and the impossibility of insuring checked luggage properly, it's easy to lose sleep the night before a flight—especially when you're carrying gear worth more than your vehicle.
Over the years, I’ve refined a system that lets me bring everything I need—600mm f/4 included—onto the plane with me, without ever having to check a single piece of expensive equipment. If you’re planning your first safari, remote expedition, or long wildlife adventure, I hope this post saves you a major headache at the airport.
📘 Before we dive in—if you’re planning a wildlife trip and want a full breakdown of gear, travel strategy, and in-field techniques, grab my free 100-page wildlife photography eBook.
Why Flying With Photo Gear Is Such a Headache
Airlines rarely design their policies with wildlife photographers in mind. If you’ve ever tried to pack multiple bodies, long telephotos, and a laptop into a single "carry-on" under 8kg, you know what I mean.
Years ago, I used to check my gear—big mistake. Especially on routes through Johannesburg, Cape Town, or Addis Ababa, where lost bags and theft are way too common. After hearing one too many horror stories from other photographers, I stopped risking it.
Now, everything expensive stays with me in the cabin. Here’s how I make it work.
My Exact Travel Setup for Wildlife Trips
The backbone of my setup is the f-stop Tilopa backpack, paired with their XL ICU (Internal Camera Unit). It’s the largest photography backpack that still meets airline carry-on size limits. Even on smaller regional jets, I’ve never been forced to check it.
Here’s what I typically fit inside:
Canon R3 and R5 camera bodies
Canon 600mm f/4 (barrel detached and fitted outside the backpack)
Canon RF 100–500mm and 70–200mm f/2.8
Teleconverters, spare batteries, SSDs
Laptop and power banks
Alongside that, I bring a personal item. My go-to options are:
F-Stop Florentin 11L shoulder bag (fits another body and a few primes), or
A Large ICU for lenses like the 100–300mm f/2.8 and additional bodies.
What Happens If the Airline Flags You?
Let’s be honest—this setup is rarely within official airline weight limits. Airlines like Lufthansa or Emirates have stopped me before. Here’s my step-by-step strategy:
Show up early at check-in and boarding. You’re less likely to face a full overhead bin or panicked gate agents.
Distribute your weight wisely. Place the heaviest gear (like lenses and cameras) in your "personal item," which is rarely weighed.
Leave the non-essentials. Chargers, cleaning kits, cables—they go in your checked luggage.
If a gate agent challenges you, stay calm and explain clearly. Let them know your bag contains professional photography gear that is fragile, high value, and not insurable in checked luggage. If needed, open the bag and show them. I’ve done this many times, and I’ve always been allowed to board with my gear.
Essential Tips for Flying With Big Photo Gear
For your first big wildlife trip, here are three hard-earned lessons that will save you stress:
✅ Never check your most valuable gear. It’s safer (and cheaper) to carry it all onboard.
✅ Avoid rolling camera bags. Backpacks attract far less scrutiny at the gate.
✅ Be respectful—but firm. Airline staff will usually help if you calmly explain your needs.
🎬 Curious about optimizing your camera setup for fast-paced wildlife moments? Check out my video on how I set my autofocus for wildlife—another game-changer when every second counts!
Flying with big lenses doesn’t have to be a nightmare. With the right backpack, a dialed-in system, and a calm mindset at check-in, you can safely travel the world with all your precious gear in tow.
Have your own tip or war story from flying with camera gear? I’d love to hear it—drop a comment or shoot me a message.
🎁 Don’t forget to grab my free wildlife photography eBook—it’s packed with insights for field shooting, gear, and travel.
👉 Click here to download it
Featured Articles

Canon RF 100-300mm f/2.8 for Wildlife Photography - why I bought it

I’ve been shooting with the Canon RF 600mm f/4 for years. It’s an incredible lens—tack-sharp, with insane subject separation and enough reach to capture intimate wildlife portraits even in wide-open environments like Etosha or the Kalahari. But recently, I added the Canon RF 100-300mm f/2.8 to my kit. And yes—it’s one of the most expensive telephotos on the market. So why the change?
In this post, I’ll break down why I decided to invest in this lens, how it solves some of the frustrations I’ve had in the field, and what my new lens setup will look like on upcoming trips across southern Africa.

In the field with the 600mm f4
First Impressions: The Canon RF 100-300mm f/2.8
The first time I picked up the 100-300mm f/2.8, I could immediately feel the difference. Despite being a fast zoom, it’s shorter and lighter than the 600mm, making it far easier to handle—especially when shooting handheld or working out of a vehicle.
Key specs that matter for wildlife:
Constant f/2.8 aperture across the zoom range
Weight: just under 2.6 kg (5.7 lbs)
Built-in image stabilization (up to 5.5 stops)
Weather-sealed construction
On paper, this lens offers an ideal balance between speed, versatility, and image quality. But let’s talk about why I felt the need to add it at all.

Why the 600mm f/4 Isn’t Always Enough
I still love the 600mm f/4. It’s produced some of my favorite images—especially when I’m further back from the subject. With the right light and distance, it delivers perfect compression and clean backgrounds, making the subject pop.
But over the years, I’ve run into a few recurring challenges that the 600mm alone can’t solve.
1. Sometimes It’s Too Long
In places like South Luangwa or Slovenian bear hides, animals often come extremely close. At 600mm, I was constantly too tight, missing compositions entirely or forced to switch lenses rapidly. The Canon RF 100-500mm has helped bridge this gap, but its variable aperture (f/7.1 at the long end) severely limits its low-light performance.
2. Handholding Gets Exhausting
Yes, I can technically handhold the 600mm, but let’s be real—it gets heavy fast. I often skip potential shots just because I can’t hold position long enough or don’t want to deal with the physical strain. With the 100-300mm, that’s no longer a problem.
3. f/4 Isn’t Always Enough in Low Light
As good as f/4 is, it doesn’t compare to f/2.8 when the light starts to fade. Dawn and dusk are when wildlife activity peaks, and shooting wide open at 2.8 means lower ISO, cleaner files, and better shutter speeds—especially when filming video, where pushing ISO is even riskier.

Sometimes the 600mm is just too long, especially when animals are walking close to my car during a safari
Why I Chose the Canon RF 100-300mm f/2.8
At first, I considered going back to the 400mm f/2.8, which I’ve used in the past. But it’s bulky and heavy, and pairing it with the 600mm made my travel setup unwieldy. The 100-300mm f/2.8 offers many of the same benefits with none of the downsides.
Here’s what sealed the deal:
More Light = More Keepers
With f/2.8, I gain a full stop over the 600mm. In low-light conditions—shaded forests, cloudy mornings, golden hour—it’s a massive advantage, both for stills and video.
Zoom Flexibility Without Sacrificing Sharpness
I now have zoom capability from 100mm to 300mm, without compromising sharpness or performance. That’s perfect when working in fast-changing scenes, or when I want to adjust framing without moving position.

Easier to Handle, Especially on the Move
Whether I’m shooting from a car window, trekking on foot, or filming handheld, the 100-300mm is compact enough to manage comfortably. This means I shoot more, move faster, and react better in the field.
Works Seamlessly with Teleconverters
With a 1.4x teleconverter, the lens becomes a 140–420mm f/4, which still delivers superb quality. On a Super35 crop (an option that I can switch on and off when I film with the R5C), that gives me up to 630mm equivalent. That kind of flexibility is hard to beat.
Replaces Multiple Lenses
It’s rare that one lens can take the place of three, but in my case, it does. With this new addition, I’ve effectively replaced:
70-200mm f/2.8
100-500mm f/4.5–7.1
400mm f/2.8
For someone who travels often and packs for self-drive safaris or remote locations, simplifying my gear like this is a huge win.
📸 Want to get more out of the gear you already own?
That’s exactly what I help photographers do on my immersive workshops. Whether it’s Namibia, Zambia or Slovenia — every trip is built around learning how to see, compose, and shoot with purpose.
What About the 600mm?
Don’t worry—the 600mm isn’t going anywhere. I’m not replacing it, I’m complementing it. My field setup for the upcoming season looks like this:
600mm f/4 on Canon R3 – used with beanbags or monopods for long-range wildlife photography
100-300mm f/2.8 on Canon R5 – my handheld go-to for dynamic stills and video
100-500mm on the R5C – mounted on a fluid head for long-form horizontal video content
This 3-lens system gives me reach, flexibility, and creative control, whether I’m tracking lions in the Kalahari or filming rhinos in Damaraland.
Final Thoughts
Adding the Canon RF 100-300mm f/2.8 was a big investment, but after using it in the field, I can confidently say it’s going to change how I work. It solves real-world problems that the 600mm couldn't—and it simplifies my gear without sacrificing quality.
As I prep for my next adventures across Namibia, Botswana, and Zambia, I’m genuinely excited to see what this lens can do. It’s rare to find a tool that makes you feel more nimble and more capable—but this is one of them.
Let me know what lens setup you’re using for wildlife—especially if you’ve tested the 100-300mm yourself. Is it worth the hype for you too?
“Still Unsure Which Lens to Bring on Safari?”
Download my free guide and learn how I pack, shoot, and protect my gear on long-haul trips.
Featured Articles

Why I Switched from Capture One to Lightroom Classic in 2025
After seven years of editing exclusively in Capture One, I finally made the leap back to Lightroom Classic—and to be honest, I didn’t think this day would ever come.
This isn’t a dramatic pivot for the sake of it. As a wildlife and travel photographer working in remote locations and under constantly changing light, I’ve spent the past year reevaluating my workflow. And after some serious testing, Lightroom Classic has become the best fit for how I shoot and edit in 2025.
Here’s why I switched—and what you should consider if you’re using Capture One and wondering whether it’s still the best tool for your needs.
Why I Originally Chose Capture One
When I first started using Capture One in 2017, it was miles ahead of Lightroom in many key areas:
Superior RAW rendering – My files looked better straight out of camera.
Advanced color control – The Color Editor allowed for incredibly precise hue and tone adjustments.
Sessions workflow – Perfect for travel and expeditions, with clean project-based organization.
Layer-based local adjustments – Essentially Photoshop-level control right inside the RAW editor.
At the time, Lightroom felt slow, clunky, and creatively limited. Capture One gave me more control and better results, especially when editing thousands of wildlife photos across long trips. I built my entire workflow around it. But technology doesn’t stand still—and Lightroom has caught up in a big way.
What Made Me Switch Back to Lightroom Classic
1. Built-In AI Noise Reduction
For wildlife photographers, clean high-ISO performance is everything. I regularly shoot in low light—pumas at dusk, lions at sunrise, birds under canopy—and I need solid noise handling.
Lightroom’s AI-powered noise reduction is the best I’ve used so far. It outperforms third-party plugins and saves me the time and hassle of round-tripping files out of my editing app. Capture One does offer noise reduction, but Lightroom's solution is more seamless, intuitive, and effective for my needs.
2. Smarter Masking for Wildlife
Lightroom’s automatic AI masking is a serious time-saver. It can detect and select subjects, skies, and backgrounds automatically—and even intersects masks for advanced control. What stands out is that when I copy and paste these masks across a batch of images, Lightroom recalculates each one to fit the new photo.
With wildlife subjects—think feathers, fur, or animals partly hidden in brush—this means I can apply localized edits across a set with almost zero manual adjustments. Capture One offers similar tools, but I’ve found they require more manual fine-tuning, which slows me down during large edits.

3. Mask Intersections = More Creative Control
Intersecting masks in Lightroom allows me to apply selective adjustments—like a graduated filter that only affects the subject, or softening just the background behind it. These combinations give me precise control without jumping into Photoshop. It's a huge win for field photographers working on tight deadlines.
4. A Smoother, More Intuitive UI
This one surprised me. After years in Capture One’s clean, minimal interface, I thought I preferred its precision. But coming back to Lightroom made me realize how fluid and intuitive it now feels. Sliders are more responsive. The overall flow of adjustments just works better for my creative process. Lightroom feels like a tool designed for photographers, not engineers—and I didn’t realize how much I’d missed that.
🎁 Want to go deeper into editing, gear, and in-field techniques? Download my free 100-page wildlife photography eBook—it’s full of practical advice from the field.
What I’ll Miss About Capture One
To be clear: Capture One is still a fantastic piece of software. There are three areas where I think it still has the edge:
1. Sessions for Travel Shoots
Sessions are ideal for managing short-term projects on the road. I’d create a session for each location or assignment, then merge everything into a master catalog back at the studio. Lightroom doesn’t have an equivalent (yet), and I haven’t found a workflow that replicates that speed and structure as cleanly.
2. Full Layer-Based Local Adjustments
In Capture One, every layer supports every tool—curves, color balance, sharpening, white balance, etc. Lightroom has come a long way, but not every adjustment is available through masking yet. That limitation is still noticeable if you’re used to Capture One’s flexibility.
3. Advanced Color Editor
Capture One’s Color Editor remains unbeatable for ultra-fine color grading. It’s especially great for portrait and studio work, where subtle color shifts matter. If you shoot fashion, lifestyle, or commercial portraits, it might still be the better choice.
That said, for my workflow—wildlife, fast-paced travel, and large volumes of RAW files—Lightroom is now ahead where it counts.

Final Thoughts: Choose the Tool That Serves You Now
This isn’t about loyalty—it’s about choosing the right tool for the job, right now.
If you’re editing large batches, working in high ISO, or want AI tools that truly speed up your editing process, Lightroom Classic in 2025 is an incredibly strong choice.
Capture One still shines for high-end control, commercial editing, and workflows where ultimate precision matters. But for fast, flexible, and effective editing in the field, I’m happy to be back in Lightroom.
Watch the Full Video

Featured articles

Why I No Longer Use ETTR for Wildlife Photography
If you're still "exposing to the right" (ETTR) like we all did back in 2012, it's time to rethink your wildlife photography strategy. I did it myself for years—but recently realized the rules have dramatically changed.
Modern camera sensors, such as those in the Canon R5, R3, Nikon Z9, and Sony A1, have drastically improved dynamic range and shadow recovery capabilities. Today, intentionally underexposing your images slightly can actually preserve critical highlights and provide greater editing flexibility later on.
In this article, I'll explain why ETTR is outdated for wildlife photography in 2025, how I now expose my images, and when ETTR might still be beneficial.
What is ETTR (Expose to the Right)?
"Expose to the Right," or ETTR, is a photography technique that was popularized more than a decade ago. The concept involves pushing your camera's histogram as far right as possible without clipping highlights. By maximizing the amount of captured light, you collected more data in the brighter areas of the image, resulting in cleaner files with less noise and better color quality—especially in the shadow areas.
This approach made perfect sense back in the era of early DSLRs like the Canon 5D Mark II or Nikon D700. These cameras had (relatively) limited dynamic range, particularly at higher ISO settings. Pulling up shadows in post-processing would often reveal ugly noise, discoloration, and loss of detail.
ETTR was the logical solution, allowing photographers to capture more image data upfront and reduce reliance on heavy shadow adjustments later. However, the photography landscape has significantly evolved.

A photo captured with Canon R3 at 20.000 ISO
Why ETTR is Now Outdated for Wildlife Photography
Today’s mirrorless cameras have completely changed the game. Sensors in cameras like the Canon R5, R3, Nikon Z9, or Sony A1 offer incredible dynamic range and impressive shadow recovery. It's now common to recover shadows by three stops or even more without noticeable quality loss.
But there’s one big catch: blown highlights are still irrecoverable. Once highlights clip—like bright feathers on a bird or sunlit fur on a predator—no amount of editing can recover those details.
In wildlife photography, conditions change rapidly. Animals move unpredictably, backgrounds shift, and lighting conditions vary in seconds. Using ETTR in these scenarios often means guessing exposure, risking highlight loss, and potentially missing shots you can't retake.
Underexposing slightly, on the other hand, helps preserve essential highlight detail, giving you more flexibility when editing RAW files later.
My New Approach: Smart Underexposure
My current technique involves intentionally underexposing images by approximately two-thirds to one full stop, especially in high-contrast or brightly lit situations. This approach ensures I retain highlight details and gives me room for shadow recovery without compromising image quality.
Here's exactly how I set up my camera in the field:
Shoot Manual mode with Auto ISO: This lets me precisely control shutter speed and aperture while the camera automatically adjusts ISO to balance exposure.
Enable Highlight Alerts (Zebras): This visual indicator quickly shows if highlights are close to clipping, so I can adjust accordingly.
Histogram management: I aim for a histogram that approaches the right edge without touching it, ensuring no crucial details are lost.
Rely on RAW data, not JPEG previews: The camera's JPEG preview can be misleading. Always check your RAW histogram and confirm recoverable details later in post-production software like Lightroom or Capture One.
By following this workflow, even in challenging lighting, I maintain maximum flexibility to adjust shadows and exposure in post-processing.
Is ETTR Ever Still Useful?
Does this mean ETTR is completely obsolete? Not quite—there's still one specific scenario where ETTR remains beneficial: extremely low-light photography at high ISO settings.
For instance, pre-dawn wildlife drives or evening shoots in dim forests are scenarios where noise—not highlights—is the primary enemy. Here, pushing the exposure slightly to the right helps produce cleaner images straight out of camera, reducing reliance on shadow brightening, which can drastically increase noise.
In low-light situations, I:
Open my lens aperture wide (f/2.8 or f/4).
Lower shutter speed as far as practical for sharp images.
Push the histogram rightward cautiously, ensuring no highlights clip.
Since these environments typically have low contrast and limited dynamic range, capturing a brighter initial exposure minimizes noise and produces higher-quality images overall.
Final Thoughts: Smart Underexposure is the Real Wildlife Photography Hack
While ETTR had its merits in the DSLR era, modern mirrorless cameras have shifted the photography landscape significantly. In 2025, careful, intentional underexposure—prioritizing highlight protection—is the superior strategy for wildlife photographers.
By exposing for flexibility, protecting highlights, and confidently working with shadows in post-processing, you'll consistently capture better wildlife images.
Still struggling with tricky lighting and high ISO scenarios? You're not alone. I made a comprehensive video on managing low-light wildlife photography, packed with practical insights for cleaner, sharper photos.
Watch my full video guide on managing tricky low-light wildlife photography here.
Featured articles

Ultimate Autofocus Trick: Use Servo and One-Shot AF at the Same Time!
I've been photographing wildlife professionally for years now, primarily using cameras like the Canon R5 and Canon R3. After countless hours tweaking settings, customizing buttons, and experimenting in the field, I've discovered something that completely changed my workflow - something I wish I'd known sooner. Today, I'm sharing my new favorite autofocus customization that allows you to use continuous (SERVIO) autofocus and single (ONE-SHOT) autofocus simultaneously—without ever diving into your camera menu while you're out shooting.
If you photograph wildlife, birds, or any fast-moving subjects, this autofocus setup could transform your photography as well.
Understanding Autofocus Modes: Servo AF vs. One-Shot AF
Before we dive into the setup, let's quickly recap the two main autofocus modes that photographers use most frequently:
Continuous Autofocus (Servo AF / AF-C):
In this mode, your camera continuously adjusts the focus to track and keep a moving subject sharp. It's ideal for wildlife, sports, or action scenes where subjects move unpredictably.Single Autofocus (One-Shot AF / AF-S):
Here, your camera locks focus once, and it remains fixed until you refocus manually. It’s excellent for stationary subjects, precise framing, or scenes where you don't want the autofocus to shift unexpectedly.
Why Servo AF Isn’t Always Perfect
Servo AF is powerful, especially with modern mirrorless cameras. However, even the most advanced autofocus tracking systems sometimes struggle, particularly:
In cluttered scenes (branches or leaves in front of your subject).
Low-contrast lighting (foggy mornings or dusk conditions).
When you want to deliberately lock focus on a specific element in the frame and recompose.
In these situations, continuous autofocus can get confused, causing missed shots and frustration in the field.

👉 Quick tip: If you're into wildlife photography and want more field-tested tips, download my free 100-page wildlife photography eBook. It’s packed with gear advice, camera settings, and in-field techniques to elevate your photography.
My Previous Workarounds (and Why They Didn’t Work)
Initially, I separated autofocus from my shutter button, assigning AF activation exclusively to the back AF-ON button. This setup (also known as "back-button focusing") gave me good control but still required frequent switching between SERVO and ONE-SHOT modes depending on the situation.
I tried assigning different buttons - front buttons on the R3, FN buttons on the R5 - to quickly switch modes, but this still meant fiddling with camera settings during critical moments. Inevitably, I would sometimes forget to switch modes back, resulting in out-of-focus shots at the worst possible times.
I needed a solution to have both autofocus modes instantly accessible at any given moment—without diving into camera menus.
The New Autofocus Setup: Servo and One-Shot AF Simultaneously
After experimenting extensively, I've finally found the perfect customization that lets me seamlessly use Servo and One-Shot AF at the same time. Here’s exactly how I set it up on my Canon R5:
Step-by-Step Autofocus Setup (Canon R5)
Go to the Autofocus Menu:
Set AF Operation to SERVO AF.
Set AF Method to Tracking + Subject Recognition.
Choose your subject (Animals, People, Vehicles).
Disable Continuous AF (to conserve battery life and avoid unnecessary AF movement).

2. Customize Your Buttons:
In the "Customize Buttons" menu, set the Shutter Button to trigger both Exposure Metering and AF. This activates continuous autofocus with tracking when half-pressed.
Set the AF-ON button similarly to trigger Exposure Metering and AF, but now press the INFO button to access the sub-menu:
Change AF Operation to ONE SHOT AF.
Change AF Method to SPOT AF (for precise, single-point focusing).


This simple yet powerful setup lets you instantly switch autofocus modes with a single button press:
Half-pressing your shutter button triggers Servo AF with tracking, ideal for action and moving subjects.
Pressing and holding the AF-ON button activates precise One-Shot AF, ideal for stationary or carefully composed scenes.

In the field with the R3
Adjustments for Canon R3 Users:
On the Canon R3, subject tracking is always activated and cannot be completely disabled, so you slightly adapt this setup (which I fully explain in detail in my YouTube video).
SEE FULL VIDEO TUTORIAL

Real-World Benefits of This Autofocus Setup
With this setup, you gain instant access to both autofocus modes in the field. For example:
Tracking a running cheetah? Half-press your shutter button and let Servo AF keep it sharp.
Suddenly spot a perched bird hidden among branches? Instantly press the AF-ON button, lock your focus precisely, and recompose confidently.
One Additional Autofocus Tip for Telephoto Users
If you're using super-telephoto lenses, occasionally the autofocus might jump to a distant background or foreground, losing your subject completely. When this happens, it takes precious seconds for your camera to find your subject again.
The solution: use your lens’s focus preset feature. Many telephoto lenses allow you to set a specific focus distance and instantly recall it with a single twist or button press. This vastly reduces focus-hunting and ensures you never lose critical moments.
I've created a full tutorial dedicated to making the most out of this underrated telephoto function. Don't head out on your next photography adventure without checking that out.
Final Thoughts and Next Steps
By implementing this autofocus setup I drastically improved my hit rate for sharp images - especially in complex, fast-changing wildlife scenarios. Give it a try on your camera and see how it transforms your own shooting experience.
Don’t forget to subscribe to my YouTube channel for more practical wildlife photography insights like this!
Happy shooting!