
The Beauty of Coming Home Empty-Handed: Lessons from the Central Kalahari
I had big expectations.
Before heading into the Central Kalahari Game Reserve, I’d read countless posts, watched videos, and even chatted with fellow photographers who all said the same thing: this place is a hidden gem for big cat sightings. Lions basking on open pans, cheetahs chasing springbok in the golden grass. And this made sense—CKGR is massive, dry most of the year, and has limited waterholes. In theory, predators should be easier to spot than in greener parks.
But this year? This year had other plans.
The rains came heavy and late. By the time we arrived in May, water was everywhere. Every pan was dotted with glistening puddles. Grass grew tall and lush, swaying in the breeze like it was the Okavango. Animals were scattered, relaxed, hydrated. We found no predators. Not one. Just tracks and distant roars.

A lone orix near Piper Pan.

Hundreds of km of emptiness.
We heard lions almost every night. Roars that shook the stillness of the early hours, coming from somewhere behind the dunes. But we never saw them. Not a flash of fur. And I won’t lie: after ten days of early mornings, long drives, and hopeful tracking, it stung a little.
Still… it was beautiful.
If you’ve ever been in the Central Kalahari, you know what I mean. The silence hits differently out there. It’s not the absence of sound. It’s the presence of nature uninterrupted. No fences, no villages, no drone of traffic in the distance. Just wind, birds, the buzz of insects—and sometimes, nothing at all.
I remember one evening in particular. We had just set up camp near Piper Pan. The sun dropped low, painting the acacias in gold. I climbed on top of the truck, sat on a jerry can, and listened. Springbok grazed nearby. A kori bustard strutted past. And all I could think was—this is it. This is exactly what I came for, even if I didn’t know it.

Phokoje Pan.
📗 Want to improve your field skills before your next trip?
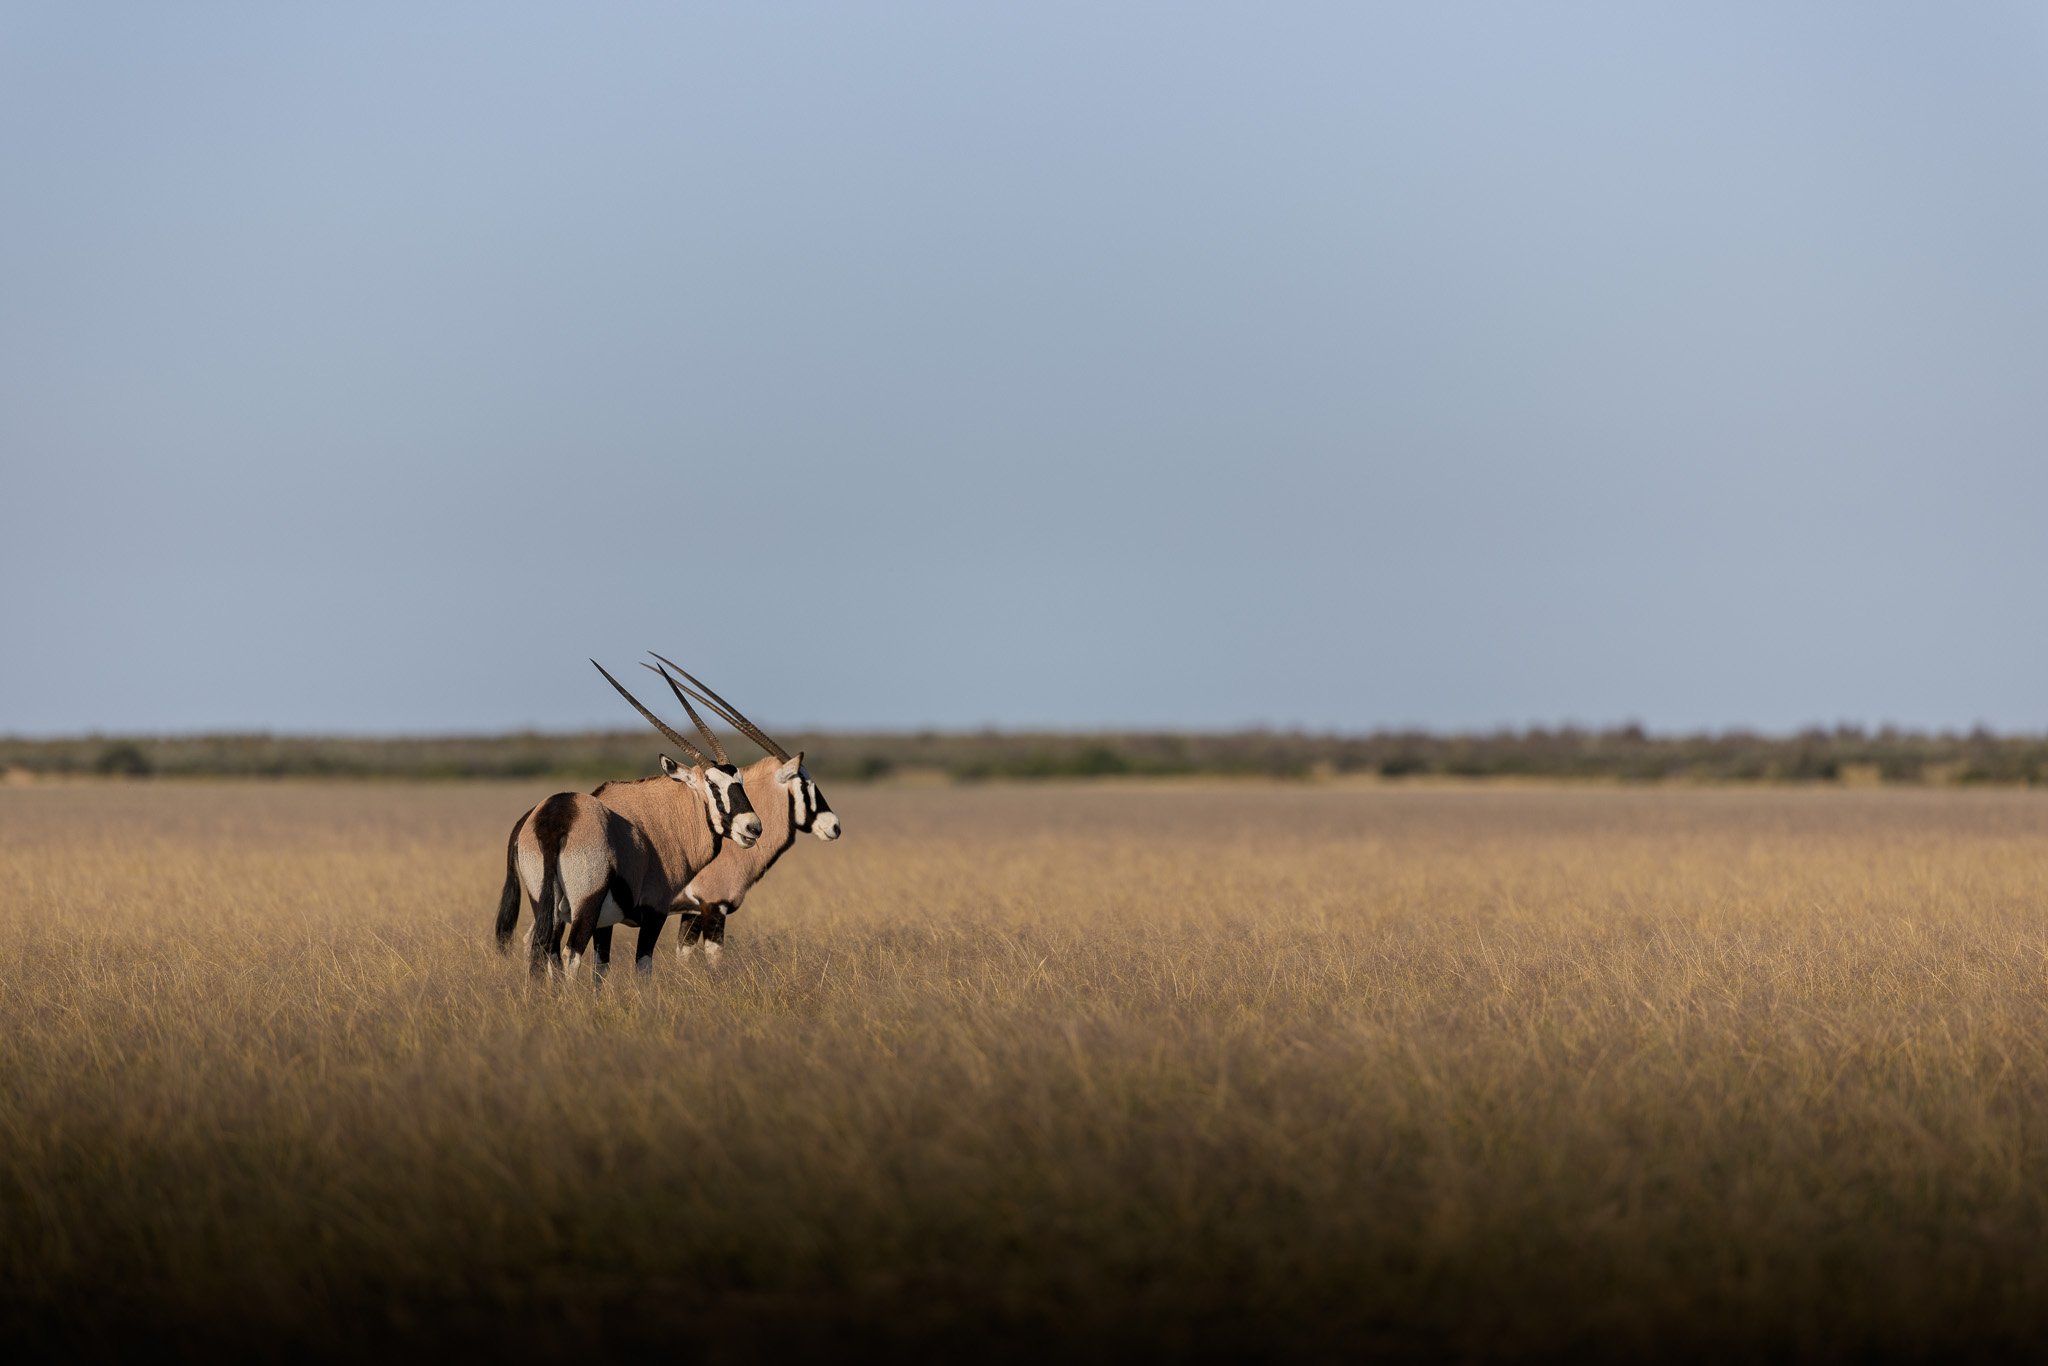
Orix in Piper Pan.
In those long, predator-less hours, I slowed down. I stopped rushing to the next sighting. Instead, I spent time just watching herds of gemsbok, oryx, and wildebeest go about their day. I started noticing tiny things: the way a springbok flicks its tail before sprinting, how oryx form a line when walking across open ground, how the golden light reflects in the eyes of a black-backed jackal.
Photography-wise, it was a shift. I stopped waiting for drama and leaned into detail. Played with backlight. Practiced slow panning to capture motion. Used wide angles to show scale. The place was too quiet for action, so I focused on mood.
Was it frustrating at times? Of course. There’s always that tension—especially when you know clients would ask, "Did you get lions?"
But I’ve come to believe these quiet trips matter just as much. They train your patience. Your eyes. Your respect for the wild. They remind you that you’re a guest, not a customer. The bush doesn’t owe you anything.

During this trip we’ve seen incredibly large herds of springbok and oryx.
📅 Thinking of joining a guided trip in 2026?
And honestly, had we seen a lion every day, I might have missed the magic of that silence. The joy of boiling water over a fire as the sky turned purple. The sound of a scops owl while you brush your teeth in the dark. The tracks in the morning sand.
Coming home empty-handed isn’t failure. It’s an invitation to go deeper.

Piper Pan waterhole.
I left the CKGR with memory cards full of oryx silhouettes, dust trails, moody landscapes, and quiet mornings. No predators—but somehow, more connection than I’d felt in a long time.
Would I go back? Absolutely. And maybe next time, I’ll bring back the lions too. But if not... I’ll still come back with something worth keeping.
Featured Articles

Why I’m Not Upgrading My Camera — and What I’m Doing Instead
I get it. It’s tempting. A new camera body drops and the internet explodes — YouTube hands-on reviews, pixel peeping on forums, and everyone asking, “Is this finally the one that will make my images better?”
I’ve been there. As a wildlife photographer who spends months each year in raw, demanding environments it’s natural to crave the best gear. But here’s the truth: I haven’t upgraded my main cameras in over four years. And I don’t feel like I’m missing out.
In fact, I think the obsession with upgrading is distracting many photographers from what really matters: being in the field, learning, and practicing the craft.
Why I’m Still Using “Old” Gear
Let me be clear — I’m not anti-gear. I love testing new equipment. I still geek out over specs. When Canon announces something like the R5 Mark II or the R1, I’m there reading every detail, imagining what it could do in the field.
But here’s the thing…
I’m still shooting with my Canon R5 and R3. The R5 gives me detail and resolution for big landscapes or environmental portraits, while the R3 nails birds in flight and fast action with its insane autofocus speed. Together, they’ve covered 99% of what I do — and never once have I come home thinking, “This camera was the reason I missed the shot.”
Instead, if I blow a moment, it’s usually because:
I didn’t anticipate the behavior.
I was too slow to react.
I used the wrong settings.
I got lazy in composition.
None of these things would be fixed by upgrading to a newer body.
Innovation Has Slowed — and That’s a Good Thing
Remember the mirrorless boom just a few years back? Every new release felt revolutionary. Sensors, stabilization, eye autofocus — everything jumped forward in huge leaps.
Now we’re in a refinement phase. The R5 II has better noise control, pre-shoot features, some added frames per second. Useful? Sure. Essential? Not for most of us.
I’ve seen it play out over and over: a client shows up on a workshop with the newest gear but lacks the confidence to react to a leopard sprinting across the frame. Meanwhile, someone with a 5-year-old body nails it because they’ve put in the reps. They know how to read the animal. They’ve studied light. They don’t panic with fast action.
That’s what makes the difference. Not whether your camera shoots 20 vs 30 frames per second.

A Better Investment: Real-World Learning
Here’s the unpopular but honest opinion: if you’ve got 4k to spend, a new camera body is not the best use of that money.
You’ll get more value — more growth, more connection, more creative fire — by joining a workshop or a guided trip.
When you travel with someone who’s been where you want to go, something changes. You ask better questions. You get live feedback. You watch how light is used, how moments are anticipated, and how technical decisions support a story.
You get challenged, gently but persistently, to see differently.
That’s the kind of investment that stays with you. It reshapes how you approach every image you take from that moment forward.
📍If This Resonates…
Spots just opened for my upcoming Namibia and South Luangwa workshops — and they’re filling faster than usual.
These trips are designed around real photographic immersion. Small groups. No rushed itineraries. Lots of time to practice, ask questions, and get out of auto-pilot mode.

When Should You Upgrade?
Let’s be fair — sometimes, a gear upgrade is the right move. Here’s when I’d consider it:
You’re still using a DSLR and struggle with moving subjects — mirrorless autofocus is a game-changer.
Your current body is unreliable or can’t handle what you throw at it (weather sealing, frame rates under 8 fps, noise getting crazy at 1600 ISO, buffer, etc.).
You truly need improved video specs for professional work.
But if you already own a mirrorless camera that works reliably, delivers decent resolution and good autofocus… pause before hitting that buy button.
Ask yourself: What’s really holding me back?

A landscape I shot with Nikon D90 and a kit lens, 2013.
It’s About How You Use the Tool
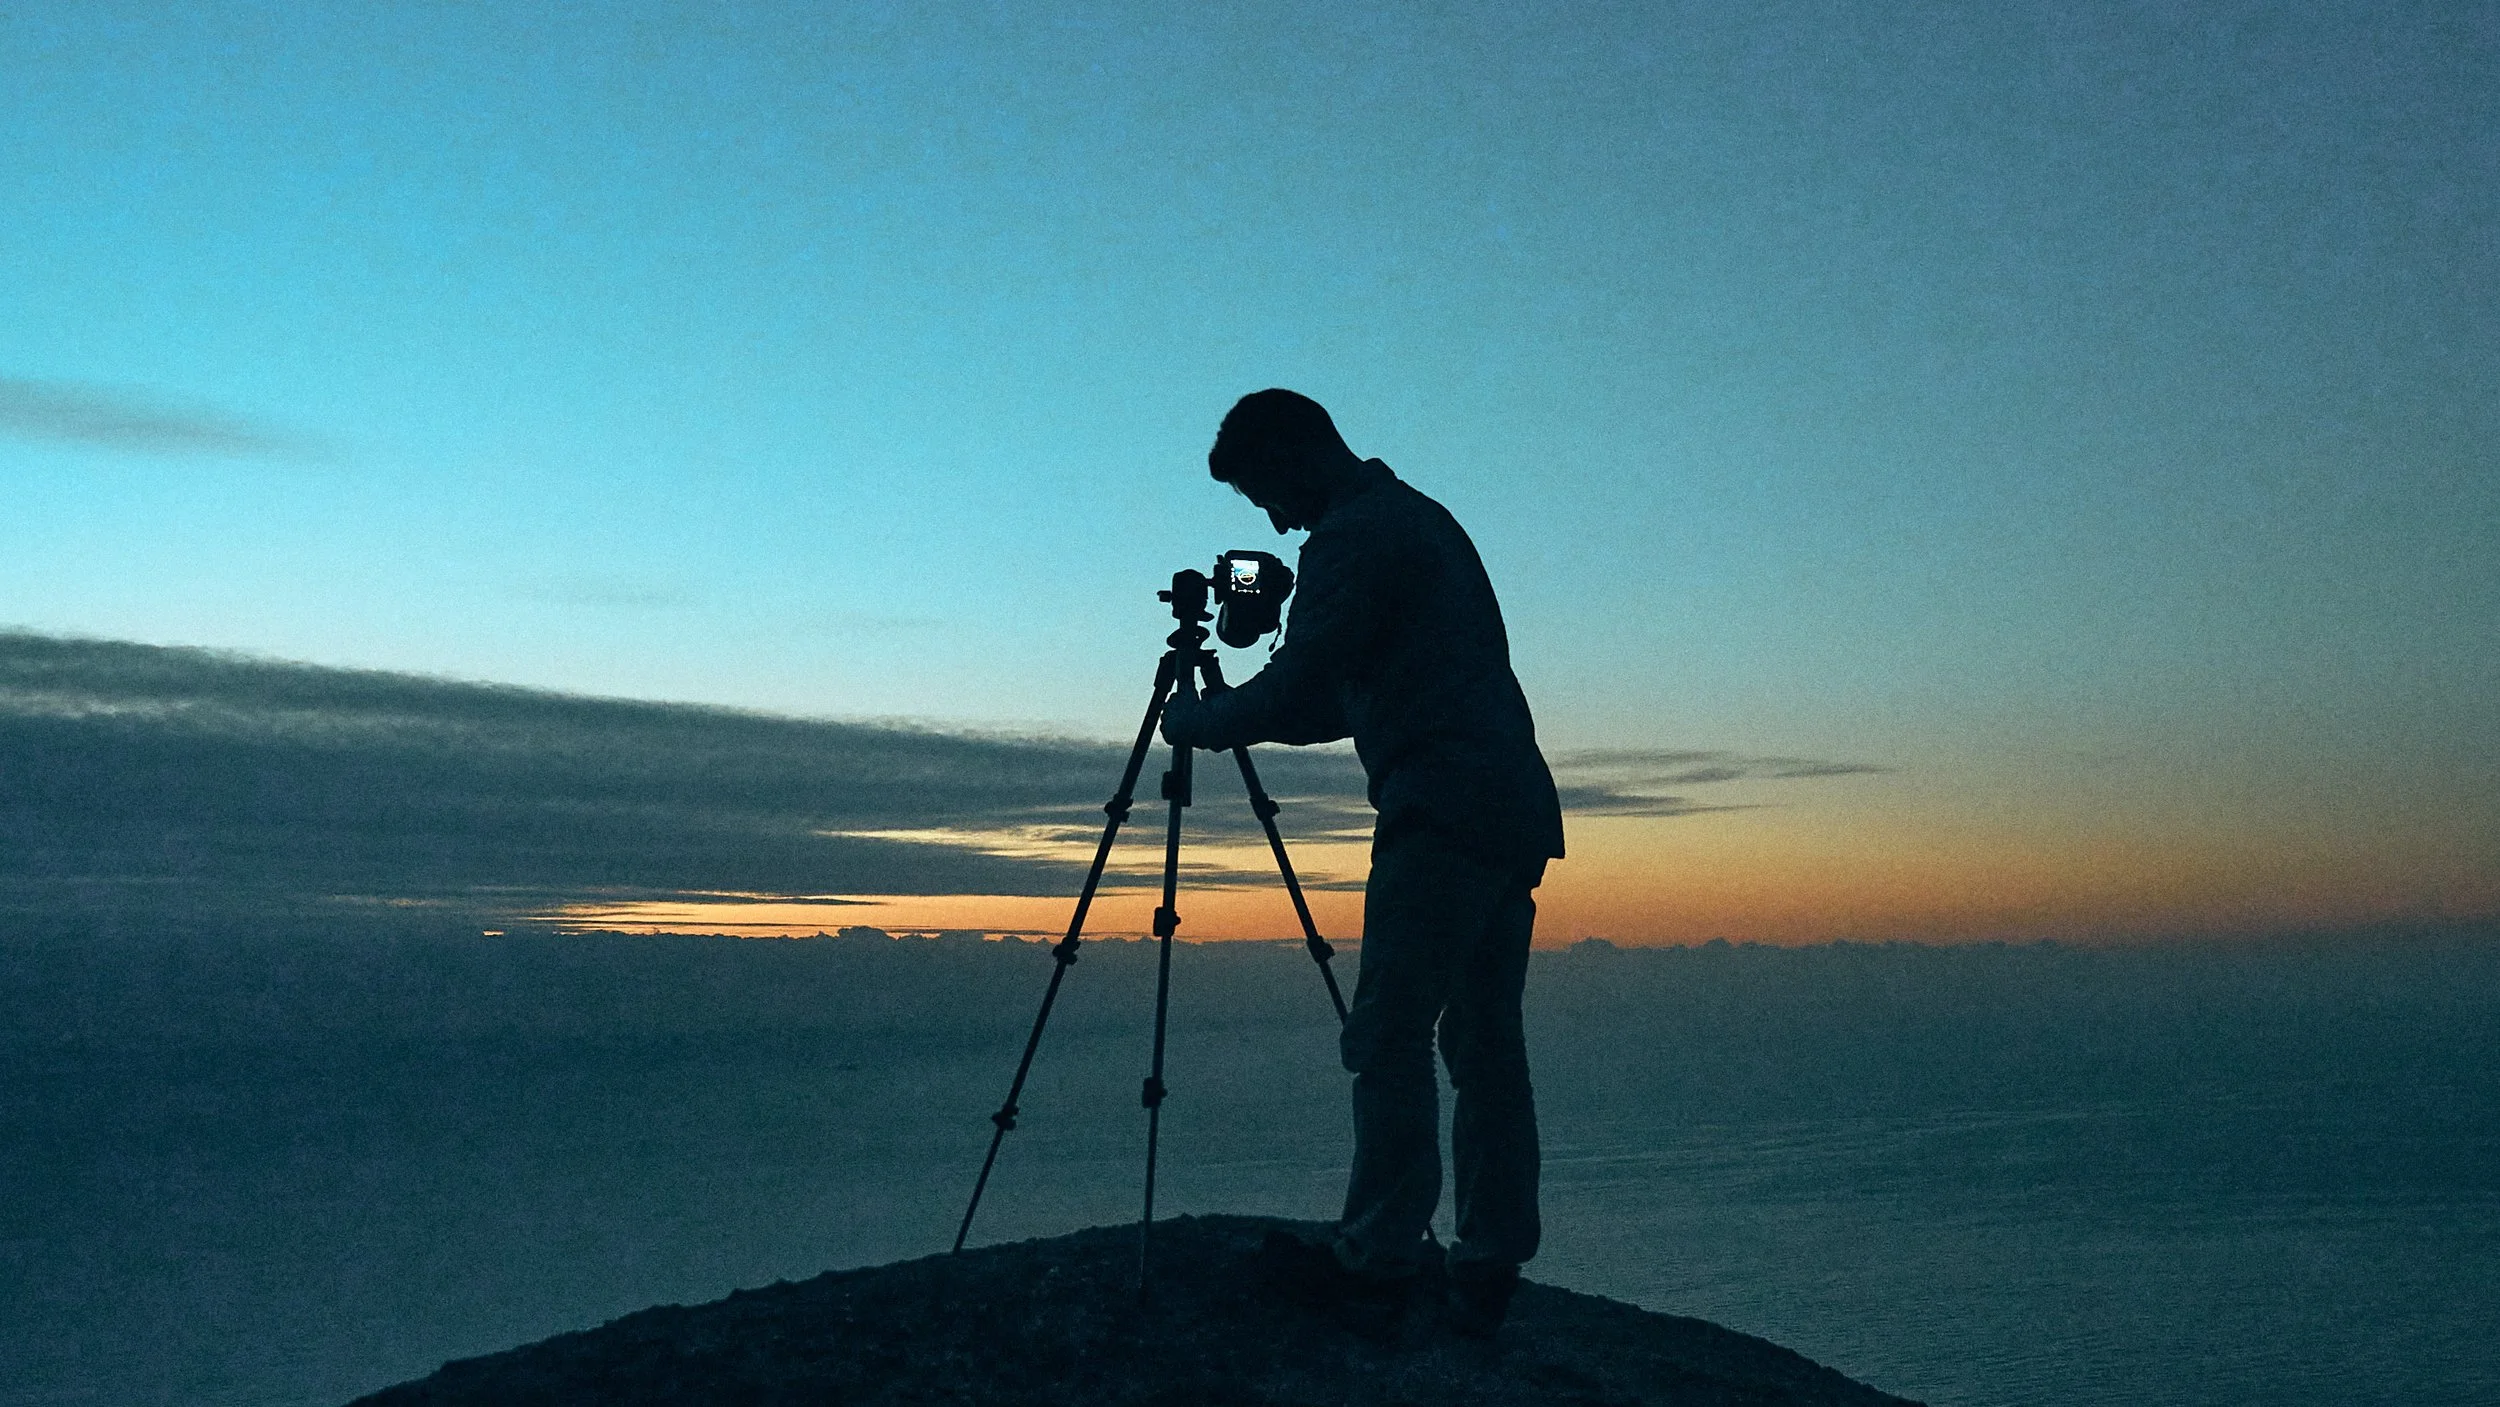
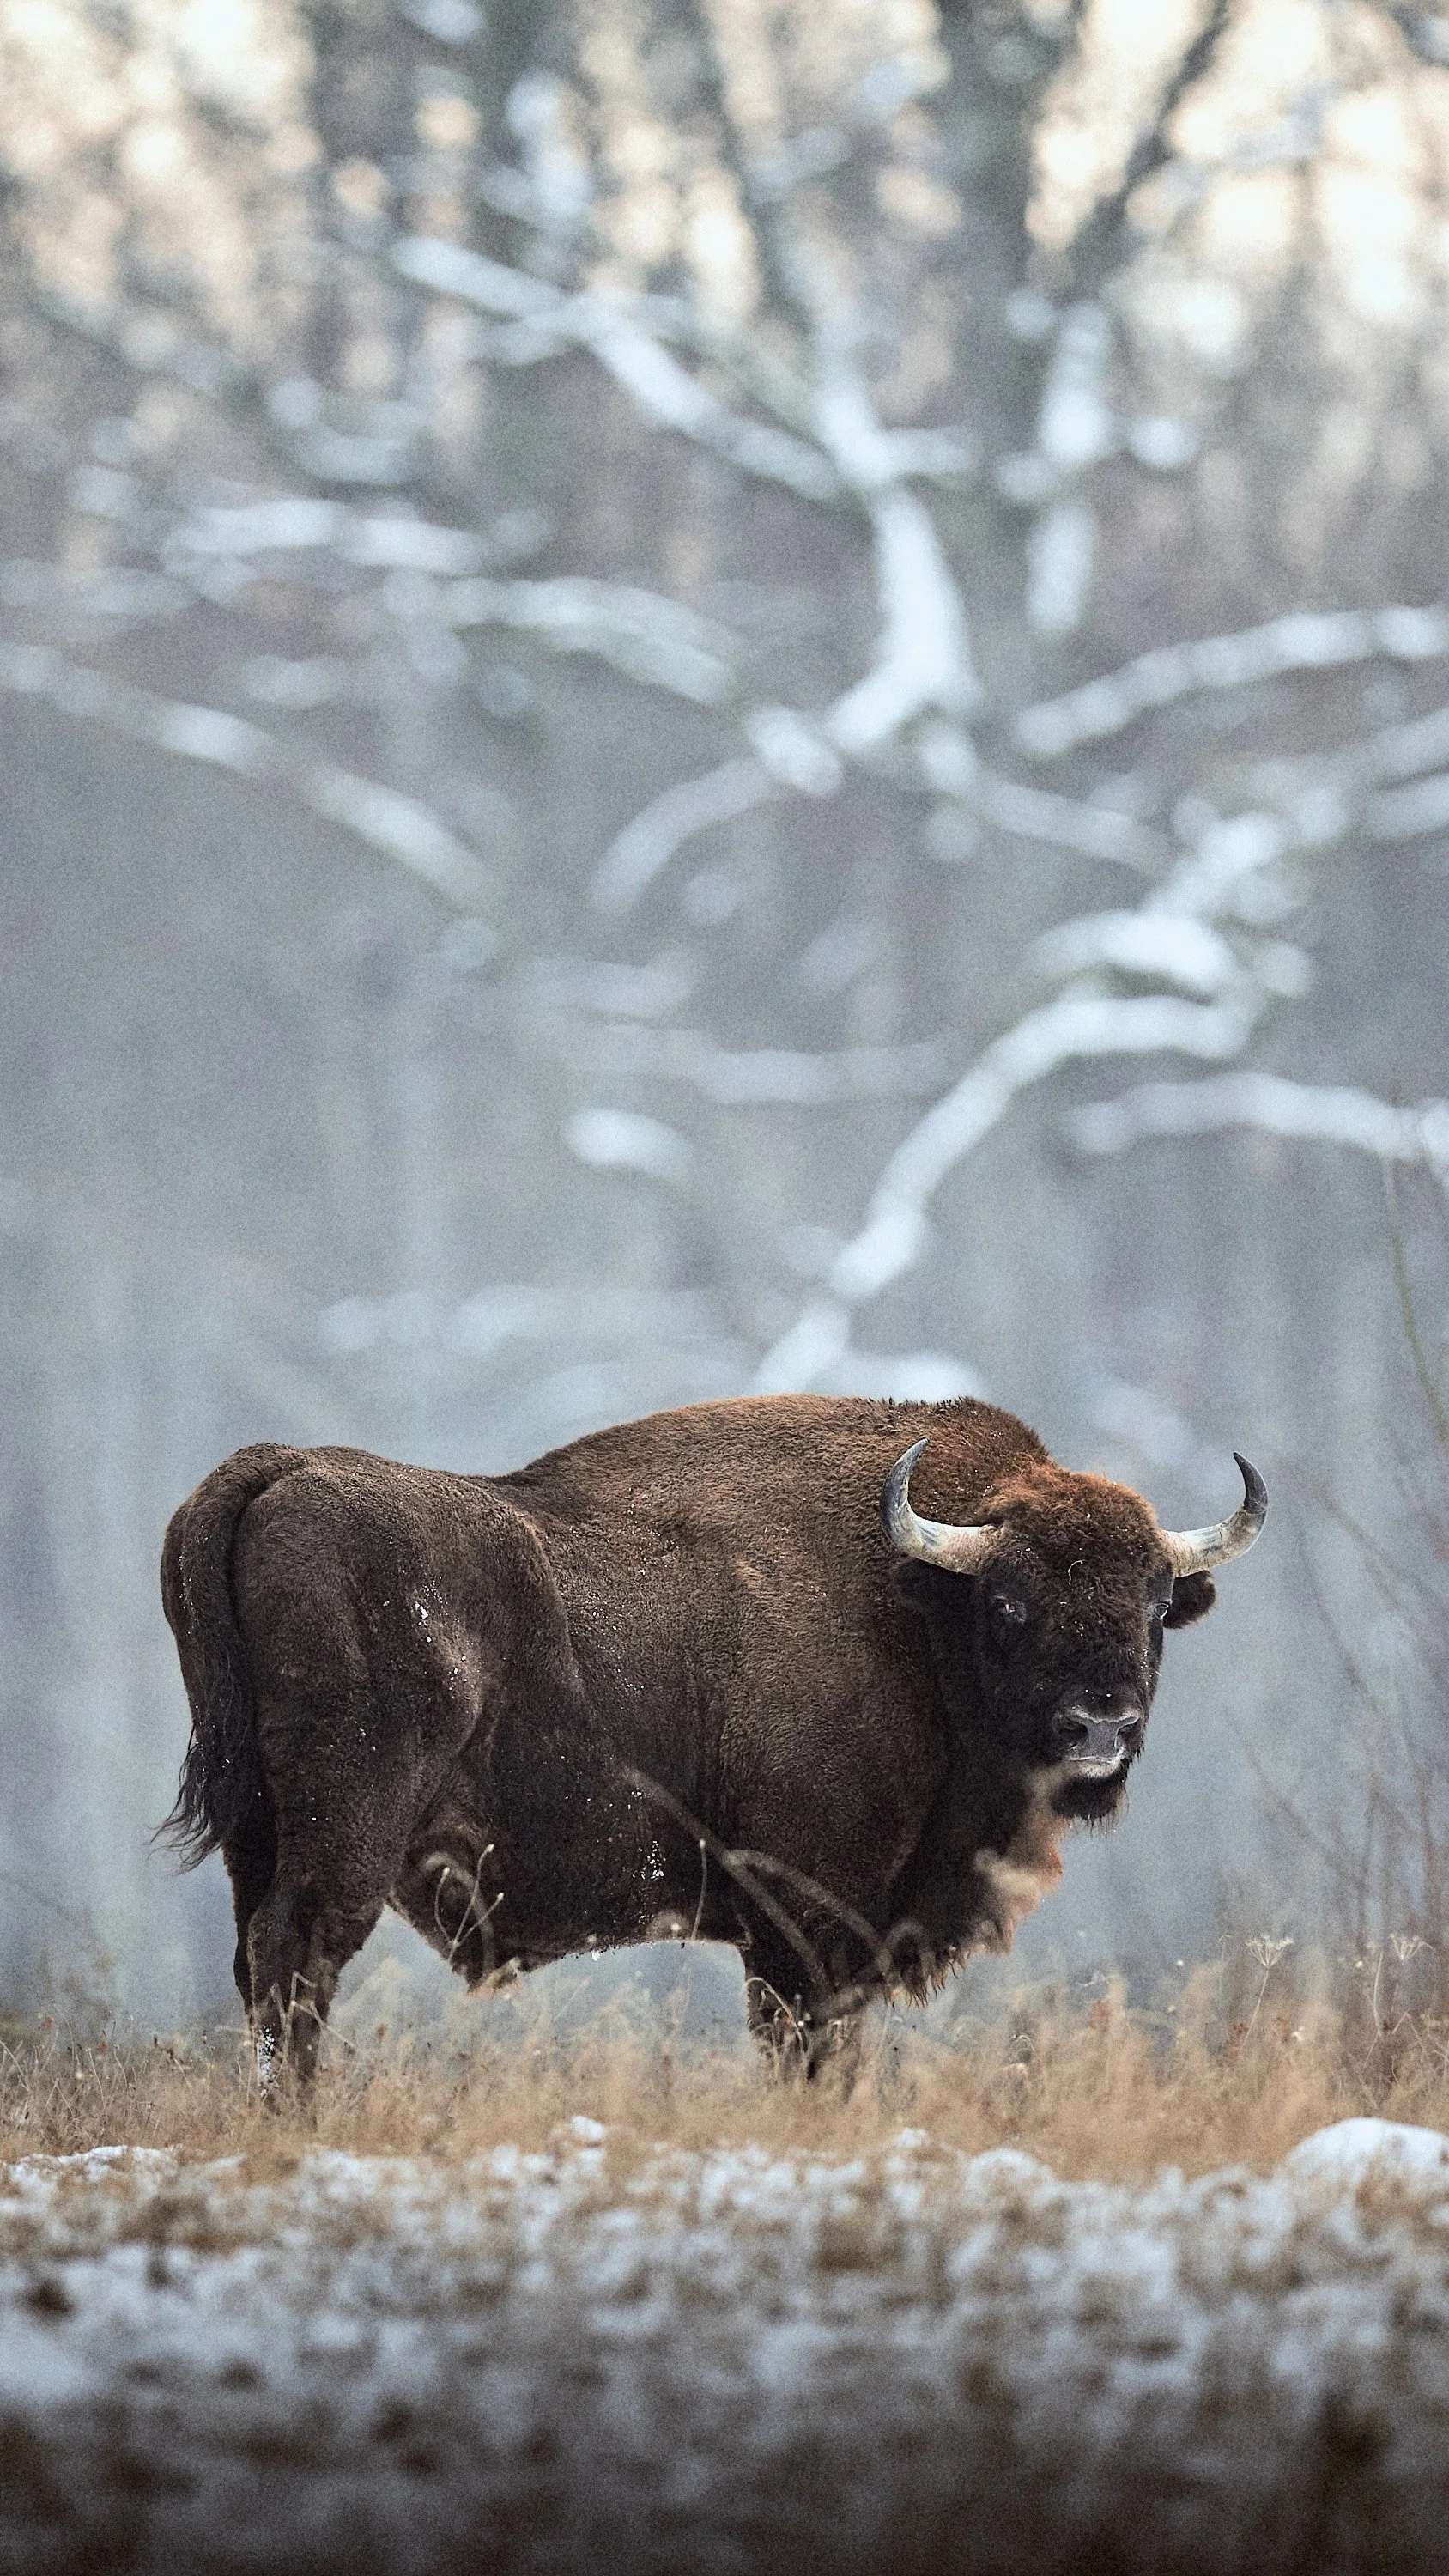
I was sitting in a hide in Slovenia when all this really clicked. I was waiting for brown bears to emerge — low light, tight quarters, no second chances. And I realized: all the tools I needed were already in my hands. No spec sheet could replace preparation, patience, and perspective.
A new camera won’t teach you to anticipate a bear stepping into golden light. It won’t teach you to hold off clicking until the composition sings.
But a workshop will.
So the next time you feel that urge to upgrade, maybe stop and ask: Am I buying a solution, or avoiding the work of becoming better with what I’ve already got?
Watch the full story here
📘 Free Wildlife Photography Guide
If you’re serious about improving — not just your gear but your skills — I’ve also put together a free 100-page PDF full of the basics I wish I had when I started.
It’s helped hundreds of photographers already. Might help you too.
Featured Articles

How to Travel with Big Lenses (And Avoid Losing Your Gear)
If you’ve ever stared at your fully packed camera bag the night before a long-haul flight—knowing there’s no way it’ll make the airline’s weight limit—you’re not alone.
I’ve been there more times than I can count. And if you’re traveling with big telephoto lenses—think 400mm f/2.8, 500mm f/4, 600mm f/4—things get even trickier.
Over the past decade, I’ve flown dozens of international routes with expensive gear. I’ve dealt with every airline mood imaginable. Some couldn’t care less if I had 22kg on my back. Others wanted to weigh my cables.
But one thing’s always been true: if you check your camera gear, you’re taking a risk.
Here’s how I carry my heavy gear—including massive lenses—without ever checking it in and without losing a single item (knock on wood).
The Golden Rule: Never Check Your Expensive Lenses
Let’s get this out of the way first.
If you value your gear—and you should—never check in telephoto lenses, especially if you’re passing through airports like Johannesburg, Addis Ababa, or Nairobi.
I’ve heard horror stories from fellow photographers. One had a checked 500mm f/4 disappear at O.R. Tambo. Another had an entire bag of gear show up in Cape Town with a broken lock and a camera body missing.
Here’s my rule: If I can’t afford to lose it, it goes in the cabin with me.
What I Travel With (Yes, It’s a Lot)
Here’s what a typical setup looks like for me on safari assignments or personal photography trips:
Canon R3 (primary body for action and low light)
Canon R5 (high-res second body)
RF 600mm f/4
RF 100–300mm f/2.8
RF 24–70 f/2.8
Canon V1 (dash cam + POV)
GoPro Hero 9
Atomos Ninja V (for screen recording)
Laptop + 2 Lacie SSDs, card readers, batteries, chargers, and a ton of accessories
Total weight? Easily 17–20kg, before even factoring in any extra accessories.
Yet somehow, it all comes with me in the cabin.
My Carry-On System: What Bags I Use
I use a two-bag system that’s been battle-tested:
🎒 Bag 1: f-stop Tilopa 50L (main carry-on backpack)
Internal ICU (Large or XL depending on the trip)
Holds my 600mm, 100–300mm, both bodies, and GoPro/Atomos
Side pouches for filters, cards, headlamp
Stays on my back at all times—no exceptions
💼 Bag 2: Large ICU used as small shoulder camera bag (personal item)
Holds laptop, hard drives, chargers, and usually my 24–105 or dash cam
Looks casual and non-threatening
Slips under the seat in front of me
💡 Pro tip: Most international airlines let you take a cabin bag AND a personal item. I make the most of that rule.
At the Check-In Counter: How to Handle Airline Weight Limits
Let’s talk about the real stress: weigh-ins.
Every photographer has had that moment. You’re in line at check-in, beads of sweat forming, wondering if this will be the airline that finally weighs your bag.
Here’s what I do:
✅ Be early but confident
Show up early. Be polite. Don’t act nervous. Airline staff are human—they’re more likely to give you a pass if you seem composed.
✅ Mention the value
If they do ask to weigh your bag, I calmly say something like:
“I’m carrying professional camera gear worth over €30,000. It can’t be checked in due to insurance reasons and risk of damage. I’m happy to show you what’s inside.”
I’ve used this line dozens of times—and every single time, they’ve let me board. Sometimes they slap a “HEAVY” sticker on it. Sometimes they don’t even flinch. But I’ve never had to leave anything behind.
Don’t Use Roller Bags for Safari Gear
You might be tempted to use a roller—like a Think Tank Airport series—but I find them impractical for Africa trips, especially safari-focused ones. Why?
They scream “heavy tech,” drawing attention at check-in
They’re harder to carry over rough terrain or load into vehicles
They often don’t look small enough for overhead compartments
Instead, a rugged hiking-style backpack like the f-stop Tilopa blends in and is easier to carry across gravel airstrips, 4x4s, and remote camps.
Tactical Tips to Shave Weight (and Stress)
If you’re still getting flagged at the counter, try these:
🪶 Wear your heaviest gear
Yes, it’s awkward. But putting some lenses or cameras in a your pockets or strapped across your shoulder magically makes your bag “lighter.” Airline staff cannot weigh what’s on you.
🧥 Use a photo vest or jacket with large pockets
You can stash chargers, hard drives, even a small lens in there. It buys you extra few kg without raising eyebrows.
🔌 Consolidate accessories
Don’t carry 3 chargers when 1 will do. Remove unnecessary battery chargers, filters, or mounting plates. All my cameras can be charged directly via USB-C so when I really need to go light I only bring a multi port usb-c charger that does it all - laptop, phone, cameras, accessories.

Flying on a small plan across the Namib desert.
What About Domestic Flights in Africa?
This is where it gets more complicated.
If you’re flying bush planes the limit drops even more, sometimes including your personal item. Here we cannot cheat and get some extra weight on board as these small planes would actually be too heavy to flight - we don’t want to put our (and others) safety at risk to carry a few extra lenses.
Here’s how I deal with it:
Book an extra seat if I absolutely have to (some photographers do this, especially for expensive charter routes)
Split gear with travel companions if flying together
Ship gear ahead to lodges if you’re working with trusted operators (rare, but possible)
Go minimal: Swap your 600mm for a 100–500mm or 200–600mm zoom if you’re just doing it for fun
Once You Land: Keeping Your Gear Safe on the Ground
Getting there is only half the battle. Once you arrive in-country, protect your gear from:
Heat: Store lenses flat in the shade. Don’t leave them in the sun.
Dust: Use drybags, neoprene covers, and avoid lens changes in open wind.
Moisture: Keep silica gel packets in your lens case and camera bag.
Theft: Lock your gear in the car if you leave it and make sure it’s not visible through windows , and never let it out of sight at gas stations.
What If You Have to Check a Bag?
Sometimes you just can’t avoid checking something—maybe it’s your tripod, gimbal, or even lens hood. In that case:
Use a Pelican case or similar with a lock
Tape over random logos and labels so it seems less serious and doesn’t scream “expensive gear inside”
Put an Apple AirTag (or similar tracker) inside
Photograph everything for insurance before you hand it over
But again: never check your camera bodies or telephoto lenses.
On location in Cape Town, SA.
Don’t Let Gear Stress Steal the Joy
I get it—traveling with big, expensive gear is nerve-wracking. You worry about weight. You worry about theft. You worry about being that guy holding up the security line. But over the years, I’ve realized this: with the right plan and attitude, you can carry everything you need—safely, confidently, and without drama. So don’t let fear stop you from bringing the lens that helps you capture magic. Just pack smart, walk tall, and know your rights.
And hey—if you see someone in a bush airport juggling a 600mm and a vlogging camera, it might be me.
Say hi. =)

Choosing the right focal length for wildlife photography
Let's talk real for a sec. I'm guilty as charged. I've been there, lying flat on my belly in the dust, telephoto lens extended like some sniper's rifle, waiting to capture that perfect, tight portrait of a leopard staring directly into the camera. You know the shot—sharp eyes, blurry background, intense gaze. Instagram gold, right? But here’s the thing: when everyone’s doing the same damn thing, your photos stop being special. They become predictable.

I'll never forget one particular trip to Etosha National Park. I had just bought my shiny new 600mm lens and trust me, I wanted to use every last euro I spent on it. So there I was, framing up tight portraits of elephants and lions, thinking I was nailing it. But then I got home and sorted through my images. Yeah, they were sharp and the animals were majestic as ever—but something felt off. They all looked the same. And honestly, boring.
Then I stumbled upon an older image I had shot years ago with a mere 24-70mm lens (yeah, "mere," because now I had this fancy beast of a lens). This shot was different—it showed a herd of zebra drinking at a waterhole together with some giraffes in the golden light of sunset. The scene was dramatic. It told a story. It wasn't just an animal portrait—it was an environmental portrait that pulled you right into the African landscape.

Want to dive deeper into how creativity shapes your wildlife images?
Here’s a look at how I approach the creative process in the field.
That moment was like a slap in the face. I realized I'd gotten lazy and fallen into a creativity trap. Social media had conditioned me into chasing "likes" rather than chasing stories. Tight portraits were winning likes but losing soul. This is where creativity goes to die.
So, here’s what I did to shake things up. Next time I was out on a safari, I challenged myself to start wide. Instead of automatically slapping on my longest lens, I began with a 100-500mm, sometimes even going wider to 35mm. My heart would sink a little, feeling guilty about leaving my 600mm unused in the bag, but that's exactly the point of the exercise. The trick is to resist that urge—just for a while—and embrace the wider view.
I was in Khwai, Botswana when I really put this exercise to the test. We came across a pride of lions with 5 or 6 cubs. My instinct screamed to zoom right in, capturing every whisker. But remembering my commitment, I stuck with a shorter lens - in this case I was on a 100-300 f2.8 - and took in the broader scene, with the mothers laying in the grass and the cubs being cubs. The wider composition told a story. It wasn't just another wildlife portrait—it was a moment frozen in time. Is that the best photo ever? No. But it’s something different, something I had to think of instead of just going auto pilot.

If you’re looking for the kind of place where wide compositions truly shine, Etosha National Park is a dream location — here’s my full photography guide.
Another example is a photo of an ibex I took in my home mountains in Italy. I walked uphill for a couple hours with the 600mm on my back, but luckily that didn’t stop me from taking the shot with the 24-70mm. This image didn’t perform well when I posted it on Instagram - horizontal format??
But it looks amazing hanging on my wall, and I won’t get tired of it anytime soon.

Sometimes, choosing to shoot wide isn’t just a creative decision — it’s the ethical one.
Here are 7 rules I follow to photograph wildlife responsibly.
But here’s the good news: If the wide shot doesn't come together, it's way easier to zoom in and simplify your composition. You can't do the opposite. Starting wide and then narrowing down ensures you get the best of both worlds.
Let me give you some specific pointers I've learned from doing this exercise regularly:
Look for Layers: Include elements in your foreground, midground, and background. This creates depth and interest, guiding your viewer’s eyes through the scene.
Wait for Action: When shooting wider, patience is key. Wait for the animal to interact with its environment. A leopard climbing a tree, a herd crossing a river, or birds taking flight from an animal’s path—these moments turn good photos into epic stories.
Use Light Creatively: Wider compositions give you more room to play with dramatic lighting. Think backlit dust clouds, rays of sun filtering through trees, or stormy skies framing your subject. Great light can elevate your storytelling to another level.
Embrace the Imperfections: Wider shots won’t always be perfect. They’ll include elements you might usually avoid. But sometimes those elements—like an awkwardly placed bush or a patch of harsh sunlight—make your shot authentic and relatable.
Switch Perspectives Often: Don't stay glued to one spot. Move around, get higher, get lower, change your angle. Different perspectives can reveal entirely new stories within the same scene.

I always carry at least one wide-angle lens on safari — even when packing light. Here’s what else I bring in my 2025 safari camera kit.
Eventually, I learned to balance things out. My 600mm lens didn't become obsolete—it just stopped dominating every decision I made. I now choose lenses based on the story I want to tell, not just on habit or social media pressure.
So, next time you're out on a wildlife adventure, challenge yourself. Leave that telephoto lens in the bag at first. Start wide, embrace the environment, and tell the bigger story. Your creativity—and your portfolio—will thank you.
📸 Wide shots tell a different kind of wildlife story — one rooted in space, emotion, and atmosphere.
If that’s the kind of imagery you want to create, come explore with me in 2026.
Featured Articles


The Best Safari Camera Setup in 2025: From Budget to Pro
If you'd told me ten years ago that I'd be spending most of my time bouncing around remote corners of Africa with thousands of euros worth of camera gear rattling in the back of a dusty 4x4, I would’ve probably laughed. But here we are. After countless safaris — some solo, some guided, some sleeping in rooftop tents with hyenas pacing outside — I’ve narrowed down what really works when it comes to safari photography gear. Whether you’re just dipping your toes into wildlife photography or you’re deep into it and trying to refine your pro kit, this post is for you.

With R3+600 f4 in South Luangwa NP, Zambia 2025
Let’s break it down into real-world tiers: budget, intermediate, and pro. Because let’s face it — your camera setup needs to reflect not just your wallet, but your goals, shooting style, and the type of safari you're on.
Budget Setup: The Safari First-Timer Who Means Business
A budget setup doesn’t mean "cheap." It means smart. You're after something lightweight, versatile, and durable — because the bush doesn’t care how much you spent.
For 2025, my top recommendation in this category is the Canon R7 paired with the RF 100-400mm f/5.6-8 IS USM. The R7 has a crop sensor, which means that 400mm suddenly acts more like 640mm. That’s a big win for wildlife. It's got excellent autofocus, solid burst speed (15 fps mechanical), and it's lightweight — which your arms will thank you for after a few days of handheld tracking.
Alternative setups?
Sony a6700 + 70-350mm f/4.5-6.3 G
Nikon Z50 + 100-400mm f/4.5-5.6
What you’ll miss here is low-light performance and that creamy shallow depth of field. But the reach and versatility are hard to beat. Add a sturdy bean bag for support on vehicle doors or window sills, and you're set.
Tips learned the hard way: Always carry a lens cloth in your pocket. I once lost an entire morning’s shoot in Chobe because of a dusty back element I didn’t notice until later.

Sunset along the Chobe river, Botswana, May 2025.
📅 Want in on my next off-grid photo expedition?
Check out the upcoming trips!
Mid-Range Setup: The Enthusiast Level-Up
If you've done a few trips and want to up your game — maybe even start selling prints or pitching stories — the mid-range gear is where magic really starts to happen. Think faster autofocus, better weather sealing, and more flexibility.
My go-to recommendation here is the Canon R6 Mark II with the RF 100-500mm f/4.5-7.1L IS USM. That combo is gold. The lens is sharp across the range, and the R6 II delivers stellar image quality with great dynamic range and tracking. Bonus: it's full frame, which adds a little magic to your backgrounds.
Other killer setups?
Sony A7 IV + 200-600mm f/5.6-6.3 G OSS
Nikon Z6 II + Z 100-400mm f/4.5-5.6 VR S
With these, you can shoot low-light lions at dawn, fast-moving birds mid-flight, and everything in between. Just make sure you bring at least two extra batteries, because mirrorless bodies are hungry, especially if you shoot videos as well.
Pro Setup: The No-Compromise Rig

With R5+100-300 f2.8, South Luangwa NP.
Alright, this one’s for the hardcore. You’re either a working pro or someone who takes their craft (and their gear) very seriously. You want tack-sharp images, the best possible low-light performance, and gear that can take a beating.
My personal favorite for 2025: Canon R5 + RF 100-300 f/2.8 L IS USM, sometimes with a 1.4x TC. This setup is fast, bright, responsive, and the bokeh is just... dreamy. I then add a second body: Canon R3 + RF 600 f/4 L IS USM. This way I can leverage the flexibility and high res of the R5 for wider scenes and environmental portraits, while making the most of the R3 speed when it comes to action closeups and small birds.
Other top-tier combos?
Sony A1 + 600mm f/4 GM OSS
Nikon Z9 + 600mm f/4 TC VR S
But here’s the truth: this kind of gear is unforgiving. It’s big, it’s expensive, and if you’re not ready to manage the logistics (air travel, bush dust, vehicle mounting), it can become a burden.
📸 Want to see how I travel with big lenses?
Pro tip: Bring a second body with a zoom. If I had to go with only one lens, would probably be the 100-500mm on the R3. That way I can cover wide scenes and environmental portraits without swapping lenses.

African fish eagle, Khwai Community Concession, Botswana, May 2025.
Accessories That Matter (Regardless of Budget)
Bean Bag or Clamp Mount: Essential. Tripods are useless in a moving vehicle.
Dust protection: I pack dry bags and silicon pouches for my gear. Safari dust doesn’t play.
Power bank or solar kit: Especially for wild camping safaris. I use a Goal Zero Sherpa 100 + solar panel.
Multiple memory cards: Always rotate them and never rely on just one. CFexpress for main, SD for backup.
Microfiber cloths & blower: I bring at least three cloths, a Giottos Rocket Blower and a battery powered blower. Don’t skimp here.
🦁 Ready for your first real safari?
Avoid these 5 beginner mistakes!
Final Thoughts: Match the Gear to the Mission
In the end, the best safari setup in 2025 isn’t the most expensive one — it’s the one that fits you. Your style, your budget, your muscle memory. I’ve captured some of my favorite moments on modest gear, and some technically perfect yet soulless frames on top-tier equipment. The magic happens when your gear disappears and you’re just... there, with the animal, in the moment.
📅 Want in on my next off-grid photo expedition?
Check out the upcoming trips!
Featured Articles


The Beauty of Coming Home Empty-Handed: Lessons from the Central Kalahari
When I planned this trip to the Central Kalahari Game Reserve, I had visions of drama - lions pacing across golden pans, leopards resting in acacia shade, and cheetahs sprinting after springbok. I’d read the trip reports, studied the sightings maps. Everyone seemed to say the same thing: at the very end of the green season water is scarce out there and the big cats stick close to the few remaining pans.
Well, that’s not how it played out.

Wildebeest herd at sunrise near Passarge Junction
Expectations vs. Reality
We entered from Tsau Gate, full tanks, full fridges, full of hope. The bush looked lush - too lush, in fact. It had rained heavily this year and what was supposed to be the dry heart of Botswana looked more like the Serengeti. Water pooled in unexpected places. The pans were teeming with grass. And with so much spread-out water, the wildlife was just as spread out.
We heard lions roaring every night. Deep roars that vibrated through the canvas tent walls and sent chills down my spine. But seeing them? Not once. I glassed every ridge and drove every loop we had mapped. I saw thousands of springbok, oryx, wildebeest, and birds… but no predators.
No lions. No leopard tracks. Not a glimpse of a cheetah tail flicking in the distance.

Phokoje Pan
📅 Thinking of joining a guided trip in 2026?
Explore upcoming workshops
The Silence of the Wild
Still, I wouldn’t call it a disappointment. There’s something oddly powerful about not getting what you came for. When nature doesn’t put on the show you expected, you start to notice the show that’s in front of you. The silence became a kind of soundtrack. I found myself just sitting for hours at the edge of the pans watching herds graze in peace, listening to wind and doves and the crunch of hooves on dry grass. I’d climb on the Hilux’s roof at sunset, sip tea, and just…be there. In the Central Kalahari, you’re tens of kilometers from the nearest village. No planes. No power lines. Just dust, open sky, and silence.

Setting up camp at Passarge 3.

Springbok herds were amongst the largest I’ve seen. Here at sunrise in Piper Pan.
📗 Want to improve your field skills before your next trip? Download my free eBook
Patience, Observation, and Stillness
One afternoon at Piper Pan I spent nearly three hours with the biggest herd of springbok I’ve ever seen. The light was soft, the breeze cool. I took maybe ten photos, but I studied their behavior more than anything. One would flick its ear, and the others would react. A small dust devil sent them shifting nervously. A black-backed jackal trotted past and was ignored. I felt like an intruder in their world.

Springbok herd in Piper Pan.
The more time I spent still, the more I noticed how everything connects. The oxpeckers on the giraffes backs. The way ground squirrels would freeze when bateleurs flew overhead. Even the ants seemed busy with purpose.
Minimal Landscapes, Maximum Emotion
Photographically, this trip pushed me hard. Without big cats to chase, I turned to the landscape. But CKGR isn’t dramatic like the Okavango or the Namib dunes. It’s flat. Monotone. Challenging. And that’s exactly why it was such a good teacher.

A shy brown hyena spotted around Tau Pan, the only predator I could find (besides a high number of black-backed jackals).

No dubt, oryx is the most iconic animal out in the Kalahari.
I learned to simplify compositions. To embrace minimalism. I shot wide and low, using termite mounds and lonely trees as subjects. I used the deep greens from the rainy season grass against the pale browns of the road tracks to build contrast. Every sunset became a canvas. I’d wait for clouds to catch fire, then use the silhouettes of animals or the horizon line to anchor my frames. I started seeing beauty in the empty space.

Piper Pan.
The Takeaway
The Central Kalahari didn’t give me the photos I expected. But it gave me something better. It gave me time to reflect. To observe. To appreciate the rhythm of a wild place where humans have no real say. Where things happen, or don’t, on their own schedule.
If you’re chasing “bangers”, CKGR might frustrate you. But if you’re open to learning, to slowing down, and to letting the place work on you, then it might just be the most rewarding park you’ve ever driven.
Will I go back? Sure I will. In a different season, or in a different year. Wildlife photography doesn’t happen at our pace - it’s nature that rules there.
📅 Thinking of joining a guided trip in 2026?
Explore upcoming workshops
Featured articles
5 Safari Photography Mistakes (and How to Avoid Them)

If you’re heading out on your first safari photography trip, this article is for you. And even if you’ve been on safari before, there’s a good chance you’re still making at least one of these common mistakes.
After years of shooting wildlife across Africa and guiding photography tours, I’ve seen the same issues come up again and again. But with a little preparation and the right mindset, you can avoid frustration and come home with stronger images.
These aren’t just about gear—they’re field-tested lessons that can truly make or break your first wildlife photography adventure.
🎯 Want a deeper dive into settings, gear, and safari-ready techniques? Download my free 100-page wildlife photography eBook here.
🎥 Prefer to watch instead? Check out the full YouTube guides and tutorials here!
1. Know Your Camera Before You Go
The biggest mistake I see? Travelers show up with a brand new camera or lens… and end up missing shots while figuring out where the settings are.
You don’t need the latest flagship body. What you need is muscle memory—knowing how to switch focus modes, shift AF points, adjust exposure, or change your frame rate without taking your eye off the viewfinder.
Spend time at home photographing moving subjects—birds, dogs, even passing cars. Practice until settings become instinctive.
2. Don’t Obsess Over Focal Length

Many first-time safari photographers think they need a 600mm or 800mm lens to get anything decent. And yes, reach helps—but some of my favorite wildlife images were captured between 100mm and 300mm.
That’s why I often recommend a versatile zoom like the Canon 100–500mm for first-timers. It’s sharp, easy to handhold, and flexible enough for both portraits and environmental compositions.
And remember—sometimes wider is better. A 200mm shot of an elephant framed against the savannah tells a deeper story than a tight crop of its eye.
🎒 Want to see exactly what I pack for long, remote safaris? Check out: What’s in My Safari Camera Bag.
3. Light Is Everything
Golden hour isn’t just a buzzword—it’s the lifeblood of great safari photography.
The first two hours after sunrise and the last two before sunset offer soft, golden light and peak animal activity. This is when you’ll capture glowing backlight, dramatic silhouettes, and beautiful animal behavior.

Midday? The light is harsh and flat. Colors are washed out, animals are usually sleeping, and the magic is missing.
Instead of chasing mediocre midday photos, use that time to:
Rest and hydrate
Clean your gear
Back up your files
Plan your next outing
Then be ready and energized when the golden light returns.
☀️ Learn more about timing your shoots perfectly in my Best Times for Safari Photography guide.
4. Think Beyond the Animal
Tunnel vision is real. It's easy to focus purely on getting a sharp, close-up portrait and forget everything else.
But truly memorable wildlife photography captures context and storytelling.
Look for:
Animal interactions—grooming, fighting, playing
Dramatic lighting—storms rolling in, dust in the air, golden backlight
Compelling backgrounds—mountains, rivers, plains
Behavior over portraits—an elephant dust bathing, lions yawning at sunset
Sometimes, a wide-angle environmental image will be far more powerful than a tight headshot.

5. Be Ready for the Unexpected
Wildlife doesn’t follow a schedule. You might drive for three hours without much action—then BOOM, a leopard crosses the road or a martial eagle dives from the sky.
That’s why I never pack my camera away during a game drive.
Tips to always stay ready:
Keep one body always ready to shoot (no lens caps!)
Use your default action settings: fast shutter, continuous autofocus
Have spare cards formatted and easy to access
Keep your batteries charged and in your pocket
Wipe your lens and viewfinder frequently
The goal is simple: be one second away from capturing the moment.
Your first safari will be unforgettable. But a little preparation can make it less stressful, more productive, and a lot more fun.
✅ Know your gear like the back of your hand
✅ Embrace flexibility over reach obsession
✅ Prioritize the golden light
✅ Tell compelling visual stories, not just take portraits
✅ Stay ready—because magic happens when you least expect it
🌍 And if you dream of joining me in Africa for hands-on workshops, learning these techniques live in the field, check out my upcoming Namibia and Botswana trips.

Featured Articles
Why I’m Bringing the Canon Powershot V1 on Safari (and How I’ll Use It)
I’m about to head back to Africa for two months of wildlife photography, filmmaking, and expedition work—and alongside my usual full-frame mirrorless setup, I’m packing something completely different: the Canon Powershot V1.
This isn’t my primary wildlife camera. It’s not even my secondary body. But for behind-the-scenes storytelling, quick vlogging, and capturing spontaneous moments during a fast-paced expedition across Botswana and Zambia, it might just become the most important camera in my bag.
Here’s exactly why I’m bringing it—and how I plan to use it during this multi-week safari adventure.
Why I Needed a Pocket-Sized Camera
On every wildlife trip, I aim to capture more than just the animals. I document behind-the-scenes footage, gear setups, roadside moments, and the daily rhythm of expedition life.
In the past, I relied on the Canon R5 or R5C to film these moments. While both produce cinematic footage, they’re heavy, setup-intensive, and often overkill for casual storytelling. Sometimes, by the time I pulled out a large camera, the moment had already passed.
This time, I needed something ultra-portable, fast, and simple—a camera that could live in my car’s door pocket or sling bag, ready at a second’s notice.
That’s where the Canon Powershot V1 comes in.

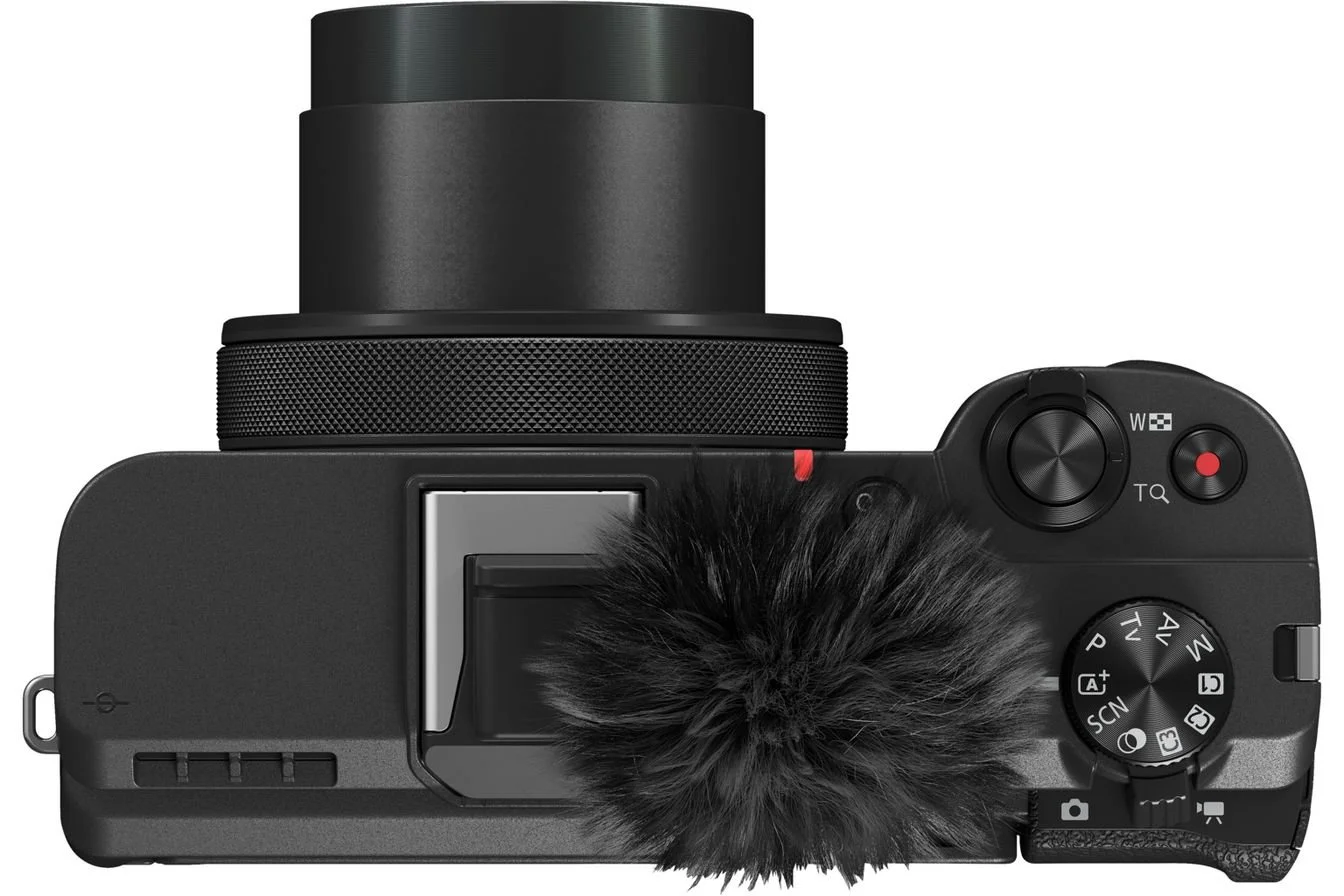
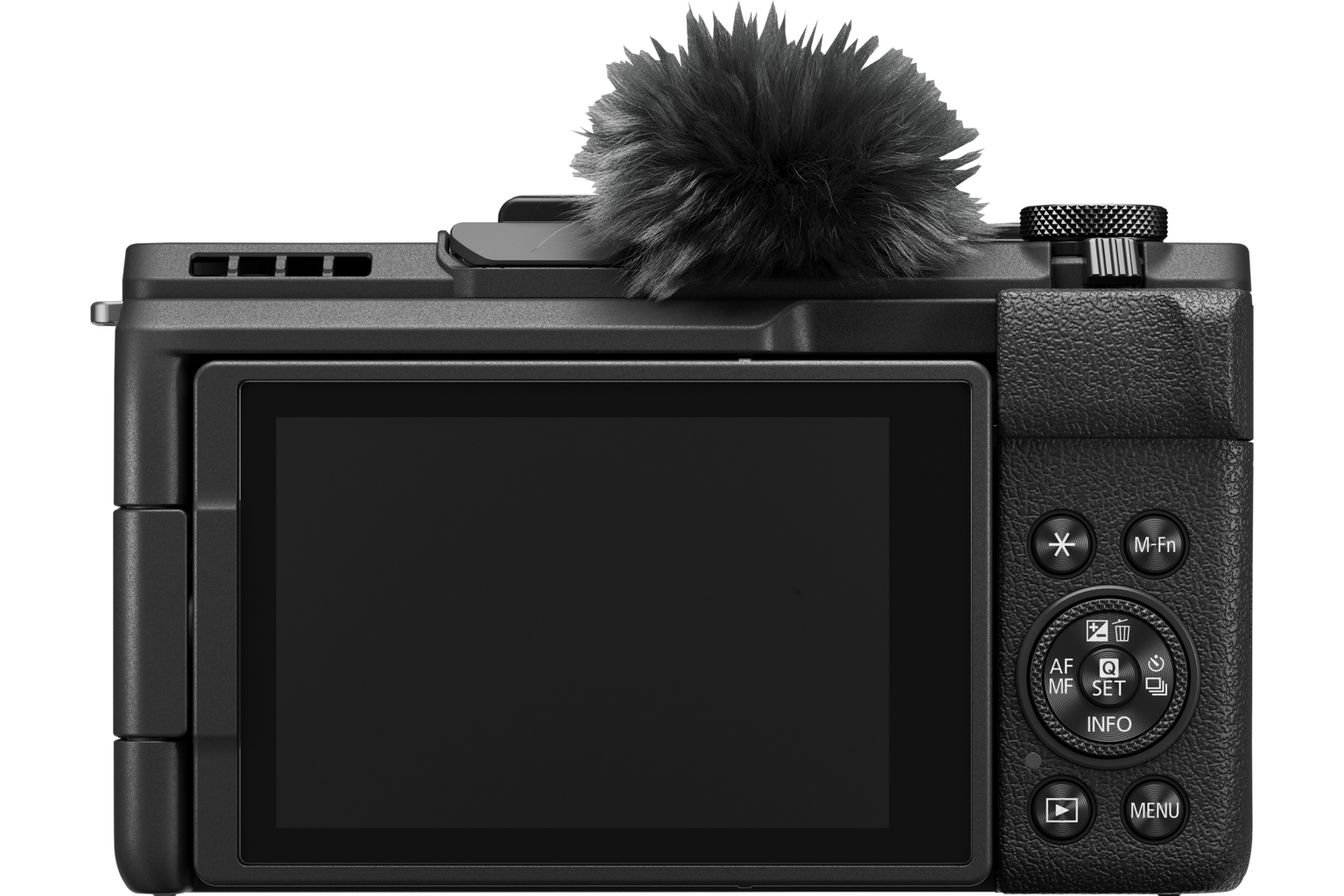
What Is the Canon Powershot V1?
Recently announced by Canon, the Powershot V1 is a compact, content-creator-focused camera designed for vloggers and filmmakers who want professional-level footage without the size and complexity of traditional setups.
Here’s why it caught my attention:
16–50mm Equivalent Zoom Lens: Versatile for capturing wide scenes, car interiors, landscapes, and spontaneous moments.
Built-in Stereo Microphones: Excellent ambient audio quality without needing external mics for casual shooting.
Flip-Out Screen: Essential for framing yourself while vlogging or filming quick updates.
4K Video with 4:2:2 10-bit C-Log 3: A huge advantage—this allows me to color match my V1 footage seamlessly with my professional Canon R5C and R5 cinema setups.
Built-In ND Filters: Extremely rare in a camera this size—perfect for controlling exposure during bright daytime filming without lugging external filters.
Internal Stabilization: Helps smooth handheld shooting or dashcam footage in rough conditions.
USB-C Charging: Ideal for travel; I can charge it in the vehicle while driving.
It’s not meant to replace a professional wildlife lens setup—but for documenting the experience, it might just be the most efficient tool I’ve ever carried.
📘 Want a deep dive into my field-tested safari gear choices? Read: The Complete Namibia Photo Guide.
How I Plan to Use the Powershot V1 on Safari
Here’s exactly how this camera fits into my workflow across two months in Botswana and Zambia:
Dashcam Recording: Mounted on my vehicle dashboard to document road journeys, off-road driving, and spontaneous roadside encounters.
Handheld Vlogging: Shooting daily field updates, campsite walkthroughs, meal setups, gear setups, and reflections at the end of long days.
Timelapse Capture: Setting up quick timelapses of sunrises over the Okavango Delta, sunset gear breakdowns, or even starry night skies from the campsites.
Quick BTS and B-Roll Shots: Filming casual camp life, spontaneous wildlife activity, or gear setup moments while my R5C and R3 focus on primary footage.
The beauty of the V1 lies in its ability to blend into the background of my day. I don’t have to stop what I’m doing to start filming—it’s always ready.
🎯 I will post a lot of BTS content on my YouTube Channel, make sure you subscribe not to miss it!
What I’ll Actually Be Filming
Expect a wide range of real-world storytelling coming from the Powershot V1:
Field Gear Setups: Practical tutorials showing how I build my safari rigs and organize photo/video gear in remote environments.
Camp Life: From coffee brewing at sunrise to setting up tents and preparing meals.
Candid Travel Moments: Encounters at local lodges, crossing river ferries, market visits, and spontaneous wildlife moments.
Wildlife Reactions: Capturing my real-time reactions when we bump into lions, elephants, or wild dogs without a long setup time.
Daily Recaps: Informal evening updates summarizing the day’s wildlife sightings, shooting conditions, and reflections.
This will allow viewers to experience the trip authentically, beyond the polished wildlife photos.
🗺️ Want a complete seasonal guide to planning your own African wildlife trip? Read: Best Time to Go on Safari.

What I’m Still Curious About
No piece of gear is perfect. Here’s what I’m eager to test once I’m deep in the field:
Stabilization Performance: Will the internal stabilization smooth out rough, bumpy off-road driving shots enough to be usable?
Battery Life: Will a pocket-sized body last through heavy shooting days without carrying half a dozen spares?
Color and Dynamic Range: Can this tiny sensor match the Canon R5C and R5 footage well enough for seamless editing across platforms?
Real-world testing will reveal whether the V1 can truly hold its own within a professional production pipeline.
A New Kind of Safari Camera?
The Canon Powershot V1 isn’t here to replace my primary bodies—but it fills a vital gap. It’s about spontaneity, speed, and storytelling.
In many ways, this camera represents a shift in how I think about travel content: low friction, ready anytime, and designed for connection, not just technical perfection.
If you’re a photographer, filmmaker, or travel content creator, there’s something powerful about having a “no-excuse” camera in your pocket—one that helps you capture the in-between moments that truly tell the story.
Featured Articles

What’s in My Camera Bag for 2 Months of Safari Filming and Photography
Planning a photography trip to Africa can feel overwhelming—especially when you're preparing for multiple weeks in remote locations with limited access to electricity, internet, or gear shops.
After years of refining my safari setup, I’m finally happy with my current packing system. In this post, I’ll walk you through the exact gear I’m bringing for a two-month expedition across Botswana and Zambia, including everything from camera bodies to power management, data backups, and the tiny accessories that save the day in the field.
Whether you're planning your first one-week safari or a multi-stop adventure across Southern Africa, this post will help you decide what’s worth bringing—and what you can safely leave behind.
📥 Before we dive in, make sure to grab my free wildlife photography eBook—it’s packed with practical gear advice, shooting tips, and field-tested techniques for your next trip.
👉 Download it here
My Camera System & Bag Setup
For this trip, I’m using the f-stop Tilopa backpack with an XL Pro ICU, which I’ve found to be the most airline-compliant way to carry big lenses and multiple bodies without checking them in.
My Main Camera Body Lineup for Safari and Adventure Filmmaking
When you're spending weeks in the field, facing everything from dusty deserts to humid forests, your camera setup needs to be more than just good—it needs to be flexible, reliable, and ready for anything. Here’s a deeper look at the core bodies I’m bringing on my upcoming trips, and how each one fits into my shooting strategy:
Canon R5 – My High-Resolution Workhorse

The Canon R5 remains one of the most versatile cameras I’ve ever used. It’s my go-to for high-resolution stills, offering 45 megapixels of sharp, detailed images without sacrificing autofocus speed or burst rate. Whether I’m photographing wide landscapes, intimate wildlife portraits, or environmental scenes that require cropping flexibility, the R5 handles it with ease.
It also excels at hybrid shooting—quickly switching from stills to 4K or even 8K video when needed. On safari, that ability to adapt to different storytelling needs on the fly is absolutely priceless.

Canon R3 – The Wildlife Action Specialist
When the action heats up—whether it’s a leopard sprinting across the plains or birds darting through golden light—the Canon R3 is the camera I grab first.
Its incredible autofocus tracking, ultra-fast frame rates, and low-light performance make it the ultimate body for fast-moving wildlife. It’s especially well-paired with my 600mm f/4 lens, giving me maximum reach while still being able to react instantly to the unexpected.
With the R3, I can track and capture split-second moments with a confidence that no other body in my kit quite matches.
Canon R5C – The Cinema Powerhouse
For true cinematic storytelling, I rely on the Canon R5C. This camera gives me the best of both worlds: the stills quality of the R5 combined with the video power of Canon’s Cinema EOS line.
It shoots full-frame 8K RAW, offers 10-bit C-log 3, and most importantly, doesn’t suffer from overheating issues during long recording sessions—something critical when filming wildlife behavior or behind-the-scenes content.
The R5C is my main body for professional wildlife filmmaking, slow-motion sequences, and BTS storytelling that needs high production value.
Canon Powershot V1 – My Everyday Vlogging Tool
This tiny but powerful camera fills a crucial gap in my kit. The Canon Powershot V1 is designed specifically for creators who need quick, spontaneous recording without sacrificing color fidelity or editing flexibility.
It shoots 4K 10-bit C-log 3, meaning it matches perfectly with the footage from my R5C. That’s a huge deal for a compact camera.
I’ll be using the V1 for handheld vlogging, dashboard driving stories, time-lapses, and casual BTS updates—giving me lightweight, ready-anytime access without pulling out my main bodies.
Its portability and ease of use are game-changers for creating daily content during long expeditions.

GoPro Hero 9 – Creative B-roll Machine
Mounted inside the vehicle or on lightweight arms, the GoPro Hero 9 gives me another layer of storytelling.
I use it primarily for dashcam recordings, driving sequences, and unique perspectives that would be impractical or risky for larger gear. Its stabilization, waterproof housing, and compact size allow me to capture immersive, adventurous footage even during rough drives or river crossings.
It's an essential part of the creative kit when I want to bring viewers deeper into the experience without worrying about damage or weight.
Why This Multi-Camera System Matters
Each of these camera bodies has a specific role to play—and together, they give me the ability to seamlessly capture anything that happens.
From wide scenic shots, to fast action bursts, to cinema-grade documentary sequences, I can cover all angles simultaneously, often with multiple cameras rolling at once.
This multi-body setup not only improves the variety and richness of the final content—it also ensures I’m ready for whatever surprises the wild throws at me.
If you want to see exactly how I use this gear on real African safaris, join me on one of my upcoming photography workshops—limited spots are still available for Botswana, Namibia, and Zambia tours.
My Wildlife Lens Kit for Safari Adventures
On a trip that spans multiple ecosystems, from open savannahs to dense woodlands, versatility and redundancy are absolutely key. Every lens in my kit has a very specific role, ensuring I can adapt quickly to different subjects, distances, and lighting conditions without missing a beat.
Here’s a closer look at the glass I’m relying on for this expedition:
Canon 15–35mm f/2.8 – For Storytelling and Scenic Impact

The Canon 15–35mm f/2.8 is my primary wide-angle lens, essential for capturing landscapes, night skies, and behind-the-scenes moments.
When the Milky Way rises over a campfire, or when I want to include dramatic skies and environmental elements around wildlife, this lens delivers stunning results.
Its fast aperture also makes it excellent for low-light situations, allowing me to shoot handheld at dawn or dusk without cranking the ISO too much.
Canon 24–70mm f/2.8 – The Storytelling Backbone

The 24–70mm f/2.8 is the ultimate storytelling lens. It's perfect for blending wildlife portraits with environmental context, giving a sense of scale and atmosphere that tighter lenses often miss.
When an elephant herd crosses the plains under golden light or lions rest beneath stormy skies, this lens allows me to frame both the subject and the stunning environment together.
It’s also a crucial tool for travel documentation, lodge photography, and casual moments during downtime in camp.
Canon 100–300mm f/2.8 – My New Go-To Action Lens

Replacing both my 70–200mm f/2.8 and the 100–500mm, the Canon 100–300mm f/2.8 has quickly become my workhorse for handheld action photography.
It offers the flexibility of a zoom with the speed and light-gathering power of a prime, making it ideal for dynamic wildlife encounters where subjects move fast and distances change constantly.
Mounted on the Canon R5, this lens will be my main tool for fast, spontaneous stills, and its compact size makes it perfect for long handheld sessions from the vehicle window.
Canon 600mm f/4 – The King of Wildlife Portraits

When it’s time for serious wildlife portraiture, the Canon 600mm f/4 remains unbeatable.
This lens delivers stunning background separation, incredible sharpness, and enough reach to photograph shy or distant animals without disturbing them.
I'll typically use it for static setups—beanbag-mounted shots of predators, birds, or distant mammals in open terrain—especially in places like South Luangwa or Etosha, where long-range opportunities are common.
Canon 100–500mm – Dedicated Video Zoom
While the 100–500mm used to be part of my stills kit, on this trip it’s taking on a new role: it will stay permanently mounted on the R5C for long-form wildlife video capture.
Its extended range allows me to frame wide environmental scenes or tight animal behavior shots without needing lens changes during critical moments.
At f/7.1 on the long end, it’s not the fastest lens, but for well-lit daytime filming, it's more than adequate—and the flexibility it offers is unbeatable.

Canon 1.4x Teleconverter – Smart Extra Reach
Finally, I’m bringing the Canon 1.4x Teleconverter, a small but powerful addition to the kit.
When paired with the 100–300mm f/2.8, it turns into a 140–420mm f/4, still razor-sharp and fast enough for action. When attached to the 600mm, it creates an 840mm f/5.6 setup, perfect for smaller subjects or distant wildlife scenes, particularly useful in open environments like the Central Kalahari or Etosha’s vast pans.

Tripods & Support Gear for a Safari Photography Expedition
Capturing sharp, cinematic wildlife footage—and even tack-sharp stills in challenging light—requires much more than just good camera technique. Stable support gear is essential, especially when working from vehicles, in windy open environments, or when filming long, smooth sequences.
Here’s the full support system I’m relying on for this safari adventure:
Fluid Head Video Tripod – My Foundation for Cinematic Wildlife Filming
For high-quality wildlife video, a fluid head tripod is non-negotiable.
I’m bringing along my trusted Manfrotto 755B tripod, paired with a Manfrotto 501 fluid head.
Even though this setup is a bit older, it remains incredibly reliable and delivers exactly what’s needed: smooth, controlled panning and stable lock-offs during long filming sessions.
The 501 head allows for consistent drag when tracking moving animals like lions or elephants across open terrain, creating that cinematic feel that handheld shooting simply can’t replicate.
It’s sturdy enough to handle heavier setups like my Canon R5C with the 100–500mm lens, even when fully zoomed in.
Lightweight Travel Tripod – Compact Stability for Stills and General Use
For photography-specific work and general support, I’m bringing my Manfrotto 190CXPRO4—a lightweight carbon fiber tripod that offers the perfect balance between portability and stability.
This tripod comes into play when shooting landscapes, night photography (like Milky Way shots in Namibia), or low-light wildlife scenes where slower shutter speeds demand rock-solid support.
Thanks to its compact size and relatively light weight, it easily fits into my checked luggage or straps neatly onto the side of my camera backpack.
And with the center column that can flip horizontally, it’s also great for creative low-angle compositions.
Gorillapod – The Ultimate Tool for Quick Setups and Creative Angles
Rounding out my support kit is the trusty Joby Gorillapod.
This flexible mini-tripod is a game-changer for on-the-fly setups—perfect for mounting cameras on dashboards for dashcam footage, wrapping around branches or railings for creative vlogging angles, or setting up quick timelapses and roadside b-roll without hauling out a full tripod.
It’s light, packable, and incredibly versatile—a small tool that punches way above its weight.
Together, this trio covers everything I need:
Smooth cinematic pans for professional-looking wildlife footage
Stable long exposures and low-light stills
Flexible creative options when documenting behind-the-scenes moments
Lightweight, manageable setups that won’t bog me down in the field
All three pieces fit efficiently into my checked luggage or are integrated into my vehicle setup once I’m on location.
This careful balance between stability and portability means I’m always ready—whether I’m filming from a moving 4x4, shooting dramatic landscapes, or quickly capturing a spontaneous wildlife encounter.

Audio, Filters & Must-Have Accessories
When you’re filming professional wildlife content—or even just documenting your own adventures—good visuals are only half the story.
Clean, immersive audio and creative control over light are what really take your work to the next level.
Here’s the essential kit I’m bringing to make sure every piece of content sounds great, looks polished, and survives the rough realities of safari life:
Audio Setup – Capturing Clean, Professional Sound in the Field
Even the most beautiful footage feels amateur without strong audio, so I'm building redundancy into my setup:
🎤 Rode VideoMic NTG – Directional Shotgun Mic for Natural Soundscapes
Mounted directly on the camera, the Rode VideoMic NTG is my go-to directional microphone.
It picks up clear, isolated audio from the subject while rejecting ambient noise from the sides and rear—perfect for recording commentary, vehicle sounds, or distant wildlife calls without capturing too much wind or background chatter.
Its compact size and USB-C recharging capability make it ideal for fieldwork where weight and charging logistics matter.
🎙️ Rode Wireless Pro – Lavalier System for Interviews and Mobile Vlogging
The Rode Wireless Pro system is essential when I want freedom of movement without losing audio quality—whether it's capturing interviews at lodges, gear talks in the field, or mobile BTS vlogging during drives.
It’s ultra-compact, has great range, and records internally as a backup—a lifesaver if the wireless signal gets sketchy in remote areas.
🛡️ Backup Shotgun Mic – Redundancy Is Key
Gear fails—it’s just a fact when you’re deep in the bush, hours from the nearest camera store.
That’s why I always pack a backup shotgun mic. It adds minimal weight but provides peace of mind, ensuring that I can always record clean sound even if my primary mic encounters problems.
Filters – Managing Harsh Light and Boosting Creative Control
Shooting in Africa often means dealing with intense, harsh light. Filters are essential tools to stay in control of exposure and color:
🛡️ ND Filters – Essential for Proper Exposure in Bright Conditions
I bring neutral density (ND) filters to cut light without affecting color, allowing me to shoot at slower shutter speeds or wider apertures even in midday sun.
They are critical for maintaining cinematic motion blur in video and for controlling depth of field creatively.
🌀 Polarizer – Cutting Glare and Enhancing Skies
A circular polarizer helps reduce glare on water, wet surfaces, and animal fur, while also deepening blue skies and enhancing contrast.
It’s a simple but powerful tool for making safari scenes pop without heavy post-processing.
Must-Have Field Accessories – Keeping Gear Running Smoothly
The boring but absolutely essential category: the stuff that keeps the entire production going smoothly day after day in remote locations.
🔋 10+ Spare Batteries (Canon R5 & R5C) + 2x R3 Batteries
When you’re shooting long days, capturing early morning light, midday wildlife, sunset scenes, and nighttime BTS footage, battery life becomes mission-critical.
I pack more than 10 spare LP-E6NH batteries (for the R5 and R5C) and at least two LP-E19 batteries (for the R3) to avoid ever running out of power mid-shoot.
⚡ Dual and USB-C Chargers – Fast, Flexible Recharging
Keeping batteries topped up while traveling between lodges or charging off a solar setup means I need multiple chargers, including USB-C options that plug into portable power banks or in-car outlets.
🧽 Cleaning Tools – Protecting Sensors and Lenses
Blower for removing dust and debris from sensors and lenses
Sensor wipes for careful on-site sensor cleaning when needed
Microfiber cloths for wiping lenses without scratching Daily cleaning routines prevent frustrating problems like sensor spots or soft images caused by dirt.
🛠️ Gaffer Tape and Cable Ties – Ultimate Field Repair Kit
Whether it's securing loose dashcams, fixing gear to a vehicle, or temporarily patching tripods and bags, gaffer tape and cable ties are absolute lifesavers.
I always carry a few rolls tucked into every gear bag.
Backup Strategy & Power Management
When you're traveling deep into remote wilderness—days away from reliable electricity—protecting your databecomes just as important as capturing it.
Wildlife photography trips are often once-in-a-lifetime experiences, and losing footage or photos simply isn’t an option. That’s why I build serious redundancy into my backup system:
📂 Backup Workflow – How I Keep My Files Safe in the Wild
🎞️ Multiple SD and CFexpress Cards – Room to Shoot Freely
I carry enough SD and CFexpress cards to shoot for several days without having to format or overwrite anything.
This approach means I can work with confidence during intense days in the field—even if unexpected sightings or creative bursts fill my cards faster than planned.
💾 Two 4TB SSD Drives – Fast Daily Backups
Each evening, I back up all new footage and photos to two identical 4TB SSDs.
SSD drives are not only shockproof and durable (important when you're bouncing around on rough roads), but they also allow for fast transfers—saving precious time when you're exhausted after a long day out.
🖥️ Two 5TB HDD Drives – Long-Term Storage & Extra Redundancy
In addition to my SSD backups, I maintain a third backup copy on 5TB rugged hard drives.
While slower and bulkier than SSDs, these drives are perfect for archival storage, ensuring that even if something happens to the faster drives, the data is still safe.
⚡ Power Management – Staying Charged Off-Grid
🔋 Goal Zero Sherpa 100 – Versatile, High-Capacity Power Bank
When you're away from lodges or grid power for days at a time, a strong power solution is non-negotiable.
The Goal Zero Sherpa 100 lets me recharge cameras, laptops, batteries, and phones multiple times.
It has USB-C PD outputs (essential for fast charging modern devices) and AC ports for added flexibility.
☀️ Small Foldable Solar Panel – Infinite Recharging Option
For extended periods in remote campsites, I bring a compact, foldable solar panel.
When paired with the Sherpa, it gives me an essential renewable energy source to keep the mission alive—especially important on longer trips into the Central Kalahari, Savuti, or South Luangwa.
🔄 Why This Backup Routine Matters
Backing up every evening has become a non-negotiable habit for me—it’s part of the rhythm of the trip, just like charging batteries and cleaning gear.
Three separate copies of every file (cards, SSD, HDD) gives me total peace of mind, knowing that no technical issue, theft, or accident will erase the irreplaceable images and footage collected in the field.
🎯 Want to learn how to build your own bulletproof field workflow?
👉 Join one of my upcoming wildlife photography workshops where I’ll teach you not just how to shoot better—but how to safeguard your hard-earned files like a pro.

Daily Vehicle & Field Kit
When you're on a safari, you can't afford to be rummaging through bags when an opportunity appears—or worse, realizing you forgot something essential back at camp.
That’s why I always keep a compact, carefully thought-out field kit within immediate reach.
🧰 Key Items Always Within Arm’s Reach
🛠️ Multitool or Knife – The Unsung Hero
A solid multitool or knife is invaluable for quick fixes—whether it’s tightening a tripod screw, adjusting a dashcam mount, cutting cable ties, or even helping with small vehicle or gear repairs.
It’s amazing how often it saves the day.
🔦 Headlamp – Essential for Pre-Dawn and Night Shoots
A good headlamp is a total must for early morning drives, camp setups, or nighttime photography.
I always use one with a red-light mode to preserve night vision, making it easier to see without disturbing animals or wrecking my own eyes' adjustment to darkness.
📓 Notebook & Pen – Capturing Creative Sparks
Despite the digital age, I never leave camp without a small notebook and pen.
I use it for sighting logs, story ideas, shot lists, or just capturing fleeting creative thoughts that pop up while spending hours in the field.
🧵 Velcro Strips & Straps – Field Multi-Tool
Velcro strips and cable straps are among the most underrated items in my kit.
They’re endlessly useful for securing dashcams, organizing cables, mounting microphones, or even keeping lens caps handy.
They weigh almost nothing, take no space, and solve countless problems on the fly.
🧳 How It All Fits
All of these essentials stay packed in a secondary shoulder bag or small daypack that I keep by my side inside the safari vehicle at all times.
This means I’m ready for anything—whether it's a sudden downpour, a flat tire, an impromptu roadside shooting opportunity, or just needing to jot down a new creative idea without missing the moment.

This might sound like a lot of gear—and it is—but when you're shooting professionally over several weeks in extreme conditions, it’s better to have exactly what you need than to scramble last-minute in the field.
Everything I’ve listed here is battle-tested. It’s designed to support stills, video, BTS content, data safety, and smooth workflows while moving between camps and locations in Botswana and Zambia.
If you're planning your own trip soon—whether it's your first or your fiftieth—hopefully this guide gave you some clarity.
🎒 Don’t forget to download my free wildlife photography eBook—it’ll help you choose the right gear, prep for the field, and start shooting smarter on your next adventure.
Featured Articles

When to Go on Safari: A Wildlife Photographer’s Guide to the Best Safari Seasons
Planning a safari isn’t just about where you go—it’s about when. The timing of your trip will completely shape your wildlife encounters, photography conditions, and even your level of comfort in the bush.
I’m writing this as I prepare for an incredible journey through Central Kalahari Game Reserve (CKGR), Khwai and Savuti in northern Botswana, and South Luangwa National Park in Zambia. Each destination was picked with the season in mind—not just for weather or sightings, but for the specific kinds of shots I’m hoping to bring home.
If you’re a wildlife photographer (or planning your first safari), understanding safari seasons will help you choose the perfect time to go.

Rainy season in Okonjima Nature Reserve, Namibia
What Are Safari Seasons?
Let’s start with the basics. Safaris in Africa don’t follow spring/summer/fall calendars. Instead, they track the rhythms of rainfall and dryness, which directly impact wildlife behavior and vegetation.
Most of Southern and East Africa operates on two main safari seasons:
Dry Season: Usually May to October
Green (Wet) Season: Typically November to April
These aren’t hard cutoffs, but they do influence what kind of safari experience you’ll have—from visibility to sightings, lighting, and landscape conditions.
The Dry Season: Best for Classic Safari Photography
The dry season is the go-to time for many photographers—and for good reason.
Water is scarce, so wildlife congregates at rivers and waterholes.
The bush thins out, making animals easier to spot and photograph.
Animals become more predictable in their movements.
There's less mud and fewer bugs (always a win).
If you’re dreaming of sharp silhouettes, lions in golden light, elephants kicking up dust—it’s all here. The conditions are clean, the backgrounds uncluttered, and the animals active. This is the best season for high-probability sightings, especially if you’re new to safari photography.

Dry season in Etosha NP, Namibia
The Green Season: Dramatic, Lush, and Underrated
Then there’s the green season, sometimes called the wet season. It gets a bad rap, but for creatives and seasoned shooters, it’s a goldmine.
Verdant landscapes create stunning compositions.
Dramatic skies—think thunderclouds, soft evening light, and atmospheric scenes.
It’s birthing season, which means adorable newborns and heightened predator action.
Migratory birds return—perfect for bird photographers.
Fewer tourists, lower rates, and quieter parks.
There are trade-offs: thicker vegetation makes it harder to spot animals, roads can get muddy, and some camps close due to flooding. But if you’re patient and looking for unique, intimate moments—this season can truly reward you.

Dramatic skies during a rainy season sunset
Why I’m Traveling Now: My Seasonal Safari Strategy
Here’s how I planned my current trip across three iconic parks, based entirely on seasonality:
📍 Central Kalahari Game Reserve (Botswana)
I’m going at the tail end of the green season—just as the landscape is still lush but predator sightings peak. Big cats are on the move, skies are dramatic, and the crowds are nonexistent.
📍 Khwai & Savuti (Northern Botswana)
For these wetter regions, I chose May - the early dry season. This gives me drying terrain, increasing sightings near water, and vegetation that still holds some softness and color.
📍 South Luangwa National Park (Zambia)
June is a sweet spot. The park is transitioning into the dry season, so water sources are shrinking and animals are easier to find—but it’s still early enough to avoid peak tourist season.
👉 Want to follow my journey in real time? I’m sharing daily Stories from the field on Instagram with gear tips, wildlife moments, and behind-the-scenes updates. And I’ll be releasing vlogs and tutorials soon from this trip—don’t miss them.

Late dry season in South Luangwa NP, Zambia
Best Times for Iconic Safari Destinations
Choosing the right time to visit Africa’s top wildlife destinations can make the difference between a good trip—and an absolutely unforgettable one. Here’s when (and why) you should plan your safari—and if you want to experience it firsthand with expert guidance, I lead safari workshops that are planned around the seasons to provide the best possible experience.
🇧🇼 Botswana
Central Kalahari Game Reserve, Kgalagadi Transfrontier Park: December–May
The Green Season transforms the arid Kalahari into a lush, living desert. Seasonal rains bring dramatic skies, short grass plains, and an explosion of life—this is prime time for witnessing predator activity such as lions and cheetahs hunting in open landscapes. It’s raw, remote, and truly wild.
Khwai, Savuti, Chobe, and Moremi: May–October
During the Dry Season, Botswana’s northern regions offer classic safari experiences. As water sources shrink, animals concentrate along river systems and waterholes, making sightings both more frequent and more dramatic. Expect excellent predator-prey interaction, large herds of elephants, and picture-perfect golden light.
📍 I’ll be leading a dedicated safari to the Kgalagadi Transfrontier Park in early May, right at the transition between lush landscapes and drying plains—a perfect window for predators, big skies, and raw storytelling opportunities.
👉 Explore the Kgalagadi safari here.
🇿🇲 Zambia
South Luangwa National Park & Lower Zambezi: June–October
Zambia’s premier parks hit their stride in the heart of the dry season. As the bush thins out and water becomes scarce, predator density skyrockets. South Luangwa, in particular, is famed for incredible leopard sightings, thriving wild dog packs, and atmospheric riverbank photography.
📍 Join me in late September for a specially timed trip to South Luangwa—an epic period when the Luangwa River pulls in huge concentrations of wildlife and the soft, dusty light creates perfect conditions for storytelling photography.
👉 View full South Luangwa trip details.
🇳🇦 Namibia
Etosha National Park: July–October
As the dry season progresses, Etosha’s waterholes become magnet-like gathering points for animals. Towering elephants, rhinos, lions, and countless antelope converge in dusty, cinematic scenes. It’s an extraordinary opportunity for high-drama, high-density photography, with stark backdrops and powerful light.
Namib Desert & Damaraland: Year-round, but June–September are ideal
While these regions are photogenic year-round, winter months bring cooler temperatures, crystal-clear skies, and incredible side lighting—perfect for photographing Namibia’s iconic desert-adapted wildlife and surreal landscapes.
📍 Every year I’m leading two distinct Namibia adventures:
A full Namibia photography tour in the second half of May, covering desert landscapes, wildlife, astrophotography and cultural highlights.
A focused wildlife-specific expedition in early October, designed around waterhole photography, elusive desert predators and exclusive photography hides.
👉 See the full Namibia safari itineraries here.
🇰🇪 Kenya & 🇹🇿 Tanzania
January–February: Calving season in Ndutu, Tanzania, combined with clear skies and active predators make this one of the most dynamic times for wildlife photography.
July–October: The Great Migration peaks, with river crossings in Kenya’s Masai Mara and excellent predator action across the Serengeti.
November & March: Shoulder seasons offer fewer crowds, lush green landscapes, and unique photographic opportunities with more intimate sightings.
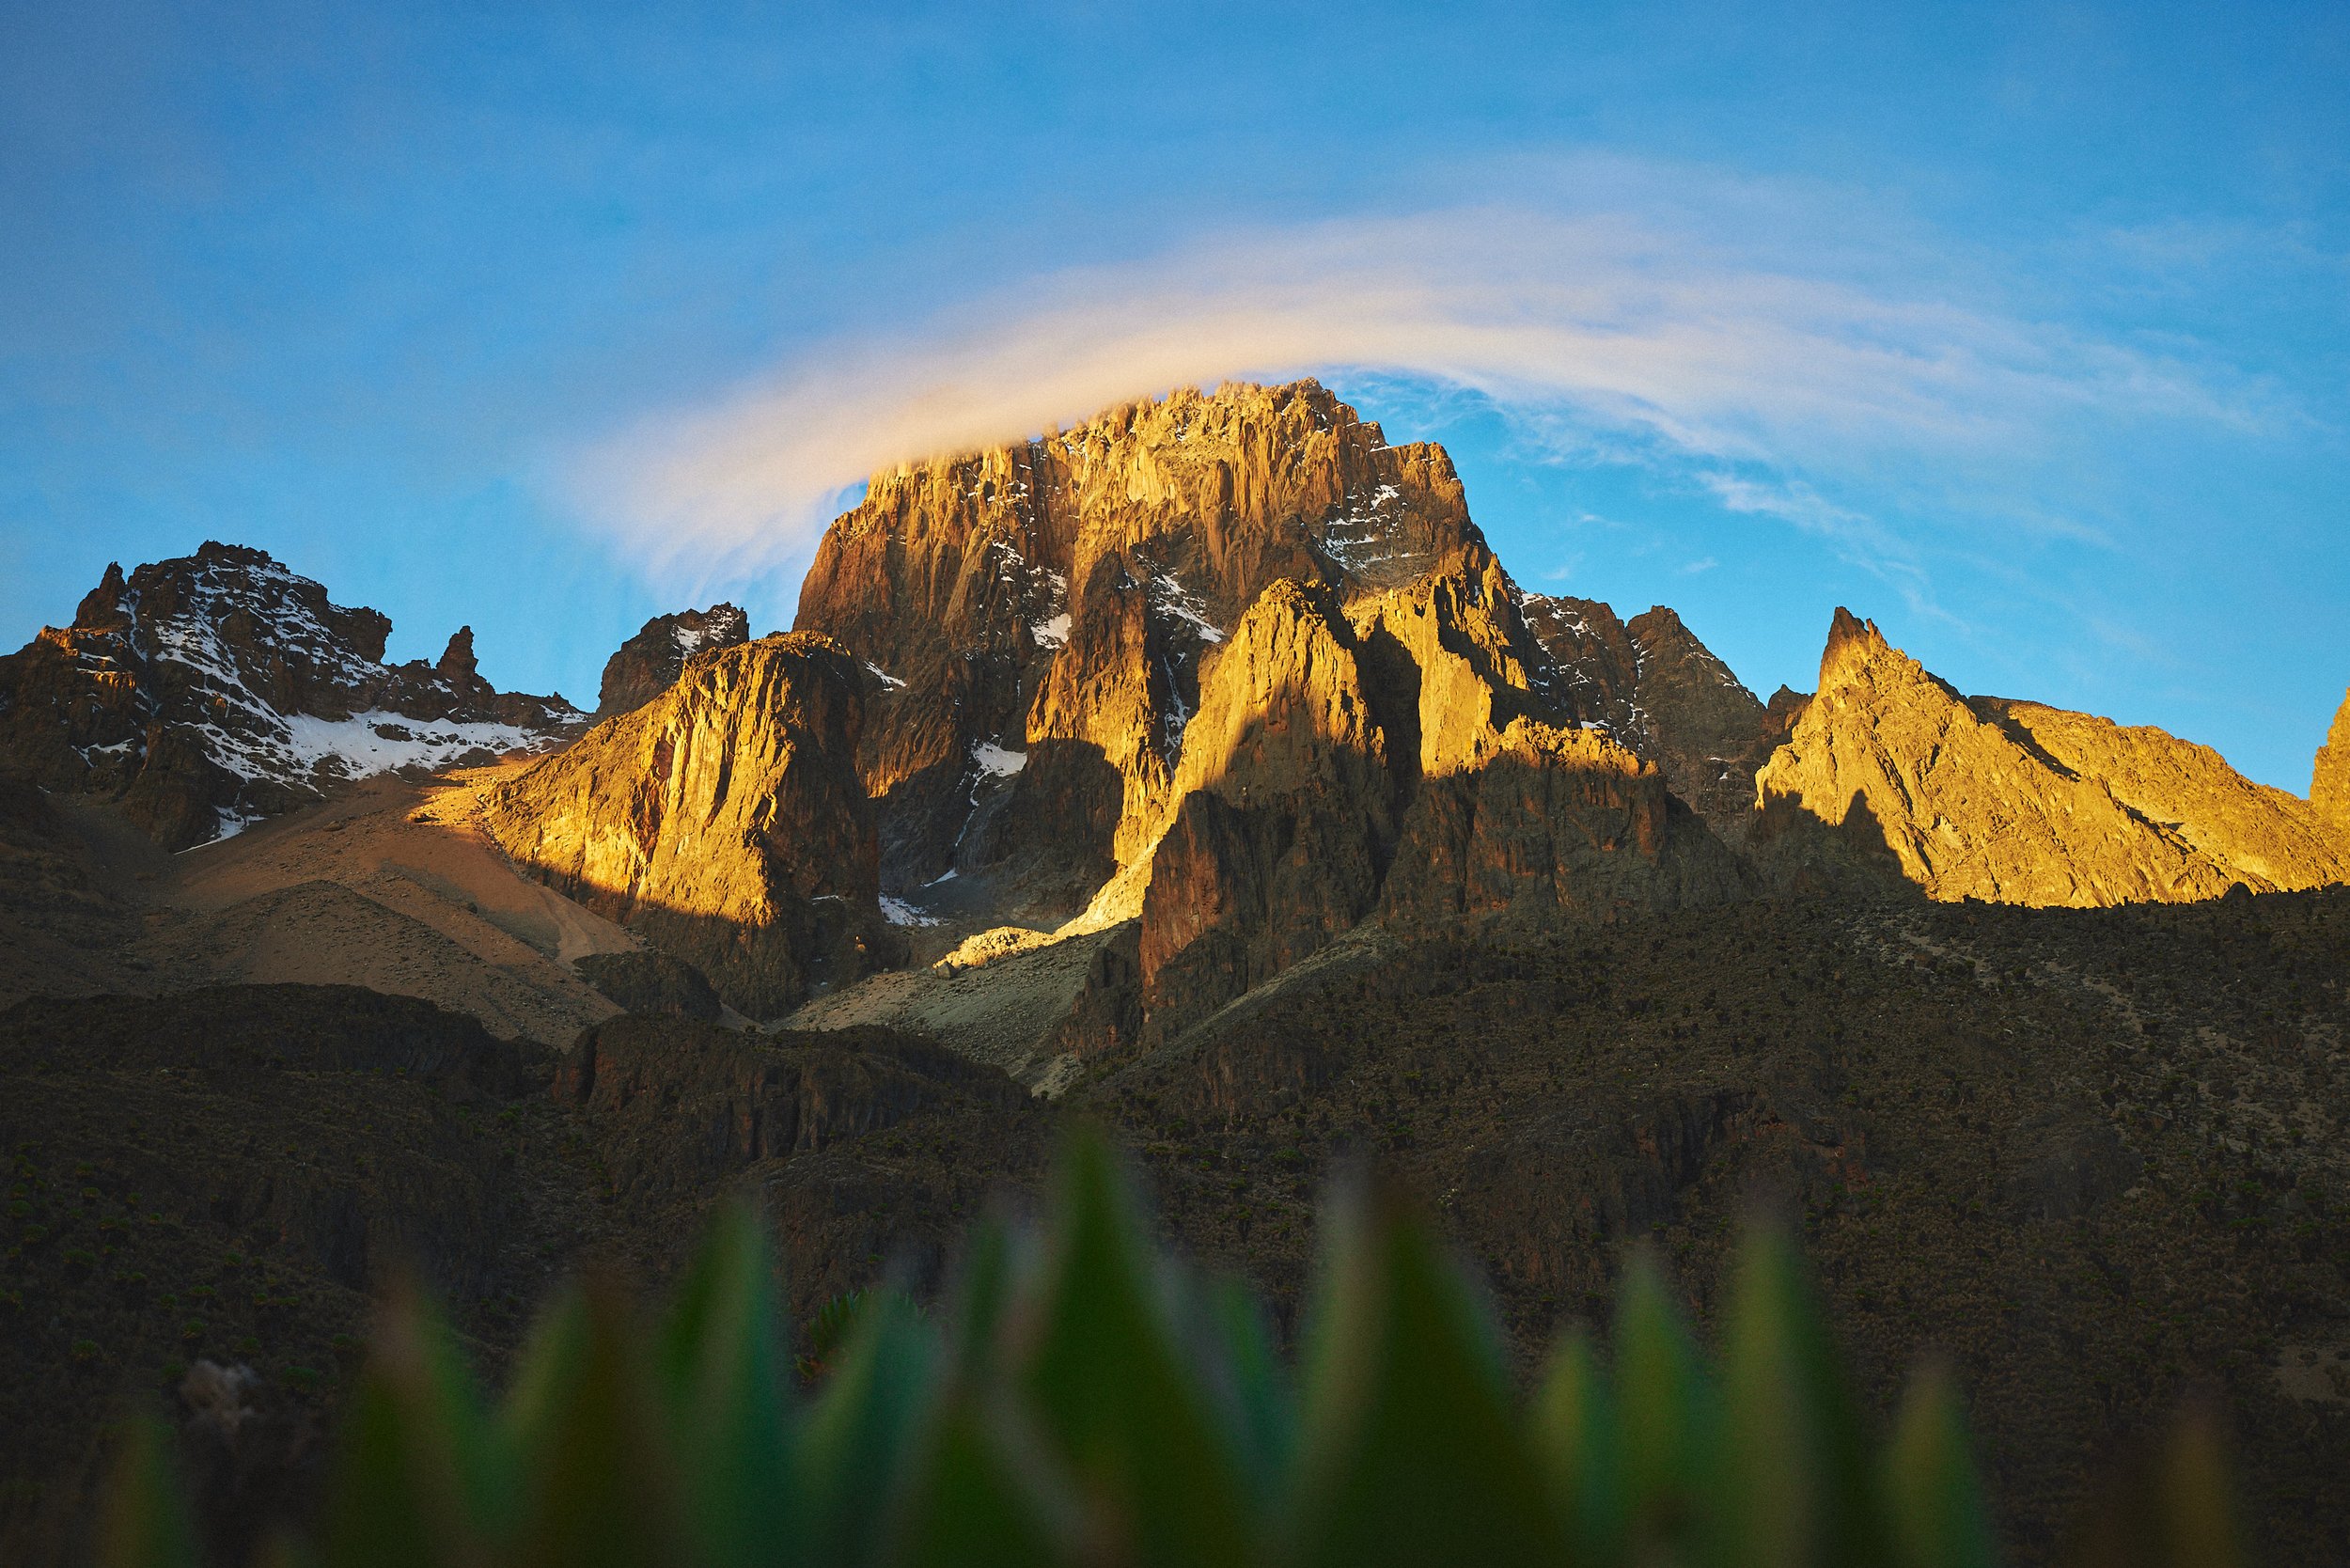
Mount Kenya at sunrise
Ready to Turn Your Dream Safari into Reality?
If these destinations and timings got you dreaming, why not turn those dreams into real-world images? My upcoming trips are designed specifically for photographers who want guided access, small group experiences, and hands-on support to capture the best possible shots.
👉 See all upcoming safaris and reserve your spot here.
Spots are limited, and many of these trips are already generating early interest, so don’t wait too long to start planning your ultimate photography adventure!

There’s no perfect time for everyone—only the best time for your specific vision. Want stark, powerful portraits? Go dry. Prefer emotion, drama, or baby animals? Green season is calling.
Whether you're planning your first safari or your tenth, let the seasons guide your choices. Your camera—and your future self—will thank you.
Featured Articles

How I Travel With Big Lenses (Without Checking a Single Camera)
Traveling with large camera gear can be one of the most stressful parts of any wildlife photography trip. Between strict airline weight limits, the risk of theft, and the impossibility of insuring checked luggage properly, it's easy to lose sleep the night before a flight—especially when you're carrying gear worth more than your vehicle.
Over the years, I’ve refined a system that lets me bring everything I need—600mm f/4 included—onto the plane with me, without ever having to check a single piece of expensive equipment. If you’re planning your first safari, remote expedition, or long wildlife adventure, I hope this post saves you a major headache at the airport.
📘 Before we dive in—if you’re planning a wildlife trip and want a full breakdown of gear, travel strategy, and in-field techniques, grab my free 100-page wildlife photography eBook.
Why Flying With Photo Gear Is Such a Headache
Airlines rarely design their policies with wildlife photographers in mind. If you’ve ever tried to pack multiple bodies, long telephotos, and a laptop into a single "carry-on" under 8kg, you know what I mean.
Years ago, I used to check my gear—big mistake. Especially on routes through Johannesburg, Cape Town, or Addis Ababa, where lost bags and theft are way too common. After hearing one too many horror stories from other photographers, I stopped risking it.
Now, everything expensive stays with me in the cabin. Here’s how I make it work.
My Exact Travel Setup for Wildlife Trips
The backbone of my setup is the f-stop Tilopa backpack, paired with their XL ICU (Internal Camera Unit). It’s the largest photography backpack that still meets airline carry-on size limits. Even on smaller regional jets, I’ve never been forced to check it.
Here’s what I typically fit inside:
Canon R3 and R5 camera bodies
Canon 600mm f/4 (barrel detached and fitted outside the backpack)
Canon RF 100–500mm and 70–200mm f/2.8
Teleconverters, spare batteries, SSDs
Laptop and power banks
Alongside that, I bring a personal item. My go-to options are:
F-Stop Florentin 11L shoulder bag (fits another body and a few primes), or
A Large ICU for lenses like the 100–300mm f/2.8 and additional bodies.
What Happens If the Airline Flags You?
Let’s be honest—this setup is rarely within official airline weight limits. Airlines like Lufthansa or Emirates have stopped me before. Here’s my step-by-step strategy:
Show up early at check-in and boarding. You’re less likely to face a full overhead bin or panicked gate agents.
Distribute your weight wisely. Place the heaviest gear (like lenses and cameras) in your "personal item," which is rarely weighed.
Leave the non-essentials. Chargers, cleaning kits, cables—they go in your checked luggage.
If a gate agent challenges you, stay calm and explain clearly. Let them know your bag contains professional photography gear that is fragile, high value, and not insurable in checked luggage. If needed, open the bag and show them. I’ve done this many times, and I’ve always been allowed to board with my gear.
Essential Tips for Flying With Big Photo Gear
For your first big wildlife trip, here are three hard-earned lessons that will save you stress:
✅ Never check your most valuable gear. It’s safer (and cheaper) to carry it all onboard.
✅ Avoid rolling camera bags. Backpacks attract far less scrutiny at the gate.
✅ Be respectful—but firm. Airline staff will usually help if you calmly explain your needs.
🎬 Curious about optimizing your camera setup for fast-paced wildlife moments? Check out my video on how I set my autofocus for wildlife—another game-changer when every second counts!
Flying with big lenses doesn’t have to be a nightmare. With the right backpack, a dialed-in system, and a calm mindset at check-in, you can safely travel the world with all your precious gear in tow.
Have your own tip or war story from flying with camera gear? I’d love to hear it—drop a comment or shoot me a message.
🎁 Don’t forget to grab my free wildlife photography eBook—it’s packed with insights for field shooting, gear, and travel.
👉 Click here to download it
Featured Articles

2025 Guide to Etosha National Park Photography
Etosha National Park is one of the most iconic safari destinations in Africa—and for good reason. Its vast white salt pan, scattered acacia trees, and floodlit waterholes set the stage for some of the most dramatic and consistent wildlife photography anywhere on the continent. Whether you're hoping to capture dust-kicking elephants, backlit black rhinos, or lion prides in the dry grass, Etosha offers an ideal mix of accessibility, wildlife density, and visual drama.
When to Go, Where to Shoot, and How to Get the Best Wildlife Photos in Namibia’s Iconic Park
Etosha National Park is one of the most iconic safari destinations in Africa—and for good reason. Its vast white salt pan, scattered acacia trees, and floodlit waterholes set the stage for some of the most dramatic and consistent wildlife photography anywhere on the continent. Whether you're hoping to capture dust-kicking elephants, backlit black rhinos, or lion prides in the dry grass, Etosha offers an ideal mix of accessibility, wildlife density, and visual drama.
This guide walks you through the best times to visit, where to base yourself inside the park, which waterholes are most rewarding photographically, what gear to bring, and what kind of animal behavior to expect throughout the year.

Elephants crossing on the Eastern Etosha plains.
When to Visit Etosha for the Best Photography Conditions
The dry season, which runs from May through October, is widely considered the prime time to photograph in Etosha. During these months, water sources become scarce and animals concentrate around permanent waterholes. This makes wildlife behavior more predictable, visibility much better, and chances of multi-species scenes far higher. The light during these months—especially in the early morning and late afternoon—is clean and golden, with low humidity and minimal atmospheric haze.
June through August brings cooler temperatures and crisp light. It’s an excellent time for photographers who want a combination of comfort, excellent visibility, and dense wildlife activity around waterholes. You’ll often see elephants lining up to drink, herds of springbok clustering for safety, and predators lurking on the fringes of these gatherings.
As the dry season deepens in September and October, conditions get harsher. Daytime heat increases, and the air becomes dustier—creating stunning backlit effects during golden hour. This is also a particularly good time for photographing elephants rolling in dust or sparring at waterholes, as well as lions gathering at known predator hotspots like Okondeka. While the heat can be intense, the photographic payoff is enormous.
During the green season from November to April, the park changes dramatically. Rain transforms the landscape into a lush, vibrant space, and wildlife disperses across wider areas, making it more difficult to predict sightings. However, the photographic aesthetic shifts in your favor if you’re looking for stormy skies, saturated greens, and dramatic contrasts. While sightings might be less concentrated, you’ll have more space, fewer tourists, and chances to photograph intimate moments—like calving antelope or birds in full breeding plumage—against moody skies.

Wildebeest at sunrise near King Nehale Gate.
➡️ For more tips on when to visit Namibia's key destinations, check out the Complete Namibia Photo Guide.
Where to Stay for Optimal Access and Light
Staying inside the park is essential if you want to maximize your shooting time, especially during early morning and late evening hours when wildlife is most active. All accommodations inside Etosha are run by Namibia Wildlife Resorts (NWR) and while they’re fairly basic compared to the luxury lodges you can find outside they offer the biggest advantage of all: proximity to wildlife and round-the-clock access to floodlit waterholes.
Okaukuejo Camp is arguably the best base in the park. Its waterhole is one of the most active in Etosha, especially at night, and is often visited by black rhinos, herds of elephants, giraffes, and even lions. The camp's position on the western side of the park also gives you quick access to several excellent morning and sunset locations. You can easily return mid-day to rest and recharge, then head back out in the late afternoon.

Okaukejo waterhole at night.
Halali Camp, located midway between Okaukuejo and Namutoni, is quieter and more shaded, with slightly more forested surroundings. The nearby Moringa Waterhole is fantastic for leopards, especially at night. This camp is well-positioned to reach some of Etosha’s central gems like Goas and Rietfontein, which are known for frequent predator sightings and excellent light angles throughout the day.
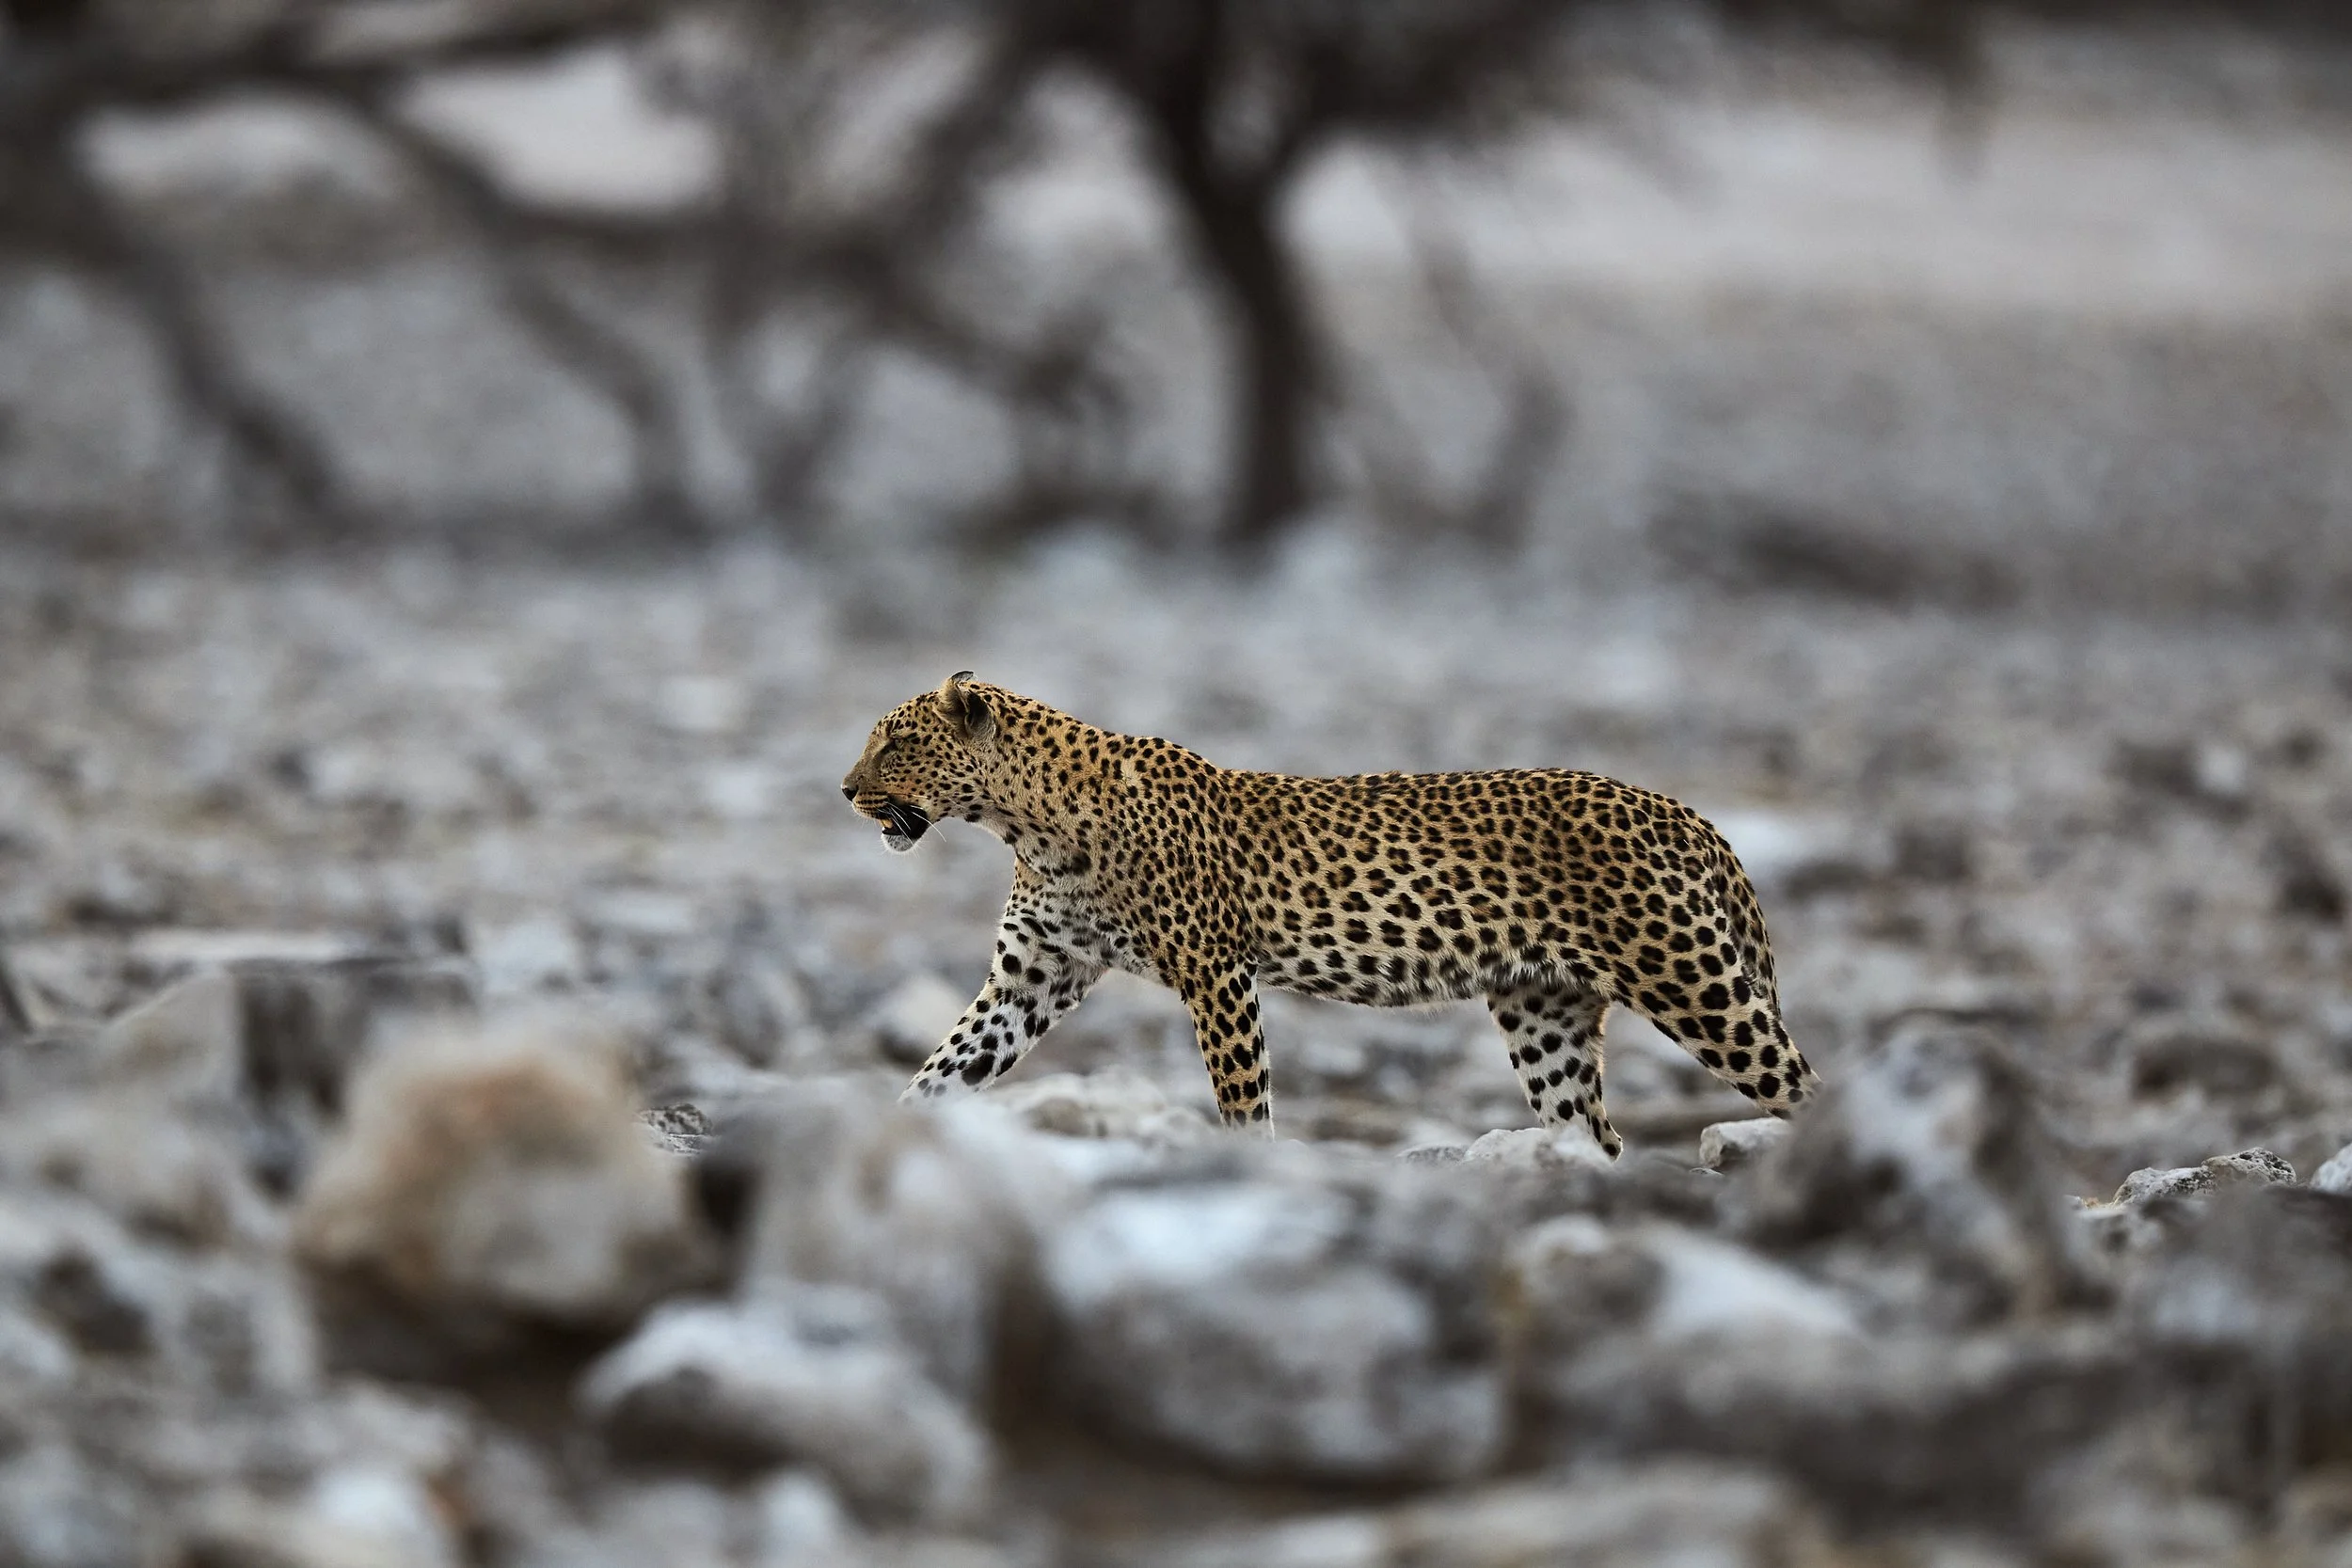
Leopard sighting at Goas.
Namutoni Camp, set against the historic Namutoni Fort, is closest to the eastern section of the park. It gives you quick access to Chudop, Klein Namutoni, and Fischer’s Pan, where you can expect good birding, early light reflections, and misty morning atmospheres in the right season.

Elephant herd approaching the waterhole at Namutoni camp.
Most Photogenic Waterholes and When to Visit Them
Etosha is a self-drive park, which means you control your schedule—but it also means you need to plan your days strategically to make the most of the light, behavior, and backdrop.
Okaukuejo Waterhole is one of the best in Africa, particularly for night photography. The large open space is well-lit and frequently visited by black rhinos, elephant herds, and zebras. Photographers can shoot from behind a low stone wall or seated benches, and longer lenses (400mm–600mm) work well here to isolate subjects or compress layers of animals against the far backdrop.
Nearby, Nebrownii Waterhole offers spectacular dust-filled scenes in the dry season. It’s especially productive in the late afternoon when elephants arrive in groups, kicking up clouds of golden dust as they approach. If you position your vehicle on the eastern side of the loop, you’ll get side or backlighting for dramatic images.
Okondeka, located west of Okaukuejo, is known for lion sightings. It overlooks the edge of the pan, so while the background might be stark and bright in the middle of the day, early morning light here can be soft and rewarding. Keep an eye out for lions resting in the golden grasses or pacing along the water’s edge.
In the east, Chudop Waterhole near Namutoni provides some of the most picturesque settings in the park. With acacia trees framing the background and shallow water reflecting early morning light, this is a top spot for giraffes, kudu, and birdlife. The area is more lush, so expect a different aesthetic compared to the barren western waterholes.
Salvadora and Sueda sit between Halali and Namutoni and are known for big cat activity, particularly cheetahs. These open plains often feature game animals spaced out across the horizon, offering classic safari silhouettes when timed with sunrise or sunset.

Lion at Salvadora.
What Gear Works Best in Etosha’s Conditions
Etosha’s shooting conditions favor long telephoto lenses and dust-sealed bodies. Most of your photography will happen from within a vehicle, so stabilization features and quick access to gear are important.
A super-telephoto lens like a 600mm f/4 or a 100–500mm zoom is extremely useful here, especially for shooting across the wide-open pans and at larger waterholes like Okaukuejo. These lenses allow you to isolate subjects, compress scenes, and capture intimate behavior without getting too close.
For more flexible compositions or closer subjects—such as elephants approaching waterholes or predators resting nearby—a 70–200mm f/2.8 or 100–300mm f/2.8 lens is perfect. Pairing one long lens and one mid-range zoom on a second body lets you switch quickly when action unfolds at different distances.
A 24–70mm lens is great for environmental shots, vehicle compositions, and atmospheric moments—especially during sunrise drives or golden hour when the pan glows.
Since you’ll be dealing with dust constantly, pack an electronic blower, lens cloths, and sensor cleaning tools. Use beanbags or window mounts for stability—tripods are almost never practical in vehicles. CFexpress cards, fast readers, and power banks like the Goal Zero Sherpa 100 are also a smart addition if you’re staying at basic camps with limited charging points.
➡️ Check out the complete What’s in My Safari Camera Bag (2025) article to see what I use in the field and why.
Understanding Wildlife Behavior Through the Year
Etosha’s wildlife rhythms are heavily influenced by water availability. During the dry months, most species are concentrated around the permanent waterholes. This includes large herds of springbok, gemsbok, zebra, and wildebeest, as well as elephants and predators that follow them closely. The lack of vegetation in these months improves visibility and composition options.
As the rains begin in November, wildlife spreads out, and the park becomes more challenging to photograph—but also more atmospheric. Calving season begins, especially among the antelope species, which in turn draws opportunistic predators. This period is also excellent for bird photography, with raptors, owls, and migratory species arriving in large numbers. Fischer’s Pan in the east is particularly good for waterbirds and waders in the wet months.
Rhinos, elephants, and giraffes are seen year-round but tend to be more active near water sources in the dry season. Cheetahs and lions, on the other hand, are easier to find when prey is forced into tighter corridors near active waterholes.

Sunset scene near Namutoni.
Join Me in Etosha: Namibia Photography Workshops
Etosha rewards patience, planning, and a strong understanding of light and animal behavior. If you want to skip the guesswork and experience the best of the park—with optimized routes, prime-time light, and photo guidance tailored to your goals—join one of my Namibia photography workshops.

Best Time to Visit Africa for Photography
Choosing the best time to visit Africa for safari photography is one of the most important decisions when planning a photo trip. With its vast landscapes, varied ecosystems, and dynamic wildlife movements, Africa offers exceptional photographic opportunities year-round—but not all months are created equal. Timing impacts everything from light conditions to animal behavior, vegetation cover, and travel logistics. This guide will help you navigate the differences between seasons and regions, understand key wildlife events, and plan an itinerary that matches your photographic goals.

Dry vs. Wet Season: Understanding the Basics
Africa’s safari destinations generally fall into two main seasonal categories: the dry season and the wet (or green) season. Each has distinct advantages and challenges for photography.
Dry Season (typically May–October)
Wildlife visibility is at its peak. Water becomes scarce, concentrating animals around rivers, waterholes, and pans—creating consistent photographic opportunities.
Vegetation thins out, improving visibility and making it easier to track and photograph wildlife from a distance.
Clear skies and golden light dominate, especially in the mornings and late afternoons—ideal for dramatic backlighting and clean subject isolation.
Roads and trails are dry and easier to navigate, reducing travel complications.

Wet Season (typically November–April)
Lush landscapes make for vibrant, moody backgrounds—excellent for wide compositions and storytelling shots.
Birdlife is at its best, with migratory species in breeding plumage and increased activity around water bodies.
Many species enter breeding or calving seasons, leading to unique behavior, new life, and predator-prey interaction.
Rain showers can lead to dramatic skies, mist, and cloud formations, creating rich atmosphere for landscape and wildlife shots alike.

Month-by-Month Guide Across Regions
To make the most of your safari photography, it’s essential to consider both timing and location. Here’s a month-by-month breakdown of key regions and what photographers can expect:
January to March
Central Kalahari Game Reserve (Botswana): The wet season transforms the desert into a blooming savanna. Plains game like oryx, springbok, and hartebeest are plentiful, and big cats are highly active, using the thick grasses for cover.
South Luangwa (Zambia): The emerald season begins. Lush vegetation and flooded lagoons create mirror-like reflections, while elephants, hippos, and birdlife dominate the scene. Most places, however, are unreachable due to flooded roads.
Ngorongoro Crater & Southern Serengeti (Tanzania): Calving season for wildebeest attracts predators like lions and hyenas. Cloud cover offers diffused light, great for soft, low-contrast portraits.
April to June
Khwai & Moremi (Botswana): Early dry season brings clearer skies and optimal game viewing without the crowds. Ideal for leopard tracking and elephant herds crossing the Khwai River.
Ruaha & Selous (Tanzania): Fewer tourists, and wildlife becomes more concentrated as seasonal rivers begin to dry.
Etosha (Namibia): Shoulder season begins in May. Wildlife begins congregating near waterholes, offering dramatic interactions between prey and predators.
July to September
Masai Mara (Kenya): Peak of the Great Migration. Expect dramatic river crossings, dust clouds, and intense predator action. Also, large gatherings of photographers—planning ahead is essential.
South Luangwa (Zambia): This is prime time for leopards and lions. Dry riverbeds and orange skies make for classic African safari frames.
Mana Pools (Zimbabwe): Elephants standing on their hind legs to reach trees—a unique behavioral photo opportunity.
October to December
Chobe & Savuti (Botswana): Late dry season heat draws huge herds to remaining water sources. Excellent for elephant photography, lion dynamics, and dramatic dust light.
Khwai: High predator concentration continues. Expect golden light, low vegetation, and clean backgrounds.
Namibia’s Skeleton Coast & Sossusvlei: The contrast of wildlife against stark, arid desert backdrops is at its best. Think desert-adapted elephants, oryx on dunes, and lone giraffes under glowing skies.

Photographic Highlights by Season
Each season offers something unique for photographers:
Calving & birthing seasons: January–March in Serengeti (Tanzania) and Kruger National Park (South Africa)
Predator activity peaks: mostly in August–October in Etosha NP, South Luangwa NP, Lower Zambezi NP (dry season)
Bird migrations: November–February in Botswana, Zambia, Northern Namibia and Kenya
Elephant behavior: Best in dry season months (July–October), especially in Chobe, South Luangwa, and Tarangire
Big cat tracking: Stronger in Khwai (year-round), Mara (July–Sept), and South Luangwa (June–October)

Sample Itineraries Based on Season
Here’s a look at some of the real-world itineraries from my guided wildlife photography workshops, designed to align with peak conditions for photography and wildlife activity:
March – Patagonia Puma Tracking
Track wild pumas in the dramatic landscapes of southern Chile. This trip focuses on low-angle stalking shots, golden backlight opportunities, and minimalist compositions in open terrain.
May – Kalahari Safari Adventure (CKGR & Beyond)
A deep dive into Botswana’s Central Kalahari Game Reserve. Expect big cats, dramatic desert light, and the feeling of true wilderness—far from the crowds.
May – Iconic Namibia
From the dunes of Sossusvlei to the wildlife-rich pans of Etosha, this itinerary is built for diversity: landscapes, desert elephants, and classic big game.
September – South Luangwa (Zambia)
Leopard central. This trip takes place during the dry season, when wildlife congregates around the Luangwa River. Incredible for predator action, dust, and light.
October – Wild Namibia
This itinerary explores Damaraland, Etosha, and beyond—perfect for backlit elephants, dramatic skies, and a mix of arid and savanna ecosystems.
Final Tips for Choosing When to Go
Define your style: Do you prefer storytelling scenes, clean portraits, or intimate behavior? Let that guide your timing.
Understand trade-offs: Wet season offers mood and action; dry season gives you clarity, access, and consistency.
Factor in travel style: Self-drive safaris (e.g., Namibia or Botswana) are easier during dry months due to road conditions.
Use location-specific knowledge: Some parks are excellent year-round, like Khwai, while others—like CKGR—are best only during a short window.
📚 Need help deciding which safari fits your style? Download the free Wildlife Photography eBook for a deeper breakdown of gear, planning, and field techniques.

Ready to Experience These Seasons for Yourself?
If you’re serious about building a powerful wildlife photography portfolio—and doing it in a small group led by professionals who understand the light, the timing, and the animals—consider joining one of my upcoming workshops.
We photograph in the best locations at the best times, with itineraries built around real field experience. From the Kalahari to South Luangwa and Namibia’s deserts, every trip is crafted for photographers who want results.

Safari Photography Gear Guide: What I Pack for Africa
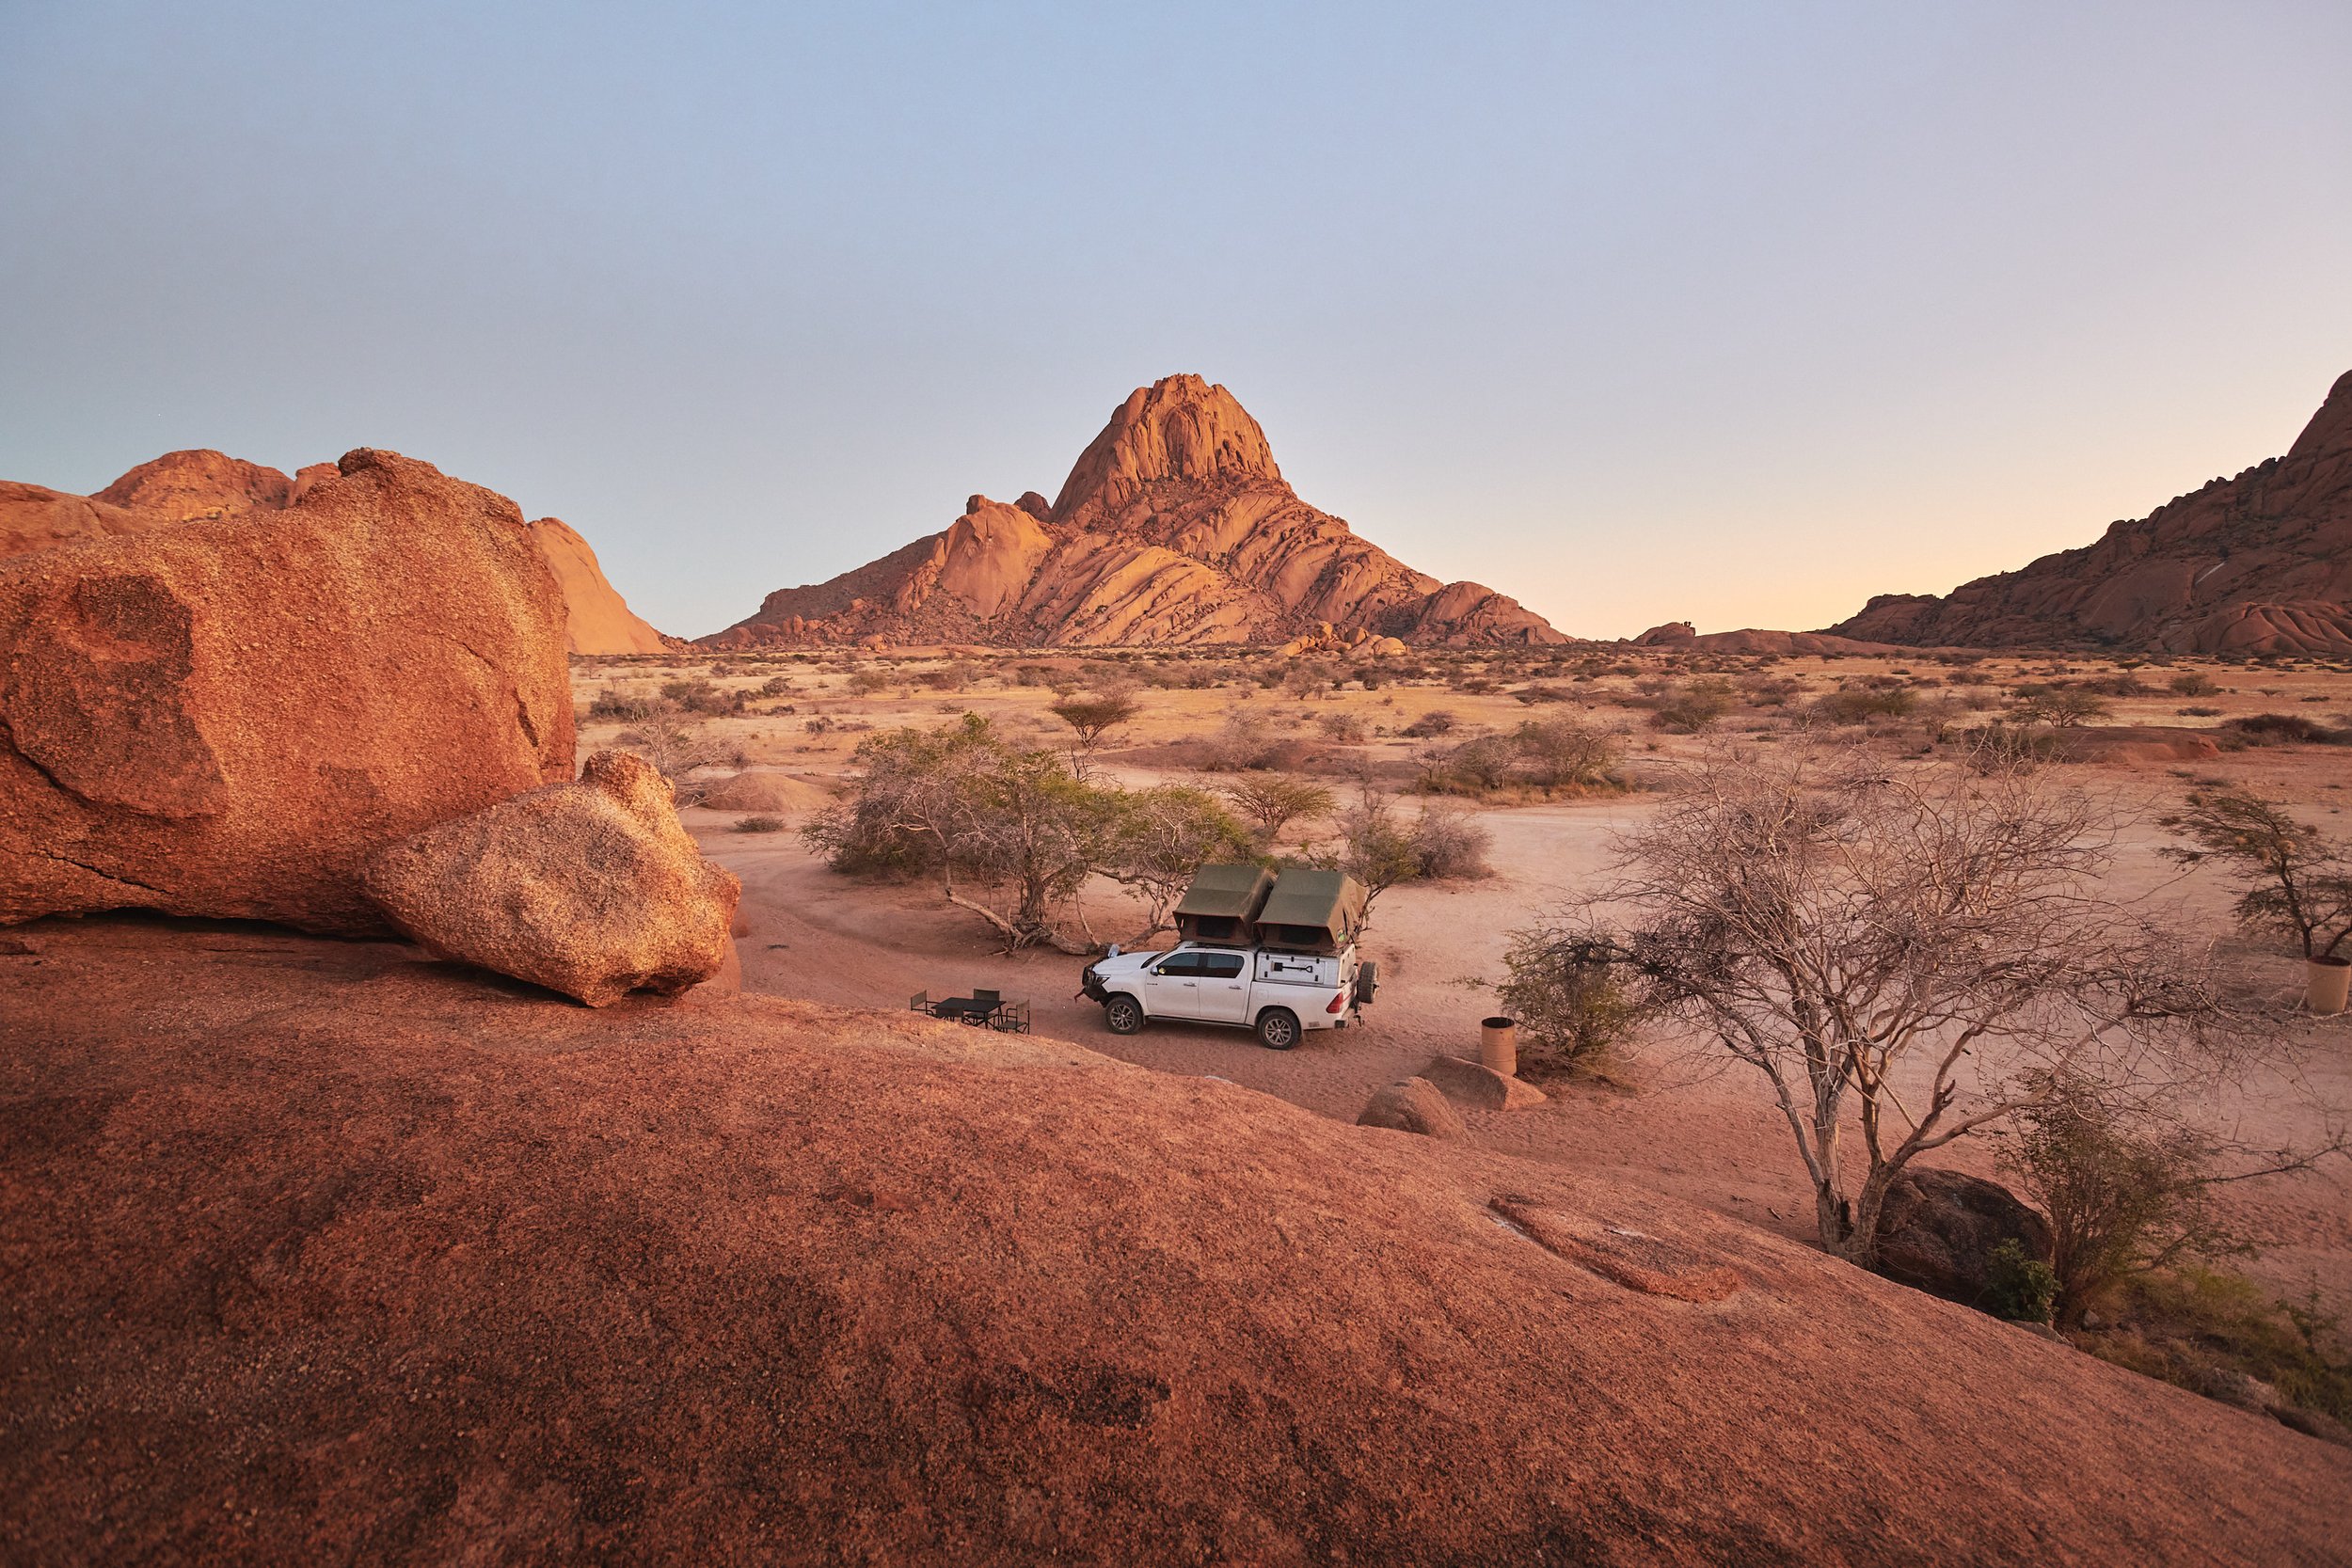
Camping in Spitzkoppe, Namibia
An African safari is the ultimate experience for wildlife photographers—one filled with incredible sightings, dramatic landscapes, and thrilling adventures. But capturing Africa’s stunning wildlife and vast landscapes requires thoughtful preparation as we have to travel through international airports and often reach our final location via small charter planes where space is limited or with long 4x4 transfers, where we must be careful not to damage our precious gear. As a consequence we cannot bring all the gear we want to on a safari; on the opposite, we have to be very selective so that we carry all we need and nothing more.
Over the years I've refined my gear choices balancing quality, versatility, and portability, ending with a gear kit that allows me to cover all situations while still keep it minimal.
Below, you'll find the exact gear list I rely on plus practical advice and scenarios illustrating why each item is essential. With the right equipment you’ll be ready to create stunning images under any condition on your next African adventure.

Shooting with R5 + Canon 100-500 somewhere in Damaraland, Namibia
📷 Cameras
Canon EOS R5
The Canon R5 is my primary choice for landscape photography and detailed wildlife portraits due to its exceptional 45-megapixel resolution and superb image quality. The R5’s advanced autofocus tracking system is incredibly reliable, ensuring your subjects are always perfectly sharp. The image quality is incredible and even in 2025 I don’t really feel the need to upgrade to the R5mk2. The 15 fps of the R5 are good for most situations and the autofocus is already incredible, and if I miss any photos with the R5 it certainly won’t be a camera’s fault. In terms of ISO, if properly exposed the R5 files are fully usable till 12.500 iso and, if careful, even up to 20.000.
When I’m using it mostly:
Landscapes
Adventure reportage
Wildlife scenes without a lot of action
Situations requiring heavy cropping without losing quality
Canon EOS R3
The R3 has a 24 mp sensor, shining in low light situations and in fast-paced wildlife photography, where animals often move unpredictably and rapidly. The autofocus is lightning-fast, even more than the already excellent R5, and when paired with the high frame rate of up to 30fps makes for an incredible tool that rarely (if ever) misses a shot. It’s also the best low-light performing camera on the market (together with the R1 that seems to be just matching the R3 low light capabilities), allowing me to go for fast shutter speeds even at dusk and opening new creative possibilities. I am confident shooting well above ISO 20.000, with usable files even at iso 50.000.
When it's most useful:
Action photography (running mammals, birds in flight)
Early morning or dusk photography when lighting conditions are challenging
Tracking fast-moving animals with absolute precision
Canon EOS R5C
With the same photo capabilities as the R5 (it doesn’t have IBIS - in body image stabilization - that doesn’t really matter when shooting wildlife with faster shutter speeds), the R5C features a video mode with the same operating system of Canon cinema line (C70, C80 etc.). This not only allow for a higher dynamic range than the R5 or the R3, but also makes the camera much more usable and the controls much more efficient when in video mode. Also the R5C has a built in cooling system, very handy to prevent the camera from overheating in the often hot safari days. I did some testing against the more recent R5mk2 but the R5C still looks a better option to me when it comes to video. It still has a slight advantage in dynamic range and the customizable controls make it for the perfect tool if you want the best quality in both photos and video.
When I’m using it mostly:
When I want to alternate still photos and videos while getting the top quality in both
Pro Tip:
An additional benefit of carrying two camera bodies is that you always have two different lenses ready to use without switching, that would cause exposing your sensor to dust—a constant concern on safari.

Friend and fellow photographer Jandre Germishuizen with a R5 and 400mm 2.8
📸 Lenses
Canon RF 15-35mm f/2.8
It’s one of my favorite lenses. It’s too short for wildlife but is always useful to have it around, allowing me to cover landscapes and documenting the adventure behind the scenes. Reaching 15mm in the wider range allows to get big scenes all into a photo, as well as shooting in tight spaces like a safari vehicle or inside a photo hide. If zoomed at 24mm or 35mm it becomes an excellent lens for environmental portraits. The aperture of 2.8 also plays a role as it’s just enough to use it for astrophotography as well.
When it's most useful:
Wide-angle landscape shots
Capturing environmental portraits, including your safari vehicle or camp life
Starry skies and astrophotography at remote African lodges
General reportage images
Canon RF 100-500mm f/4.5-7.1
My go-to lens for flexibility and responsiveness. It allows me to zoom quickly from mid-range wildlife portraits to distant action scenes, reducing the need to constantly reposition the vehicle and allowing me to include more or less of the habitat in my compositions. Of course the aperture is a bit of a limit, especially at dusk, but the flexibility given by the zoom range and the compact building makes it for an incredible tool that I always bring along; it often stays on my R5 or R5C.
When it's most useful:
Versatile for wildlife photography
Quickly adapting to changing wildlife scenarios without changing lenses
Capturing unexpected wildlife encounters that unfold rapidly as you can keep it always at hand and ready to shoot
Canon RF 400mm f/2.8 or 600mm f/4
The ultimate tools for dedicated wildlife photography, these lenses excels at isolating subjects and producing beautiful background blur. The price doesn't make them for everyone but the exceptional sharpness and large aperture ensure clear, dramatic wildlife portraits, even in low-light situations. While I own both I usually go for a 600mm on a safari, with some exceptions for the situations where I know I’ll be able to get really close to my subjects and also where I won’t be photographing very small subjects. In fact the bigger aperture of the 400m is an advantage only if we don’t need to crop the image in post processing. If we crop the relative noise will increase and we will loose that one-stop advantage, plus we loose some of the image resolution. For this reason my go-to for safari situations is still the 600 f/4.
When it's most useful:
Photographing shy or elusive animals like leopards, which require significant reach
Capturing animals at dawn or dusk with limited natural light
High-quality, intimate wildlife portraits with gorgeous bokeh
Pro Tip:
Using teleconverters like a 1.4x extender can extend the reach of your 600mm lens even further, providing unparalleled opportunities to photograph distant wildlife clearly.

Bee eaters. Canon R3, 600mm f/4 + 1.4x for an equivalent of 840mm f5.6
🔋 Essential Accessories
Extra Batteries:
We usually have regular access to electricity even in the most remote safaris, but it’s always a good idea to carry enough batteries to last at least a full day of shooting. During safari drives charging isn’t available and you'll be shooting thousands (sometimes tens of thousands) of images. You surely don’t want to find yourself trying to save battery in front of some amazing wildlife encounters.High-Speed Memory Cards:
Fast cards (such as CFexpress or high-speed SD cards) ensure your camera keeps up with rapid-fire sequences without filling the buffer. This is essential for action photography. Another benefit of high performing memory cards is that they tend to be more reliable and less prone to failure. Bring at least double the cards you expect to use on a full day - again, you don’t want to be in a situation where you can’t shoot because of a card. Cards are cheap compared to your cameras and lenses or even compared to the cost of being on a safari, so buy big and reliable cards. My choice is Angelbirds AV PRO CFexpress Type B; I carry 6x 256GB cards, that ensures me a couple days of shooting before I have to download them.Reliable Tripod:
It’s not mandatory for a safari, but if you plan on photographing also sunrise/sunset landscapes, low-light wildlife shots, astrophotography, and long-exposure photography then a light carbon fiber tripod will be very handy.Camera Cleaning Kit:
African safaris are notoriously dusty, especially during dry seasons (that tend to be the best for wildlife viewing). Regularly cleaning your gear prevents sensor dust spots and maintains image quality. I bring several brushes, a kit for cleaning lenses, a battery powered blower to dust off the gear and a classic manual blower. I also have with me a sensor cleaning kit with wet wipes; I rarely have to use it but I always have it in my bag.Laptop and Portable SSD Drives:
You can’t bring enough memory cards for a whole safari, and even if you can, it’s not recommended to leave your valuable files there without backing up your photos daily. To do that you will need a laptop and some hard drives. SSD drives offer fast, reliable file management and ensure your images remain safe throughout your trip. I usually bring my MacBook Pro 13’’ and 2x 4TB ssd hard drives; this will allow me to save 2 copies of everything, protecting my files from a possible disk failure.Binoculars:
Crucial for spotting wildlife from a distance before setting up your camera. They enhance your safari experience, giving you ample time to anticipate and capture unique behaviors.
🧢 Safari Apparel

Comfort and practicality are crucial during an African safari. Here’s a comprehensive clothing list to stay comfortable and safe:
Neutral-colored Clothing (khaki, olive, brown):
Helps blend into the environment. Avoid bright vivid and bright colors that stand out too much.Long-sleeve Shirts and Pants:
Provide sun and insect protection while remaining breathable and lightweight.
Wide-brimmed Hat:
Essential sun protection during long game drives.Fleece or Light Jacket:
Early mornings and late evenings can be surprisingly cold out in the savannah. Always bring a light insulated and windproof jacket. If you are going in the winter season (May to August in Southern Africa) consider also some light gloves and a beanie for morning game drives.Waterproof Jacket:
During rainy seasons unexpected downpours can occur quickly and having a waterproof layer will prove very handy. If you are traveling during the dry season you can leave it home.Buff or Scarf:
Shields you from dust and provides sun protection.
Pro Tip:
Avoid dark colors, especially blue or black, as they attract biting insects like tsetse flies.
👞 Footwear
Comfortable Hiking Boots or Trail Shoes:
Ideal for walking safaris, camps, and uneven terrains. These are very specific situations and you won't need it in most cases.Closed-toe Shoes:
Your main safari shoes must offer protection from insects, thorns, and rough terrain. While you won't be spending much time out of your safari vehicle you want something that will allow you to move comfortably on the rough savannah and bush, protecting your feet from rocks, vegetations and insects.Sandals or Flip-flops:
Great for downtime around lodges or camps.
Pro Tip:
Ensure all shoes are well-broken-in to prevent discomfort during your adventure.
🎒 Additional Safari Accessories
Insect Repellent: Vital, especially at dawn and dusk, in humid areas or during rainy season.
Sunscreen and Lip Balm: African sun is intense, even on cloudy days.
Headlamp or Flashlight: Essential at camps, especially at night.
Reusable Water Bottle: Hydration is crucial throughout safari days. While you can always get single-use plastic bottles, having a personal steel bottle is a much better option. You can fill it up anytime at the lodge or camp. If you can, bring an insulated bottle to prevent your water from getting boiling hot.
Dry Bags: Protect gear from dust, sand, and unexpected rain.
First Aid Kit: Include basics like antiseptic, painkillers, bandages, and any personal medications, a good first aid kit is essential if you are on a self drive safari adventure, where you must be able to solve any problem you might encounter. Not necessary if you are joining a guided safari tour.
📅 Join Me on an Exclusive African Safari!
Put these gear recommendations into action on one of my exclusive guided photography trips. We’ll explore stunning wildlife destinations like Namibia, Botswana, Zambia, and South Africa, where you'll have the chance to refine your skills and create unforgettable images.

Photographer's Guide to Sossusvlei: Capturing Namibia's Iconic Landscapes
Nestled within Namibia's Namib-Naukluft National Park, Sossuslvei is a haven for landscape photographers. Its towering red dunes (the tallest and oldest in the world), stark white clay pans, and ancient camelthorn trees offer a surreal canvas for capturing nature's artistry. Over the years I’ve been visiting Sossusvlei multiple times and those incredible views never fail to amaze me. However there are a few things I learned over time that I wish I had known earlier. Drawing from my experiences and insights from fellow photographers, here's a comprehensive guide to making the most of your photographic journey in this mesmerizing desert landscape.

1. Secure Accommodation Inside the Park
To truly capitalize on the enchanting light of dawn and dusk, it's imperative to stay within the park's confines. In fact, Sossusvlei operates with two main gates:
Outer Gate: Opens at sunrise and closes at sunset, restricting access during prime photography hours.
Inner Gate: Opens one hour before sunrise and closes one hour after sunset, granting photographers the coveted golden hours.
If you consider that from Sesriem you still have to drive 40 to 60 km to reach your shooting location (plus 7km on sand and 20 mins walking for Deadvlei) it’s clear that the outer gate timing won’t allow you to capture the beautiful golden hour on the dunes. For this reason is paramount to get accommodation inside of the park, past the outer gate.
Accommodations like the Sossus Dune Lodge, Sesriem NWR Campsite, and Oshana Camp are situated inside the inner gate. Staying here ensures you're on location when the light is at its best. Given their popularity, it's advisable to book well in advance - and I mean, WELL in advance. Accommodation inside the park is limited and might fill up very soon. I’d suggest you to book at least 6 months before your visit to secure your access.

2. Plan Your Shoots Around Optimal Lighting
The desert's lighting transforms dramatically throughout the day:
Sunrise: Soft, golden hues illuminate the dunes, creating long shadows and enhancing textures.
Midday: Harsh light can wash out colors and reduce contrast, making it less ideal for photography.
Sunset: Warm tones return, casting a magical glow over the landscape.
Prioritize shooting during the early morning and late afternoon to harness these favorable conditions. Midday can be reserved for rest, scouting locations, or capturing abstract shots that play with the intense sunlight.
My go-to daily schedule in Sossusvlei includes waking up very early, having a quick coffee and packing up so that we can be at the gat at least 10 minutes before opening. This will allow me to be amongst the first car to drive into the park. At sunrise I usually go towards Deadvlei, shooting for about 2 hours till the light becomes too harsh and the main tourists start coming in from the outer gate. I will then leave and drive back to Sesriem for a good brunch and some hours of rest in the shade before heading back at mid afternoon, usually around dune 45 or dune 39, to find my spot for the sunset session.
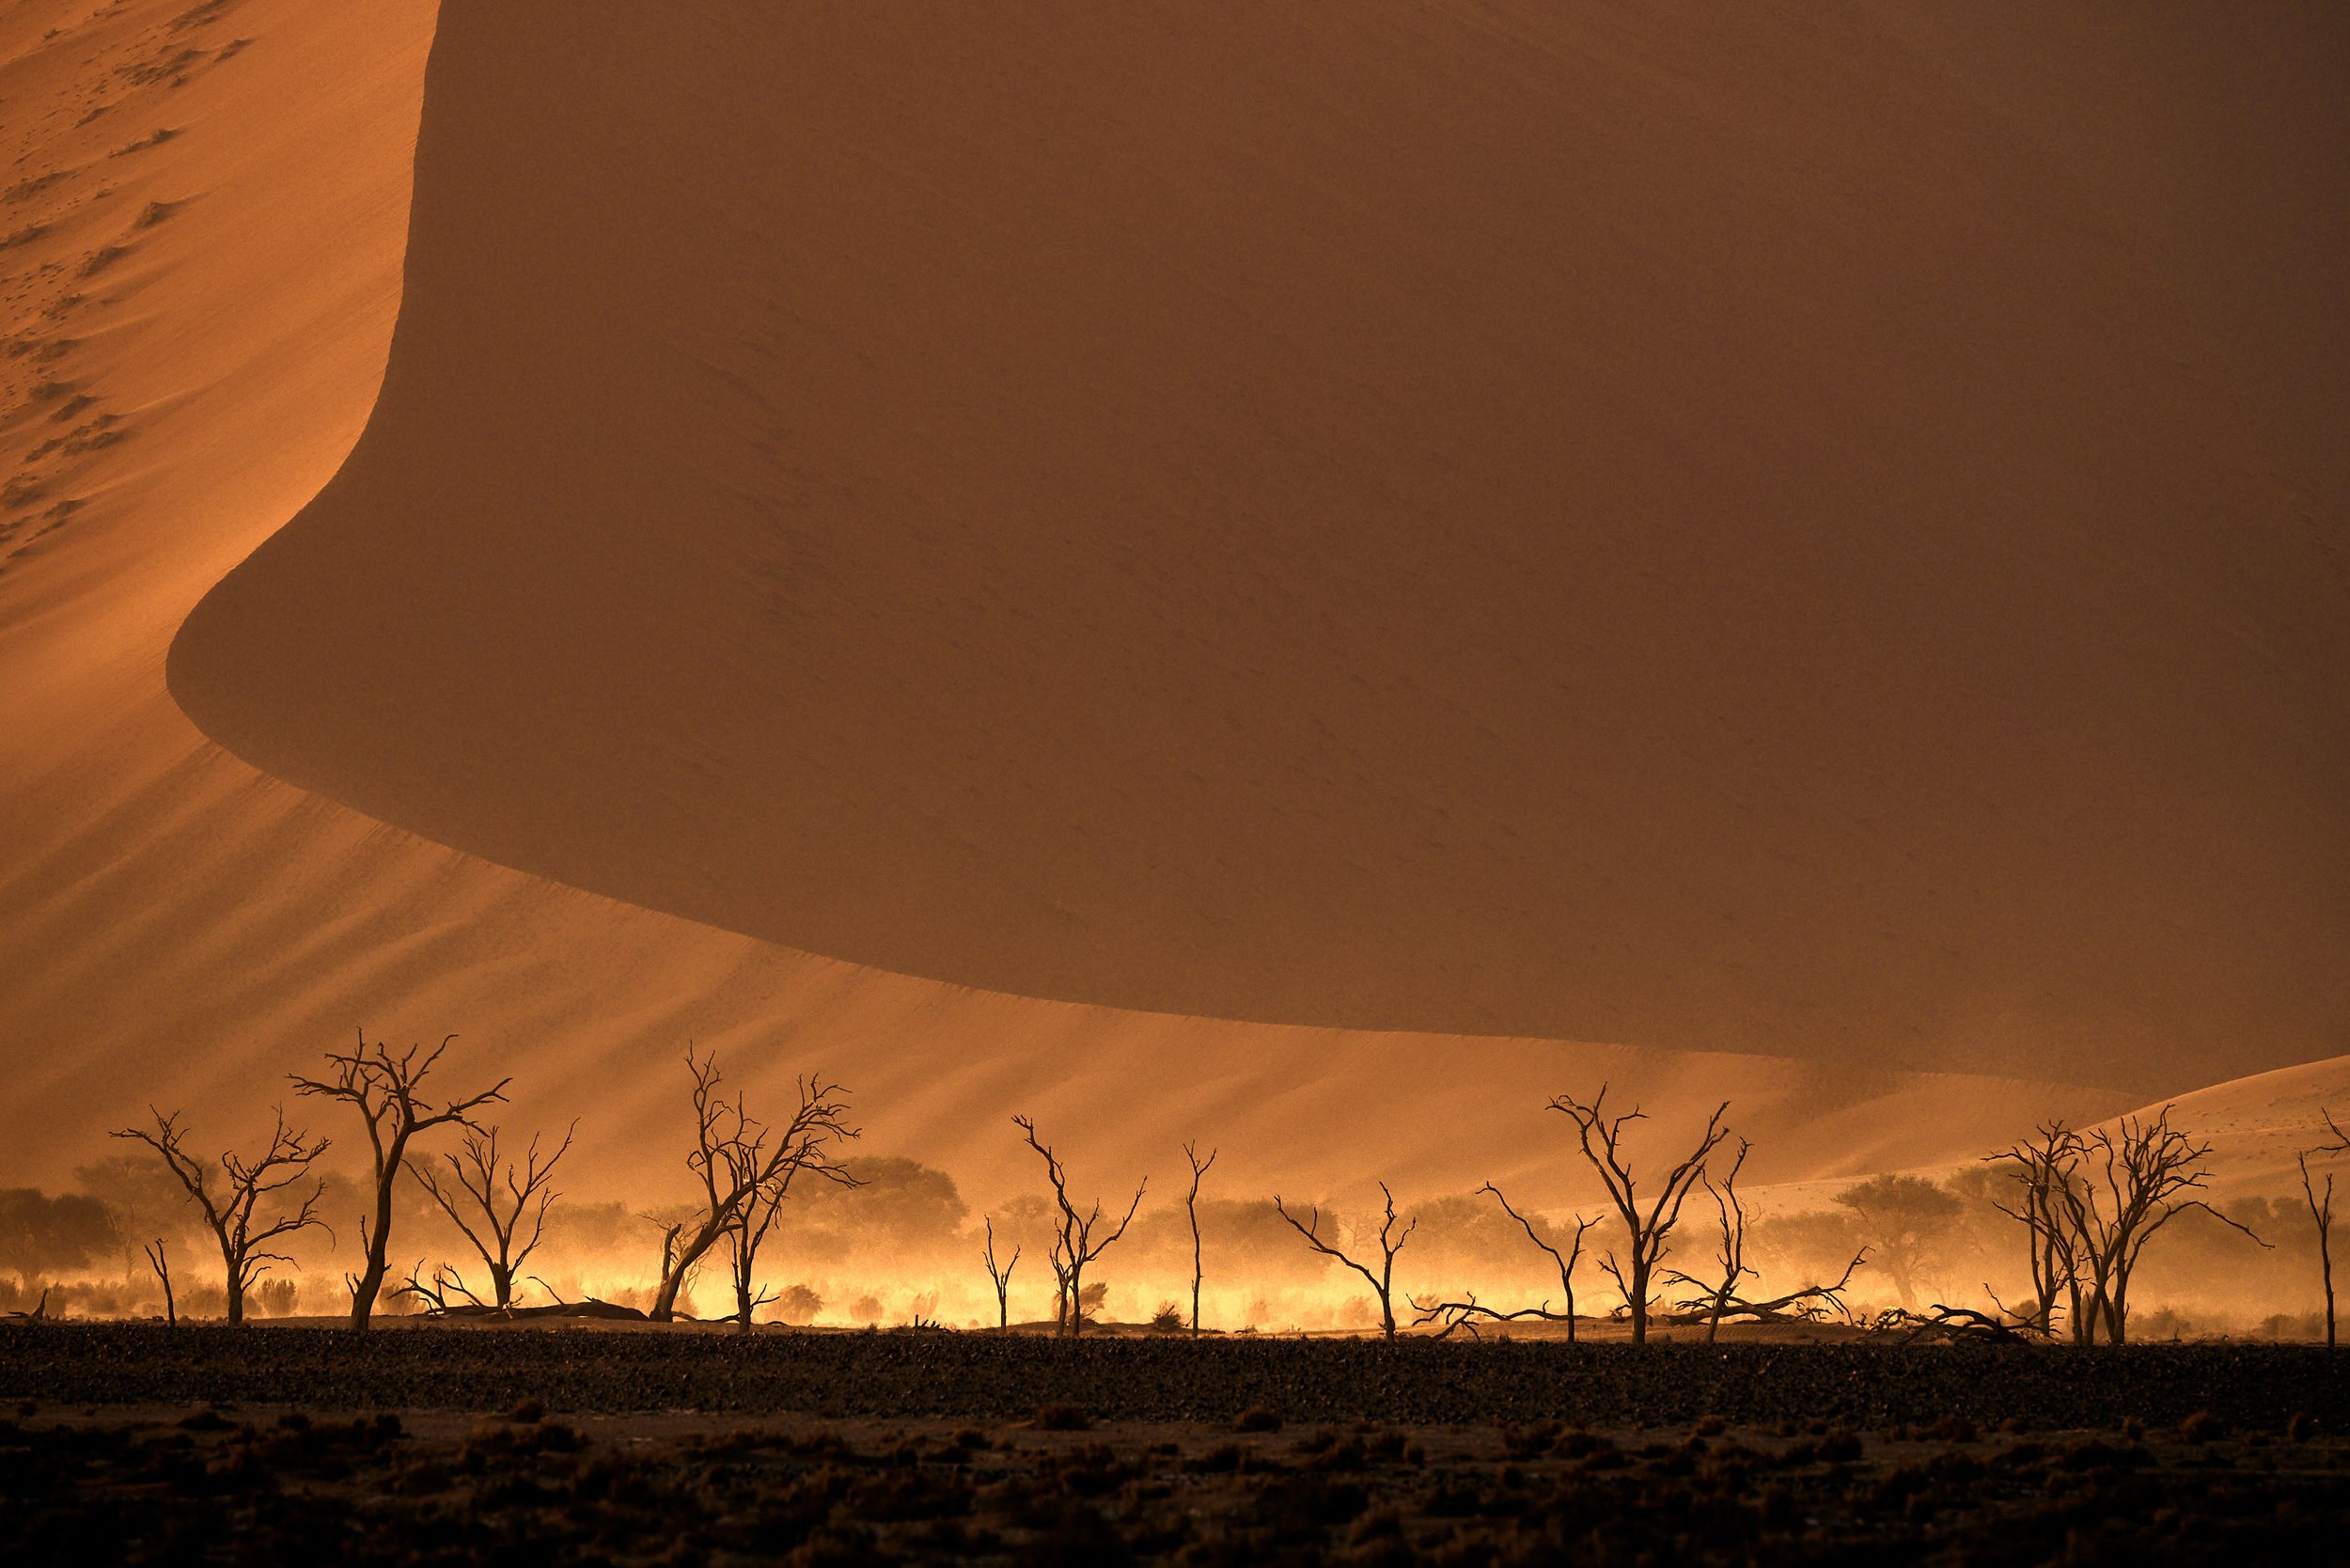
3. Equip Yourself with Essential Gear
The unique environment of Sossusvlei demands specific equipment:
Lenses: you can use anything from super wide to super telephoto, but expect to be shooting more in the mid telephoto range. The landscape is very empty and vast and the telephoto helps compressing elements, making for interesting, minimal compositions.
Tripod: Essential for stability during low-light conditions and for precise compositions. While you can always shoot wide open, if you are going for stylized, minimalist landscapes my advice is to stop down to f8 or f11, especially on telephotos, so that all the lines in your frame are sharp and crisp.
Filters: I rarely use polarizers but Sossusvlei is one of the exceptions. The dunes are reflecting an incredible amount of light and using a polarizer will improve dramatically the contrast in your image.
Cleaning Kit: Dust and sand are unavoidable here, and it’s paramount to bring some camera cleaning tools. Expect to be cleaning your gear multiple times a day, and try to avoid changing lenses out in the dunes to prevent dust to reach your camera’s sensor.


4. Explore Iconic and Lesser-Known Locations
Sossusvlei offers a plethora of photographic opportunities:
Deadvlei: This clay pan, adorned with centuries-old dead camelthorn trees set against white sands and encircled by red dunes, provides a stark and captivating contrast. Photo opportunities are endless, but it might also be quite challenging. It’s the furthest location you can access in Sossusvlei: form the inner gate in Sesriem you must drive the 60km tar road to the end, then you switch on your 4x4 and drive about 7km on sand. Once you reach the parking area you still have to walk approx 20 min over a small dune to access it.
Dune 45: Easily accessible and famed for its elegant shape, this 80-meter-high dune is often dubbed "the most photographed dune in the world." The number indicates the distance from the gate, meaning that we will have to drive 45km back to Sesriem. This is a go-to spot for sunset sessions, as we can stay till the sun is set before driving back.
Big Daddy: Standing approximately 325 meters tall, it's one of the highest dunes in the area and offers panoramic views for those who undertake the climb. You can do it after a sunrise session in Deadvlei, but remember to bring with you a lot of water - it gets crazy hot out there!
Hiddenvlei: A more secluded spot, it’s a good option for photographers that don’t want to deal with the crowds in Deadvlei.

5. Respect the Fragile Ecosystem
The beauty of Sossusvlei comes with a responsibility to preserve its delicate environment:
Stay on Designated Paths: Avoid creating new trails that can lead to erosion.
Avoid Touching Ancient Trees: The dead camelthorn trees in Deadvlei are estimated to be around 900 years old; avoid touching or, worst, sitting on them.
Carry Out All Waste: Ensure no litter is left behind, maintaining the pristine nature of the desert.
Stay within the speed limits: The limit inside the park is 60km/h. If you are ready at the gate at opening time, there’s no need to speed. Also avoid staying too late in the park and then speed to get out in time. There’s plenty of orix running around when is dark and it’s very likely to end in a car accident when driving at night.
Do not use drones: Drones are not allowed in the park. Unless you apply for a permit trough the park service, avoid using them or you can get a very high fine.

Photographing Sossusvlei is a transformative experience, offering scenes that seem otherworldly. By planning meticulously, respecting the environment, and embracing the unique challenges of desert photography, you'll capture images that resonate with the timeless beauty of Namibia's iconic dunes.
Join Our Photography Workshops
If you're eager to explore Sossusvlei and other breathtaking landscapes with guided expertise, consider joining one of my photography workshops.
We offer tailored experiences that cater to various skill levels, ensuring you leave with both stunning images and enriched knowledge.
For more infos and inspiration about Sossusvlei check out this video guide:

Wildlife Photography Workshops: Best Locations to Elevate Your Skills in 2026
Discover the best locations for wildlife photography workshops in 2026! From the vast savannas of Africa to the icy landscapes of the Arctic, find top destinations to refine your skills, capture stunning wildlife shots, and learn from expert photographers.
Imagine standing in the middle of the Serengeti, camera in hand, as a pride of lions moves through the golden grass at sunrise. Or capturing the mesmerizing dance of the Northern Lights above a herd of reindeer in Svalbard. Wildlife photography workshops offer the perfect blend of adventure, learning, and hands-on experience in breathtaking locations around the world!
In this guide we’ll explore the best destinations for wildlife photography workshops, detailing what makes each location unique, what wildlife you can expect to photograph, and key factors to consider when choosing the right workshop for your skill level.
Whether you’re a beginner looking to master camera settings or a seasoned pro seeking rare wildlife encounters, these destinations will take your photography to the next level!

A young ibex in the Italian Alps
What Makes a Great Wildlife Photography Workshop?
I’ve been on both sides of a wildlife photography workshop - first as an eager participant, then as an instructor leading groups into some of the world’s most breathtaking ecosystems. And let me tell you, not all workshops are created equal. A great wildlife photography workshop isn’t just about snapping cool pictures; it’s about learning, growing, coming home with shots you never thought you’d be able to capture and with memories you’ll cherish for a lifetime. But what is that separates an unforgettable experience from a mediocre one?
Expert Guidance from Seasoned Wildlife Photographers
A workshop is only as good as the person leading it. I’ve been on trips where the “guide” was just a tour operator with a camera, and let’s just say... it showed. A real wildlife photography mentor doesn’t just know their way around a camera; they understand animal behavior, lighting conditions and how to adapt when nature doesn’t cooperate (because trust me, it won’t always).
Look for workshops led by photographers with actual field experience - not just in photography, but in the specific environment you’re visiting. Someone who has spent years photographing African lions or Arctic foxes will have a sixth sense for when and where to be for the best action. They’ll teach you how to anticipate behavior, work with natural light, and fine-tune your settings in real time. That kind of expertise is invaluable.
Prime Locations with Diverse Wildlife Populations
You can be the best photographer in the world but if the location isn’t right, you won’t get the shots. I’ve made the mistake before - signing up for a trip that promised incredible wildlife but delivered little more than distant specks through a telephoto lens.
A great workshop takes you to prime locations during the best seasons. Think of the Serengeti during the Great Migration, the Pantanal for jaguars or Alaska for grizzly bears fishing in rivers. These aren’t just scenic places - they're where you’ll have the highest probability of witnessing jaw-dropping animal behavior.
And don’t overlook local knowledge. The best workshops often partner with expert guides who live in the area, ensuring you get to the right spot at the right time. A workshop that skimps on local expertise? Big red flag.

Wild camping in Damaraland, Namibia. I visited the country more than 20 times before I led my first workshop there.
Small Group Sizes for Personalized Attention
This one’s non-negotiable. I’ve been on trips where there were too many photographers crammed into a single safari vehicle, and it was a mess - elbows knocking, lenses clashing and everyone fighting for the same angle.
A great wildlife photography workshop keeps group sizes small, usually around 4 to 6 participants. This ensures that the instructor has time to give personalized feedback and that everyone gets a fair shot (literally). Small groups also mean more flexibility. If a leopard suddenly appears on the opposite side of the vehicle, you want to be able to reposition quickly - not wait for five people to shuffle out of the way.
Ethical Wildlife Photography Practices
This is a big one. I’ve seen workshops where photographers push too close, bait animals, or otherwise disrupt wildlife just to get “the shot.” It’s frustrating and, frankly, unethical.
A responsible wildlife photography workshop follows ethical guidelines, keeping a respectful distance, never baiting or disturbing animals, and educating participants on how to capture images without causing harm. If a workshop doesn’t have a clear stance on ethics, that’s a major red flag. The best leaders prioritize conservation and responsible storytelling over sensationalist images.
Ideal Seasons for Capturing Stunning Animal Behavior
Timing is everything in wildlife photography. If you’re hoping to photograph brown bears fishing for salmon, you need to go in late summer. Want snow leopards? Winter in the Himalayas is your best bet. Migration patterns, mating seasons, and even daily weather conditions affect what you’ll see and how you’ll photograph it.
A high-quality workshop isn’t just set in the right location—it’s scheduled during the ideal time to capture dynamic wildlife moments. A good leader will also help you understand how to work with the seasonal conditions, whether it’s low light in the Arctic winter or the harsh midday sun in the savanna.

Our local guide looking for animals on the banks of Chobe river, Botswana.
Best Locations for Wildlife Photography Workshops in 2025
Wildlife photography workshops are one of the best ways to improve your skills while immersing yourself in some of the most incredible natural environments on the planet. Whether you’re after big cats on the hunt or mountain wildlife in the Alps, 2025 is shaping up to be an exceptional year for wildlife photography. Here are the top destinations for workshops, each offering something unique for photographers of all levels.
1. Serengeti National Park, Tanzania
If there’s one place that consistently delivers mind-blowing wildlife photography opportunities, it’s the Serengeti. This iconic park is home to the Great Migration, where over a million wildebeest, zebras, and gazelles thunder across the plains, pursued by lions, cheetahs, and crocodiles lurking in the rivers. The sheer density of wildlife means incredible sightings are almost guaranteed.
Best time to visit: January to March is prime time if you want to photograph the baby boom—when thousands of wildebeest calves are born each day, attracting big cats and scavengers. The lush green season offers stunning contrasts, dramatic skies, and fewer crowds.
A well-planned workshop here will take you to key areas where the action is unfolding, ensuring you get the best vantage points for predator-prey interactions, intimate portraits, and stunning landscape shots with wildlife in scale.
2. Damaraland and Etosha National Park, Namibia
Namibia is wild, remote, and surreal - a true photographer’s paradise. The combination of rugged desert landscapes and unique wildlife makes it one of the most special places for a wildlife photography workshop. Damaraland, in particular offers a rare chance to track desert-adapted elephants and rhinos across Mars-like terrain, while Etosha National Park provides incredible wildlife congregations around the waterholes.

Waterhole scene in Etosha.
Best time to visit: May to October is the dry season, when wildlife congregates around water sources, making sightings more predictable.
A workshop here often includes exclusive access to off-the-grid locations - far from tourists, where you can spend time tracking animals, photographing against Namibia’s golden light and capturing scenes that feel truly untouched. Then, there’s Etosha, famous for its mirage-like salt pan, where lions, oryx, and giraffes gather in striking compositions.
See my full Etosha NP photography guide

Desert elephants in Damaraland.
3. Yellowstone National Park, USA
I’ve not been there myself yet, but according to a few trusted friends and fellow photographers, Yellowstone is America’s crown jewel for wildlife photography. The mix of majestic landscapes and powerful wildlife makes it an incredible destination. Bison moving through steam-filled geysers, wolves in the early morning mist, and grizzly bears hunting in meadows—this place is pure magic.
Best time to visit: Winter. It’s cold, challenging, and absolutely worth it. The snow-covered landscapes create the perfect contrast for wildlife, and the animals are more active in their search for food.
Winter workshops focus on capturing the raw beauty of wildlife in extreme conditions, perfect for honing skills in exposure, composition, and storytelling. If you want those National Geographic-style shots of a wolf piercing through the white-out conditions, this is your place.
More Yellowstone infos here

After sunset during a workshop in South Luangwa, Zambia.
4. South Luangwa National Park, Zambia
Leopards are notoriously elusive…except in South Luangwa. This park is one of the best places in the world for spotting and photographing these sleek, nocturnal hunters. It’s also home to wild dogs, one of Africa’s rarest and most exciting predators to photograph.
Best time to visit: The dry season (July - October) is the best time for photography, as water sources shrink and wildlife congregates. During the wet season (December to April) most camps and lodges are closed due to access and flooding problems.
A standout feature of workshops here is the option for walking safaris, a totally different experience from photographing from a vehicle. You’ll learn to anticipate animal behavior, practice low-light photography and capture intimate images without disturbing the scene.

Leopardess with her meal on a tree in South Luangwa NP, Zambia.
5. Svalbard, Norway (Arctic Wildlife)
On of my top-of-the-list destinations for 2025, Svalbard is as wild as it gets. It’s one of the few places on earth where you can photograph polar bears in their natural habitat, along with walruses, Arctic foxes, and breathtaking ice landscapes.
Best time to visit: April - September, when there’s still plenty of ice, but enough daylight for long shooting hours.
Workshops here teach the unique challenges of cold-weather photography, ensuring your gear doesn’t fail when you’re face-to-face with a polar bear on the ice. The Arctic light is soft and ethereal, making even the simplest shots look otherworldly.
6. Torres del Paine National Park, Chile
If you dream of photographing a wild puma in Patagonia, this is where you need to be. Torres del Paine is the world’s best location for puma tracking, with skilled local guides knowing exactly where to find these elusive big cats.

A female puma during my last trip to Patagonia.
Best time to visit: October to May, when pumas are most visible, and the landscapes are at their most dramatic.
In addition to pumas you’ll photograph guanacos, Andean condors, foxes, and jaw-dropping mountains, often with dynamic weather adding an extra layer of drama to your shots.
7. Europe
Europe might not always come to mind first for wildlife photography, but it offers a diverse range of incredible workshops:

Fox in Gran Paradiso National Park, Italy.
Slovenia, Slovakia, Croatia, and Finland: Perfect for brown bear photography, using professional hides to capture natural behavior.
The Alps (Italy, France, Switzerland): Stunning backdrops for ibex, chamois, golden eagles, and bearded vultures.
Spain: The Iberian lynx, one of the rarest wild cats in the world, is an absolute must-photograph.
Norway: Musk oxen in Dovrefjell, an experience that takes patience and endurance.
Finland and Sweden: Wolves, owls, and birds of prey, often from hides designed for ultra-close encounters.
Best time to visit: Varies depending on the species—winter for owls, summer and autumn for bears, early spring for ibex, early winter for chamois. Most of these environments are close to human settlements so workshops here often involve tracking skills, long-lens techniques, and ethical photography practices.

Brown bear in Slovenia.
8. Antarctica
This is the ultimate adventure for wildlife photographers. You’ll find yourself surrounded by thousands of penguins, seals, and ice formations that defy imagination.
Best time to visit: November - March, when the Antarctic summer provides better access and light.
Workshops here focus on extreme environment photography, capturing the essence of isolation, survival, and untouched beauty.
9. Central Kalahari Game Reserve, Botswana
The Central Kalahari is raw, untamed, and utterly mesmerizing. This vast, arid wilderness is home to the famous black-maned lions, cheetahs, and desert-adapted wildlife that thrive in one of the toughest ecosystems on Earth.
Best time to visit: December - April for the zebra migration and lush landscapes, but year-round for incredible wildlife encounters.
Workshops here emphasize tracking skills, patience, and understanding light in a harsh environment. It’s an exclusive, off-the-beaten-path experience—perfect for those wanting a truly wild adventure.
Want expert guidance and a front-row seat to some of the best wildlife encounters on the planet?
Check out my upcoming wildlife photography workshops and join me on an unforgettable journey to capture nature’s most extraordinary moments!
How to Choose the Right Wildlife Photography Workshop
Picking the right wildlife photography workshop isn’t just about finding an exciting destination; it’s about choosing an experience that matches your skill level, goals, and expectations. Trust me, I’ve seen photographers make the mistake of jumping into a trip that was way beyond their ability, and it can be frustrating. You don’t want to be that person struggling with camera settings while everyone else is nailing the shot of a lifetime.
Consider Your Skill Level

Paolo looking for ibex during a recent workshop in Gran Paradiso National Park, Italy.
This is the first and probably most important factor. If you’re a beginner, avoid workshops that focus on highly technical or fast-paced photography, like birds in flight or nocturnal predators. I’ve met people who booked expensive safaris to places like Svalbard, only to realize they had no idea how to track focus on a polar bear, let alone the abundant birds you can find up there. Start with something more forgiving, like bear photography in Europe or a trip to Etosha in Namibia, where stationary wildlife around waterhole makes conditions not as challenging and where you can practice composition and settings without too much pressure.
Intermediate photographers can take on slightly more challenging environments, where light, speed, and weather conditions become more unpredictable. This might mean photographing predators on the hunt or learning to work in low-light conditions. And if you’re advanced, you’ll likely want a workshop that offers more than just photography basics - think specialized trips focusing on rare wildlife behaviors, remote locations, or advanced post-processing techniques.
Group Size Matters
Bigger isn’t better when it comes to photography workshops. A small group means more one-on-one instruction, better shooting positions, and a more immersive experience. I once joined a 12-person workshop in Africa, and let’s just say it wasn’t ideal—half the time, we were fighting over space in the vehicle, and the instructor barely had time for individual feedback. Now, I always recommend workshops with six participants or fewer, especially if you’re serious about improving.
Choose an Instructor Who Knows Photography, Not Just Wildlife
Not all guides are photographers and not all photographers are good teachers. Look for workshops led by professionals with strong wildlife photography experience - someone who understands camera settings, light, and composition in tough environments. The best instructors blend technical expertise with field experience, ensuring you’re in the right place at the right time and can actually get the shot.
Pay Attention to Seasonal Factors
Wildlife photography is all about timing. Seasons affect everything, from migration patterns to breeding behaviors to light quality. A winter trip to Yellowstone, for example, gives you dramatic snowy landscapes and frost-covered bison, while the same location in summer might feel overcrowded and uninspiring. If you’re after specific animal behavior, research the best time of year to see it. Many pros schedule workshops around peak action, like the wildebeest migration in the Serengeti or the puffin breeding season in Iceland.
Prioritize Ethical Wildlife Photography
Finally, choose workshops that respect wildlife and their habitats. Ethical wildlife photography means no baiting, no disturbing animals for the shot, and no overcrowding sensitive areas. I once saw a group of photographers surround a stressed-out fox just for a close-up—completely unacceptable. Responsible workshops follow ethical guidelines, keep a respectful distance, and focus on conservation. Some even contribute to local projects, ensuring that your trip supports wildlife protection rather than exploitation.

Not only wildlife…here our safari vehicle during a transfer between locations in Namibia.
Do Research on the Location and Species You’ll Photograph
One of the biggest mistakes I see people make is showing up unprepared. If you’re heading to the Maasai Mara, for example, you should know that early mornings are prime time for lion activity. If you’re doing a wildlife photography workshop in Borneo, understanding the habits of orangutans will help you anticipate their movements.
Before your trip, dig into the details of your destination. What time of year offers the best sightings? What’s the typical behavior of the animals you’ll be photographing? I remember my first trips to Namibia, when I was struggling a lot to find any big cats. Back then I thought it was just a matter of driving around and hoping for the best. Now I know the truth: back then I had no idea where to look. If I had done more research, I would have avoided midday hours as lions and leopards are hiding in the shade at that time of the day. I would have then looked for waterholes in late evenings, or checked on scavengers activity to locate lions kills.
A little prep goes a long way. Watch documentaries, read wildlife guides and check recent trip reports from photographers who have been there. This kind of groundwork means you won’t waste time figuring things out when you’re already in the field.
Practice Camera Settings Before the Trip to Avoid Missing Shots
Wildlife doesn’t wait for you to fumble with your camera. I’ve seen it happen too many times. Someone spots a cheetah sprinting across the plains, they raise their camera… and miss the shot because they were still in landscape mode from the day before.
Before your workshop, practice adjusting settings on the fly. Get comfortable switching between shutter speeds, ISO, and aperture without looking. A good exercise? Go to a park within your city and photograph birds in flight; it’ll teach you how to track fast-moving subjects and adjust settings quickly.
Be Patient—Wildlife Photography Requires Time and Persistence
Patience isn’t just helpful, it’s essential. Unlike landscape photography, where mountains don’t run away, wildlife photography is unpredictable. You could wait hours for a leopard to descend from a tree or a bear to step into the perfect patch of light.
During a wildlife photography tour in Zambia, I spent three days tracking a pride of lions. Just when we thought we’d lost them, they suddenly appeared at sunset, playing in golden light. That one moment made all the waiting worth it.
Bring a mindset that embraces the process. Enjoy the quiet moments in nature. Even if the perfect shot doesn’t happen, you’re still experiencing something incredible.

Boat safari on the Kwando river, Namibia.
Engage with Instructors and Fellow Photographers for Learning Opportunities
Your instructor has years of experience, so don’t be shy about asking questions. Need help with wildlife photography camera settings? Ask. Curious about composition techniques? Pick their brain. And don’t overlook your fellow participants. Some of the best tips I’ve picked up have come from chatting with other photographers over dinner.
Respect the Wildlife and Follow Ethical Photography Guidelines
No photo is worth disturbing an animal. Ethical wildlife photography means keeping a respectful distance, avoiding baiting and not stressing animals for the sake of a shot. In national parks, follow guidelines and listen to guides; they’re there to protect the wildlife as much as to help you get great images.
A simple rule? If an animal changes its behavior because of you, you’re too close. I once watched a photographer in Chobe NP, Botswana, get too close to a desert elephant. The elephant flared its ears - a clear warning - but the guy didn’t back off. Moments later, the elephant mock-charged, sending dust flying. It could’ve ended badly.
Be patient, stay respectful, and you’ll capture authentic, natural moments—without harming the animals in the process.
Conclusion
Wildlife photography workshops are more than just a chance to take amazing pictures—they’re immersive experiences that push you to grow as a photographer while exploring some of the world’s most breathtaking ecosystems. Whether you’re tracking pumas in Patagonia, waiting for the perfect shot of a lion in the golden light of the Serengeti or braving the Arctic chill to capture polar bears on the sea ice, the right workshop can elevate your skills and deepen your connection to the wild.
The best part? You don’t have to go at it alone. A well-structured workshop puts you in the right place at the right time, surrounded by like-minded photographers and experienced guides who can help you refine your craft. You’ll return home not just with stunning images, but with new techniques, a sharper creative eye, and unforgettable memories.
Want expert guidance and a front-row seat to some of the best wildlife encounters on the planet?
Check out my upcoming wildlife photography workshops and join me on an unforgettable journey to capture nature’s most extraordinary moments!

Seasonal Guide: Best Times to Photograph Wildlife in Africa
Discover the best times to photograph wildlife in Africa with this seasonal guide. Learn when to visit for iconic migrations, predator action, and stunning landscapes for wildlife photography.
Africa is a paradise for wildlife photographers, but timing is everything! Whether you're chasing the Great Migration, looking for big cat action or dreaming of misty rainforest shots, each season offers something unique. In this guide, I'll break down the best times to visit Africa for wildlife photography, helping you plan your next epic adventure.

Dry season in South Luangwa NP, Zambia
Why Timing Matters in Wildlife Photography
If there's one lesson wildlife photography has hammered into me, it's that timing is everything. I learned this the hard way during my first trips to Africa. I had imagined golden sunsets, crisp shots of big cats, and dramatic landscapes. Instead, I arrived right after the wet season; while it was technically a good time of the year for safari, thick vegetation hid most of the animals and the abundant water sources deep in the bush veld kept most predators from coming closer to the camps waterholes. Sure, it had its own beauty—lush green backdrops and dramatic skies—but I quickly realized that knowing the right season for photography makes or breaks a trip.

A shot from my first every night on a safari camp. Okaukejo, Etosha National Park, Namibia
The Role of Seasons in Wildlife Behavior and Photographic Opportunities
Seasons dictate everything in the animal kingdom—movement, feeding, mating, and even the way animals interact with their surroundings. If you’re after predator-prey action, for example, you’ll want to be around when young animals are born. In places like the Serengeti and Masai Mara, the calving season (January–March) is a feast for lions and cheetahs, making it the perfect time to capture intense moments of survival.
Migration patterns also change with the seasons. The Great Migration, one of the most jaw-dropping wildlife spectacles, peaks in July–October when millions of wildebeest cross crocodile-infested rivers. But if you show up in the same spot in December? You’ll just get endless plains of grass with barely a hoof in sight.
Also for bird photographers seasons are just as critical. Wet seasons (November–April) bring an explosion of migratory bird species, with colorful flocks arriving from Europe and Asia. You’ll get vibrant plumage, dramatic mating displays, and a chance to shoot rare species in their breeding grounds.
Dry Season vs. Wet Season: How Conditions Affect Animal Visibility
Every photographer wants clear, uninterrupted shots of animals in their natural environment. But what many don’t realize is how much the seasons affect visibility.
Dry Season (May–October)
Animals gather around water sources; this happens more and more as dry season progress and makes it easier to locate and photograph wildlife
Shorter grass and bare trees mean less obstruction for clean compositions
There’s usually a lot of dust in the air, making for stunning golden backlit shots but also potential lens issues
The harsh midday light is very challenging for exposure, but is not a big problem as it’s also the part of the day when wildlife is less active; on the opposite, sunrise and sunset are just magical
Wet Season (November–April)
Thick foliage makes it tougher to spot and photograph animals
One of the advantages of traveling in the wet season is that there are much less visitors around, making for more intimate shooting experiences
We can see stunning green landscapes, dramatic skies, and baby animals
Rain and humidity can be challenging, so gear protection is a must, and slippery and muddy roads can make travel harder.

Green season in Namibia. While it makes for vibrant colors, spotting animals is much more difficult in the thick vegetation
Impact of Light, Dust, and Weather on Photography
Also the light changes dramatically across seasons and understanding its impact is key to getting pro-level shots. During the dry season, dust in the air creates gorgeous warm glows during golden hour but can also lead to hazy, washed-out images if you’re not careful. A polarizer can sometimes help cut down the glare and improve contrast, but it’s not easy to use such a filter when shooting wildlife.
In the wet season the clouds act like a natural diffuser, softening harsh sunlight and allowing for even exposure throughout the day. This is great for capturing fine details in fur and feathers without harsh shadows. The downside? Rain can ruin your gear if you’re not prepared. A simple rain cover and a microfiber cloth for wiping your lens can save your shoot.
Dry vs. Wet Season Photography in Africa
Africa is one of those places where the time of year completely changes the photographic experience. I’ve shot in both the dry and wet seasons, and each has its own magic—and challenges. If you're planning a photography trip, knowing what to expect in each season can help you maximize your shots and avoid frustrating surprises. Let’s see more in detail.

Sunset in Etosha NP in October
Dry Season: Best for Visibility & Big Game
The dry season (usually from May to October, depending on the region) is prime time for wildlife photography. The reason is simple: animals need water. As rivers dry up, wildlife is forced to gather around the few remaining water sources, making it much easier to find and photograph them. If you’ve ever dreamt of classic safari images - elephants dust-bathing, lions lounging by a waterhole, or a leopard descending from an acacia tree - this is the season to go.
One of the biggest advantages? Crystal-clear skies every day. With little humidity, the air is crisp, meaning sharp images with fewer atmospheric distortions. Sunrise and sunset produce warm, glowing hues that make everything look cinematic and magic. Since it rarely rains, you don’t have to worry about sudden storms cutting your golden hour short.
But it's not all perfect. The midday light is brutal—harsh, flat, and unflattering. If you’re shooting during those hours, expect strong shadows and high contrast, which can be tricky to expose properly. Also, the dryness means dust—lots of it. If you're changing lenses frequently, that fine dust will find its way into every crevice of your gear. A simple tip? Bring a rain cover for your camera (yes, even in the dry season) and a blower to keep your sensor clean.
Another downside? More tourists. National parks get crowded, and during peak times, you might have 10+ vehicles surrounding a big cat sighting. If you want more exclusivity, consider private reserves or lesser-known parks where sightings are still excellent but without the traffic jams.

A young lion in full dry season. Etosha NP, Namibia
Wet Season: Best for Colors, Unique Shots & Fewer Crowds
Come November, the first rains hit, and everything changes. Dry, brown landscapes transform into lush green paradises. For photographers who love vibrant color and dramatic skies this season is a dream. The air is fresher, the skies are often filled with dramatic cloud formations, and the golden light reflects beautifully on the wet ground, creating unique compositions.
Another major perk? Baby animals. Many species give birth during the wet season, meaning you’ll see wobbly-legged zebras, playful lion cubs, and curious young elephants. This is a jackpot for storytelling images—capturing the softer, more intimate side of wildlife.
For bird photographers this is peak season. Migratory birds arrive in massive numbers and species that are harder to spot in the dry season (like colorful bee-eaters) become much more visible. The contrast of bright feathers against deep green foliage makes for spectacular shots.
However, the wet season does come with some challenges. Muddy roads can make certain areas inaccessible, especially in parks with black cotton soil (which turns into a slippery mess). If you’re self-driving a proper 4x4 and recovery gear are a must. The thicker vegetation can also make spotting wildlife trickier, as animals have more places to hide. You might hear a lion roaring nearby but struggle to get a clear shot through the dense bush.
On the plus side? Fewer crowds. Many tourists avoid the wet season, meaning you’ll often have sightings all to yourself. And honestly, that alone can be worth the occasional downpour.
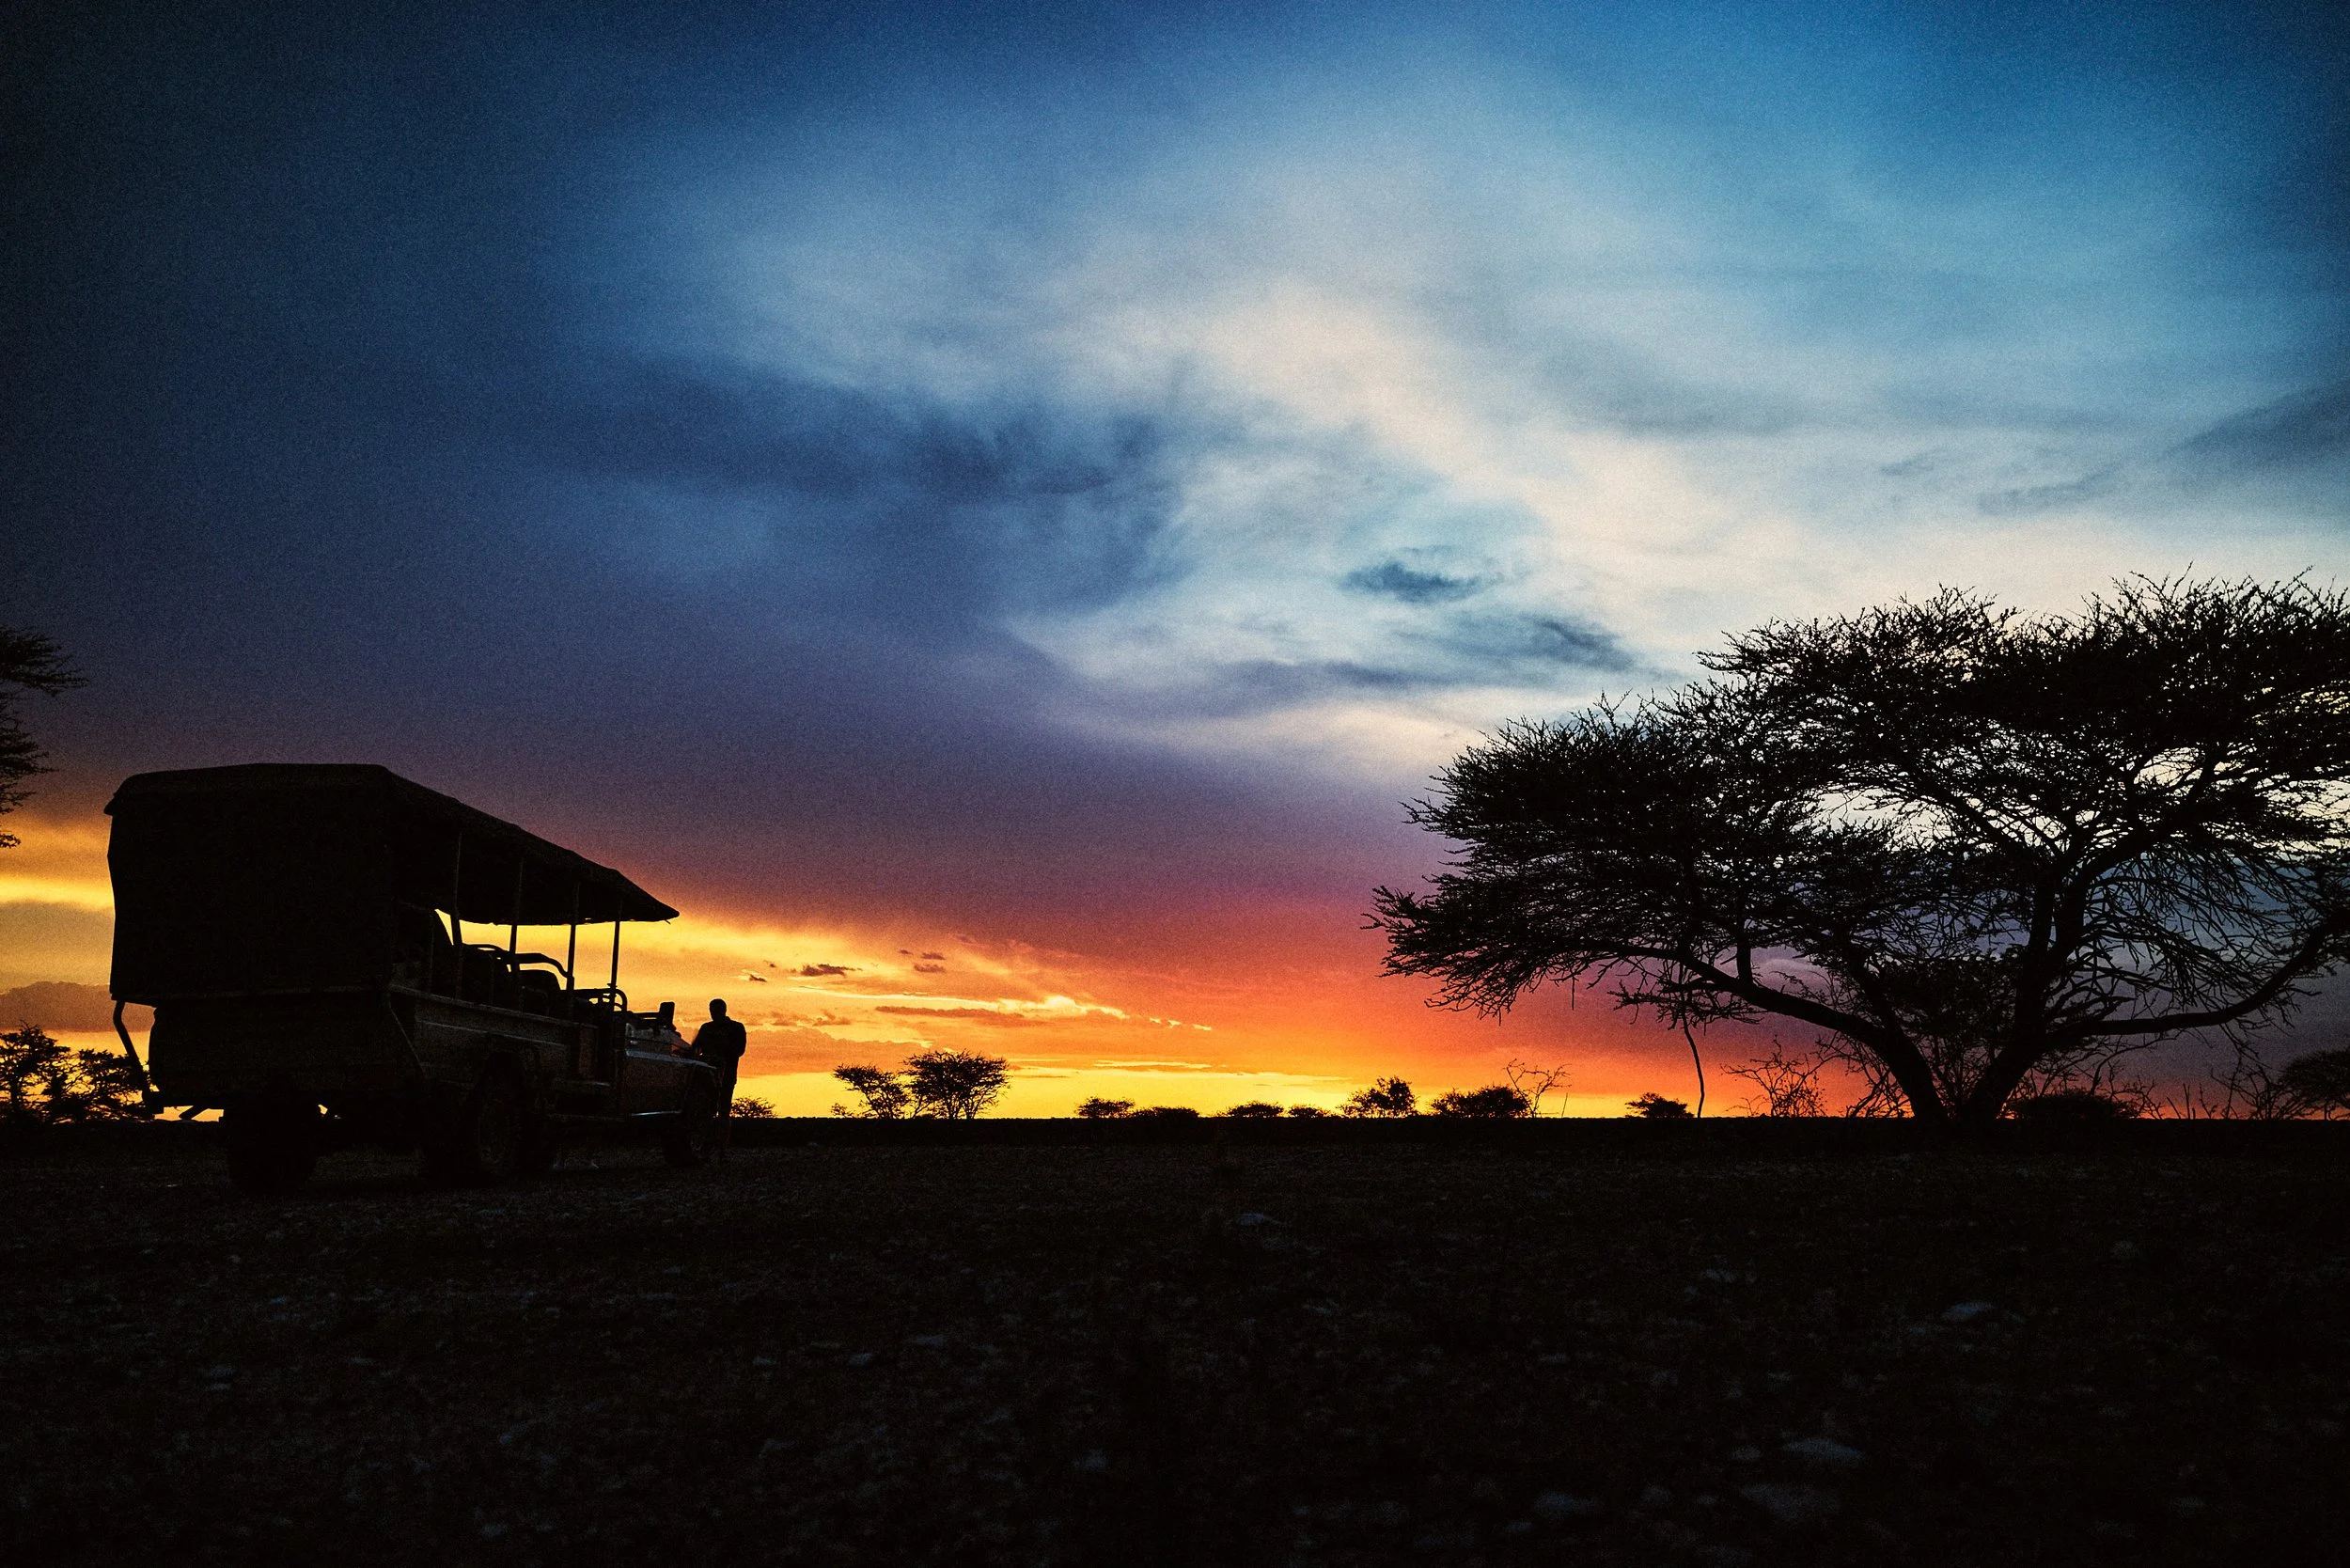
During the wet season you can expect very dramatic skies. Central Namibia, February 2024
Best Time for Wildlife Photography by Region
Now that you understand the differences between seasons in Africa let’s see the different destinations more in detail.
East Africa (Kenya, Tanzania, Uganda, Rwanda)
Great Migration (June–October):
If there’s one event that defines East African wildlife photography, it’s the Great Migration. Watching thousands of wildebeest and zebras thunder across the Serengeti and Masai Mara is unreal. But if you want the shot—crocodiles lunging in the Mara River or chaotic stampedes—it’s all about timing. The crossings typically peak between July and September, though nature doesn’t run on a schedule.
Calving Season (January–March):
This is the hidden gem of the Serengeti. The southern plains explode with life as thousands of wildebeest calves drop within weeks. With all this new life comes a surge of predators—lions, cheetahs, and hyenas locked in an endless game of survival. This is where you get those dramatic hunting sequences. The golden grass, dramatic chases, and adorable calves make this one of my favorite times to shoot. It’s also less crowded than peak migration months.
Mountain Gorillas (Year-round, but best June–September):
Trekking through Rwanda’s Volcanoes National Park or Uganda’s Bwindi Impenetrable Forest is no easy feat. Rain can turn trails into mudslides, and dense foliage makes shooting tough. June to September offers the driest conditions, meaning clearer views, better hiking, and less mist on your lens. But let’s be real—any gorilla encounter is magical. Just keep your ISO high (800–3200) to compensate for the low light under the canopy.
Southern Africa (Botswana, South Africa, Namibia, Zambia, Zimbabwe)
Dry Season (May–October):
This is when Africa’s wilderness turns into a photographer’s dream. Water sources shrink, forcing animals to congregate at rivers and waterholes. If you want crisp, clean shots of big game—elephants in Chobe, lions in the Okavango Delta, leopards in South Luangwa—this is the time to go. With less foliage, animals are easier to spot, and the golden light at sunrise and sunset is unreal.
Green Season (November–April):
Now, if you love moody skies, lush landscapes, and baby animals, this is your season. Well, almost. I would still personally avoid November and December as temperatures are incredibly hot and vegetation is still very dry. The best is from mid January to mid March, before the vegetation will grow too much. The rains bring life to the land, and suddenly, everything is vibrant. Sure, tracking big cats in tall grass can be tricky, but the reward? Scenes straight out of a painting—stormy skies, soft light, and zero crowds. Plus, bird lovers will find migratory species in full display. Just pack a rain cover for your gear.
Victoria Falls & Zambezi Wildlife (April–June):
Timing Victoria Falls is a delicate dance. If you go too early, the falls aren’t at full power. Too late, and the mist is so thick it’ll soak your camera. April and May is the sweet spot—enough water for drama, but not so much that visibility is a nightmare. The added bonus? Wildlife viewing along the Zambezi is fantastic, with elephants, hippos, and crocodiles making for prime subjects.
Central Africa (Congo, Gabon, Central African Republic)
Dry Season (June–September):
Central Africa’s rainforests are another world entirely. Lowland gorillas, forest elephants, and bongo antelopes roam in the shadows, but getting a clear shot? That’s a challenge. The dry season offers slightly better visibility, as animals gather at bai clearings to drink. But even then, expect dim light and high humidity - fast lenses (f/2.8 or lower) are your best friend here.
Rainy Season (October–May):
If you’re after the most dramatic rainforest shots, this is when to go. Lush greens, misty mornings, and an explosion of insect and bird life make for incredible compositions. The downside? Mud. Lots of it. Trekking in this season is not for the faint of heart, but the rewards—intimate gorilla portraits in dewy undergrowth—are unmatched.
Photography Tips for Each Season
Dry Season: Use a Longer Lens for Distant Subjects, Embrace the Dust for Creative Effects
The dry season is a dream for wildlife photographers, but it comes with its own set of challenges. Water sources shrink, making animals congregate around the few remaining pools—perfect for getting dramatic action shots. But with less foliage, animals also tend to keep their distance, which is why a longer telephoto lens (like a 400mm or 600mm) becomes essential. I once made the mistake of heading into Etosha National Park with only a 70-200mm, thinking I'd get close enough to elephants at a waterhole. Spoiler alert: I didn’t. They stayed at least 50 meters away, and I ended up cropping most of my shots to oblivion.
Another unique aspect of the dry season? Dust. Lots of it. And while that might sound like a photographer’s nightmare, it can actually be a creative goldmine. Shooting against the light, especially in the late afternoon, dust in the air can add a golden, ethereal glow to your images. If animals are moving through it, their silhouettes become even more dramatic. The trick is to slightly underexpose your shot so the highlights don’t get blown out. And yes, dust is brutal on gear, so always carry a blower and microfiber cloth to keep your lens and sensor clean.

Dry season in Zambia.
Wet Season: Use a Rain Cover, Focus on Vivid Colors & Dramatic Cloud Formations
Most people avoid the wet season because, well, it’s wet. But honestly? Some of the most breathtaking, vibrant wildlife and landscape shots I’ve ever captured were during a heavy downpour. Rain brings out deep greens in foliage, darkens animal coats, and makes colors pop like crazy. Think about how stunning a leopard looks with rain droplets glistening on its fur, or how an elephant covered in mud takes on deep, rich textures.
The trick is to be prepared for the elements. A rain cover for your camera is a must—I learned this the hard way when my camera body got completely drenched in a surprise storm in the Serengeti. If you don’t have a rain cover, even a simple plastic bag with a hole cut for the lens can work in a pinch. Also, use a lens hood to keep raindrops off the front element.
Another underrated advantage of the wet season? Sky drama. With heavy rain clouds rolling in, sun rays breaking through, and sudden downpours, the sky becomes a major player in composition. Try using a polarizing filter to enhance contrast and cut through glare when the light is harsh after a storm. Some of my favorite shots of lions and cheetahs were taken with massive storm clouds looming in the background—it just adds a cinematic feel you don’t get in the dry season.

Golden Hour & Blue Hour Magic: Plan Around Sunrise/Sunset for Best Light
Golden hour is the holy grail of natural light photography, and for good reason. The low angle of the sun creates soft, warm hues, long shadows, and rich textures that make wildlife and landscapes look absolutely stunning. But getting the best golden hour shots takes planning—you don’t just show up and hope for the best.
One of the most useful habits I developed is scouting locations in advance. If I’m in a national park or a new area, I’ll spend midday looking for good vantage points so I know exactly where to be when the light is perfect. I also use apps like PhotoPills to track the sun’s position and see where the light will fall at different times.
And let’s not forget about blue hour—that brief period just before sunrise and after sunset when the world is bathed in cool, moody tones. It’s perfect for creating a sense of mystery and drama, especially when shooting landscapes with mist or wildlife in silhouette. If you’re shooting during this time you will likely use high ISO and a slower shutter speed to make the most of the low light.
Conclusion: Making the Most of Africa’s Seasons for Wildlife Photography
Africa offers mind-blowing wildlife photography opportunities year-round, but knowing the seasons can be the difference between an average trip and a truly unforgettable one. Whether you’re capturing the Great Migration in the Serengeti, navigating the flooded channels of the Okavango Delta, or trekking through misty forests in search of mountain gorillas, timing is everything.
Wanna join me on one of my exclusive wildlife photography workshops or safari trips?
I regularly organize guided photographic safaris and workshops to incredible locations, including Namibia, Botswana, Zambia and other amazing destinations worldwide. These trips are designed to offer photographers of all levels the chance to apply these techniques in the field, all while receiving personalized coaching and feedback.
Ready to embark on the photography adventure of a lifetime? Check out my upcoming photography trips and workshops and book your spot today: