
Why I No Longer Use ETTR for Wildlife Photography
If you're still "exposing to the right" (ETTR) like we all did back in 2012, it's time to rethink your wildlife photography strategy. I did it myself for years—but recently realized the rules have dramatically changed.
Modern camera sensors, such as those in the Canon R5, R3, Nikon Z9, and Sony A1, have drastically improved dynamic range and shadow recovery capabilities. Today, intentionally underexposing your images slightly can actually preserve critical highlights and provide greater editing flexibility later on.
In this article, I'll explain why ETTR is outdated for wildlife photography in 2025, how I now expose my images, and when ETTR might still be beneficial.
What is ETTR (Expose to the Right)?
"Expose to the Right," or ETTR, is a photography technique that was popularized more than a decade ago. The concept involves pushing your camera's histogram as far right as possible without clipping highlights. By maximizing the amount of captured light, you collected more data in the brighter areas of the image, resulting in cleaner files with less noise and better color quality—especially in the shadow areas.
This approach made perfect sense back in the era of early DSLRs like the Canon 5D Mark II or Nikon D700. These cameras had (relatively) limited dynamic range, particularly at higher ISO settings. Pulling up shadows in post-processing would often reveal ugly noise, discoloration, and loss of detail.
ETTR was the logical solution, allowing photographers to capture more image data upfront and reduce reliance on heavy shadow adjustments later. However, the photography landscape has significantly evolved.

A photo captured with Canon R3 at 20.000 ISO
Why ETTR is Now Outdated for Wildlife Photography
Today’s mirrorless cameras have completely changed the game. Sensors in cameras like the Canon R5, R3, Nikon Z9, or Sony A1 offer incredible dynamic range and impressive shadow recovery. It's now common to recover shadows by three stops or even more without noticeable quality loss.
But there’s one big catch: blown highlights are still irrecoverable. Once highlights clip—like bright feathers on a bird or sunlit fur on a predator—no amount of editing can recover those details.
In wildlife photography, conditions change rapidly. Animals move unpredictably, backgrounds shift, and lighting conditions vary in seconds. Using ETTR in these scenarios often means guessing exposure, risking highlight loss, and potentially missing shots you can't retake.
Underexposing slightly, on the other hand, helps preserve essential highlight detail, giving you more flexibility when editing RAW files later.
My New Approach: Smart Underexposure
My current technique involves intentionally underexposing images by approximately two-thirds to one full stop, especially in high-contrast or brightly lit situations. This approach ensures I retain highlight details and gives me room for shadow recovery without compromising image quality.
Here's exactly how I set up my camera in the field:
Shoot Manual mode with Auto ISO: This lets me precisely control shutter speed and aperture while the camera automatically adjusts ISO to balance exposure.
Enable Highlight Alerts (Zebras): This visual indicator quickly shows if highlights are close to clipping, so I can adjust accordingly.
Histogram management: I aim for a histogram that approaches the right edge without touching it, ensuring no crucial details are lost.
Rely on RAW data, not JPEG previews: The camera's JPEG preview can be misleading. Always check your RAW histogram and confirm recoverable details later in post-production software like Lightroom or Capture One.
By following this workflow, even in challenging lighting, I maintain maximum flexibility to adjust shadows and exposure in post-processing.
Is ETTR Ever Still Useful?
Does this mean ETTR is completely obsolete? Not quite—there's still one specific scenario where ETTR remains beneficial: extremely low-light photography at high ISO settings.
For instance, pre-dawn wildlife drives or evening shoots in dim forests are scenarios where noise—not highlights—is the primary enemy. Here, pushing the exposure slightly to the right helps produce cleaner images straight out of camera, reducing reliance on shadow brightening, which can drastically increase noise.
In low-light situations, I:
Open my lens aperture wide (f/2.8 or f/4).
Lower shutter speed as far as practical for sharp images.
Push the histogram rightward cautiously, ensuring no highlights clip.
Since these environments typically have low contrast and limited dynamic range, capturing a brighter initial exposure minimizes noise and produces higher-quality images overall.
Final Thoughts: Smart Underexposure is the Real Wildlife Photography Hack
While ETTR had its merits in the DSLR era, modern mirrorless cameras have shifted the photography landscape significantly. In 2025, careful, intentional underexposure—prioritizing highlight protection—is the superior strategy for wildlife photographers.
By exposing for flexibility, protecting highlights, and confidently working with shadows in post-processing, you'll consistently capture better wildlife images.
Still struggling with tricky lighting and high ISO scenarios? You're not alone. I made a comprehensive video on managing low-light wildlife photography, packed with practical insights for cleaner, sharper photos.
Watch my full video guide on managing tricky low-light wildlife photography here.
Featured articles


Ultimate Autofocus Trick: Use Servo and One-Shot AF at the Same Time!
I've been photographing wildlife professionally for years now, primarily using cameras like the Canon R5 and Canon R3. After countless hours tweaking settings, customizing buttons, and experimenting in the field, I've discovered something that completely changed my workflow - something I wish I'd known sooner. Today, I'm sharing my new favorite autofocus customization that allows you to use continuous (SERVIO) autofocus and single (ONE-SHOT) autofocus simultaneously—without ever diving into your camera menu while you're out shooting.
If you photograph wildlife, birds, or any fast-moving subjects, this autofocus setup could transform your photography as well.
Understanding Autofocus Modes: Servo AF vs. One-Shot AF
Before we dive into the setup, let's quickly recap the two main autofocus modes that photographers use most frequently:
Continuous Autofocus (Servo AF / AF-C):
In this mode, your camera continuously adjusts the focus to track and keep a moving subject sharp. It's ideal for wildlife, sports, or action scenes where subjects move unpredictably.Single Autofocus (One-Shot AF / AF-S):
Here, your camera locks focus once, and it remains fixed until you refocus manually. It’s excellent for stationary subjects, precise framing, or scenes where you don't want the autofocus to shift unexpectedly.
Why Servo AF Isn’t Always Perfect
Servo AF is powerful, especially with modern mirrorless cameras. However, even the most advanced autofocus tracking systems sometimes struggle, particularly:
In cluttered scenes (branches or leaves in front of your subject).
Low-contrast lighting (foggy mornings or dusk conditions).
When you want to deliberately lock focus on a specific element in the frame and recompose.
In these situations, continuous autofocus can get confused, causing missed shots and frustration in the field.
👉 Quick tip: If you're into wildlife photography and want more field-tested tips, download my free 100-page wildlife photography eBook. It’s packed with gear advice, camera settings, and in-field techniques to elevate your photography.
My Previous Workarounds (and Why They Didn’t Work)
Initially, I separated autofocus from my shutter button, assigning AF activation exclusively to the back AF-ON button. This setup (also known as "back-button focusing") gave me good control but still required frequent switching between SERVO and ONE-SHOT modes depending on the situation.
I tried assigning different buttons - front buttons on the R3, FN buttons on the R5 - to quickly switch modes, but this still meant fiddling with camera settings during critical moments. Inevitably, I would sometimes forget to switch modes back, resulting in out-of-focus shots at the worst possible times.
I needed a solution to have both autofocus modes instantly accessible at any given moment—without diving into camera menus.
The New Autofocus Setup: Servo and One-Shot AF Simultaneously
After experimenting extensively, I've finally found the perfect customization that lets me seamlessly use Servo and One-Shot AF at the same time. Here’s exactly how I set it up on my Canon R5:
Step-by-Step Autofocus Setup (Canon R5)
Go to the Autofocus Menu:
Set AF Operation to SERVO AF.
Set AF Method to Tracking + Subject Recognition.
Choose your subject (Animals, People, Vehicles).
Disable Continuous AF (to conserve battery life and avoid unnecessary AF movement).

2. Customize Your Buttons:
In the "Customize Buttons" menu, set the Shutter Button to trigger both Exposure Metering and AF. This activates continuous autofocus with tracking when half-pressed.
Set the AF-ON button similarly to trigger Exposure Metering and AF, but now press the INFO button to access the sub-menu:
Change AF Operation to ONE SHOT AF.
Change AF Method to SPOT AF (for precise, single-point focusing).


This simple yet powerful setup lets you instantly switch autofocus modes with a single button press:
Half-pressing your shutter button triggers Servo AF with tracking, ideal for action and moving subjects.
Pressing and holding the AF-ON button activates precise One-Shot AF, ideal for stationary or carefully composed scenes.

In the field with the R3
Adjustments for Canon R3 Users:
On the Canon R3, subject tracking is always activated and cannot be completely disabled, so you slightly adapt this setup (which I fully explain in detail in my YouTube video).
SEE FULL VIDEO TUTORIAL

Real-World Benefits of This Autofocus Setup
With this setup, you gain instant access to both autofocus modes in the field. For example:
Tracking a running cheetah? Half-press your shutter button and let Servo AF keep it sharp.
Suddenly spot a perched bird hidden among branches? Instantly press the AF-ON button, lock your focus precisely, and recompose confidently.
One Additional Autofocus Tip for Telephoto Users
If you're using super-telephoto lenses, occasionally the autofocus might jump to a distant background or foreground, losing your subject completely. When this happens, it takes precious seconds for your camera to find your subject again.
The solution: use your lens’s focus preset feature. Many telephoto lenses allow you to set a specific focus distance and instantly recall it with a single twist or button press. This vastly reduces focus-hunting and ensures you never lose critical moments.
I've created a full tutorial dedicated to making the most out of this underrated telephoto function. Don't head out on your next photography adventure without checking that out.
Final Thoughts and Next Steps
By implementing this autofocus setup I drastically improved my hit rate for sharp images - especially in complex, fast-changing wildlife scenarios. Give it a try on your camera and see how it transforms your own shooting experience.
Don’t forget to subscribe to my YouTube channel for more practical wildlife photography insights like this!
Happy shooting!

My Favorite Focal Lengths for Wildlife in 2025 - and why
Discover the best focal lengths for wildlife photography—from 100mm to 600mm. Learn when and why to use each lens, with real field-tested tips for safaris, birds, and big game.
Every wildlife photographer has a “lens journey.” Mine started with humble beginnings, filled with compromises, missed shots, and a lot of trial and error. And honestly? That’s what makes it interesting.
From Kit Zooms to Super-Telephotos: A Lens Evolution
I started out with a Nikon 70-300mm DX. It was light, cheap, and just good enough to give me a taste of reach. But it was also frustrating. I remember trying to photograph a red deer through the trees during golden hour, only to end up with soft images and a jittery autofocus that couldn’t lock on. The lens simply didn’t perform in low light, and I knew I’d outgrown it.
So I upgraded to the Nikon 70-200mm f/2.8. Now that was a lens. Fast, sharp, beautifully built—and a dream for portraits and low-light forest scenes. But for wildlife? Still short. I was constantly cropping my shots and missing the intimacy that longer focal lengths bring. That’s when I started to realize: wildlife photography isn’t just about reach, it’s about compression, background control, and distance.

One from the archives. Nikon D850 with 500mm f4
Later I got the Nikon 500mm f/4, and it changed everything. Suddenly, I could isolate my subject, separate it from messy backgrounds, and shoot from a distance without disturbing anything. I loved that lens—it taught me what a super-telephoto can really do. But when I switched to Canon in 2022, the game changed again.
I started building out a new system with the Canon RF 600mm f/4, RF 100-500mm, and the 70-200mm f/2.8. At one point, I even added the 400mm f/2.8—incredible for big cats in soft light or closer subjects on foot. Now I’m about to add the Canon RF 100-300mm f/2.8, which with a 1.4x teleconverter becomes a magical 140-420mm f/4 lens. Bright, flexible, sharp—it might become my go-to for many future shoots.
Why the 600mm f/4 Is Still King
Let’s talk about the 600mm f/4, though. It’s heavy. It’s expensive. It’s not for casual walks in the woods. But when you’ve got the space, and you want separation, nothing beats it. Not even the 400mm f4.
The biggest advantage? Shooting from a distance. I’ve often found that the further you are from an animal, the more natural its behavior remains—and that distance helps compress the background into soft, buttery blur. It’s not just about reach; it’s about clean angles and visual storytelling. That’s why I reach for the 600mm when I’m set up at a waterhole, waiting for elephants to come in, or when I’m perched in a vehicle near open plains.
You also tend to get better compositions. When you can’t move much—say you’re in a hide or locked into a safari vehicle—600mm forces you to see differently. You’re not zooming in and out; you’re waiting for the moment. It disciplines your eye.
But I don’t always use it.
Canon R3 + 600mm f4
Why the 100-500mm Is My Workhorse
For all its power, the 600mm is also rigid. That’s where the Canon RF 100-500mm comes in. It’s lighter, more flexible, and incredibly sharp across the range.
This lens lives on my second body, but honestly, it sees the most use on safari. Why? Because things happen fast. A lion walks out of the bushes at 50 meters, then suddenly appears five meters from the vehicle. A cheetah climbs a termite mound, then bolts after prey. You can’t always follow that with a prime. With the 100-500, I can adapt.
Another huge plus? Framing flexibility. A wider focal length allows me to include more of the environment when I want to tell a bigger story. I love zooming out a bit to show animals in their context—the dust, the sky, the vegetation. That’s something a fixed 600mm can’t offer.

With the 100-500mm I can include more of the environment.
The 400mm f/2.8: The Portrait Specialist
I carried the 400mm f/2.8 for a few months, and wow—what a lens. The depth of field is razor-thin, and the subject separation is dreamy. I found it especially good for predator portraits, like tight headshots of leopards or lions at dusk. It’s shorter than the 600mm but offers incredible image quality and slightly more flexibility when working from ground level or on foot.
That said, I eventually let it go. It filled a niche, but with the 100-500 covering mid-range and the 600mm for ultimate reach, I wasn’t using it as often. Still, I think about it whenever I see a beautifully lit, tight portrait.
The Exciting New Arrival: 100-300mm f/2.8 + Teleconverter
Now this is the lens I’m most excited about: the Canon RF 100-300mm f/2.8. It’s a unicorn—fast aperture, internal zoom, excellent handling, and with a 1.4x teleconverter, it becomes a 140-420mm f/4. That’s near-perfect versatility for fast-paced fieldwork.
This lens could replace my 70-200mm in some cases and work alongside the 100-500 as a brighter, sharper option when I’m not sure what kind of conditions I’ll face. Especially in forest environments or overcast situations where every stop of light matters.
When Focal Length Shapes the Story
Focal length isn’t just about distance. It’s about how you tell a story. A 600mm compresses the scene—it isolates. A 100-300mm or 70-200mm includes the environment, giving context and scale. One isn’t better than the other. They’re tools for different narratives.
Which Lens for Which Job? A Quick Reference
Here’s how I break it down in practice:
70-200mm f/2.8: Close encounters, storytelling frames, wildlife in landscape, low light
100-300mm f/2.8 (with 1.4x TC): Fast-paced work, forest animals, handheld flexibility
100-500mm: Generalist lens for safari, birds, mammals, spontaneous shots
400mm f/2.8: Predator portraits, dusk/dawn conditions, handheld tracking
600mm f/4: Birds, distant subjects, clean backgrounds, patient observation

Sometimes we don’t need a crazy zoom. Shot this one with a 70-200 f2.8
📬 Want More Real-World Gear Talk and Wildlife Field Notes?
If you’ve found this helpful, you’d probably enjoy my free newsletter. I share behind-the-scenes stories, field-tested gear tips, and new trip announcements—along with honest reflections on the wins and fails of working in the wild.

2025 Guide to Etosha National Park Photography
Etosha National Park is one of the most iconic safari destinations in Africa—and for good reason. Its vast white salt pan, scattered acacia trees, and floodlit waterholes set the stage for some of the most dramatic and consistent wildlife photography anywhere on the continent. Whether you're hoping to capture dust-kicking elephants, backlit black rhinos, or lion prides in the dry grass, Etosha offers an ideal mix of accessibility, wildlife density, and visual drama.
When to Go, Where to Shoot, and How to Get the Best Wildlife Photos in Namibia’s Iconic Park
Etosha National Park is one of the most iconic safari destinations in Africa—and for good reason. Its vast white salt pan, scattered acacia trees, and floodlit waterholes set the stage for some of the most dramatic and consistent wildlife photography anywhere on the continent. Whether you're hoping to capture dust-kicking elephants, backlit black rhinos, or lion prides in the dry grass, Etosha offers an ideal mix of accessibility, wildlife density, and visual drama.
This guide walks you through the best times to visit, where to base yourself inside the park, which waterholes are most rewarding photographically, what gear to bring, and what kind of animal behavior to expect throughout the year.

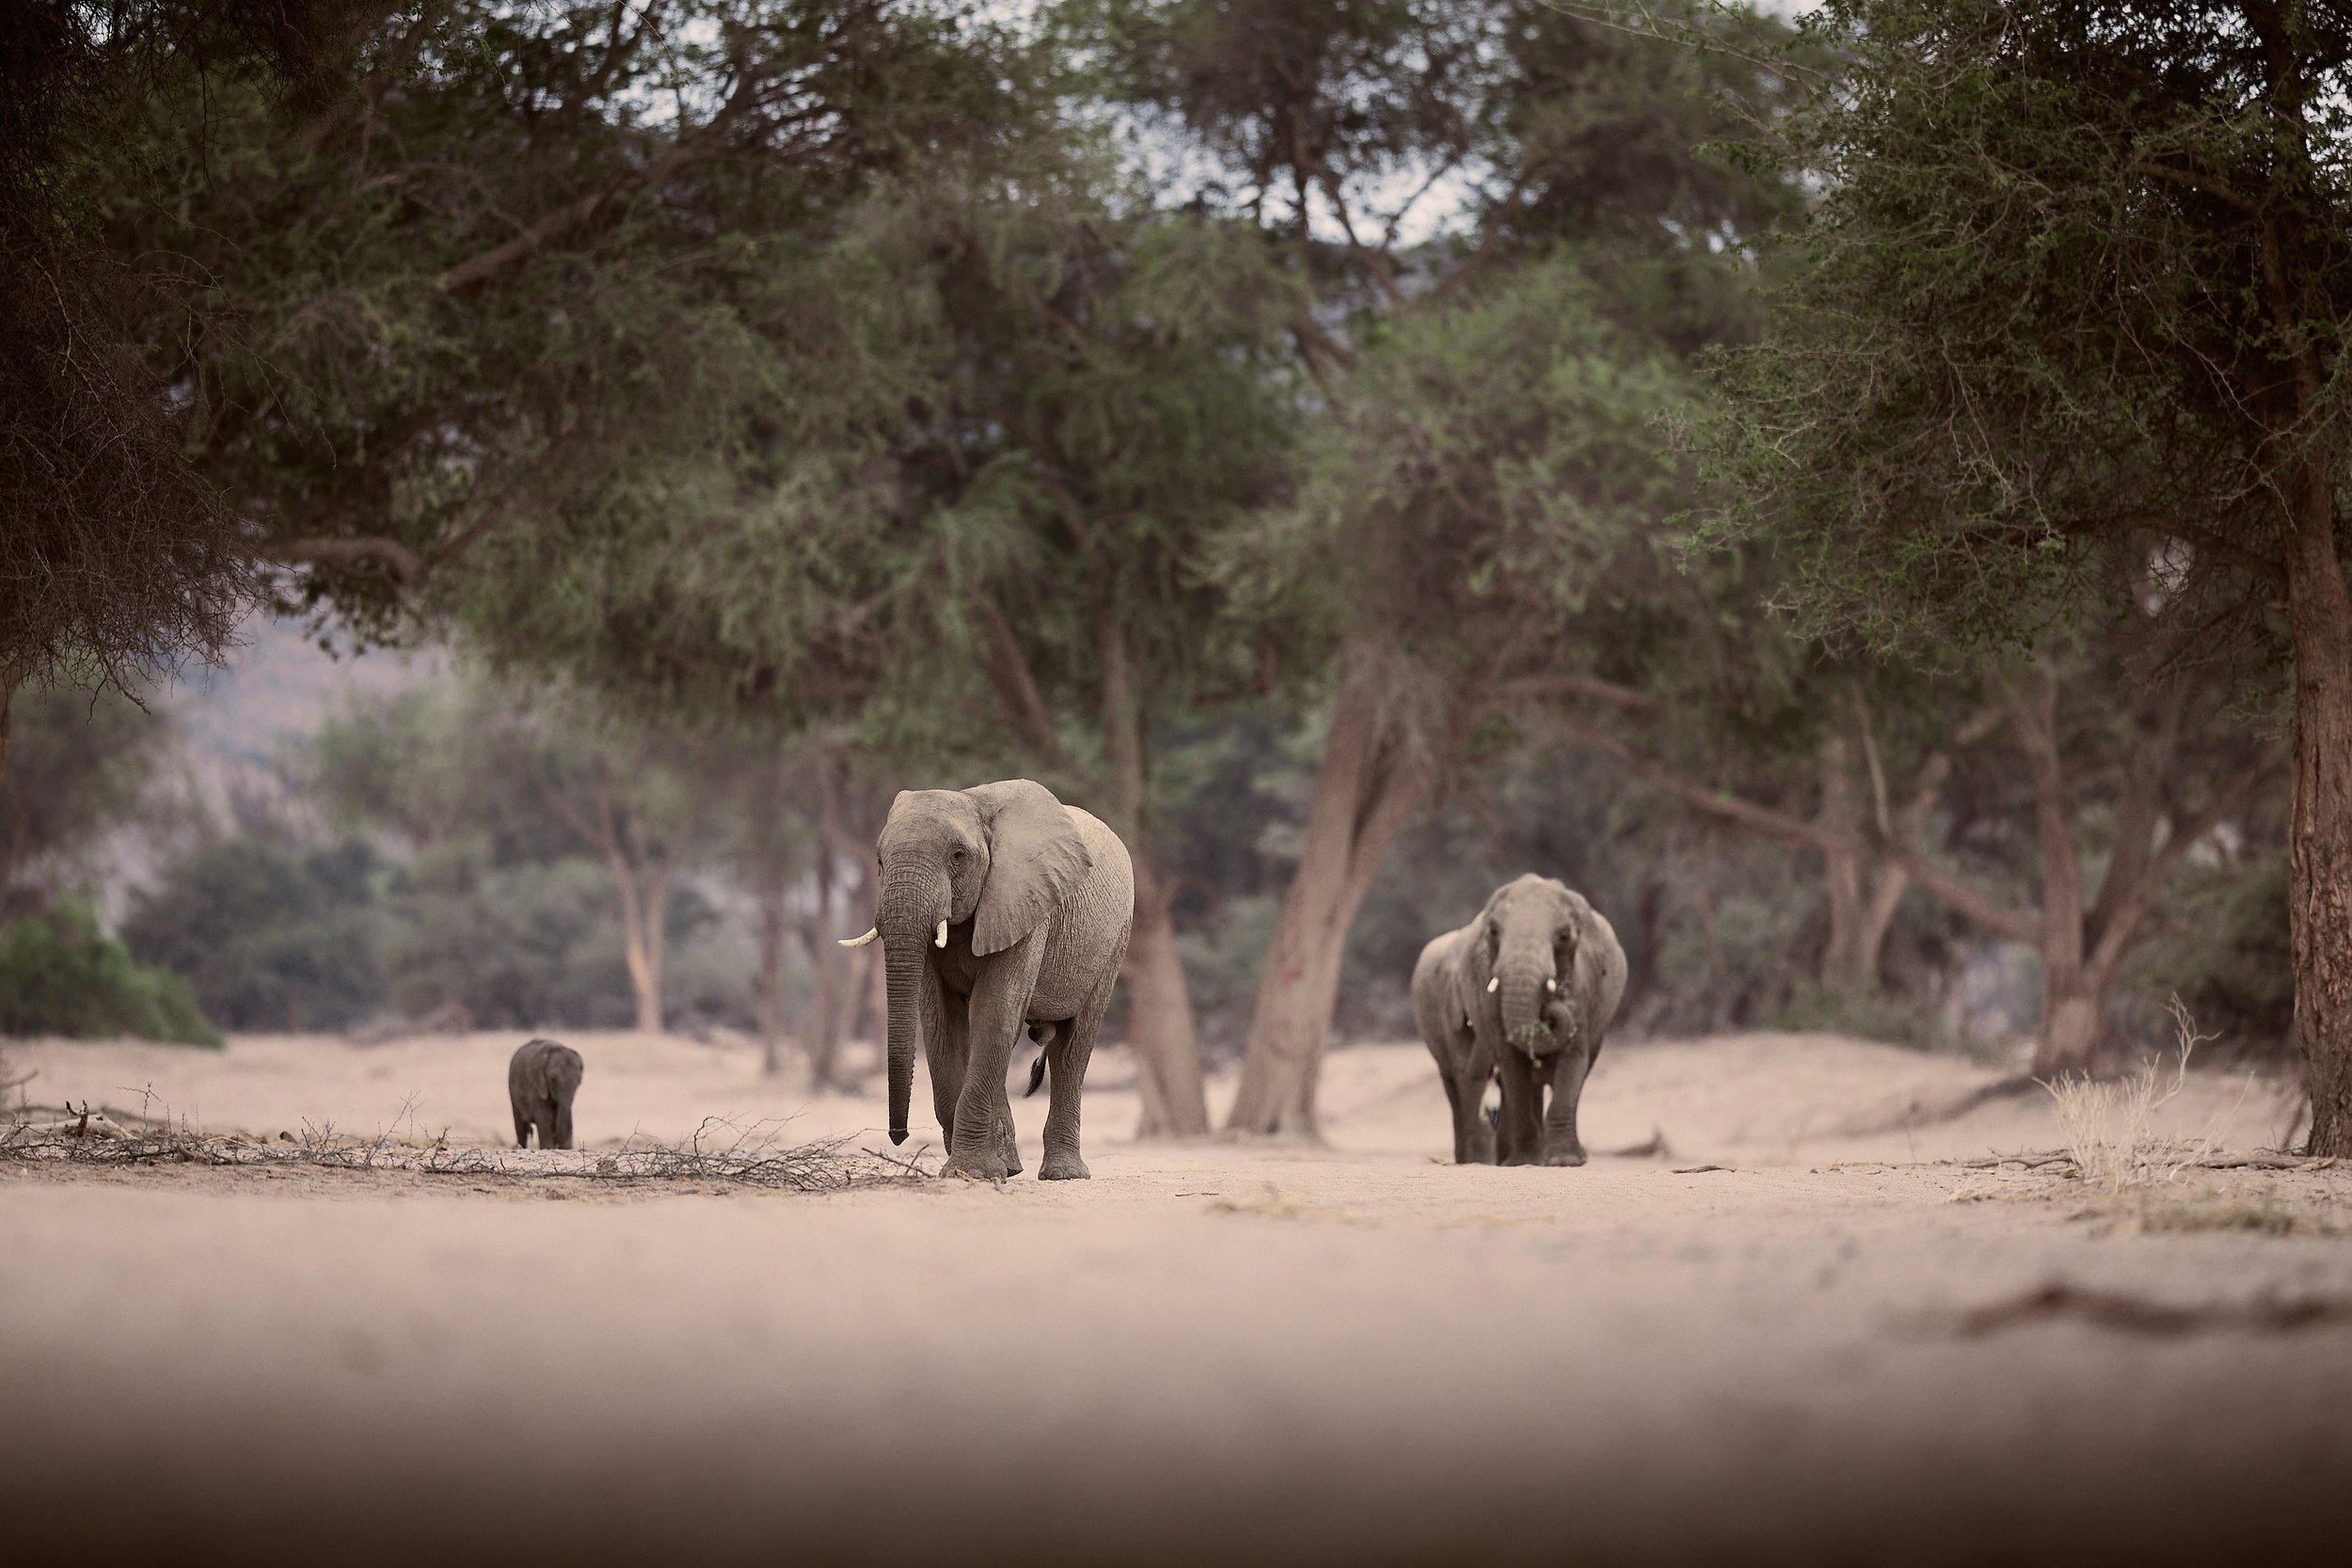
Elephants crossing on the Eastern Etosha plains.
When to Visit Etosha for the Best Photography Conditions
The dry season, which runs from May through October, is widely considered the prime time to photograph in Etosha. During these months, water sources become scarce and animals concentrate around permanent waterholes. This makes wildlife behavior more predictable, visibility much better, and chances of multi-species scenes far higher. The light during these months—especially in the early morning and late afternoon—is clean and golden, with low humidity and minimal atmospheric haze.
June through August brings cooler temperatures and crisp light. It’s an excellent time for photographers who want a combination of comfort, excellent visibility, and dense wildlife activity around waterholes. You’ll often see elephants lining up to drink, herds of springbok clustering for safety, and predators lurking on the fringes of these gatherings.
As the dry season deepens in September and October, conditions get harsher. Daytime heat increases, and the air becomes dustier—creating stunning backlit effects during golden hour. This is also a particularly good time for photographing elephants rolling in dust or sparring at waterholes, as well as lions gathering at known predator hotspots like Okondeka. While the heat can be intense, the photographic payoff is enormous.
During the green season from November to April, the park changes dramatically. Rain transforms the landscape into a lush, vibrant space, and wildlife disperses across wider areas, making it more difficult to predict sightings. However, the photographic aesthetic shifts in your favor if you’re looking for stormy skies, saturated greens, and dramatic contrasts. While sightings might be less concentrated, you’ll have more space, fewer tourists, and chances to photograph intimate moments—like calving antelope or birds in full breeding plumage—against moody skies.

Wildebeest at sunrise near King Nehale Gate.
➡️ For more tips on when to visit Namibia's key destinations, check out the Complete Namibia Photo Guide.
Where to Stay for Optimal Access and Light
Staying inside the park is essential if you want to maximize your shooting time, especially during early morning and late evening hours when wildlife is most active. All accommodations inside Etosha are run by Namibia Wildlife Resorts (NWR) and while they’re fairly basic compared to the luxury lodges you can find outside they offer the biggest advantage of all: proximity to wildlife and round-the-clock access to floodlit waterholes.
Okaukuejo Camp is arguably the best base in the park. Its waterhole is one of the most active in Etosha, especially at night, and is often visited by black rhinos, herds of elephants, giraffes, and even lions. The camp's position on the western side of the park also gives you quick access to several excellent morning and sunset locations. You can easily return mid-day to rest and recharge, then head back out in the late afternoon.

Okaukejo waterhole at night.
Halali Camp, located midway between Okaukuejo and Namutoni, is quieter and more shaded, with slightly more forested surroundings. The nearby Moringa Waterhole is fantastic for leopards, especially at night. This camp is well-positioned to reach some of Etosha’s central gems like Goas and Rietfontein, which are known for frequent predator sightings and excellent light angles throughout the day.
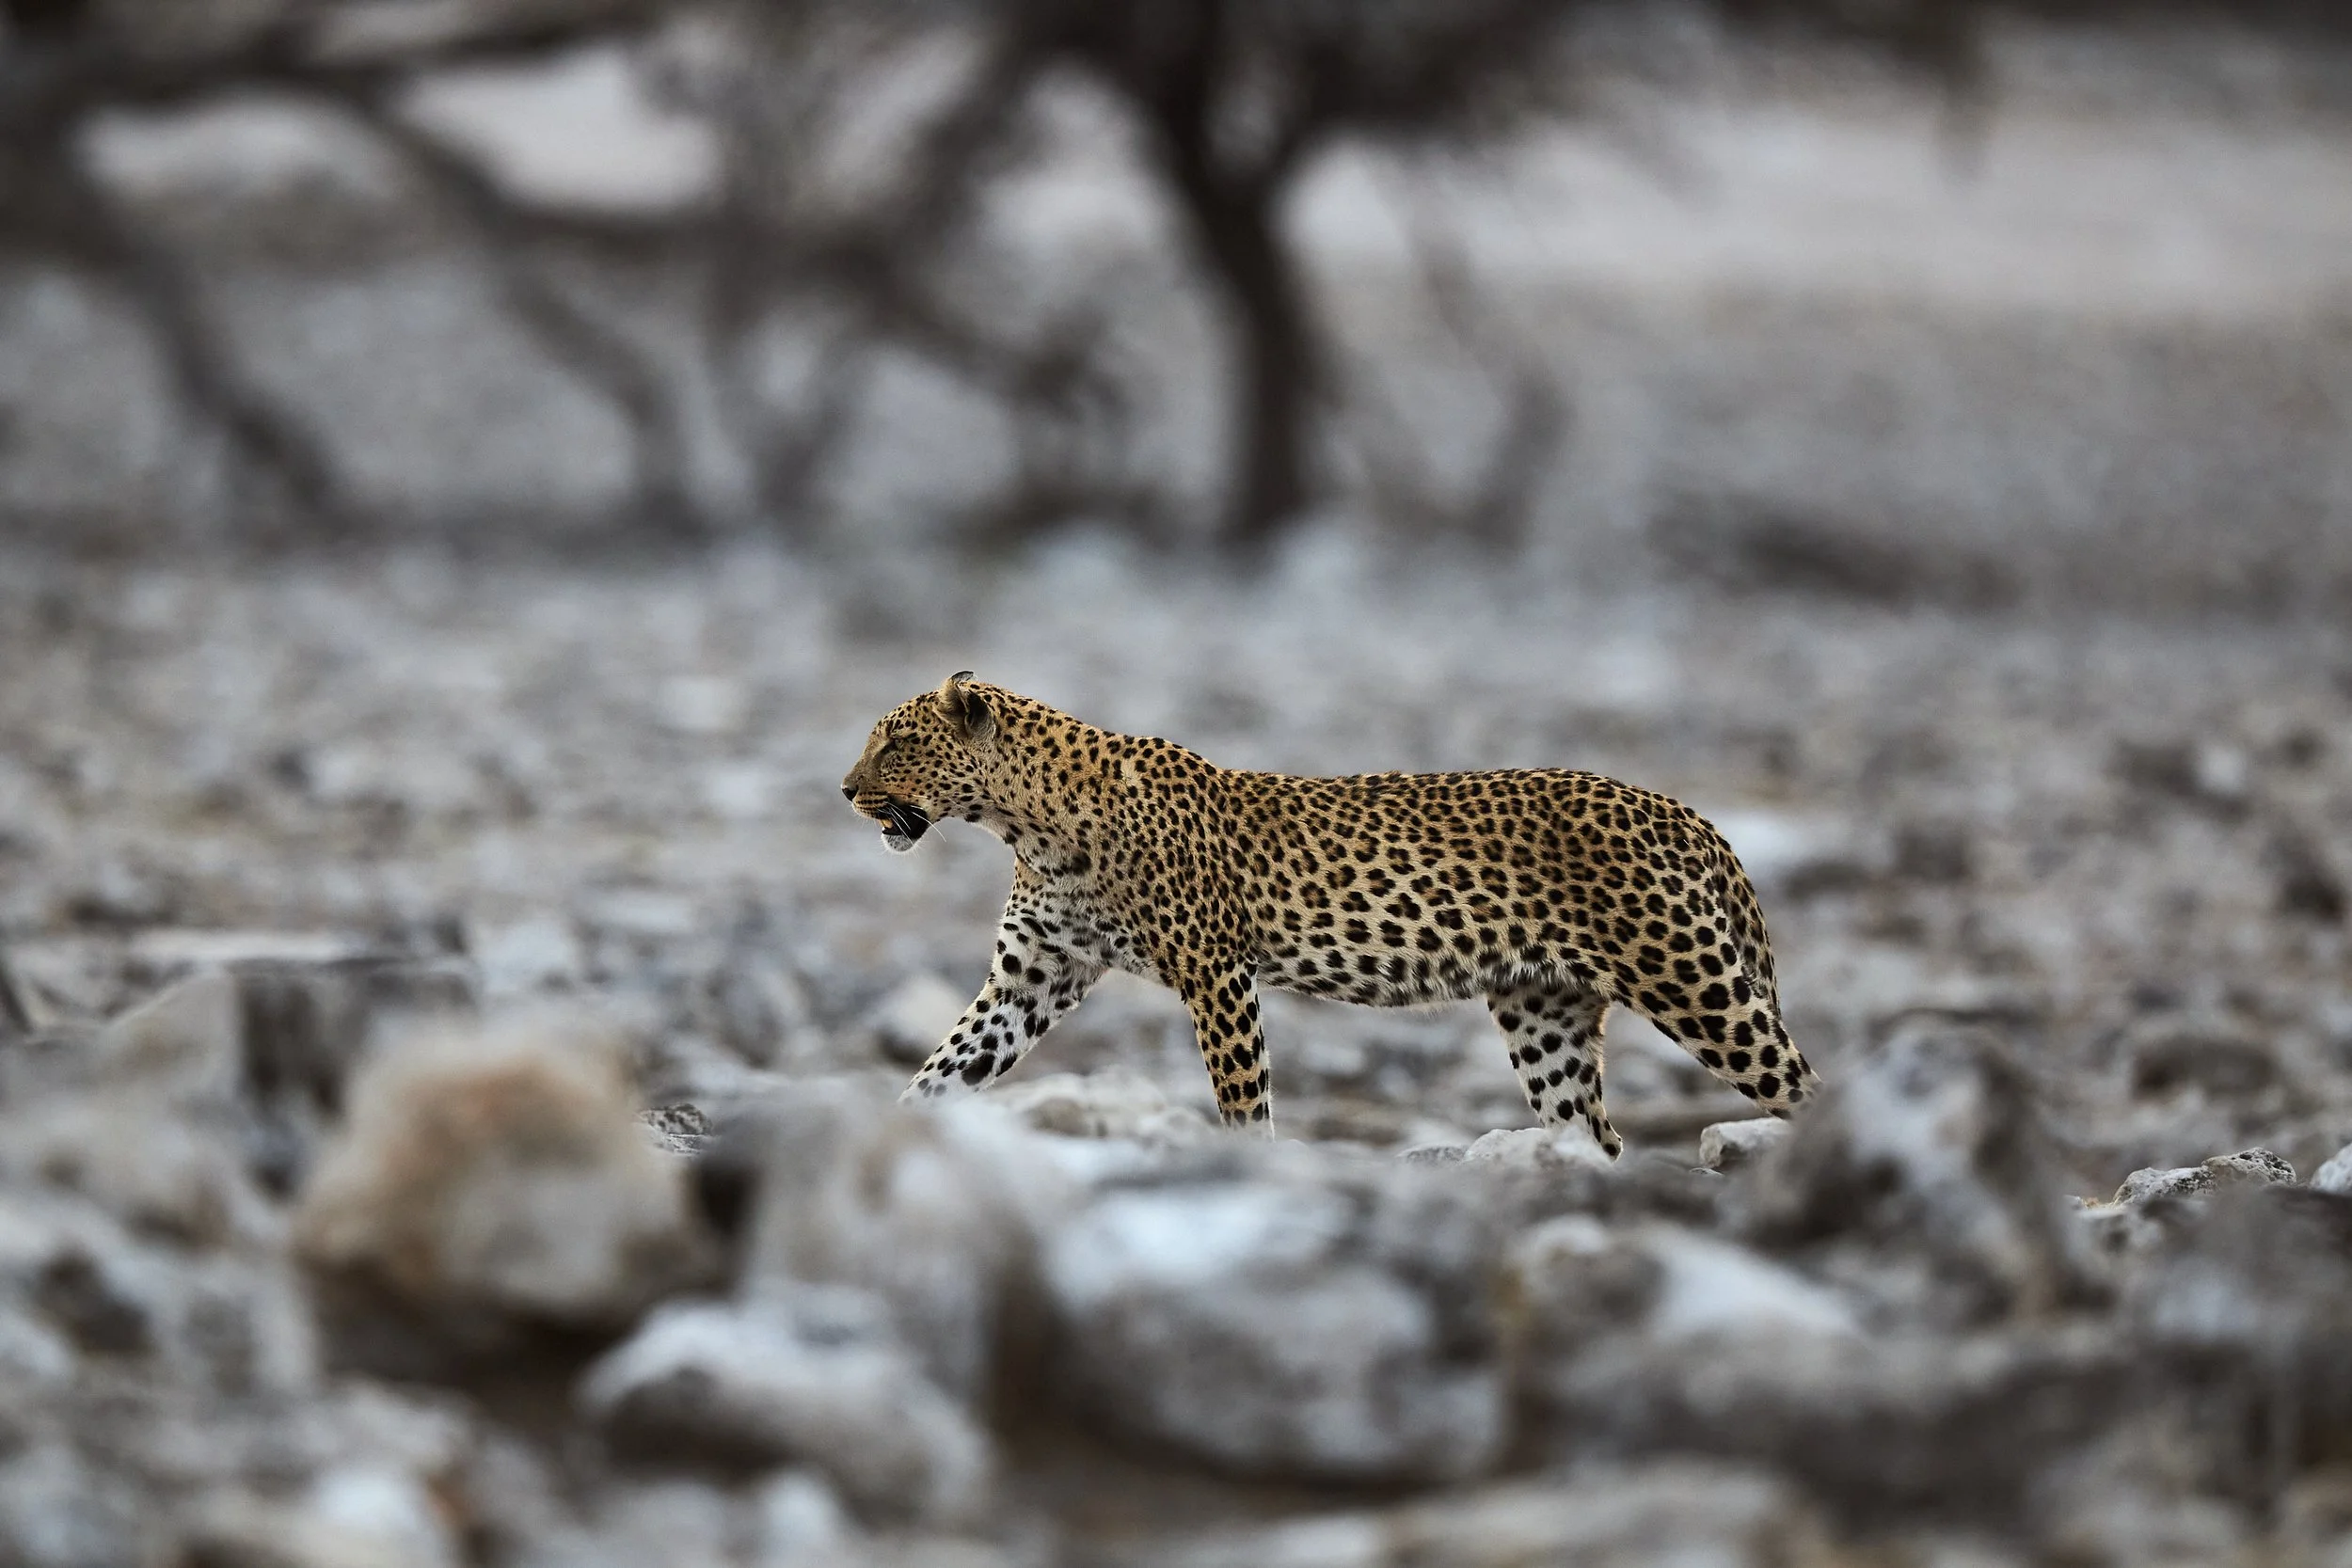
Leopard sighting at Goas.
Namutoni Camp, set against the historic Namutoni Fort, is closest to the eastern section of the park. It gives you quick access to Chudop, Klein Namutoni, and Fischer’s Pan, where you can expect good birding, early light reflections, and misty morning atmospheres in the right season.

Elephant herd approaching the waterhole at Namutoni camp.
Most Photogenic Waterholes and When to Visit Them
Etosha is a self-drive park, which means you control your schedule—but it also means you need to plan your days strategically to make the most of the light, behavior, and backdrop.
Okaukuejo Waterhole is one of the best in Africa, particularly for night photography. The large open space is well-lit and frequently visited by black rhinos, elephant herds, and zebras. Photographers can shoot from behind a low stone wall or seated benches, and longer lenses (400mm–600mm) work well here to isolate subjects or compress layers of animals against the far backdrop.
Nearby, Nebrownii Waterhole offers spectacular dust-filled scenes in the dry season. It’s especially productive in the late afternoon when elephants arrive in groups, kicking up clouds of golden dust as they approach. If you position your vehicle on the eastern side of the loop, you’ll get side or backlighting for dramatic images.
Okondeka, located west of Okaukuejo, is known for lion sightings. It overlooks the edge of the pan, so while the background might be stark and bright in the middle of the day, early morning light here can be soft and rewarding. Keep an eye out for lions resting in the golden grasses or pacing along the water’s edge.
In the east, Chudop Waterhole near Namutoni provides some of the most picturesque settings in the park. With acacia trees framing the background and shallow water reflecting early morning light, this is a top spot for giraffes, kudu, and birdlife. The area is more lush, so expect a different aesthetic compared to the barren western waterholes.
Salvadora and Sueda sit between Halali and Namutoni and are known for big cat activity, particularly cheetahs. These open plains often feature game animals spaced out across the horizon, offering classic safari silhouettes when timed with sunrise or sunset.

Lion at Salvadora.
What Gear Works Best in Etosha’s Conditions
Etosha’s shooting conditions favor long telephoto lenses and dust-sealed bodies. Most of your photography will happen from within a vehicle, so stabilization features and quick access to gear are important.
A super-telephoto lens like a 600mm f/4 or a 100–500mm zoom is extremely useful here, especially for shooting across the wide-open pans and at larger waterholes like Okaukuejo. These lenses allow you to isolate subjects, compress scenes, and capture intimate behavior without getting too close.
For more flexible compositions or closer subjects—such as elephants approaching waterholes or predators resting nearby—a 70–200mm f/2.8 or 100–300mm f/2.8 lens is perfect. Pairing one long lens and one mid-range zoom on a second body lets you switch quickly when action unfolds at different distances.
A 24–70mm lens is great for environmental shots, vehicle compositions, and atmospheric moments—especially during sunrise drives or golden hour when the pan glows.
Since you’ll be dealing with dust constantly, pack an electronic blower, lens cloths, and sensor cleaning tools. Use beanbags or window mounts for stability—tripods are almost never practical in vehicles. CFexpress cards, fast readers, and power banks like the Goal Zero Sherpa 100 are also a smart addition if you’re staying at basic camps with limited charging points.
➡️ Check out the complete What’s in My Safari Camera Bag (2025) article to see what I use in the field and why.
Understanding Wildlife Behavior Through the Year
Etosha’s wildlife rhythms are heavily influenced by water availability. During the dry months, most species are concentrated around the permanent waterholes. This includes large herds of springbok, gemsbok, zebra, and wildebeest, as well as elephants and predators that follow them closely. The lack of vegetation in these months improves visibility and composition options.
As the rains begin in November, wildlife spreads out, and the park becomes more challenging to photograph—but also more atmospheric. Calving season begins, especially among the antelope species, which in turn draws opportunistic predators. This period is also excellent for bird photography, with raptors, owls, and migratory species arriving in large numbers. Fischer’s Pan in the east is particularly good for waterbirds and waders in the wet months.
Rhinos, elephants, and giraffes are seen year-round but tend to be more active near water sources in the dry season. Cheetahs and lions, on the other hand, are easier to find when prey is forced into tighter corridors near active waterholes.

Sunset scene near Namutoni.
Join Me in Etosha: Namibia Photography Workshops
Etosha rewards patience, planning, and a strong understanding of light and animal behavior. If you want to skip the guesswork and experience the best of the park—with optimized routes, prime-time light, and photo guidance tailored to your goals—join one of my Namibia photography workshops.

What’s in My Safari Camera Bag (2025)
A Wildlife Photographer’s Gear Guide for African Safaris
Planning your first (or fifth) African photo safari? Choosing the right gear is one of the biggest factors in whether you come home with just memories or jaw-dropping images. In this guide, we’ll break down my professional safari camera kit built for serious wildlife work in 2025.
This list reflects current best-in-class Canon gear, trusted accessories, and field-tested choices optimized for safari conditions, power limitations, and airline weight restrictions.

Safari along the Chobe River, Botswana
Camera Bodies: What I Still Trust in 2025
Let’s start with the core: the camera bodies. In 2025, Canon’s R3, R5, and R5C remain incredibly capable—even with newer models like the R1 and R5 Mark II entering the scene. While the newer models are indeed more powerful, these “old” bodies still deliver all the image quality, autofocus performance, and reliability you need on safari.
Canon R3: My go-to for fast action and low light situations. It provides incredible AF system and low light handling, and the built-in vertical grip make it ideal for long days shooting wildlife on the move.
Canon R5: A perfect all-rounder. Lightweight, high-res (45MP), and great dynamic range. It usually stays on my 100-500mm.
Canon R5C: If you shoot video as well, this hybrid body handles 8K RAW and gives full manual video control with active cooling—perfect for BTS safari content or cinematic work. These days I am pairing it with the new Canon 100-300mm f2.8. I can make the most of this lens when filming in S35 crop mode, that gives me a 150-450mm f2.8 equivalent, or even add in a 1.4 TC resulting in an impressive 210-630mm f4 equivalent. A total beast for wildlife filming.
So no, you don't need the latest bodies to produce great work. These three still cover 99% of pro-level needs, at least for me.
Canon Powershot V1: I just added this new compact camera that seems to be a very capable piece of tech. Of course it’s not a great fit when it comes to wildlife but I think it will fit well in my equipment lineup to film more BTS during self drives and guided safaris, allowing me to share more content with you. During and after my upcoming trip to Botswana and Zambia I’ll be sharing a lot of “from the field” content, so make sure you follow me on Instagram and subscribe to my Youtube channel. Detailed field review coming soon!
Lenses: Covering Every Focal Range
Africa’s varied terrain demands a flexible lens lineup. From dusty open plains to dense forests, choosing the right focal length can make or break a shot. Here’s what goes in the bag:
RF 600mm f/4: The staple for long-range wildlife. Especially critical in open areas like CKGR and Etosha, where getting close is rarely possible. I still prefer this one to the 400mm f2.8 as, forcing me to stay a bit further away from the subject, I often get a better angle and a cleaner background.
RF 100-500mm: A flexible workhorse. Great for self-drives where you must always be ready for unexpected action. Lightweight, versatile, perfect for subjects on the move.
RF 70-200mm f/2.8: One of my go-to in places like South Luangwa, where I’m often closer to the action in lush surroundings. Great for both portrait-style animal shots and bigger shots that show the habitat.
RF 24-70mm f/2.8: Always useful for general storytelling, vehicle shots, landscapes and camp life. Essential for giving context to your wildlife subjects.
NEW: RF 100-300mm f/2.8: During my upcoming trips I will test this new beast that will hopefully replace the 70-200 + 100-500 mm. Constant 2.8 is great for low light, and early tests suggest phenomenal sharpness. Plus I can pair it with a 1.4x TC getting a powerful 140-420mm f4. A full field review is coming soon.

A shot from back in my Nikon days. Nikon D850, 500mm f4. Etosha NP, Namibia.
➡️ Planning to photograph in Namibia’s open desert landscapes? Check out the Complete Namibia Photo Guide to see how different focal lengths perform in extreme terrain.
Accessories That Make Life Easier in the Field
Accessories might not be flashy, but they’re what keep your kit running smoothly day after day.
Canon RF 1.4x Teleconverter: Perfect for boosting reach on the 600mm or 100-300mm when you need it. Minimal quality loss, especially in good light.
Angelbird CFexpress Cards: Fast, reliable, and tough. When you’re recording 8K or rapid bursts of action, these cards won’t choke.
Electronic Blower: Dust is inevitable in Africa. This is safer than canned air and more effective than manual blowers. Use it at camp or mid-drive when changing lenses.
Goal Zero Sherpa 100 Power Bank: On self-drives or multi-day bush camps without power, this keeps everything charged—bodies, phones, even laptops. Compact enough to bring as carry-on.

Off the grid in the Kalahari region.
Big Lenses: Pros and Cons for Safari Travel
There’s a constant debate in the field: bring the big glass or not?
Pros of Big Lenses (like 600mm f/4):
Sharpness and subject isolation are unmatched.
Allows you to shoot tighter from farther away—essential for shy species.
Pairs beautifully with teleconverters without killing image quality.
Cons:
Heavy and bulky—harder to travel with, especially on small aircraft.
Not as flexible when shooting in tight or fast-paced environments.
Requires a solid monopod or beanbag setup for best results.
If you’re traveling by charter or bush planes with strict carry-on limits, consider shipping gear ahead with your operator or swapping the 600mm for a more versatile and compact zoom like the 100-300mm f/2.8, paired with a 1.4x extender.
Tips for Safari Carry-On & Packing
Always carry your camera bodies and lenses onboard. Never check them in, especially if flying through hubs like Johannesburg or Addis Ababa.
Use a modular camera backpack, like an F-Stop Tilopa (my go-to) and keep weight under the stated limit.
Bring a small shoulder camera bag as your “personal item” to distribute weight.
If questioned at check-in, calmly explain the value of your gear and your need to keep it protected. In most cases, airline staff will allow exceptions.

Crossing the Namib desert on a small bush plane.
Packing for a safari is about knowing your destination, planning for the unexpected, and bringing only what helps you create your best work in the field. The gear above has been tested across deserts, forests, wetlands, and remote tracks—and it's built to perform when the action happens fast.
🎒 Want to see how this gear performs in real conditions—and learn how to use it in the wild? Join one of my upcoming wildlife photography workshops. From Namibia’s dunes to Botswana’s wild rivers and the predator-rich South Luangwa, every trip is handcrafted for photographers who want to improve their craft and walk away with shots that matter.

Best Time to Visit Africa for Photography
Choosing the best time to visit Africa for safari photography is one of the most important decisions when planning a photo trip. With its vast landscapes, varied ecosystems, and dynamic wildlife movements, Africa offers exceptional photographic opportunities year-round—but not all months are created equal. Timing impacts everything from light conditions to animal behavior, vegetation cover, and travel logistics. This guide will help you navigate the differences between seasons and regions, understand key wildlife events, and plan an itinerary that matches your photographic goals.

Dry vs. Wet Season: Understanding the Basics
Africa’s safari destinations generally fall into two main seasonal categories: the dry season and the wet (or green) season. Each has distinct advantages and challenges for photography.
Dry Season (typically May–October)
Wildlife visibility is at its peak. Water becomes scarce, concentrating animals around rivers, waterholes, and pans—creating consistent photographic opportunities.
Vegetation thins out, improving visibility and making it easier to track and photograph wildlife from a distance.
Clear skies and golden light dominate, especially in the mornings and late afternoons—ideal for dramatic backlighting and clean subject isolation.
Roads and trails are dry and easier to navigate, reducing travel complications.

Wet Season (typically November–April)
Lush landscapes make for vibrant, moody backgrounds—excellent for wide compositions and storytelling shots.
Birdlife is at its best, with migratory species in breeding plumage and increased activity around water bodies.
Many species enter breeding or calving seasons, leading to unique behavior, new life, and predator-prey interaction.
Rain showers can lead to dramatic skies, mist, and cloud formations, creating rich atmosphere for landscape and wildlife shots alike.

Month-by-Month Guide Across Regions
To make the most of your safari photography, it’s essential to consider both timing and location. Here’s a month-by-month breakdown of key regions and what photographers can expect:
January to March
Central Kalahari Game Reserve (Botswana): The wet season transforms the desert into a blooming savanna. Plains game like oryx, springbok, and hartebeest are plentiful, and big cats are highly active, using the thick grasses for cover.
South Luangwa (Zambia): The emerald season begins. Lush vegetation and flooded lagoons create mirror-like reflections, while elephants, hippos, and birdlife dominate the scene. Most places, however, are unreachable due to flooded roads.
Ngorongoro Crater & Southern Serengeti (Tanzania): Calving season for wildebeest attracts predators like lions and hyenas. Cloud cover offers diffused light, great for soft, low-contrast portraits.
April to June
Khwai & Moremi (Botswana): Early dry season brings clearer skies and optimal game viewing without the crowds. Ideal for leopard tracking and elephant herds crossing the Khwai River.
Ruaha & Selous (Tanzania): Fewer tourists, and wildlife becomes more concentrated as seasonal rivers begin to dry.
Etosha (Namibia): Shoulder season begins in May. Wildlife begins congregating near waterholes, offering dramatic interactions between prey and predators.
July to September
Masai Mara (Kenya): Peak of the Great Migration. Expect dramatic river crossings, dust clouds, and intense predator action. Also, large gatherings of photographers—planning ahead is essential.
South Luangwa (Zambia): This is prime time for leopards and lions. Dry riverbeds and orange skies make for classic African safari frames.
Mana Pools (Zimbabwe): Elephants standing on their hind legs to reach trees—a unique behavioral photo opportunity.
October to December
Chobe & Savuti (Botswana): Late dry season heat draws huge herds to remaining water sources. Excellent for elephant photography, lion dynamics, and dramatic dust light.
Khwai: High predator concentration continues. Expect golden light, low vegetation, and clean backgrounds.
Namibia’s Skeleton Coast & Sossusvlei: The contrast of wildlife against stark, arid desert backdrops is at its best. Think desert-adapted elephants, oryx on dunes, and lone giraffes under glowing skies.

Photographic Highlights by Season
Each season offers something unique for photographers:
Calving & birthing seasons: January–March in Serengeti (Tanzania) and Kruger National Park (South Africa)
Predator activity peaks: mostly in August–October in Etosha NP, South Luangwa NP, Lower Zambezi NP (dry season)
Bird migrations: November–February in Botswana, Zambia, Northern Namibia and Kenya
Elephant behavior: Best in dry season months (July–October), especially in Chobe, South Luangwa, and Tarangire
Big cat tracking: Stronger in Khwai (year-round), Mara (July–Sept), and South Luangwa (June–October)

Sample Itineraries Based on Season
Here’s a look at some of the real-world itineraries from my guided wildlife photography workshops, designed to align with peak conditions for photography and wildlife activity:
March – Patagonia Puma Tracking
Track wild pumas in the dramatic landscapes of southern Chile. This trip focuses on low-angle stalking shots, golden backlight opportunities, and minimalist compositions in open terrain.
May – Kalahari Safari Adventure (CKGR & Beyond)
A deep dive into Botswana’s Central Kalahari Game Reserve. Expect big cats, dramatic desert light, and the feeling of true wilderness—far from the crowds.
May – Iconic Namibia
From the dunes of Sossusvlei to the wildlife-rich pans of Etosha, this itinerary is built for diversity: landscapes, desert elephants, and classic big game.
September – South Luangwa (Zambia)
Leopard central. This trip takes place during the dry season, when wildlife congregates around the Luangwa River. Incredible for predator action, dust, and light.
October – Wild Namibia
This itinerary explores Damaraland, Etosha, and beyond—perfect for backlit elephants, dramatic skies, and a mix of arid and savanna ecosystems.
Final Tips for Choosing When to Go
Define your style: Do you prefer storytelling scenes, clean portraits, or intimate behavior? Let that guide your timing.
Understand trade-offs: Wet season offers mood and action; dry season gives you clarity, access, and consistency.
Factor in travel style: Self-drive safaris (e.g., Namibia or Botswana) are easier during dry months due to road conditions.
Use location-specific knowledge: Some parks are excellent year-round, like Khwai, while others—like CKGR—are best only during a short window.
📚 Need help deciding which safari fits your style? Download the free Wildlife Photography eBook for a deeper breakdown of gear, planning, and field techniques.

Ready to Experience These Seasons for Yourself?
If you’re serious about building a powerful wildlife photography portfolio—and doing it in a small group led by professionals who understand the light, the timing, and the animals—consider joining one of my upcoming workshops.
We photograph in the best locations at the best times, with itineraries built around real field experience. From the Kalahari to South Luangwa and Namibia’s deserts, every trip is crafted for photographers who want results.

Ethical Wildlife Photography: 7 Rules Every Photographer Should Follow
Want to capture stunning wildlife photos without harming nature? Learn the 7 essential rules of ethical wildlife photography—plus real-world tips to shoot responsibly and respectfully in the wild.
Wildlife photography is more than just capturing stunning images—it’s about respecting nature, preserving habitats, and ensuring the well-being of the animals we photograph. Unfortunately, many photographers unintentionally disturb wildlife, causing stress or harm. Ethical wildlife photography means putting the welfare of animals before the perfect shot. In this guide, we’ll explore 7 key rules every wildlife photographer should follow to minimize their impact and practice responsible photography in the field.

📚 New to the field? Before diving in, check out my Complete Guide to Wildlife Photography for essential gear, shooting tips, and mindset shifts that’ll set you up for success.
Respect the Animal’s Space & Boundaries
One of the hardest lessons I learned as a wildlife photographer came early on in my career when I unintentionally stressed a family of deer while trying to get the perfect shot. I was crouched low, inching forward, convinced I was being subtle. But the moment the mother flicked her ears back and stiffened, I knew I had pushed too far. She let out a warning snort, and within seconds, the entire group bolted—tails flashing white as they disappeared into the trees. No shot was worth that. It was a wake-up call: just because we have cameras doesn’t mean we have the right to invade their space.
Wildlife photography isn’t about us—it’s about them. Every time we step into an animal’s environment, we are visitors, and good visitors don’t disrupt the host. Animals have stress thresholds, and when we get too close, we can alter their behavior in ways that may seem small but have lasting consequences. A bird flying off a nest too early might leave eggs vulnerable to predators. A resting lion forced to move burns precious energy needed for hunting. Even a seemingly calm deer standing still could be on high alert, heart pounding because a photographer is too close.

So how do you know when you’re invading an animal’s space? It’s all about body language. If an animal stops what it’s doing to look directly at you, you’re probably too close. If it moves away, even a few steps, you’ve already pushed its limits. Signs like flattened ears, raised tails, or a sudden freeze indicate discomfort. And in some cases—like with elephants, bears, or big cats—ignoring those signals could be downright dangerous. I once saw a photographer in Africa get a little too bold with a bull elephant. He didn’t respect the subtle signs—ears flaring, foot stomping—and he nearly paid for it when the elephant mock-charged. Let’s just say, I’ve never seen someone scramble back into a safari vehicle that fast!
The best approach? Use a long lens and be patient. A good 400mm or 600mm telephoto lens lets you capture detailed shots without encroaching on an animal’s comfort zone. If you find yourself tempted to inch closer, stop. Ask yourself: Am I affecting its behavior? Would I act this way if I wasn’t holding a camera? If the answer is yes, back off. The goal is to capture animals as they naturally are—not as they are when stressed by human presence.
Another key tip: Know your species. Different animals have different tolerance levels. In Yellowstone, for example, bison seem unfazed by cars but will charge if a person gets too close on foot. Meanwhile, mountain goats in the Alps are surprisingly tolerant of human presence, often coming close on their own. Researching an animal’s behavior beforehand helps you understand how much space they need and what signs indicate stress.
At the end of the day, ethical wildlife photography is about respect. If you’re constantly chasing animals for a better shot, you’re missing the point. The best images come when an animal trusts you enough to ignore you completely. I once sat quietly near a waterhole in Namibia for over an hour, letting the wildlife settle. Eventually, a herd of springbok wandered so close that I barely needed to zoom in. That’s the magic of patience—it rewards you with moments you’d never get by forcing a shot.
Remember: If an animal changes its behavior because of you, you’re too close. The best wildlife photographers are the ones who blend in, observe, and let the wild remain wild.

🦓 Want to practice ethical distance without sacrificing quality? Learn how I balance lens choices and proximity in my Etosha National Park Photo Guide, where telephoto discipline is key to success.
Follow Local Laws & Conservation Guidelines
I’ll be honest—when I first got into wildlife photography, I didn’t pay much attention to the legal side of things. I figured as long as I wasn’t harming the animals, I was in the clear. Then, on a trip to a national park in Africa, I learned the hard way that ignorance isn’t an excuse. I had unknowingly walked a few meters off the designated path to get a better angle of a giraffe. A park ranger pulled up within minutes, explaining that I had violated a rule designed to protect both visitors and wildlife. It was a wake-up call—even well-meaning photographers can accidentally cause harm if they don’t understand local laws.
Wildlife protection laws exist for a reason, and they vary from place to place. Some areas have strict no-drone policiesto prevent noise pollution from disturbing animals, while others require permits for commercial photography. Some parks prohibit flash photography, feeding animals, or even wearing brightly colored clothing that could startle wildlife. In certain regions, photographing endangered species without a special permit can even get you fined. A great example is gorilla trekking in Rwanda or Uganda—photographers must keep a strict 7-meter distance to prevent disease transmission, and rangers enforce time limits to minimize stress on the animals.
So how do you make sure you’re following the rules? Research, research, research. Before heading to any location, check the official website for the park, reserve, or country you’re visiting. National parks and wildlife reserves often have detailed guidelines about what’s allowed and what isn’t. If you’re traveling internationally, be extra cautious—some countries have strict regulations on exporting or even possessing wildlife photos. Certain reserves in Botswana and Namibia, for example, have restrictions on commercial photography unless you have a filming permit.
One of the biggest differences you’ll encounter is national parks vs. private reserves. National parks are government-managed and usually open to the public, with well-defined rules that prioritize conservation over tourism. You’ll often need to stay on designated roads, and off-road driving is usually forbidden. Private reserves, on the other hand, are owned by organizations or individuals and often have looser regulations. Some allow off-road driving, night photography, and closer wildlife encounters—but that doesn’t mean you should abandon ethical practices. Just because a guide lets you get closer doesn’t mean it’s good for the animal.

Here’s where it gets serious: breaking wildlife laws, even unintentionally, can have long-term consequences. Disturbing nesting birds, getting too close to marine life, or baiting predators for a better shot can have ripple effects that harm conservation efforts. A well-known example is the overcrowding of jaguar habitats in the Pantanal, where too many boats chasing a sighting have led to stress-induced changes in the cats’ hunting behavior. In some cases, irresponsible photographers have been banned from reserves for repeated rule-breaking.
I once met a photographer who got fined in Yellowstone for stepping a few feet too close to a herd of bison. His defense? “I just wanted a better shot.” The reality? Park officials take these rules seriously because wildlife safety matters more than any photograph.
If you love wildlife photography, respecting the law is part of the job. Always check local regulations, get permits if needed, and follow park guidelines. Conservation and photography should go hand in hand—because if we don’t protect these places, there won’t be anything left to photograph.
Leave No Trace & Minimize Your Footprint
Wildlife photography is about capturing the beauty of nature, but the irony is that photographers can sometimes be the very thing that damages it. I’ll never forget the first time I truly understood how much of an impact human presence can have on a fragile ecosystem. I was photographing a family of foxes in a meadow, carefully adjusting my position to get a better composition. When I stepped back, I noticed my boots had flattened delicate wildflowers—plants that took months to grow, crushed in seconds. It hit me hard: even when we think we’re being careful, we can unintentionally alter an environment in ways that aren’t immediately obvious.
Every step we take in nature has a consequence. In some environments, like alpine tundras or deserts, a single footprint can take years to recover. In wetland areas, the mere act of stepping too close can disturb nests or destroy eggs, even if they’re hidden underfoot. One of the most heartbreaking sights I’ve seen was in a bird rookery, where a group of photographers, eager to get closer, trampled the surrounding reeds. Later that day, I spotted abandoned nests, likely because the parent birds had been too stressed to return. That’s when I made it a rule—if I have to alter the environment to get the shot, I’m in the wrong place.
So, how do you ensure you’re not doing more harm than good? First, stick to established trails whenever possible. I get it—sometimes the perfect angle seems to be just a few steps off the path. But those few steps can cause erosion, damage plant life, or even disturb burrows that house small mammals, reptiles, or insects. In sandy or snow-covered environments, our footprints can create unnatural paths that predators use to find prey, disrupting the balance of the ecosystem.
Another big one: don’t disturb or move natural elements. That means no stacking rocks for Instagram aesthetics, no pulling branches aside for a clearer shot, and absolutely no relocating an animal or nest for a better composition. Nature should look untouched in your photos because it should be untouched in reality.
And let’s talk about waste. It’s wild (and infuriating) how many times I’ve been in remote locations and still found candy wrappers, water bottles, or even lens wipes left behind by other photographers. Always pack out what you bring in—even biodegradable waste like fruit peels or food scraps, which can introduce non-native bacteria and attract animals to areas they shouldn’t be. A simple habit I’ve developed is carrying an extra bag just for picking up trash. If I leave a location cleaner than I found it, I know I’m doing my part.
At the end of the day, wildlife photography is about appreciation, not interference. The best photographers aren’t just masters of composition or lighting—they’re stewards of the land, leaving no trace so that future generations can experience these wild places as they were meant to be: untouched, unspoiled, and thriving.

Never Bait or Manipulate Wildlife for a Shot
I still remember the first time I saw someone baiting an animal for a photo. It was in a remote forest, and a photographer had placed bits of meat near a tree stump, hoping to lure out a predator. Sure enough, a fox eventually emerged, cautiously approaching the free meal while the photographer clicked away. The shots looked incredible—but at what cost? That fox, once an independent hunter, had just learned that humans provide food. And that’s exactly where the problem begins.
Feeding wildlife disrupts natural behavior in ways that most people don’t realize. Wild animals are meant to hunt, forage, and scavenge on their own, not rely on human handouts. When they associate people with food, it creates dependency, alters their survival instincts, and can even make them aggressive. I’ve seen this firsthand in places like Yellowstone, where bears conditioned to human food end up getting euthanized because they become a danger to tourists. The phrase "a fed animal is a dead animal" exists for a reason.
But baiting doesn’t just impact the animal being fed—it affects the entire ecosystem. Predators that get used to human-provided meals might abandon their natural hunting patterns, which can throw off the delicate balance of an area’s wildlife. Meanwhile, smaller creatures—like birds—can develop an unhealthy reliance on feeders, disrupting their migration patterns and increasing the risk of disease spread.
And then there’s staged photography, another major ethical issue. You’ve probably seen those jaw-dropping images of owls flying straight at the camera or eagles snatching prey in perfect lighting. What many don’t realize is that some of these shots are staged, with live bait (often pet-store mice) placed in strategic locations to force action. Some wildlife photography workshops even cage animals temporarily, releasing them just to get the "perfect shot." If the scene looks too good to be true, there’s a good chance it was manipulated.
So, how do you photograph wildlife naturally, without interference? The answer is simple: patience, research, and respect.
Know your subject. Research the habits and routines of the species you’re targeting. The more you understand an animal’s natural behavior, the better you’ll anticipate its movements and get the shot without artificial manipulation.
Use the right gear. A long telephoto lens (400mm or more) lets you stay at a respectful distance while still capturing intimate shots. A wide aperture and fast shutter speed help freeze motion without needing to force action.
Stake out real feeding areas. Rather than setting up bait, learn where animals naturally find food. If you want to capture a bird in flight, visit its nesting or feeding grounds during peak hours. If you want a predator in action, go where its prey naturally gathers.
Blend in and wait. Wildlife photography isn’t about forcing moments—it’s about witnessing and documenting them as they happen. I once spent three hours in a hide waiting for a leopard to emerge from dense brush. It finally happened, and that shot meant far more to me than any staged encounter ever could.
At the end of the day, the best wildlife photographers are observers, not disruptors. The thrill of capturing a truly wild moment—one that happens naturally, without interference—is what makes this craft so rewarding. If we truly respect nature, we won’t try to control it for the sake of a photograph.

Use Silent & Non-Intrusive Photography Techniques
Wildlife photography is all about capturing the raw beauty of nature—but that doesn’t mean we should announce our presence while doing it. I learned this the hard way on a night shoot in Africa. I was photographing a leopard resting in a tree, and in my excitement, I forgot to turn off my camera’s focus assist light. The second that little red beam flickered onto the trunk, the leopard’s ears perked up, and within seconds, it was gone. Just like that, I had ruined the moment. I wasn’t being a silent observer—I was an intruder. That’s when I realized how much our gear choices and shooting techniques can impact wildlife behavior.
The Right Lens: Get Close Without Getting Too Close
The easiest way to stay non-intrusive? Use a long telephoto lens. If you’re shooting wildlife with a standard zoom lens (like 70-200mm), chances are you’re getting too close. A 400mm or 600mm lens allows you to frame tight shots while maintaining a respectful distance.
Some tips for using a long lens effectively:
Use a monopod or tripod to stabilize the shot—long lenses amplify small movements.
Avoid sudden movements when repositioning. Slow, deliberate adjustments keep you unnoticed.
Stay hidden and let the wildlife come to you. The best encounters happen when animals don’t feel your presence.
Respect Over the Perfect Shot
At the end of the day, wildlife photography isn’t just about the image—it’s about the experience. The more we blend into the environment, the more natural and intimate our shots become. By keeping our cameras silent, ditching the flash, and using the right gear, we ensure that our presence doesn’t disturb the very creatures we set out to admire. The best wildlife photographers aren’t seen or heard—they’re simply there, capturing moments as they unfold.

Respect Other Photographers & Visitors in the Field
Wildlife photography isn’t a solo sport—whether you’re in a national park, on a guided safari, or at a well-known birding hotspot, chances are you won’t be the only one trying to capture the perfect shot. And let’s be honest, nothing ruins the magic of the moment faster than bad photographic etiquette. I’ve seen it all: photographers elbowing their way to the best view, cutting in front of tripods, and even whistling or clapping to get an animal’s attention. Wildlife photography should be about respect—both for nature and for fellow photographers.
Give Others Space & Don’t Block Viewpoints
One of the biggest mistakes photographers make—especially in crowded locations—is hogging the best spot. I once spent an early morning at a well-known hide, waiting patiently for a rare bird to appear. Just as it finally landed, a photographer rushed in, set up right in front of me, and started clicking away without a second thought. That moment taught me a valuable lesson: always be aware of those around you.
Good photographic etiquette means:
Taking turns if a prime spot is limited. If you’ve had your shot, step aside and let others get theirs.
Avoiding “tripod sprawl.” Set up efficiently without blocking paths or hogging space.
Keeping noise to a minimum. Loud talking, phone calls, or unnecessary movement can ruin the experience for others—and scare away wildlife.
Avoid Crowding Animals for the Perfect Shot
I get it—when an incredible wildlife moment happens, there’s a temptation to move in closer, reposition, or push the limits to get “the shot.” But when dozens of people start creeping in, it can quickly turn into a problem. I’ve seen situations where photographers corner an animal, unintentionally stressing it or forcing it to flee.
If an animal starts acting differently because of the crowd, back off. If you notice birds flying away, deer stiffening, or a predator shifting uncomfortably, it’s time to give it space.
Respect personal distance. If you wouldn’t want someone standing a foot behind you while you work, don’t do it to others.
Use a telephoto lens instead of moving closer. A 400mm+ lens allows you to capture great details withoutneeding to invade an animal’s space.
One of the worst things I’ve seen was in Yellowstone, where a group of photographers surrounded a grizzly on a roadside, blocking its escape route. Park rangers had to intervene—situations like this aren’t just unethical, they’re dangerous for both humans and animals.
Work With Local Guides & Conservationists
If you’re in a new location—especially on a photography tour—local guides and conservationists are your best friends. They understand animal behavior, know the best ethical ways to photograph wildlife, and can ensure that your presence isn’t causing harm.
Ask questions about local regulations and conservation efforts.
Follow the guide’s lead—they know when an animal is comfortable and when it’s time to leave.
Support ethical operators who prioritize wildlife well-being over profit.
At the end of the day, wildlife photography is a privilege, not a right. We all share the same passion, and the more we respect each other—and the animals we photograph—the better the experience for everyone. A little courtesy goes a long way, and trust me, nothing feels better than capturing an incredible shot knowing you did it the right way.
Educate & Inspire Ethical Photography Through Your Work
If you’re posting wildlife photography online—whether on Instagram, YouTube, or a personal blog—you have an opportunity to educate your audience about ethical photography. Instead of just posting a stunning shot of a lion or an eagle, tell the story behind it.
Mention ethical practices you followed to get the shot—like keeping a safe distance, avoiding baiting, or using silent shutter mode.
Talk about conservation issues related to the species—Is it endangered? Is its habitat under threat? What challenges does it face?
Call out unethical practices when necessary. Many people don’t realize that some viral wildlife photos were taken under unethical conditions, such as animals in captivity or staged encounters. Raising awareness helps others make informed choices.
For example, I once posted an image of a snow leopard I photographed after days of patience and remote camera trapping. Instead of just sharing the shot, I explained why snow leopards are elusive, how human encroachment affects their habitat, and why baiting them is harmful. The response was incredible—people were genuinely interested in learning more. That’s when I realized: photos capture attention, but the message behind them is what truly resonates.
Share Conservation Stories Alongside Your Images
Some of the most powerful wildlife images tell stories of survival, loss, and resilience. If you have a platform, use it to amplify conservation efforts.
Work with conservation organizations to document their efforts and showcase their work.
Share behind-the-scenes insights about challenges in ethical wildlife photography—like the patience required to capture authentic, unmanipulated moments.
Highlight success stories—such as species making a comeback or protected areas thriving.
One of my most memorable moments was photographing African wild dogs, one of the most endangered predators. Instead of just posting the images, I collaborated with a conservation group to share how human-wildlife conflict threatens their survival. The post led to direct donations to the organization. That’s the kind of impact wildlife photography can have when used for good.
Encourage New Photographers to Prioritize Ethics Over "Likes"
Let’s face it—social media rewards dramatic content. The more extreme or unusual an image, the more attention it gets. This has led to dangerous trends where people get too close, disturb animals, or manipulate scenes just to go viral. As experienced photographers, it’s our responsibility to set an example for the next generation.
Teach new photographers that patience is key. The best shots happen when you let nature unfold naturally, not when you force a moment.
Discourage unethical shortcuts, like baiting animals, using drones irresponsibly, or staging encounters.
Celebrate authentic wildlife photography. If you see an amazing ethical wildlife shot, share it, comment on it, and boost it—let’s shift the focus from staged drama to real, respectful encounters.
I’ve had young photographers ask, "But how do I stand out without chasing viral moments?" My answer: By telling real stories, showing genuine respect for wildlife, and creating images with depth and meaning. Ethical photography may not always be the fastest way to fame, but it’s the only way to truly honor the wild and its inhabitants.
At the end of the day, we’re more than photographers—we’re storytellers, educators, and conservationists. Every image we share is an opportunity to change the way people see and respect wildlife. So let’s make it count.

Ethical wildlife photography isn’t just about capturing breathtaking images—it’s about ensuring that future generations of photographers can experience the same beauty without causing harm. By following these seven ethical rules, you can minimize your impact, contribute to conservation efforts, and set an example for others in the photography community.
🎒 If you’re serious about growing as a wildlife photographer—ethically and creatively—consider joining one of my guided workshops. From the savannas of Africa to the peaks of the Alps, my trips are built to challenge your skills, deepen your field knowledge, and help you create meaningful, portfolio-worthy work.
FEATURED ARTICLES

Decoding the Creative Process in Wildlife Photography
I’ve often asked myself: What makes a successful photographer? Is it raw talent—some genetic gift that lets certain people see the world differently—or is it just relentless practice and a stubborn refusal to quit? I’ve swung between both ideas over the years. There were times when I looked at a National Geographic spread and thought, Wow, that photographer must have been born with a sixth sense for light and composition. And then, other times, I’d remind myself of those endless, frustrating days in the field, tweaking my camera settings over and over, waiting for the perfect moment, missing more shots than I’d like to admit.

It’s human nature to attribute our successes to innate ability and our failures to external circumstances. If I capture an award-winning shot of a leopard in the golden light of the Serengeti, it’s easy to think, That’s just my eye for composition, my instincts kicking in. But when I completely botch a once-in-a-lifetime moment—say, a bald eagle swooping down for a fish and I miss focus—I’m quick to blame the gear, the light, or pure bad luck. The truth, though? Real mastery in wildlife photography means paying just as much attention to what goes wrong as what goes right.
The Myth of Natural Talent
There’s a lingering idea that every world-class photographer was born with an exceptional gift. But let’s break that down. Reinhold Messner, the legendary mountaineer, was once portrayed as some sort of genetic superman—built differently, destined to conquer the world’s highest peaks without supplemental oxygen. Yet, when he was tested in labs, physiologists found nothing remarkable about his body. What set him apart? His ability to relentlessly focus on a goal, stretching the limits of what he knew was possible.
I think about this every time I hear someone say, I could never take photos like that—I just don’t have the talent. If there’s one thing I’ve learned, it’s that success in photography isn’t about an inborn eye for beauty, but about dedication, repetition, and a deep understanding of your craft. The best photographers I know aren’t just talented. They’re obsessive. They go out when the light is terrible just to experiment. They take thousands of photos that never see the light of day, all in the pursuit of that one perfect frame.

Hard Work > Luck
I once heard an NPR interview with a prodigy violinist. The host gushed over her “natural talent,” but she immediately shut it down. She said she was sick of people assuming she was just born gifted. What they didn’t see were the thousands of hours she had spent practicing, the moments when she sacrificed normal teenage fun to perfect her craft. And here’s the kicker: when she slacked off, her performances suffered.
That struck a chord with me because I see the same thing in wildlife photography. If I go weeks without shooting, my first few rolls (or memory cards, in today’s world) feel rusty. My reaction times are slower. I hesitate when I should just trust my instincts. Early in my career, I used to think this meant I wasn’t cut out for it—that “real” photographers could just pick up their cameras and create magic. Then I attended a National Geographic seminar and heard seasoned pros admitting the same thing. Turns out, performance swings are universal. Even top-tier photographers struggle when they’ve been away too long.
The lesson? Photography isn’t like riding a bike. If you don’t use it, you lose it.
The Power of Observation
One thing I’ve noticed about truly great wildlife photographers is that they don’t just see things—they study them. They aren’t just snapping away at every bird or animal that crosses their path. They observe, anticipate behavior, and position themselves accordingly. It’s a habit that often starts in childhood. Studies have found that many of the world’s most creative minds were obsessive collectors as kids—whether it was fossils, stamps, or even beer cans. It wasn’t about the objects themselves, but about learning how to categorize and make sense of the world.
Photography follows a similar pattern. At first, we’re all just collectors—capturing random moments, experimenting, clicking away without much thought. Then, we move into the organization phase, where we start refining what we shoot, becoming selective, and thinking about composition. The real magic happens in the third phase, when we take all that accumulated knowledge and start seeing patterns and possibilities that others don’t. That’s when our work starts to feel truly unique.

Why the Best Photos Feel Personal
I’ve come to believe that our best photographs don’t come from a perfectly planned shot list. They come from moments where we feel deeply connected to what we’re shooting. Have you ever taken a picture that made your heart race? That moment when you just know you’ve captured something special? It’s not about technical perfection. It’s about emotional resonance.
Somebody standing a few feet away from you could take a picture of the same scene, but their version will be different—because creativity isn’t in the camera; it’s in the mind’s eye. Every great image is a product of a lifetime of memories, experiences, and emotions. When we bring all of that into our work, photography stops being just documentation. It becomes art.

Final Thoughts
If you take one thing from this, let it be this: creativity isn’t a gift. It’s a process. Wildlife photography—like any creative pursuit—follows a natural progression. You start by collecting, then organizing, then, with enough time and practice, you begin to create something truly original.
So, the next time you feel like you’re not talented enough, remember: your best work is still ahead of you. Keep shooting, keep learning, and most importantly—stay curious. That’s where the magic happens.
Ready to turn passion into progress, I’d love to invite you to join one of my wildlife photography workshops. We go deep—not just into wild places, but into the craft itself. Whether you’re just starting out or looking to refine your skills in the field, these trips are designed to help you grow, connect with like-minded photographers, and create your best work yet.
FEATURED ARTICLES

Best Wildlife Photography Camera Settings
Discover the best wildlife photography camera settings for any camera! This guide covers shutter speed, aperture, ISO, autofocus, and pro tips to capture stunning wildlife shots.
Wildlife photography is all about capturing those fleeting, magical moments. But here’s the thing: no matter how incredible the moment is, if your camera settings aren’t dialed in correctly, you’ll end up with a blurry, noisy, or poorly exposed image. And that? That’s the fastest way to turn an epic shot into a missed opportunity.
I’ve been there. Early on, I remember photographing a leopard at sunrise in a private reserve in Namibia. The golden light was perfect, but I was so caught up in the moment that I didn’t check my exposure dial. The result? An overexposed fur - and an unusable photo. Since then, I’ve learned that understanding exposure settings isn’t just technical jargon—it’s the key to nailing sharp, detailed wildlife shots every single time.
In my early days I’d find quite difficult to nail exposure, especially in high contrast and fast changing conditions.
At its core, exposure is controlled by three main settings: shutter speed, aperture, and ISO. These work together like a finely tuned engine, and knowing how to adjust them based on lighting conditions and animal behavior will make or break your shot.
Shutter speed determines how quickly your camera captures movement. A fast shutter speed (1/2000s or higher) freezes action, while a slow one introduces motion blur.
Aperture controls the depth of field—how much of your image is in focus. A wide aperture (f/2.8-f/5.6) isolates your subject beautifully, while a narrower aperture (f/8-f/11) keeps more of the scene sharp.
ISO affects brightness and noise. Modern cameras handle high ISOs well, but balancing it with the other settings is key to avoiding unnecessary grain.
In this quick video you will find a complete explanation of these concepts:
The trick is to adjust these settings dynamically. If the light changes or the animal moves, your settings should adapt instantly. That’s why knowing them inside and out is crucial—it lets you respond to the scene without fumbling through menus.
Best Shutter Speed for Wildlife Photography
Shutter speed can make or break a wildlife shot. Too slow, and you’ll get motion blur where you don’t want it. Too fast, and you might push your ISO too high, introducing noise. Finding that sweet spot takes practice, but once you get a feel for it, it becomes second nature. Let’s break it down based on different scenarios so you can confidently adjust on the fly.
Fast-Moving Subjects: Birds in Flight & Running Mammals
If you’ve ever tried capturing a bird mid-flight only to end up with a blurry mess, your shutter speed was probably too slow. For fast action, like birds in motion or cheetahs sprinting, you need a shutter speed of at least 1/3200s. Some birds—especially smaller, erratic ones like swallows—may even require 1/4000s or higher.

For fast subjects like birds you need to go as high as 1/4000s to get a sharp image.
For running mammals like wolves, deer, or big cats, 1/2000s is a good baseline. It freezes their motion while keeping enough detail sharp. I’ve learned this the hard way—one time in Namibia, I had a cheetah dashing past my Land Cruiser, and my shutter was at 1/800s. The result? A series of blurry spots instead of a crisp predator in action. Lesson learned.

Cheetah sprinting in Etosha NP, Namibia.
Walking Animals & Slower Movements
Not everything in wildlife photography is about freezing lightning-fast action. If an animal is walking or making slower movements—like a bear foraging or an elephant strolling—you can drop your shutter speed to around 1/500s to 1/1000s. This allows you to lower your ISO and get a cleaner image while still maintaining sharpness.
For example, on a recent shoot in Zambia I photographed a kudu moving through the golden grass in the fading evening light at 1/320s. It kept it sharp while allowing for a balanced exposure. Had I gone with 1/3200s, I would have needed to crank up my ISO, adding unnecessary noise.

Kudu at dusk in South Luangwa NP, Zambia.
When to Go Lower: Stationary Subjects
When an animal is completely still—like a sleeping lion, a perched owl, or a resting bear—you can go much slower, sometimes even down to 1/100s or lower. But there’s a catch: the longer your focal length, the faster your shutter speed should be to counteract camera shake.
With a 600mm lens, you generally don’t want to go below 1/600s unless you’re using a tripod or have impeccable hand-holding skills. With shorter focal lengths, like a 100mm, you can push it lower, even 1/50s in some cases.
Balancing Shutter Speed with ISO and Aperture
Wildlife photography is all about balancing the exposure triangle. If you need a fast shutter speed but don’t have much light, you have two choices: open up your aperture or raise your ISO.
Aperture: A wide aperture (like f/2.8 or f/4) lets in more light, allowing you to use a higher shutter speed without cranking up the ISO too much. This is great for isolating your subject and blurring the background.
ISO: Sometimes, you have no choice but to increase your ISO. Modern cameras handle ISO 3200 or even 6400quite well, so don’t be afraid to push it when needed. It’s better to have a slightly noisy shot than a blurry one.
A simple rule of thumb: if you’re shooting in low light and your shutter speed is too slow, first open up your aperture. If that’s maxed out, then bump up the ISO.
Wide Apertures (f/2.8 – f/5.6) for Isolation and Bokeh
Most of the time, especially when shooting wildlife portraits, you want to use a wide aperture (low f-number). Something like f/2.8 or f/4 helps separate the subject from the background, giving that creamy bokeh effect photographers love. This is crucial when shooting in dense environments—forests, tall grass, or busy savannahs—where you want to blur out distractions.

Shallow depth of field at 600mm f4
However, be mindful of your depth of field. When shooting a close-up of an eagle at 600mm and f/4, you might end up with only the eye in focus. That’s where fine-tuning comes in—f/5.6 or f/8 can be a sweet spot for maintaining sharpness while still getting a nice blur.
Narrow Apertures (f/8 – f/11) for Group Shots & Environmental Portraits
If you're capturing an animal in its environment you’ll want more depth of field. This is where f/8 to f/11 comes in handy. These settings keep both the animal and part of the background in focus, giving the viewer a sense of place without overwhelming the subject.
Narrower apertures are also useful when photographing multiple animals in the same frame. If you’re shooting a pack of wolves or a group of lions resting together, a narrower aperture ensures all of them stay in focus, rather than just the closest one.

I shot this image at f11 to make sure both the elephant and the mopane trees were in focus.
Best ISO Settings for Wildlife Photography
Ah, ISO - the setting that used to haunt photographers back in the day. If you started out in the early digital era you probably remember cringing at the thought of pushing ISO past 800. Grainy, muddy images were the norm. But today? Modern cameras have changed the game. ISO isn't the enemy anymore; it’s a powerful tool that lets us freeze fast-moving wildlife, shoot in low light, and balance our exposure without worry.
How High Can You Go? Depends on Your Camera
The good news? Most modern cameras can handle high ISO settings really well. But the exact limits depend on what you're shooting with.
Entry-level and mid-range cameras: If you're using a crop-sensor body (like a Canon R7, Nikon D7500, or Sony A6700), you’ll probably get clean results up to ISO 3200 or 6400. Beyond that, noise starts creeping in, but it’s still usable with some noise reduction in post.
High-end full-frame cameras: If you’re shooting with a flagship model like the Canon R1, Nikon Z9, or Sony A1 II you can comfortably push ISO 12,800 or even 20,000 and still get solid files with plenty of detail. With my R3 I can sometimes go as far as 51.200 and still get usable files.
High-resolution cameras (like the Canon R5 or Sony A7R V): These pack a ton of megapixels, which means noise becomes a bit more noticeable. Still, ISO 12,800 is totally usable—especially if you expose correctly and apply noise reduction wisely.
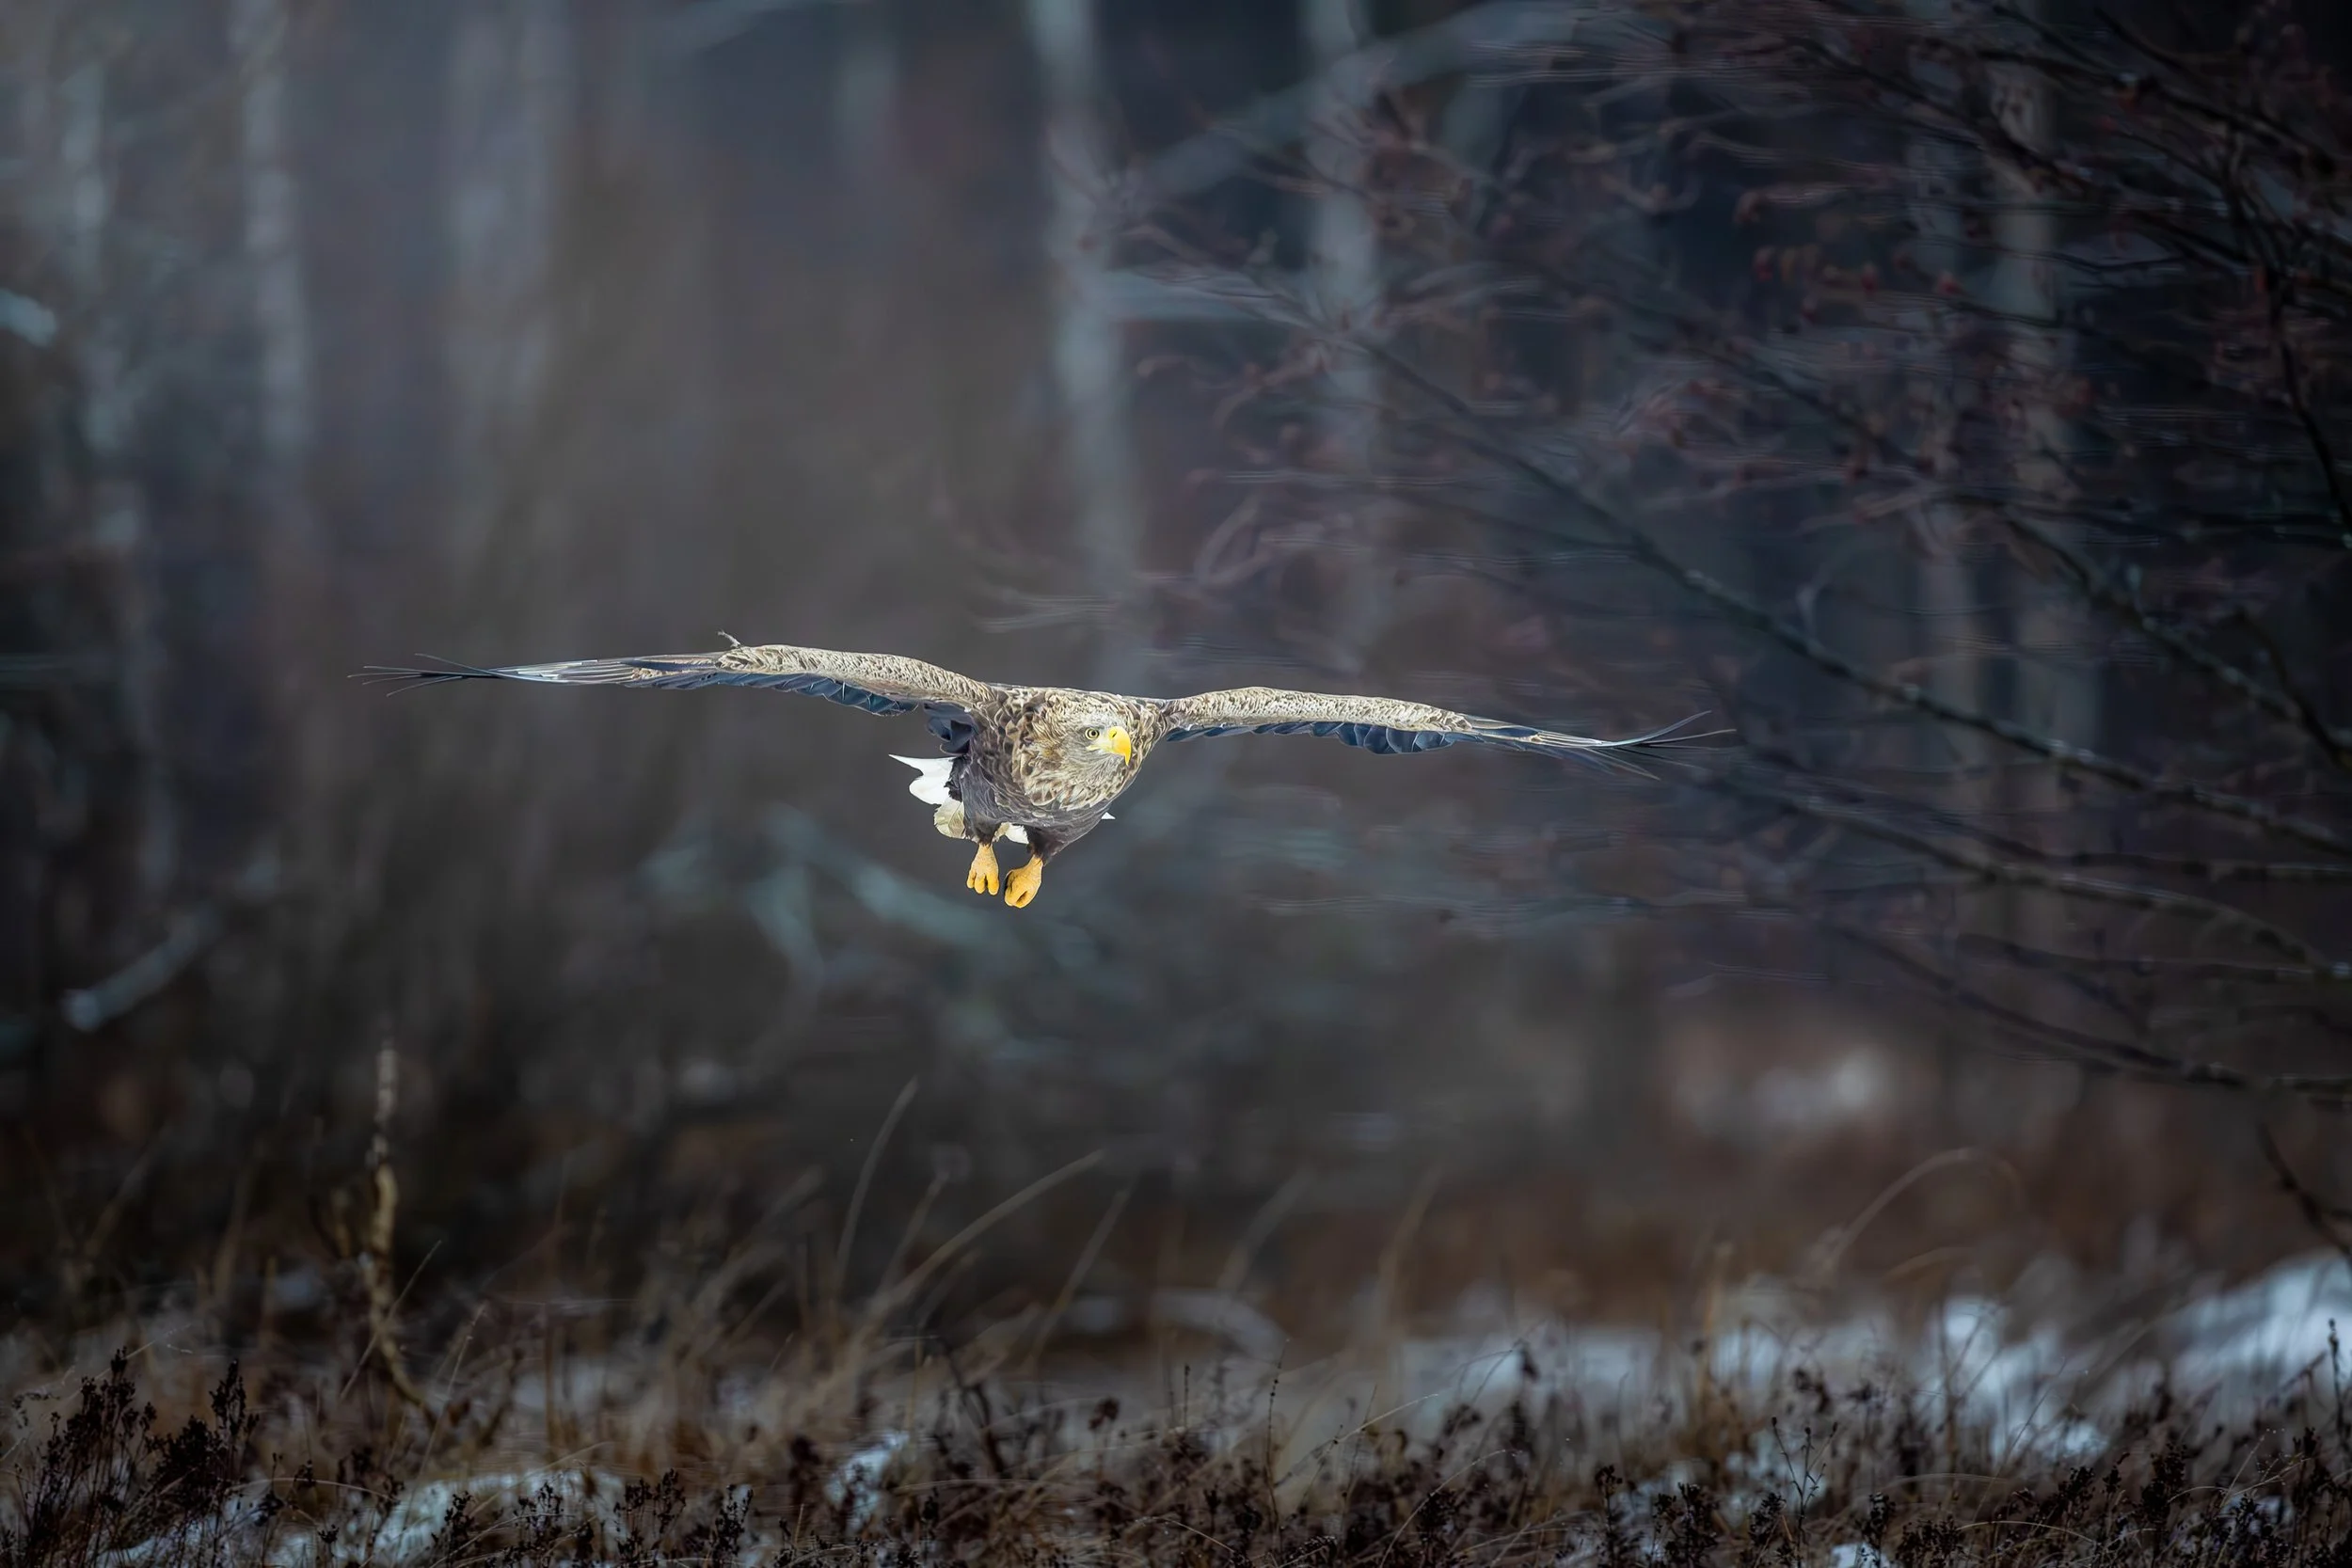
I shot this image on Canon R3 at ISO 20.000
How to Set ISO Based on Your Shutter Speed & Aperture
ISO is all about balancing your exposure triangle. The trick is knowing when to raise it.
Fast-moving subjects (birds in flight, running predators) → You need a high shutter speed (1/2000s or more), which means your ISO will have to compensate, especially in lower light.
Blue hour shots → At dusk or dawn you’ll need to bump ISO up, often past ISO 3200–6400, to keep a usable shutter speed.
Low-light wildlife (forests, nocturnal animals) → This is where full-frame cameras shine. Don’t be afraid to push ISO 6400, 12,800, or higher if needed. Noise is better than motion blur.
Using Auto ISO with Manual Limits
One of the best ways to handle ISO efficiently is by using Auto ISO with manual limits. This lets you focus on adjusting your shutter speed and aperture while letting the camera tweak ISO automatically—within a range you’re comfortable with.
Set a minimum shutter speed (e.g., 1/1000s for wildlife, 1/2500s for birds in flight).
Set a max ISO limit based on your camera’s capabilities (e.g., ISO 6400 for entry-level cameras, ISO 12,800 or more for full-frame models).
Use exposure compensation to fine-tune brightness when needed.
This way, you get the best balance of exposure without worrying about underexposed or blurry shots.
If you want to understand ISO more in depth I suggest you to check this video:
Autofocus Settings for Wildlife Photography
You can have the best camera and the sharpest lens, but if your autofocus settings aren’t dialed in, you’ll end up with a blurry mess instead of a crisp, tack-sharp image of that once-in-a-lifetime moment. Over the years, I’ve tested different autofocus modes in all sorts of conditions—tracking cheetahs at full sprint in Namibia, following an eagle in flight over Patagonia and locking focus on a leopard hidden in the dense brush of South Luangwa. Each scenario requires a slightly different approach, so let’s break it down.
AF-C (Continuous Autofocus) vs. AF-S (Single Autofocus)
One of the biggest mistakes I made early on was relying too much on AF-S (Single Autofocus) for moving subjects. AF-S locks focus on a subject when you half-press the shutter, but if the animal moves even slightly, the focus doesn’t adjust. This works fine for completely stationary animals—like a lion lounging in the shade or an owl perched on a branch—but for anything moving, it’s a disaster. I once missed an entire sequence of a fox hunting in the snow because my camera was stuck in AF-S. Lesson learned.
For wildlife, AF-C (Continuous Autofocus or Servo AF) is the way to go 99% of the time. When set to AF-C your camera continually adjusts focus as long as you keep the shutter half-pressed (or use back-button focus, but we’ll get to that in a bit). This is essential for tracking animals in motion, whether it’s a bird taking off, a wolf running through the forest, or a bear fishing in a river. If you shoot wildlife, just leave your camera in AF-C by default - you won’t regret it.
Best Focus Modes for Wildlife Photography
Single Point AF → For Stationary Animals
If an animal is still, Single Point AF is your best bet. This lets you place the autofocus point exactly where you want - usually on the animal’s eye. I use this when photographing an animal at rest, like a leopard in a tree or a puffin standing on a cliff. The key is to be precise with your focus point. Even slight misplacement - like locking onto the nose instead of the eye—can make your image feel soft.
Dynamic AF / Tracking AF → For Fast-Moving Subjects
For wildlife on the move, Dynamic AF (Nikon) or Tracking AF (Canon/Sony) is a lifesaver. Unlike Single Point AF, which stays fixed, Dynamic AF allows the camera to use nearby focus points if the subject moves slightly. I use this when tracking running, flying, or swimming animals. When a lion charges, or a bird suddenly shifts direction mid-flight, this setting gives you a much better chance of keeping focus locked.
Eye-Detection AF → When Available for Animal Subjects
Not all cameras have Animal Eye AF, but if yours does, use it! Modern mirrorless cameras from Sony, Canon, and Nikon have AI-powered Eye-Detection AF for animals and it’s a game-changer. Instead of worrying about manually selecting the focus point, the camera automatically locks onto the eye, even if the animal moves slightly. This works best in good light and with clear visibility of the eye, but when it works, it’s pure magic.
How to Set Up Back-Button Focus for Better Control
If you haven’t tried Back-Button Focus (BBF) yet, do it. This technique separates autofocus from the shutter button, giving you better control. Instead of half-pressing the shutter to focus, you assign autofocus to a button on the back of the camera—usually the AF-ON button. This lets you:
✔️ Hold focus on a subject even if you recompose the shot
✔️ Prevent accidental refocusing when pressing the shutter
✔️ Quickly switch between AF-C and manual focus by simply releasing the button
Setting it up varies by camera, but here’s the basic process:
Go to your custom settings menu and find the "AF Activation" or "Shutter/AF-ON" setting.
Disable autofocus from the shutter button (this stops AF from activating when you press the shutter).
Assign AF-ON button to autofocus activation.
Once you get used to BBF, you won’t go back. It’s especially useful for situations where you want to lock focus on an animal, recompose, and shoot without refocusing—perfect for framing wildlife creatively without losing sharpness.
Best Shooting Modes for Wildlife Photography
When you’re out in the field, trying to capture a perfectly sharp image of a lion mid-yawn or an eagle in flight, the last thing you want is for your camera settings to work against you. The shooting mode you choose can make or break your wildlife shots. Many beginners assume that Aperture Priority (Av or A mode) or Shutter Priority (Tv or S mode) are good choices, but both have major flaws when it comes to fast-moving wildlife. The best approach? Full Manual Mode with Auto ISO. Let’s break it down.
Why Aperture Priority Isn’t Ideal
Aperture Priority mode lets you control the aperture (f-stop) while the camera automatically adjusts the shutter speed to maintain proper exposure. In theory, this sounds great, especially if you want to control depth of field (DOF). For example, if you want to blur the background of a portrait-style shot of a cheetah, you might choose f/2.8 or f/4 and the camera will pick an appropriate shutter speed.
But here’s the problem: Wildlife is unpredictable. If a change in lighting conditions trigger your camera to suddenly drops the shutter speed too low, your fast-moving subject will be blurry. A running antelope or a flying bird requires a shutter speed of at least 1/2000s or faster, but in Aperture Priority mode, depending on the light, the camera might select 1/500s or lower, leaving you with motion blur. And sure, you can set a minimum shutter speed in some cameras, but it’s not a perfect solution - it still removes full control from you, which isn’t ideal for action photography.
Why Shutter Priority Falls Short
Shutter Priority mode flips the control - you select the shutter speed and the camera picks the aperture to balance exposure. This seems like a great idea for wildlife because you can lock in 1/2500s for birds in flight or 1/1000s for a walking elephant. No motion blur, right?
The problem is that you lose control over aperture, which is a huge issue for wildlife photography. The aperture dictates depth of field, which affects how much of your subject is in focus. If the camera decides to use f/16, you might get a busy, distracting background. If it picks f/2.8, your subject might not be entirely in focus—especially if it has long features like a bird’s beak or an animal’s horns.
You don’t want to leave aperture up to chance. That’s why Manual Mode is the best solution.
Why Manual Mode + Auto ISO is the Best
In Manual Mode, you take full control of both shutter speed and aperture, ensuring that neither changes unexpectedly.
Shutter speed: Set this based on your subject’s motion. Use 1/1000s for walking animals, 1/2000s–1/4000s for birds in flight, and 1/500s for slow-moving subjects.
Aperture: Choose based on how much of your subject you want in focus. Use f/4 or f/5.6 for isolating animals from the background and f/8–f/11 for groups or detailed shots.
But what about exposure? That’s where Auto ISO comes in.
How Auto ISO Works & Why It’s Essential
ISO controls the camera’s sensor sensitivity to light, and instead of manually adjusting it every time the light changes, Auto ISO allows the camera to do it for you while keeping your exposure balanced. This means you don’t have to worry about tweaking ISO while tracking a running cheetah or waiting for a leopard to emerge from the shadows.
Most modern cameras let you set a maximum ISO limit (e.g., ISO 6400 or 12,800) to prevent excessive noise.
With this setup, you retain control over motion sharpness (shutter speed) and depth of field (aperture), while allowing the camera to handle exposure adjustments automatically with ISO. It’s the best of both worlds.

When light is even through the frame evaluative (or matrix mode) works perfectly.
Using Manual Mode + Auto ISO for Exposure Control
One of the best tricks I’ve picked up over the years is using Manual mode with Auto ISO and controlling the exposure with exposure compensation. Here’s how it works:
In Manual mode you set your shutter speed (to freeze motion) and aperture (to control depth of field).
Auto ISO adjusts automatically based on the light conditions, so you’re not constantly fiddling with settings when an animal moves from sunlight to shade.
Exposure compensation (+/-EV) lets you override the camera’s automatic adjustments to brighten or darken the image as needed.
For example, if I’m photographing a dark-furred bear against a snowy background, the camera might underexpose the image because it sees all that bright snow. I’d dial in +1 or +2 EV to compensate. The opposite happens when shooting a bright white bird against a dark background—I’d reduce exposure compensation to avoid blowing out the highlights on the bird.
This method gives me full control while letting the camera handle the tricky, fast-changing lighting situations.
Daylight vs Cloudy WB → Adjusting for Warm or Cool Tones
While these days AUTO White Balance works for most situations, I often use specific white balance presets to keep colors consistent. Daylight WB (usually around 5200K) works well in bright sun, giving a natural, balanced look without overcompensating. But if I want to enhance warmth—like during sunrise or sunset—I switch to Cloudy WB (6000K–6500K). This makes golden tones pop without looking unnatural.
On the flip side, if I’m in snowy conditions (like photographing ibex in the Alps), I sometimes dial my WB slightly cooler to keep the whites crisp and prevent them from looking too warm. That’s the beauty of manual white balance - tiny tweaks can make a big difference.
Why Shooting in RAW Gives More Flexibility for Color Correction
Now, let’s talk RAW vs JPEG—because this is where color really comes into play.
When you shoot in RAW your camera captures all the data from the sensor without applying compression. This means if your white balance is slightly off, you can adjust it later in post-processing without any loss in quality. If you shoot in JPEG? You’re stuck with whatever WB the camera decided at the moment of capture.
Pros and Cons of RAW vs JPEG

If you're serious about wildlife photography, RAW is the way to go—especially for controlling white balance and color accuracy. The only real downside? You will need to spend time editing. But for me, that’s a small price to pay for perfect colors and more creative control.
Pro Tips for Adjusting Settings in the Field
Nature doesn’t wait for you to fiddle with your settings. The best moments happen in an instant and if you’re not prepared to adjust fast you’re going to miss the shot. Here’s how to stay ahead of the curve when conditions change in the field.
How to Quickly Adjust Settings Based on Changing Light
Light changes fast, especially at dawn and dusk. One moment, you’ve got perfect golden-hour glow, and the next, the sun dips behind a cloud, throwing your scene into shadow. If you’re not ready, you’ll either underexpose your shot or end up with a noisy mess from cranking ISO too late.
As we’ve seen ISO Auto with a max limit can save you when light changes mid-shot; you just have to keep an eye on your shutter speed and aperture, adjusting settings as light condition changes, and let the camera handle the rest.
Using Custom User Modes (C1, C2, C3 in Canon) for Quick Recall
Every wildlife photographer should be using custom user modes. If you’re not, you’re leaving speed on the table. Most modern cameras let you pre-program custom settings under C1, C2, and C3 (Canon) or U1, U2, U3 (Nikon). Think of these as instant presets for different scenarios.
For example, I use:
C1: Fast-moving wildlife (1/3200s, f/5.6, Auto ISO, Tracking Autofocus) – perfect for birds in flight or running predators.
C2: Low-light wildlife (1/200s, f/4, Auto ISO, Single Point Autofocus) – for dawn/dusk moments when every bit of light matters.
C3: General mammal subjects (1/800s, f/4, Auto ISO, Tracking Autofocus with eye detection) – for portraits of resting animals where sharpness is key.
With one flick of a dial I can instantly swap between settings, instead of frantically adjusting exposure, autofocus, or drive mode. It’s a lifesaver when the action shifts fast!
Burst Mode & Silent Shooting → Capturing Multiple Frames Discreetly
Wildlife rarely poses for you. That’s why burst mode is a must - but knowing when to use it is just as important. I shoot in continuous high (15+ fps) for fast action and I switch to silent burst (or electronic shutter) when dealing with skittish subjects. Some birds can react to the shutter sound, so silent mode helps get natural behavior instead of a startled reaction.
Important tip: Don’t just hold down the shutter and pray. Unless some real action is happening use short bursts of 3-5 shots to avoid filling your card with duplicates. Look for peak action—wings at full extension, an animal’s eyes perfectly sharp - and time your bursts accordingly.
Using a Tripod vs Handheld Techniques for Stabilization
Tripods are great but in fast-paced wildlife photography they can be kinda limiting. I almost only use a tripod when I’m shooting from a photographic hide.
For everything else, I prefer handheld shooting with proper technique:
Tuck your elbows in and brace against your body for stability.
Use your left hand under the lens to control movement.
Lean against trees, rocks, or kneel down to reduce camera shake.
Often the safari vehicle provides a perfect shooting support, but turn off the engine to avoid vibrations.

Download My Complete Wildlife Photography Guide for Beginners
If you’re just getting started with wildlife photography, you probably have a million questions. I remember struggling with all of these things when I first picked up my camera and I know it can feel overwhelming. That’s exactly why I put together my Complete Wildlife Photography Guide for Beginners—a 100-page resource designed to give you clear, actionable advice so you can start capturing stunning wildlife images right away.
Ready to take your wildlife photography to the next level? Sign up now and grab your free copy!
Join One of My Workshops – The Best Way to Learn Photography
There’s only so much you can learn from blog articles and YouTube videos. Trust me, I tried. But the real game-changer? Hands-on experience in the field. There’s no substitute for being out in nature, camera in hand, with an experienced mentor guiding you through the challenges of wildlife photography in real time. That’s why my in-person photography workshops are designed to give you practical experience in breathtaking locations where you’ll refine your skills, get immediate feedback, and capture portfolio-worthy shots.
I run workshops in some of the world’s most stunning wildlife destinations, from Namibia and Botswana to Patagonia and the Italian Alps. These aren’t just tours; they’re immersive learning experiences designed to push your skills to the next level.
If you’re serious about improving your wildlife photography, join one of my workshops. It might just be the best investment you ever make in your photography journey.


Safari Photography Gear Guide: What I Pack for Africa
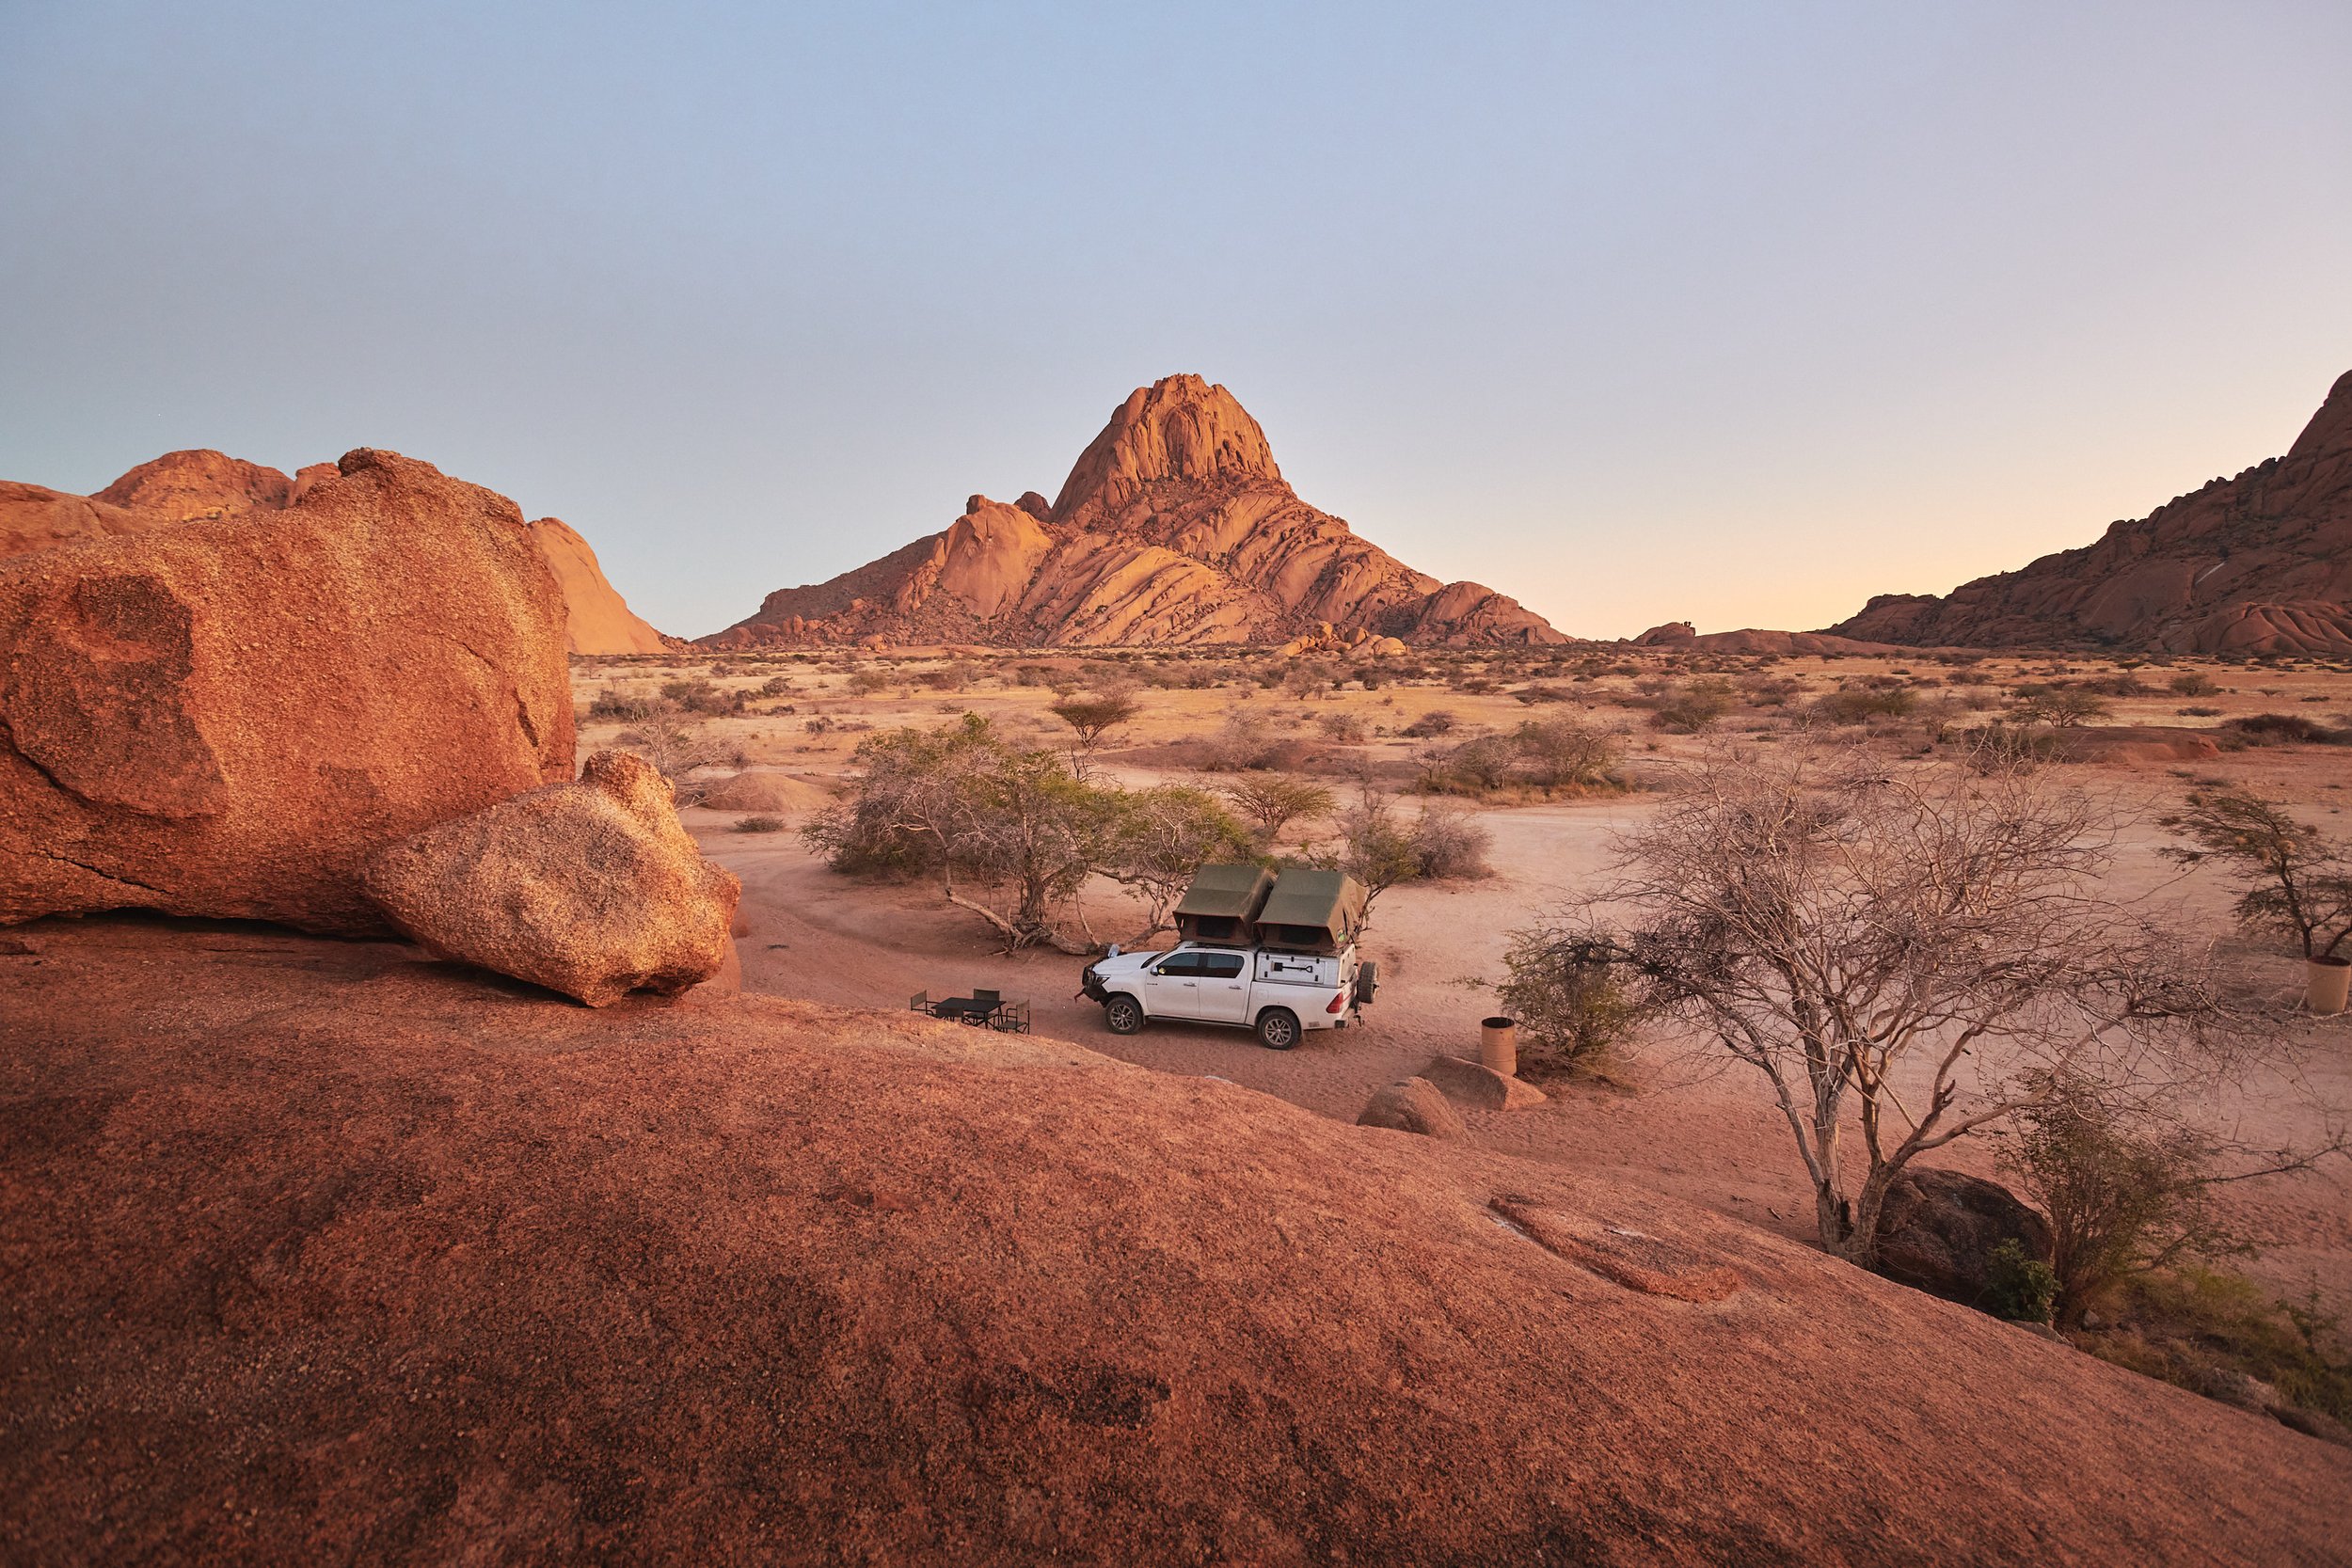
Camping in Spitzkoppe, Namibia
An African safari is the ultimate experience for wildlife photographers—one filled with incredible sightings, dramatic landscapes, and thrilling adventures. But capturing Africa’s stunning wildlife and vast landscapes requires thoughtful preparation as we have to travel through international airports and often reach our final location via small charter planes where space is limited or with long 4x4 transfers, where we must be careful not to damage our precious gear. As a consequence we cannot bring all the gear we want to on a safari; on the opposite, we have to be very selective so that we carry all we need and nothing more.
Over the years I've refined my gear choices balancing quality, versatility, and portability, ending with a gear kit that allows me to cover all situations while still keep it minimal.
Below, you'll find the exact gear list I rely on plus practical advice and scenarios illustrating why each item is essential. With the right equipment you’ll be ready to create stunning images under any condition on your next African adventure.

Shooting with R5 + Canon 100-500 somewhere in Damaraland, Namibia
📷 Cameras
Canon EOS R5
The Canon R5 is my primary choice for landscape photography and detailed wildlife portraits due to its exceptional 45-megapixel resolution and superb image quality. The R5’s advanced autofocus tracking system is incredibly reliable, ensuring your subjects are always perfectly sharp. The image quality is incredible and even in 2025 I don’t really feel the need to upgrade to the R5mk2. The 15 fps of the R5 are good for most situations and the autofocus is already incredible, and if I miss any photos with the R5 it certainly won’t be a camera’s fault. In terms of ISO, if properly exposed the R5 files are fully usable till 12.500 iso and, if careful, even up to 20.000.
When I’m using it mostly:
Landscapes
Adventure reportage
Wildlife scenes without a lot of action
Situations requiring heavy cropping without losing quality
Canon EOS R3
The R3 has a 24 mp sensor, shining in low light situations and in fast-paced wildlife photography, where animals often move unpredictably and rapidly. The autofocus is lightning-fast, even more than the already excellent R5, and when paired with the high frame rate of up to 30fps makes for an incredible tool that rarely (if ever) misses a shot. It’s also the best low-light performing camera on the market (together with the R1 that seems to be just matching the R3 low light capabilities), allowing me to go for fast shutter speeds even at dusk and opening new creative possibilities. I am confident shooting well above ISO 20.000, with usable files even at iso 50.000.
When it's most useful:
Action photography (running mammals, birds in flight)
Early morning or dusk photography when lighting conditions are challenging
Tracking fast-moving animals with absolute precision
Canon EOS R5C
With the same photo capabilities as the R5 (it doesn’t have IBIS - in body image stabilization - that doesn’t really matter when shooting wildlife with faster shutter speeds), the R5C features a video mode with the same operating system of Canon cinema line (C70, C80 etc.). This not only allow for a higher dynamic range than the R5 or the R3, but also makes the camera much more usable and the controls much more efficient when in video mode. Also the R5C has a built in cooling system, very handy to prevent the camera from overheating in the often hot safari days. I did some testing against the more recent R5mk2 but the R5C still looks a better option to me when it comes to video. It still has a slight advantage in dynamic range and the customizable controls make it for the perfect tool if you want the best quality in both photos and video.
When I’m using it mostly:
When I want to alternate still photos and videos while getting the top quality in both
Pro Tip:
An additional benefit of carrying two camera bodies is that you always have two different lenses ready to use without switching, that would cause exposing your sensor to dust—a constant concern on safari.

Friend and fellow photographer Jandre Germishuizen with a R5 and 400mm 2.8
📸 Lenses
Canon RF 15-35mm f/2.8
It’s one of my favorite lenses. It’s too short for wildlife but is always useful to have it around, allowing me to cover landscapes and documenting the adventure behind the scenes. Reaching 15mm in the wider range allows to get big scenes all into a photo, as well as shooting in tight spaces like a safari vehicle or inside a photo hide. If zoomed at 24mm or 35mm it becomes an excellent lens for environmental portraits. The aperture of 2.8 also plays a role as it’s just enough to use it for astrophotography as well.
When it's most useful:
Wide-angle landscape shots
Capturing environmental portraits, including your safari vehicle or camp life
Starry skies and astrophotography at remote African lodges
General reportage images
Canon RF 100-500mm f/4.5-7.1
My go-to lens for flexibility and responsiveness. It allows me to zoom quickly from mid-range wildlife portraits to distant action scenes, reducing the need to constantly reposition the vehicle and allowing me to include more or less of the habitat in my compositions. Of course the aperture is a bit of a limit, especially at dusk, but the flexibility given by the zoom range and the compact building makes it for an incredible tool that I always bring along; it often stays on my R5 or R5C.
When it's most useful:
Versatile for wildlife photography
Quickly adapting to changing wildlife scenarios without changing lenses
Capturing unexpected wildlife encounters that unfold rapidly as you can keep it always at hand and ready to shoot
Canon RF 400mm f/2.8 or 600mm f/4
The ultimate tools for dedicated wildlife photography, these lenses excels at isolating subjects and producing beautiful background blur. The price doesn't make them for everyone but the exceptional sharpness and large aperture ensure clear, dramatic wildlife portraits, even in low-light situations. While I own both I usually go for a 600mm on a safari, with some exceptions for the situations where I know I’ll be able to get really close to my subjects and also where I won’t be photographing very small subjects. In fact the bigger aperture of the 400m is an advantage only if we don’t need to crop the image in post processing. If we crop the relative noise will increase and we will loose that one-stop advantage, plus we loose some of the image resolution. For this reason my go-to for safari situations is still the 600 f/4.
When it's most useful:
Photographing shy or elusive animals like leopards, which require significant reach
Capturing animals at dawn or dusk with limited natural light
High-quality, intimate wildlife portraits with gorgeous bokeh
Pro Tip:
Using teleconverters like a 1.4x extender can extend the reach of your 600mm lens even further, providing unparalleled opportunities to photograph distant wildlife clearly.

Bee eaters. Canon R3, 600mm f/4 + 1.4x for an equivalent of 840mm f5.6
🔋 Essential Accessories
Extra Batteries:
We usually have regular access to electricity even in the most remote safaris, but it’s always a good idea to carry enough batteries to last at least a full day of shooting. During safari drives charging isn’t available and you'll be shooting thousands (sometimes tens of thousands) of images. You surely don’t want to find yourself trying to save battery in front of some amazing wildlife encounters.High-Speed Memory Cards:
Fast cards (such as CFexpress or high-speed SD cards) ensure your camera keeps up with rapid-fire sequences without filling the buffer. This is essential for action photography. Another benefit of high performing memory cards is that they tend to be more reliable and less prone to failure. Bring at least double the cards you expect to use on a full day - again, you don’t want to be in a situation where you can’t shoot because of a card. Cards are cheap compared to your cameras and lenses or even compared to the cost of being on a safari, so buy big and reliable cards. My choice is Angelbirds AV PRO CFexpress Type B; I carry 6x 256GB cards, that ensures me a couple days of shooting before I have to download them.Reliable Tripod:
It’s not mandatory for a safari, but if you plan on photographing also sunrise/sunset landscapes, low-light wildlife shots, astrophotography, and long-exposure photography then a light carbon fiber tripod will be very handy.Camera Cleaning Kit:
African safaris are notoriously dusty, especially during dry seasons (that tend to be the best for wildlife viewing). Regularly cleaning your gear prevents sensor dust spots and maintains image quality. I bring several brushes, a kit for cleaning lenses, a battery powered blower to dust off the gear and a classic manual blower. I also have with me a sensor cleaning kit with wet wipes; I rarely have to use it but I always have it in my bag.Laptop and Portable SSD Drives:
You can’t bring enough memory cards for a whole safari, and even if you can, it’s not recommended to leave your valuable files there without backing up your photos daily. To do that you will need a laptop and some hard drives. SSD drives offer fast, reliable file management and ensure your images remain safe throughout your trip. I usually bring my MacBook Pro 13’’ and 2x 4TB ssd hard drives; this will allow me to save 2 copies of everything, protecting my files from a possible disk failure.Binoculars:
Crucial for spotting wildlife from a distance before setting up your camera. They enhance your safari experience, giving you ample time to anticipate and capture unique behaviors.
🧢 Safari Apparel

Comfort and practicality are crucial during an African safari. Here’s a comprehensive clothing list to stay comfortable and safe:
Neutral-colored Clothing (khaki, olive, brown):
Helps blend into the environment. Avoid bright vivid and bright colors that stand out too much.Long-sleeve Shirts and Pants:
Provide sun and insect protection while remaining breathable and lightweight.
Wide-brimmed Hat:
Essential sun protection during long game drives.Fleece or Light Jacket:
Early mornings and late evenings can be surprisingly cold out in the savannah. Always bring a light insulated and windproof jacket. If you are going in the winter season (May to August in Southern Africa) consider also some light gloves and a beanie for morning game drives.Waterproof Jacket:
During rainy seasons unexpected downpours can occur quickly and having a waterproof layer will prove very handy. If you are traveling during the dry season you can leave it home.Buff or Scarf:
Shields you from dust and provides sun protection.
Pro Tip:
Avoid dark colors, especially blue or black, as they attract biting insects like tsetse flies.
👞 Footwear
Comfortable Hiking Boots or Trail Shoes:
Ideal for walking safaris, camps, and uneven terrains. These are very specific situations and you won't need it in most cases.Closed-toe Shoes:
Your main safari shoes must offer protection from insects, thorns, and rough terrain. While you won't be spending much time out of your safari vehicle you want something that will allow you to move comfortably on the rough savannah and bush, protecting your feet from rocks, vegetations and insects.Sandals or Flip-flops:
Great for downtime around lodges or camps.
Pro Tip:
Ensure all shoes are well-broken-in to prevent discomfort during your adventure.
🎒 Additional Safari Accessories
Insect Repellent: Vital, especially at dawn and dusk, in humid areas or during rainy season.
Sunscreen and Lip Balm: African sun is intense, even on cloudy days.
Headlamp or Flashlight: Essential at camps, especially at night.
Reusable Water Bottle: Hydration is crucial throughout safari days. While you can always get single-use plastic bottles, having a personal steel bottle is a much better option. You can fill it up anytime at the lodge or camp. If you can, bring an insulated bottle to prevent your water from getting boiling hot.
Dry Bags: Protect gear from dust, sand, and unexpected rain.
First Aid Kit: Include basics like antiseptic, painkillers, bandages, and any personal medications, a good first aid kit is essential if you are on a self drive safari adventure, where you must be able to solve any problem you might encounter. Not necessary if you are joining a guided safari tour.
📅 Join Me on an Exclusive African Safari!
Put these gear recommendations into action on one of my exclusive guided photography trips. We’ll explore stunning wildlife destinations like Namibia, Botswana, Zambia, and South Africa, where you'll have the chance to refine your skills and create unforgettable images.

Patagonia Photography Adventure: Chasing the Perfect Puma Photo

Patagonia is a place of rugged mountains, dramatic skies and elusive wildlife. It's the kind of place every photographer dreams of visiting, especially if, like me, you're drawn to the majestic - and often elusive - Patagonian puma.
I recently traveled to Patagonia with a clear vision in mind: capturing the perfect photograph of a wild puma against the breathtaking backdrop of Torres del Paine. With only three days on the ground I knew the odds were stacked against me. But as any wildlife photographer knows, patience, persistence and a bit of luck can make dreams a reality.
Here’s the story behind my unforgettable adventure, and what it taught me about photography itself.
Day 1: An Exciting Start
After a long trip with a one night stop in Santiago, we finally landed in Punta Arenas were we started the long transfer north, with a quick lunch in Puerto Natales and then the final destination, Torres del Paine National Park.
The anticipation was high as we headed into Patagonia’s stunning terrain. We had only three days and with wildlife photography, you know, nothing is guaranteed. Our main objective was clear: a wild puma framed against the spectacular peaks of Torres del Paine.
From the first morning we had amazing encounters. We woke up under an unexpected layer of snow and the guide warned us about the very low chances to see anything in those conditions. Yet, only a few hundreds meters out of the gate, while Nana, our guide, and Andrea, my friend and fellow photographer are chatting, I see the unmistakable shape of a big cat in the darkness. My first puma.

After a few shots we moved on and we soon spotted a new one with a guanaco kill. We positioned ourselves for the shots but after a while the weather started deteriorating and we had no choice but to go back to our lodge.

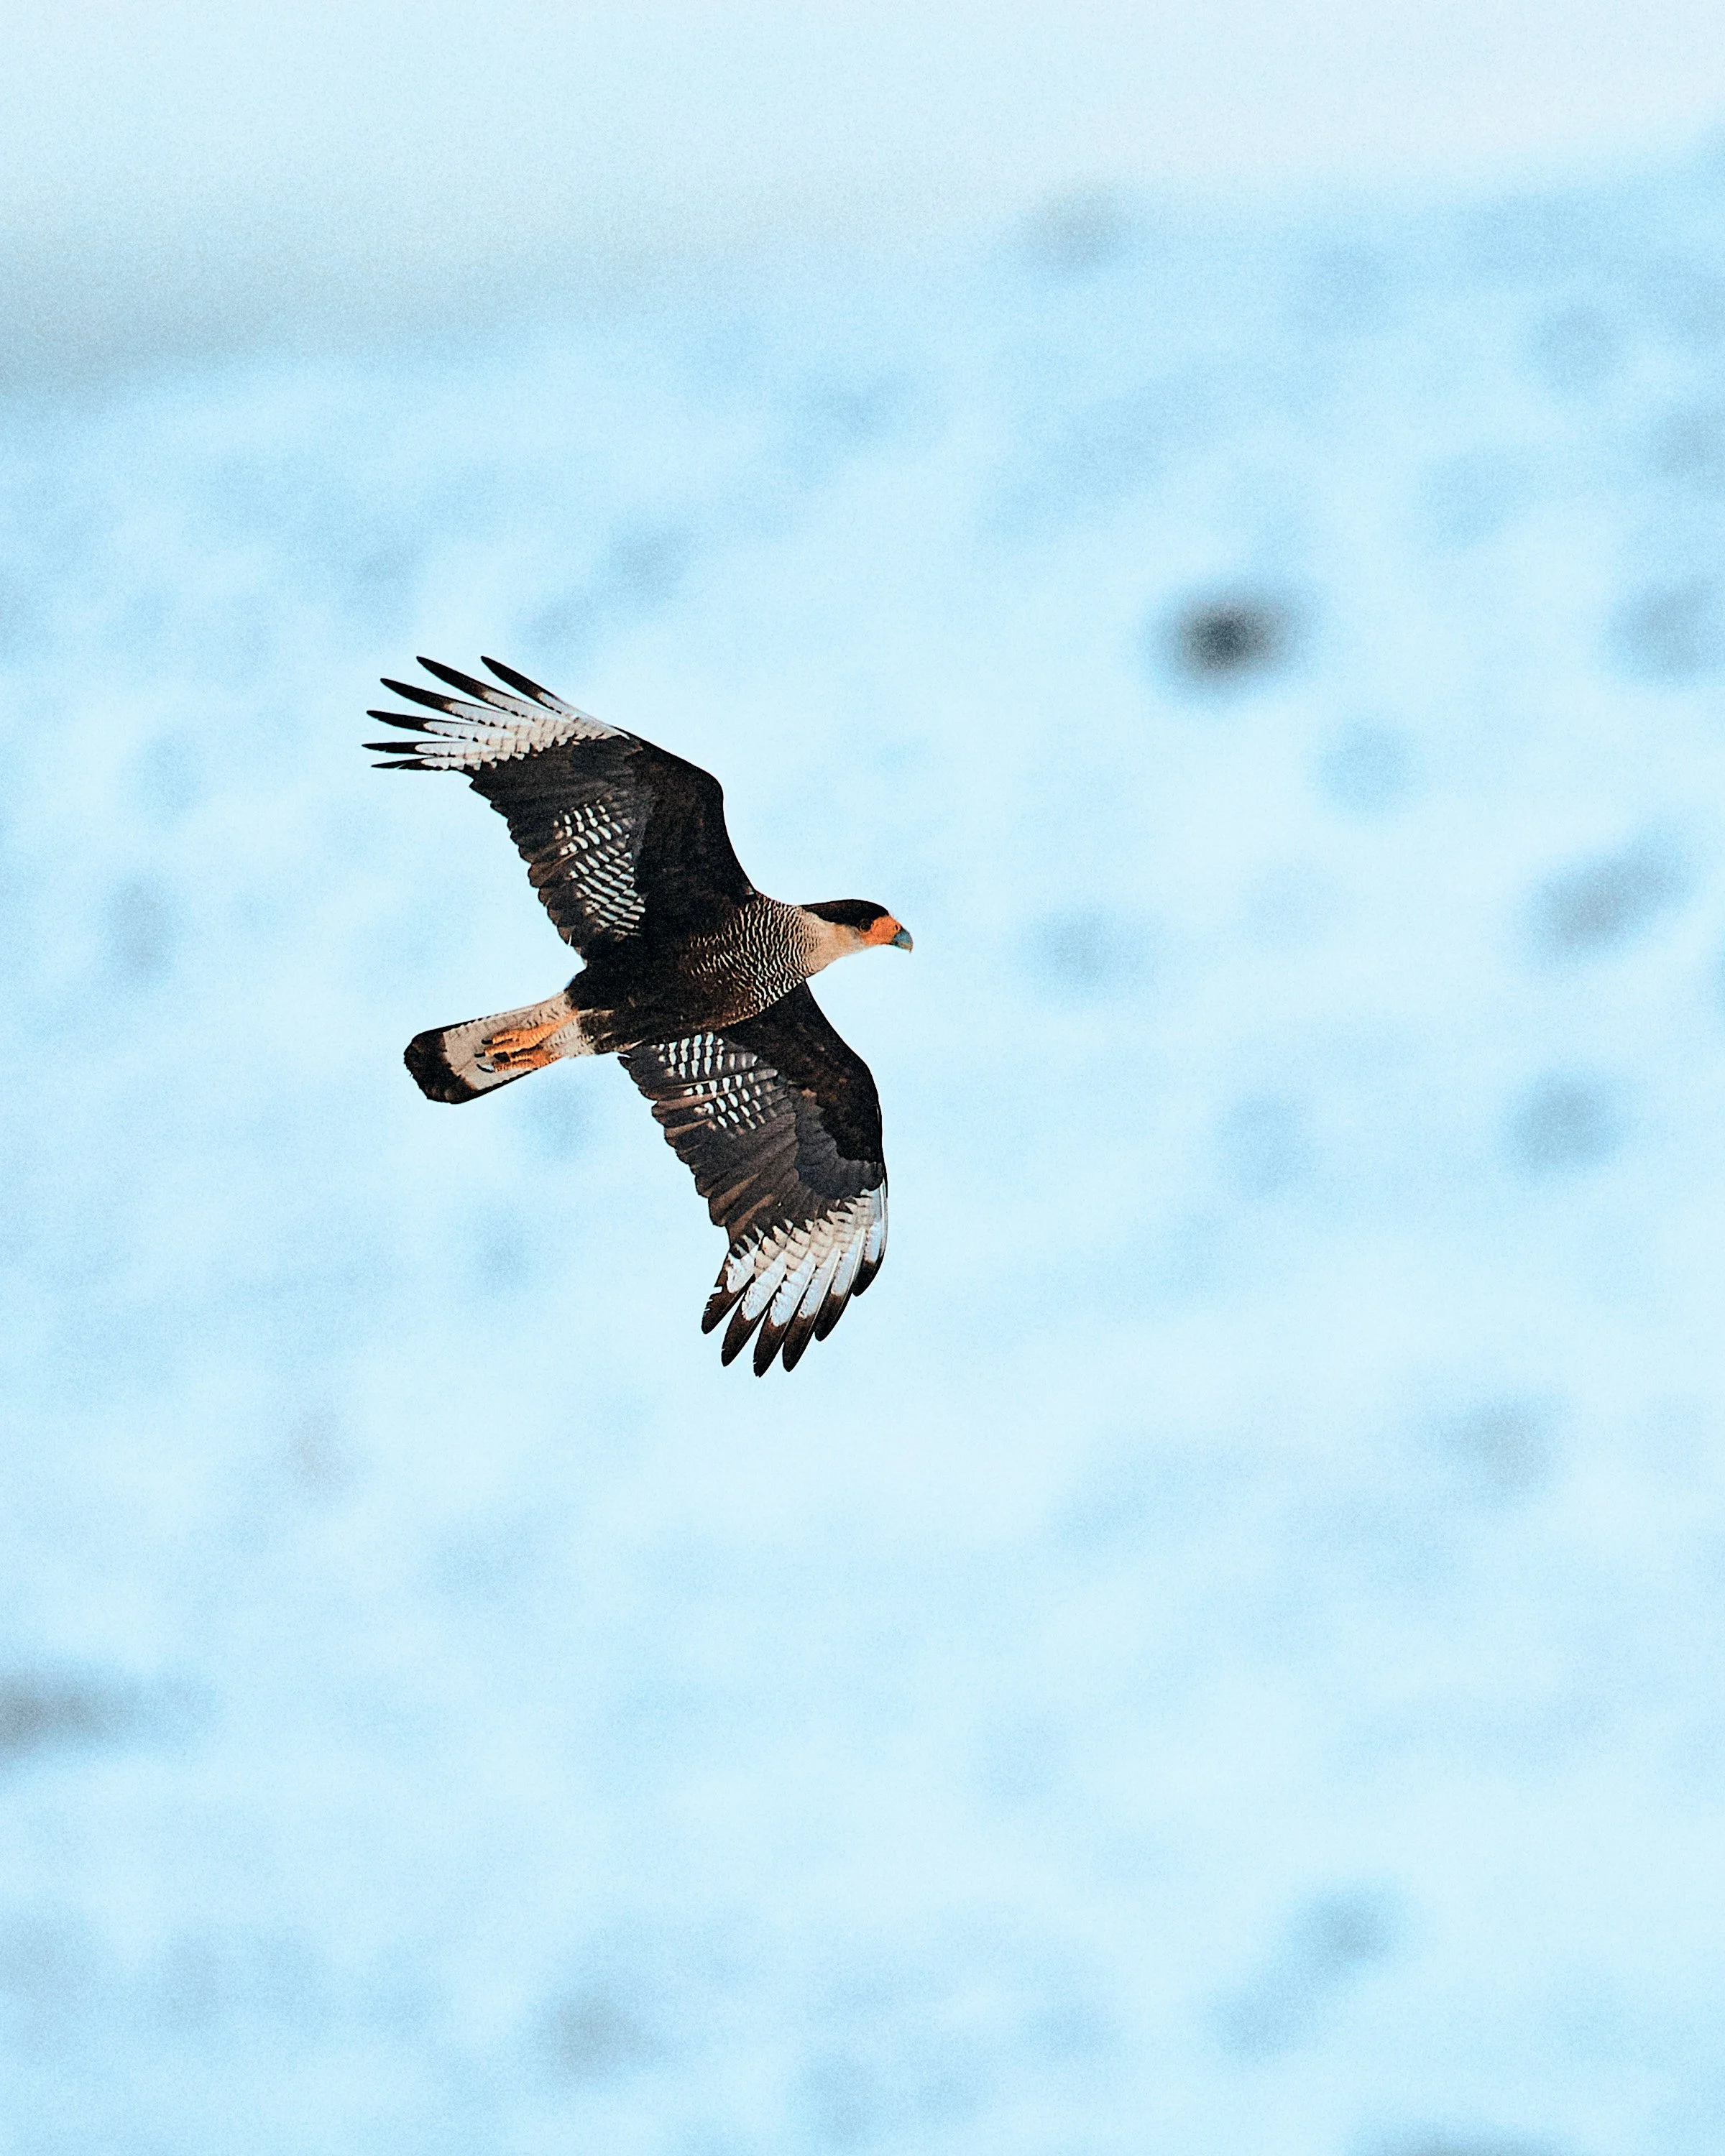
Day 2: Busy Pumas
On the second day Patagonia rewarded us with an incredible sunrise and some more stunning wildlife experiences. We spent the day tracking across rugged landscapes, following hints from local guides and scanning every rock and ridge.
We found a puma on the hunt; we tried to follow for a while but the fear of interfering with the process forced us to leave it alone. We then spotted one sleeping close to a kill, but after a while it became clear that it woudln’t have moved anytime soon.
At one point we stumbled upon a fresh kill—a clear sign a puma was nearby. We waited, camera ready, hearts racing. Minutes turned into hours, yet our elusive subject stayed just beyond our view.
Even without our desired shot, the experience was thrilling. Patagonia's landscape alone is magical—every turn offered new compositions, dramatic lighting shifts, and captivating moments. Still, as photographers, we can’t help but strive for the image we’ve envisioned. With only one day left, hope—and pressure—were mounting.


Day 3: The Final Chance
On our final day we started early, determined not to leave Patagonia without capturing our perfect puma image. Conditions were perfect: the golden glow of sunrise illuminated Torres del Paine’s granite peaks in the distance, providing the perfect backdrop for the photo I’d dreamed of capturing.
Just as the day was drawing to a close, everything suddenly aligned.

Our guide spotted her first—an elegant puma slowly making her way across the ridge line. Then we realized it was more of them, a whole group of 4 pumas. Silently, carefully, I adjusted my position and waited. They were all resting just under the skyline. I framed the shot, balancing exposure and composition while quietly hoping one of them would stand and move to the right spot. And then it happened. Against the grandeur of Torres del Paine, the puma stood perfectly still, giving me a few fleeting moments to press the shutter.
In that brief moment, after three days of patience, persistence, and anticipation, I captured the image I had traveled thousands of kilometers to get.
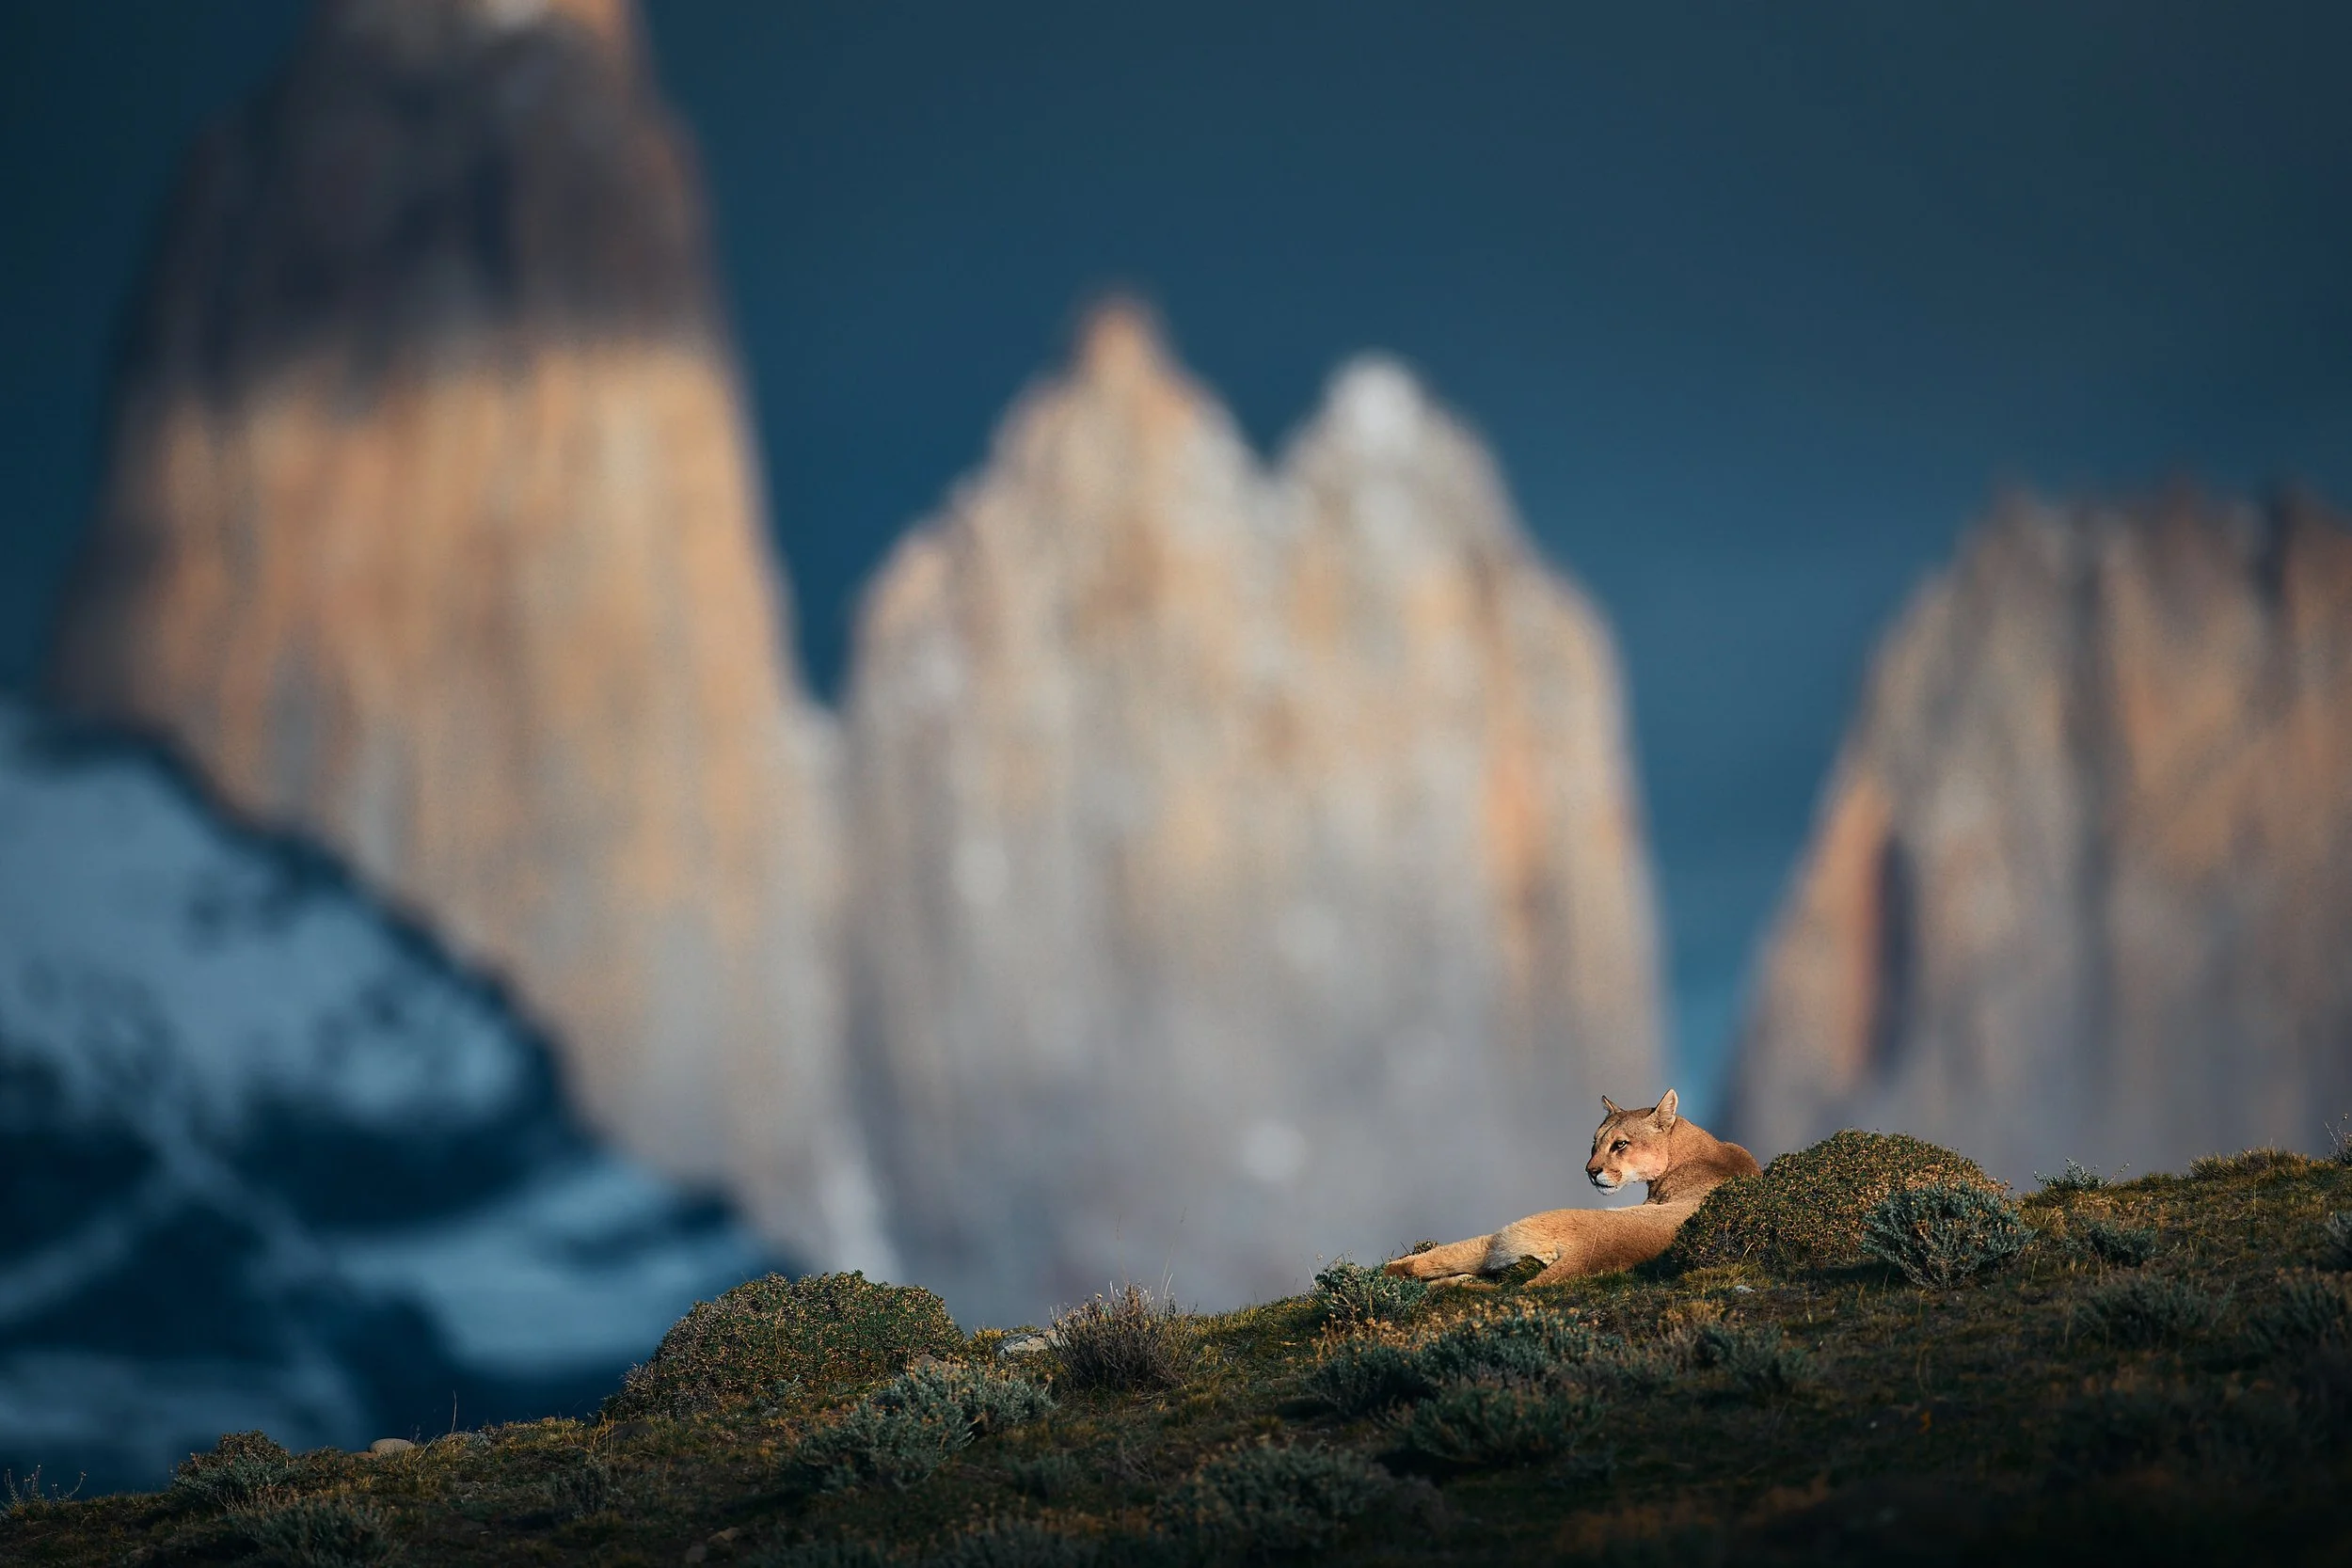
This experience made me reflect deeply on the value of photography in our modern world. Today, we can effortlessly generate stunning visuals—even AI can create flawless images. But what makes photography truly valuable and meaningful?
For me, the real value lies in the journey itself.
Photography isn’t just about capturing a moment; it's about living an experience fully, with all your senses awake. It’s about feeling the cold Patagonian wind, witnessing wildlife in their natural habitats, and immersing yourself in landscapes that leave you speechless.
When I look at my puma photo I don’t just see a beautiful image - I see the patience, the excitement, the disappointment, the joy, and the adventure behind it. The photograph becomes a powerful reminder of an unforgettable experience that no AI or shortcut could ever replicate.
Experience Patagonia Yourself
Inspired to embark on your own photographic adventure? Join me on one of my photography workshops and expeditions in Patagonia and other incredible destinations around the globe. Together we'll chase extraordinary moments, craft powerful images, and most importantly, share unforgettable journeys.
Check out the full video from my trip:

Best Wildlife Photography Cameras for Beginners in 2025 (Top Picks & Buying Guide)
Looking for the best wildlife photography cameras for beginners in 2025? Explore top-rated entry-level DSLRs, mirrorless cameras, and budget-friendly options to capture stunning wildlife shots.
Wildlife photography is an exciting yet challenging genre that requires the right gear. But if you're just starting out, finding the best beginner-friendly camera can feel overwhelming. Should you go for a DSLR or mirrorless? What about sensor size, autofocus, and burst speed? Don’t worry—I’ve got you covered!
In this guide, we’ll break down the best wildlife photography cameras for beginners in 2025, covering top choices for different budgets and needs. Whether you're capturing birds in flight or big cats on safari, these cameras will help you get stunning shots without breaking the bank.

How to Choose a Beginner-Friendly Camera for Wildlife Photography
When I first got into wildlife photography I was coming from almost a decade of commercial, lifestyle and sports photography. This made me feel like I knew what I needed in terms of camera performance. I quickly learned that capturing sharp, detailed shots of fast-moving animals wasn’t as easy though. Wildlife photography throws a lot of challenges your way - unpredictable motion, tricky lighting, and the need for serious telephoto capabilities, not to mention wildlife is the most demanding autofocus genre in photography. If you’re just starting out, picking the right camera can make all the difference between frustrating missed shots and stunning captures that make you fall in love with the craft. Here’s what I’ve learned over the years about choosing a beginner-friendly camera for wildlife photography.
Sensor Size: APS-C vs. Full-Frame – Which is Better for Wildlife?
This is one of the biggest debates in photography, and honestly, there’s no one-size-fits-all answer. But if you’re just starting, an APS-C sensor is often the better choice. Why? Crop factor. An APS-C sensor gives you a 1.5x or 1.6x crop (depending on the brand), which means a 300mm lens effectively becomes a 450mm or more. That extra reach is a game-changer for wildlife because telephoto lenses can get crazy expensive.
Full-frame cameras, on the other hand, have better low-light performance and higher dynamic range, but they come at a cost—literally. They’re pricier, and you’ll need longer (more expensive) lenses to get the same framing as an APS-C setup. If budget isn’t a concern and you plan to shoot in low-light conditions a lot (like deep forests or early mornings), a full-frame might be worth it. But for most beginners, APS-C is the smarter, more affordable choice to get started with wildlife photography.
DSLR vs mirrorless
Dslr have been the standard cameras for decades but in recent years they’ve been almost entirely replaced by mirrorless systems. Without going too much into technical details, one of the biggest advantages of mirrorless is much faster and intelligent autofocus. So while you could still go for Dslr systems (and save a lot of money) if you’re shooting landscapes, for wildlife a mirrorless system will be much better.
Autofocus System: Why Fast & Accurate Autofocus is a Must
Wildlife doesn’t wait for you to nail your focus. I’ve missed countless shots because my camera’s autofocus just couldn’t keep up. If you’re shooting birds in flight or a running cheetah, you need a fast and reliable AF system. Period.
Look for a camera with:
✅ Phase-detection autofocus (PDAF) – It’s much faster than contrast detection.
✅ Animal Eye AF – Some newer mirrorless cameras have this, and it’s a game-changer for sharp wildlife portraits.
✅ Tracking modes – You want a camera that can continuously focus on a moving subject without losing it.
Mirrorless cameras have been killing it in the AF department lately, with models like the Canon R7 or Sony A6700 offering insanely good subject tracking. But even if you go DSLR, make sure your camera has a solid autofocus system, or you’ll spend more time cursing than shooting.

Burst Rate: Why Continuous Shooting Speed Matters
Wildlife photography is all about catching the perfect moment, and most of those moments happen in the blink of an eye. Whether it’s an eagle taking off or a lion yawning, having a high burst rate (frames per second, or FPS) can mean the difference between a great shot and a missed opportunity.
For beginners, aim for at least 8 FPS or more. Some budget-friendly options, like the Canon R7 (15 FPS mechanical, 30 FPS electronic) or Nikon Z50 (11 FPS) give you excellent burst rates without breaking the bank. If your camera can shoot at 10 FPS or higher you’re in a great spot. Anything lower, and you might struggle with fast-moving subjects.
Low-Light Performance: Why It’s Critical for Wildlife
Some of the best wildlife action happens in low light—sunrise, sunset, or deep in the forest. A camera with poor low-light performance will leave you with grainy, unusable images when the sun starts dipping below the horizon.

Here’s what matters:
✅ ISO performance – Look for a camera that can handle at least ISO 3200-6400 with minimal noise.
✅ A wide aperture lens helps – A camera alone won’t fix low light; pairing it with an f/2.8 or f/4 lens can make a difference.
✅ In-body image stabilization (IBIS) – Helps reduce blur when shooting handheld at slow shutter speeds - even though you can’t use slow shutter speeds with fast moving subjects.
Full-frame sensors generally perform better in low light, but some APS-C models—like the Canon R7—do a pretty solid job. If you shoot in dawn or dusk often, test a camera’s high ISO performance before buying to avoid frustration later.
A QUICK NOTE: I will now go through the best models available in 2025 in the different price ranges; note that I never used the models listed in the entry level and mid level categories; my considerations there are only based on tech specs applied to wildlife scenarios.
Best Entry-Level Cameras for Wildlife Photography in 2025
For beginners looking to get serious without breaking the bank, there are three standout options in 2025: the Canon EOS R10, Nikon Z50 II, and Sony A6400. Each of these cameras has its strengths and weaknesses, so let’s break them down.
Canon EOS R10 – A Speedy All-Rounder
Tech Specs
Sensor: 24.2MP APS-C CMOS
Autofocus: Dual Pixel AF II with 651 points
Frame Rate: 15 fps (mechanical), 23 fps (electronic)
Low Light Performance: ISO 100-32,000 (expandable to 51,200)
Memory Card: Single UHS-II SD slot
Usability for Wildlife
The Canon EOS R10 is an absolute beast when it comes to speed. With 15 fps burst shooting using the mechanical shutter and 23 fps with the electronic shutter, it’s a fantastic option for tracking fast-moving animals. The Dual Pixel AF II system is snappy, with deep-learning AI to detect and track birds, mammals and even reptiles. The APS-C sensor crop also gives your lenses extra reach - ideal for wildlife photographers who can’t afford a massive telephoto lens yet. However, the single UHS-II SD card slot means no redundancy, so be extra careful with storage and only use high quality memory cards.
Video Capabilities
Resolution & Frame Rates: 4K 60p (cropped), 4K 30p (oversampled), Full HD 120p
Codecs & Bitrates: MP4 (H.265/H.264), 8-bit & 10-bit via HDMI
Dynamic Range & Color Profiles: Canon Log 3 available via HDMI output
On the video side the Canon EOS R10 offers sharp 4K 30p from 6K oversampling, delivering excellent detail. But the 4K 60p mode comes with a crop, which isn’t ideal if you’re already working with a cropped APS-C sensor. There’s no internal 10-bit recording but Canon Log 3 is available via HDMI, meaning you can pair it with an external recorder for serious grading flexibility. The autofocus in video mode is superb, making it good to record some video clips for social media. However the lack of 10bit recording is an issue when it comes to more serious video editing.
Nikon Z50 II – Great Low-Light Performance
Tech Specs
Sensor: 20.9MP APS-C CMOS
Autofocus: 273-point hybrid AF
Frame Rate: 11 fps (mechanical/electronic)
Low Light Performance: ISO 100-51,200 (expandable to 204,800)
Memory Card: Single UHS-II SD slot
Usability for Wildlife
The Nikon Z50 II improves upon its predecessor with better autofocus tracking, particularly for animals. While it doesn’t match the EOS R10 in terms of burst speed (11 fps vs. 15-23 fps), it makes up for it with excellent low-light performance. The higher native ISO (51,200) and solid noise reduction make this a strong choice for dawn or dusk wildlife shots. Nikon’s ergonomics are also fantastic—the grip feels natural, and the menus are intuitive.
Video Capabilities
Resolution & Frame Rates: 4K 30p (oversampled), Full HD 120p
Codecs & Bitrates: MP4 (H.265/H.264), 8-bit internal
Dynamic Range & Color Profiles: Flat profile, no N-Log
If you’re focused on video, the Z50 II is a bit behind. While 4K 30p is sharp due to oversampling, there’s no 4K 60p option, which limits slow-motion flexibility. Nikon also doesn’t include N-Log on APS-C bodies, so color grading potential is more restricted than with Canon or Sony. However, Full HD 120p looks great, and the rolling shutter performance is well-controlled. Overall, it’s better for photographers than videographers.
Sony A6400 – Best Autofocus and Lens Selection
Tech Specs
Sensor: 24.2MP APS-C CMOS
Autofocus: 425-point phase detection
Frame Rate: 11 fps (mechanical/electronic)
Low Light Performance: ISO 100-32,000 (expandable to 102,400)
Memory Card: Single UHS-I SD slot
Usability for Wildlife
Sony’s Real-Time Eye AF is what makes the A6400 stand out. It locks onto animal eyes better than any other camera in this price range, making it perfect for birds and fast-moving mammals. The lens selection is also the best—Sony’s E-mount has tons of affordable telephoto options compared to Canon RF-S and Nikon Z DX. The downside? Only 11 fps burst shooting, and the buffer fills up fast, so you need to be selective with your shots.
Video Capabilities
Resolution & Frame Rates: 4K 30p (no crop), Full HD 120p
Codecs & Bitrates: XAVC S (H.264), 8-bit internal
Dynamic Range & Color Profiles: S-Log2, S-Log3, HLG
For video, the A6400 is solid but showing its age. It offers sharp, uncropped 4K 30p, but no 4K 60p. The biggest advantage is the inclusion of S-Log2, S-Log3, and HLG, which gives you the most color grading flexibility among these three cameras. However, rolling shutter is an issue in 4K, and there’s no IBIS, so handheld footage can be shaky. It’s still great for wildlife videography if you use a tripod or gimbal.
Which One Should You Get?
For speed and autofocus: The Canon EOS R10 is the best bet, especially with its 23 fps burst rate and top-tier tracking.
For low-light shooting: The Nikon Z50 II wins with expandable ISO 204,800 and better noise control.
For video and lens flexibility: The Sony A6400 stands out with S-Log profiles and better E-mount lens options.
All three are great beginner-friendly choices for wildlife photography, but it ultimately depends on what features matter most to you. If you want speed and tracking, go for Canon. If you need better low-light performance, Nikon is your friend. And if you prioritize video, Sony is the way to go.

Best Mid-Range Cameras for Wildlife Photography in 2025
Moving to the mid-range options things start looking interesting; in 2025 the best contenders are: Nikon Z6 III, Canon EOS R7, Canon EOS R6 Mark II, Sony A7C II, and Sony A7 IV.
1. Nikon Z6 III
Specs & Performance:
Sensor: 24.5MP Full-Frame BSI CMOS
Frame Rate: Up to 20 fps (electronic), 14 fps (mechanical)
Autofocus: 493-point phase-detection AF, improved subject tracking
Low Light: Native ISO 100-51,200 (expandable to 204,800)
Memory Cards: Dual slots (CFexpress Type B + SD UHS-II)
Wildlife Usability:
The Z6 III is an excellent all-rounder for wildlife photographers who need a rugged body with great high-ISO performance. Its autofocus is much improved over previous generations, with subject-detection AF capable of locking onto animals and birds. The burst rate is decent, though not the fastest in this lineup. The CFexpress slot allows for quick buffer clearing, a big plus when shooting in RAW bursts.
Video Capabilities:
Resolution & Frame Rates: 6K 60p (RAW), 4K 120p (10-bit)
Codec: N-RAW, ProRes RAW, H.265
Log Profiles: N-Log, HLG
Dynamic Range: Around 14 stops
Other Features: Full-size HDMI, no recording limit
The 6K 60p RAW recording is a huge deal for wildlife videographers looking for flexibility in post-production. The N-Log profile provides a great dynamic range, making this a strong hybrid camera.
2. Canon EOS R7
Specs & Performance:
Sensor: 32.5MP APS-C CMOS
Frame Rate: 30 fps (electronic), 15 fps (mechanical)
Autofocus: Dual Pixel CMOS AF II, deep-learning subject detection
Low Light: Native ISO 100-32,000 (expandable to 51,200)
Memory Cards: Dual UHS-II SD slots
Wildlife Usability:
For wildlife photographers on a budget the R7 is a killer APS-C option. The crop factor extends the reach of telephoto lenses, making a 100-400mm behave like a 160-640mm—perfect for distant subjects. 30 fps electronic shutter is blisteringly fast, but the buffer can fill up quickly. The weather sealing is solid but not on par with full-frame models.
Video Capabilities:
Resolution & Frame Rates: 4K 60p oversampled, 1080p 120fps
Codec: H.265, H.264
Log Profiles: C-Log 3, HDR PQ
Dynamic Range: ~12.5 stops
Other Features: No overheating, IBIS
The 4K 60p oversampling from 7K delivers crisp footage but there’s no 4K 120p for extreme slow motion. 10 bits C-Log 3 provides some flexibility in post, but it’s not on the level of Canon’s full-frame options.
3. Canon EOS R6 Mark II
Specs & Performance:
Sensor: 24.2MP Full-Frame CMOS
Frame Rate: 40 fps (electronic), 12 fps (mechanical)
Autofocus: Dual Pixel CMOS AF II with deep-learning AI
Low Light: Native ISO 100-102,400
Memory Cards: Dual UHS-II SD
Wildlife Usability:
The 40 fps burst rate in electronic mode is one of the fastest in this range, making it great for fast-moving wildlife. The AI-powered AF locks onto birds, mammals, and even insects with ease. Its low-light performance is excellent, though dynamic range lags behind Sony models.
Video Capabilities:
Resolution & Frame Rates: 4K 60p oversampled, 4K 120p (cropped), 1080p 180fps
Codec: H.265, H.264
Log Profiles: C-Log 3, HDR PQ
Dynamic Range: ~13 stops
Other Features: IBIS, no record limit
The 4K 120p crop is a bit of a letdown, but oversampled 4K 60p looks fantastic. It’s a solid hybrid camera, ideal for photographers who shoot video as well.
4. Sony A7C II
Specs & Performance:
Sensor: 33MP Full-Frame BSI CMOS
Frame Rate: 10 fps (mechanical/electronic)
Autofocus: Real-time Tracking, AI-powered AF
Low Light: Native ISO 100-51,200
Memory Cards: Single UHS-II SD
Wildlife Usability:
The compact size makes it a dream for travel photographers but 10 fps is slower than competitors. Autofocus is excellent, but buffer performance isn’t as strong. If portability is key, this is a solid choice.
Video Capabilities:
Resolution & Frame Rates: 4K 60p (10-bit), 1080p 120fps
Codec: XAVC HS, XAVC S
Log Profiles: S-Log3, S-Cinetone
Dynamic Range: ~14 stops
Other Features: No overheating
Sony’s S-Log3 and S-Cinetone deliver beautiful video, though no 4K 120p is a limitation. Good for travel-friendly hybrid shooting.
5. Sony A7 IV
Specs & Performance:
Sensor: 33MP Full-Frame BSI CMOS
Frame Rate: 10 fps (mechanical/electronic)
Autofocus: AI-based Real-Time Eye AF
Low Light: Native ISO 100-51,200
Memory Cards: CFexpress Type A + UHS-II SD
Price: ~$2,500
Wildlife Usability:
The A7 IV is a workhorse—not the fastest, but fantastic dynamic range and color science. The CFexpress Type A slot speeds up buffer clearing, making it more reliable for action shooting.
Video Capabilities:
Resolution & Frame Rates: 4K 60p (10-bit), 4K 120p (cropped)
Codec: XAVC HS, XAVC S
Log Profiles: S-Log3, S-Cinetone
Dynamic Range: ~14+ stops
Other Features: Great rolling shutter control
For hybrid shooters, Sony’s color science and dynamic range make it a go-to. The rolling shutter is better controlled than older models, making it a solid video and photo hybrid.
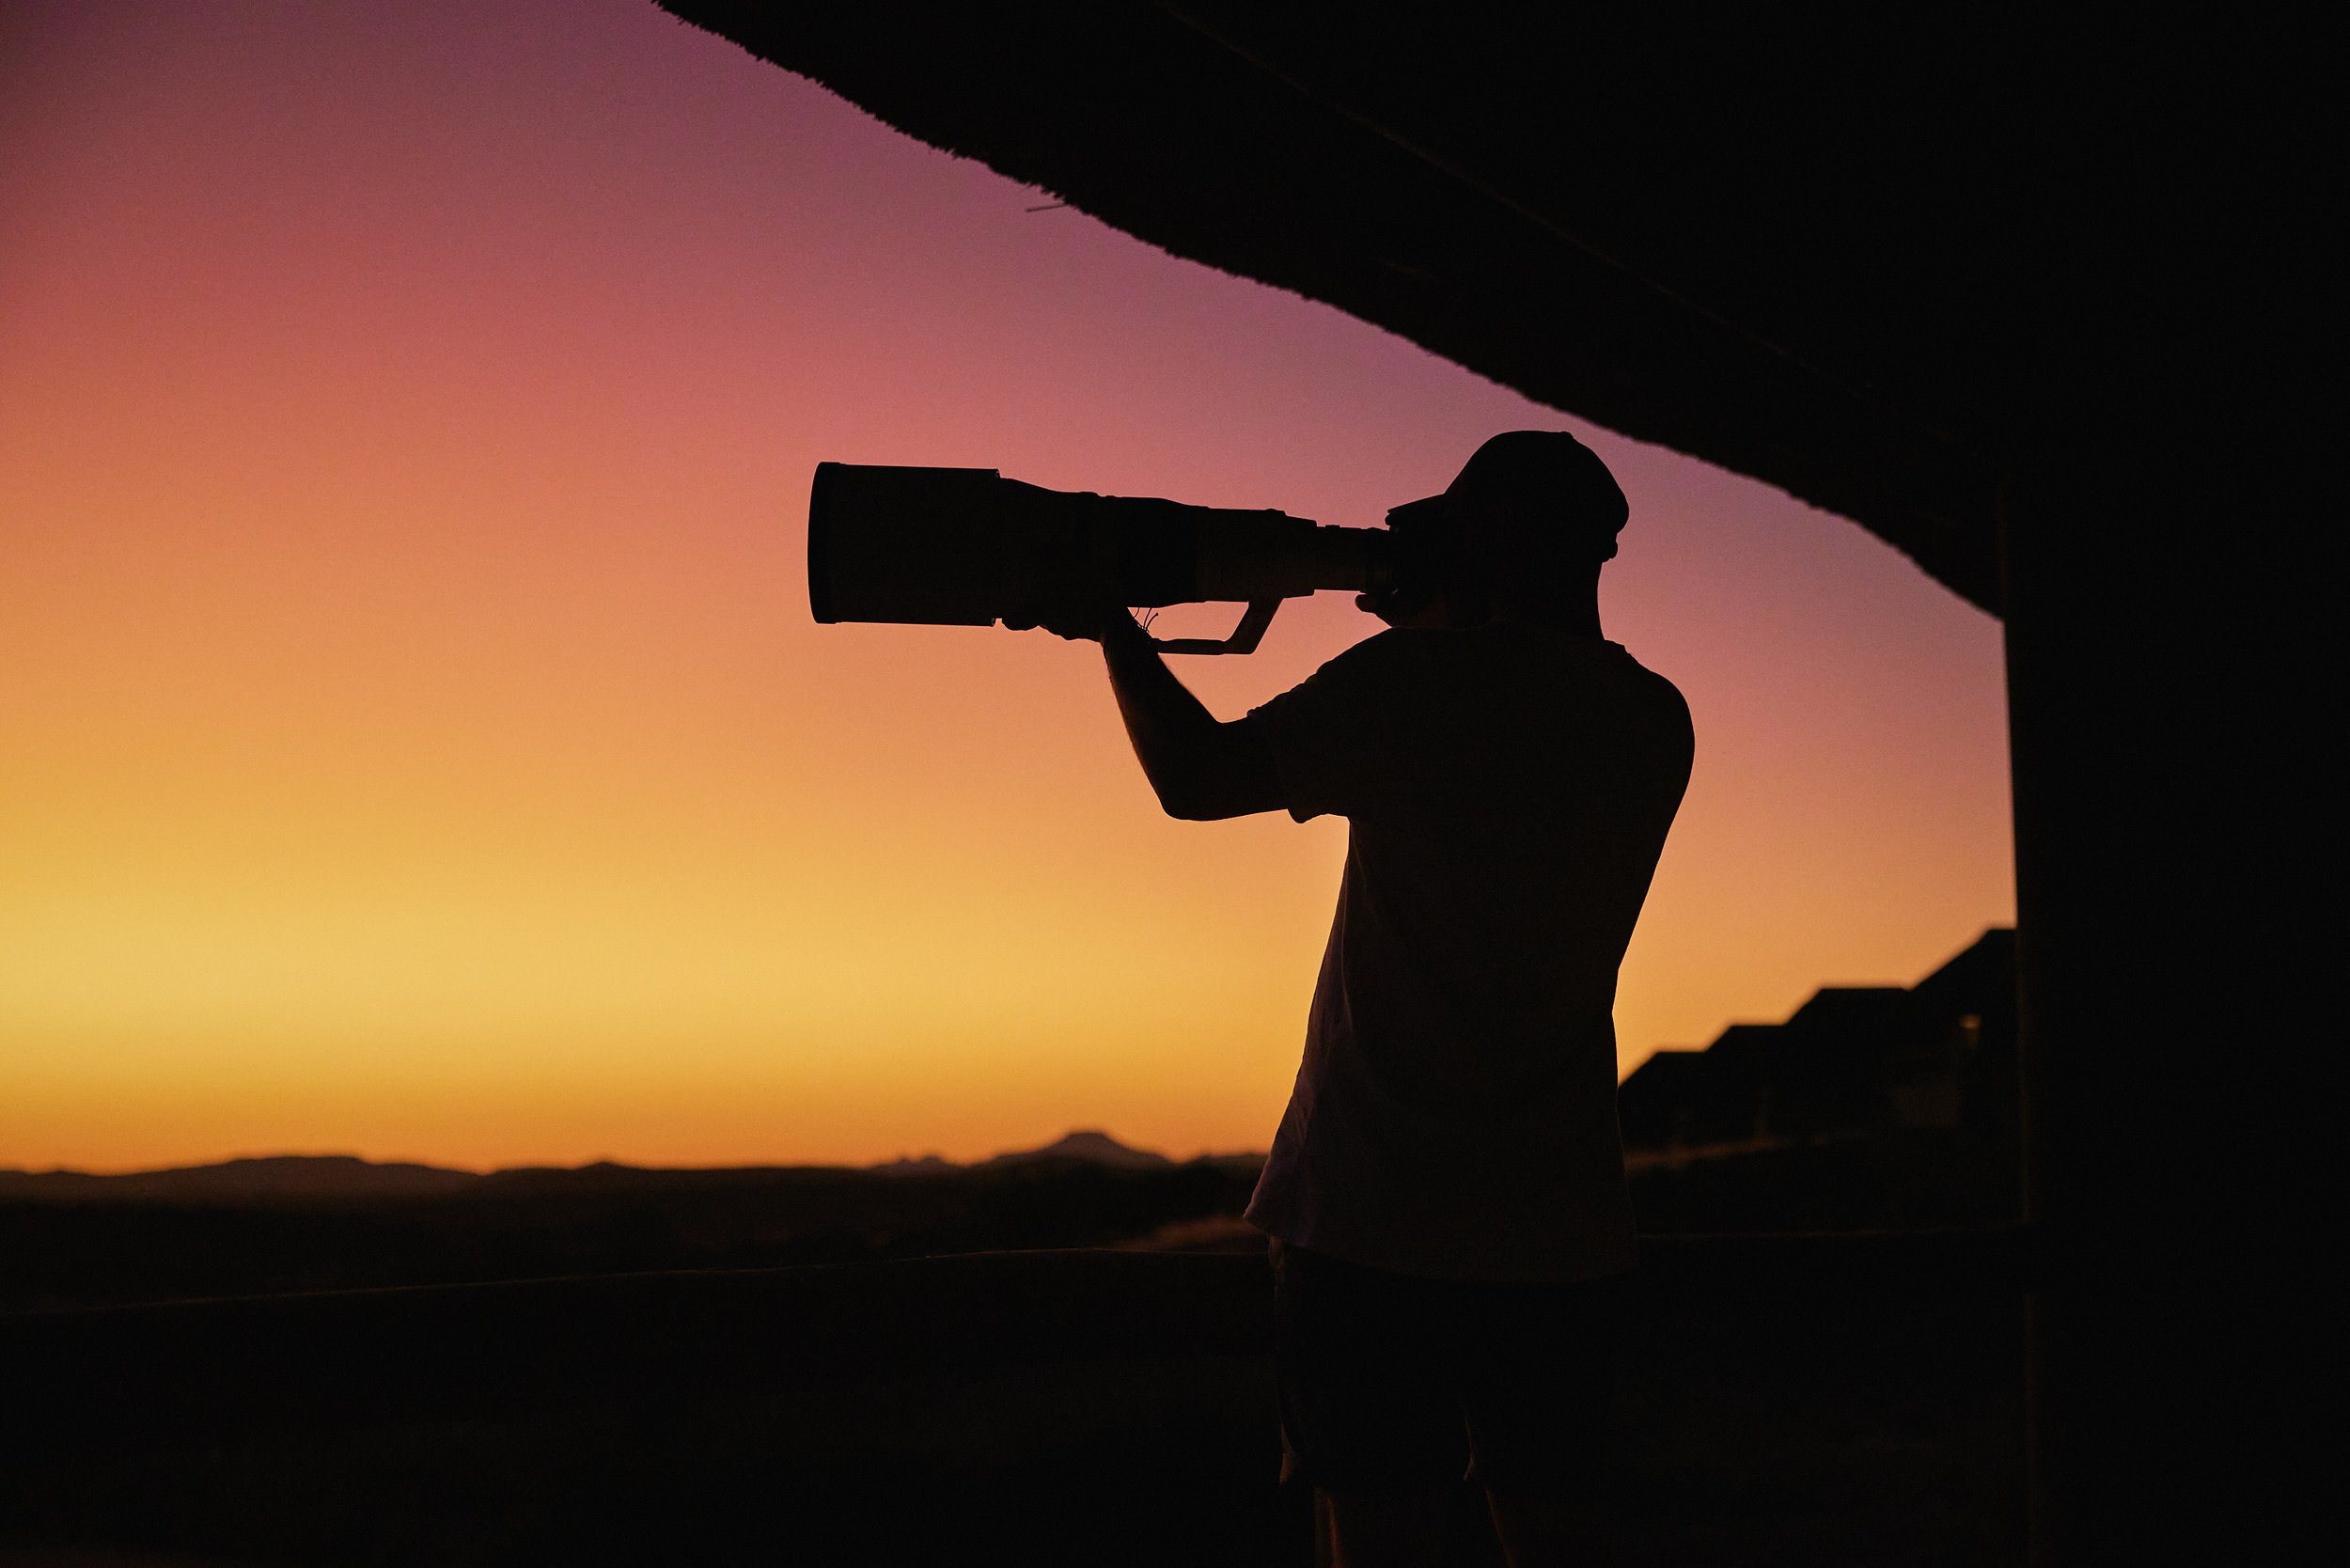
Best Professional Cameras for Wildlife Photography in 2025
The latest professional models keep improving, offering insane autofocus capabilities, lightning-fast burst rates, and high-resolution sensors that, compared the best DSLRs of the past, are in another league. Below are the top professional wildlife cameras of 2025, followed by a comparison with some still-relevant models from previous years.
Top Wildlife Photography Cameras of 2025
1. Nikon Z8
Sensor: 45.7MP full-frame BSI stacked CMOS
Frame Rate: 20 fps RAW, 30 fps JPEG, 120 fps at 11MP
Autofocus: 493-point phase detection with Deep Learning AI
Low Light Performance: ISO 64-25,600 (expandable to 102,400)
Memory Cards: Dual slots (CFexpress Type B + SD UHS-II)
Wildlife Photography Performance
The Nikon Z8 is essentially a “mini Z9,” packing the same powerhouse sensor and AF system into a more compact body. With its stacked sensor the Z8 delivers blackout-free shooting, very helpful for tracking birds in flight or fast mammals. The 20 fps RAW burst is fast enough for most wildlife scenarios, while 120 fps at 11MP can be useful for behavioral series.
Video Capabilities
Internal recording: 8K 60p (N-RAW), 4K 120p (ProRes 422 HQ)
Color profiles: N-Log, HLG
Dynamic range: Around 14 stops
Codec support: ProRes RAW, H.265, and H.264
The Z8 is an absolute beast for wildlife videographers, supporting 8K 60p RAW and 4K 120p for slow-motion shots. The N-Log profile provides great dynamic range, making it ideal for grading.
2. Canon EOS R5 Mark II
Sensor: 45MP full-frame stacked CMOS
Frame Rate: 30 fps RAW, 60 fps JPEG
Autofocus: Dual Pixel AF II with Deep Learning AI
Low Light Performance: ISO 100-51,200 (expandable to 204,800)
Memory Cards: Dual slots (CFexpress Type B + SD UHS-II)
Price: $4,599
Wildlife Photography Performance
Canon's upgrade to the legendary R5 brings improved burst speeds (30 fps RAW) and a new AI-driven autofocus system, making it one of the best cameras for fast action. The expanded ISO range improves its usability in low light, making dawn and dusk shooting much more manageable.
Video Capabilities
Internal recording: 8K 60p RAW, 4K 120p 10-bit 4:2:2
Color profiles: Canon Log 3, HDR PQ
Codec support: RAW, H.265, All-I, IPB
A huge leap for video, the 8K 60p RAW recording makes it future-proof for high-end productions. 4K 120p with 10-bit 4:2:2 recording is perfect for slow-motion wildlife sequences.
3. Canon EOS R1
Sensor: 24MP stacked full-frame CMOS
Frame Rate: 40 fps RAW
Autofocus: Next-gen Dual Pixel AF with AI tracking
Low Light Performance: ISO 100-102,400 (expandable to 409,600)
Memory Cards: Dual CFexpress Type B
Price: $6,999
Wildlife Photography Performance
The Canon EOS R1 is designed for sports and wildlife shooters who need speed over resolution. Its 40 fps RAW burst rate makes it the fastest Canon ever, with superb tracking AI that locks onto subjects like a dream. The low-light performance is also a massive upgrade, making it perfect for nocturnal wildlife.
Video Capabilities
Internal recording: 6K 120p RAW
Color profiles: Canon Log 2 & 3, HDR PQ
Codec support: RAW, XF-AVC
Canon's flagship features 6K 120p recording, a game-changer for high-speed wildlife videography.
4. Sony A9 III
Sensor: 24.6MP global shutter full-frame
Frame Rate: 120 fps RAW
Autofocus: 759-point hybrid AF
Low Light Performance: ISO 100-51,200
Memory Cards: Dual CFexpress Type A
Price: $5,499
Wildlife Photography Performance
Sony’s first global shutter camera eliminates rolling shutter issues, ensuring perfect motion capture at 120 fps RAW. The instant readout sensor makes it ideal for fast-paced wildlife like birds and big cats.
Video Capabilities
Internal recording: 4K 120p, 6K oversampled
Color profiles: S-Log3, S-Cinetone
This camera is an absolute monster for wildlife action photography, but lacks 8K capabilities.
5. Sony A1 II
Sensor: 50.1MP full-frame stacked CMOS
Frame Rate: 30 fps RAW
Autofocus: AI-enhanced real-time tracking
Low Light Performance: ISO 100-102,400
Memory Cards: Dual CFexpress Type A
Price: $7,499
Wildlife Photography Performance
The successor to the legendary A1 improves autofocus tracking, faster burst rates, and increased low-light performance. The 50MP sensor gives unparalleled detail for wildlife, allowing deep crops.
Video Capabilities
Internal recording: 8K 60p, 4K 120p
Color profiles: S-Log3, S-Cinetone
Codec support: RAW, H.265
For wildlife videographers, the 8K 60p and 4K 120p are outstanding. The S-Log3 profile allows for incredible color grading.

Test shot, R3, ISO 102.400
Previous-Gen Cameras Still Worth Buying in 2025
Canon EOS R3 vs. R1
The Canon R3 remains a wildlife powerhouse in 2025, featuring a 24MP stacked sensor, 30 fps RAW burst, and low-light ISO 204,800. Compared to the R1, it lacks the 40 fps burst speed and pre-capture shooting, but the price lowered significantly since the launch of the R1, making it a very interesting choice. I personally shoot with the R3 for 60-70% of my wildlife photos and I don’t feel any need to upgrade to the R1.
Canon EOS R5 vs. R5 Mark II
Also the Canon R5 is still a killer camera when compared to its successor. Here the difference is a bit more noticeable when it comes to autofocus performance, but the original R5 is already so good that I don’t really feel the need of something more performing.
Sony A1 vs. A1 II
In the same way, the original Sony A1 still competes with the A1 II, where this last one got lot of improvements but the previous model was already incredibile and will still be a workhorse camera for several years.
Final Thoughts
Wildlife photographers in 2025 have an incredible selection of cameras, from insanely fast burst rates to high-res sensors and 8K video, and anyone can find a perfect fit in the different budget ranges. Whether you go for the latest flagship or a previous-gen bargain, any of these models will elevate your wildlife photography.
Wanna join me on one of my exclusive wildlife photography workshops or safari trips?
I regularly organize guided photographic safaris and workshops to incredible locations, including Namibia, Botswana, Zambia and other amazing destinations worldwide. These trips are designed to offer photographers of all levels the chance to apply these techniques in the field, all while receiving personalized coaching and feedback.
Ready to embark on the photography adventure of a lifetime? Check out my upcoming photography trips and workshops and book your spot today:

Wildlife Photography Workshops: Best Locations to Elevate Your Skills in 2026
Discover the best locations for wildlife photography workshops in 2026! From the vast savannas of Africa to the icy landscapes of the Arctic, find top destinations to refine your skills, capture stunning wildlife shots, and learn from expert photographers.
Imagine standing in the middle of the Serengeti, camera in hand, as a pride of lions moves through the golden grass at sunrise. Or capturing the mesmerizing dance of the Northern Lights above a herd of reindeer in Svalbard. Wildlife photography workshops offer the perfect blend of adventure, learning, and hands-on experience in breathtaking locations around the world!
In this guide we’ll explore the best destinations for wildlife photography workshops, detailing what makes each location unique, what wildlife you can expect to photograph, and key factors to consider when choosing the right workshop for your skill level.
Whether you’re a beginner looking to master camera settings or a seasoned pro seeking rare wildlife encounters, these destinations will take your photography to the next level!

A young ibex in the Italian Alps
What Makes a Great Wildlife Photography Workshop?
I’ve been on both sides of a wildlife photography workshop - first as an eager participant, then as an instructor leading groups into some of the world’s most breathtaking ecosystems. And let me tell you, not all workshops are created equal. A great wildlife photography workshop isn’t just about snapping cool pictures; it’s about learning, growing, coming home with shots you never thought you’d be able to capture and with memories you’ll cherish for a lifetime. But what is that separates an unforgettable experience from a mediocre one?
Expert Guidance from Seasoned Wildlife Photographers
A workshop is only as good as the person leading it. I’ve been on trips where the “guide” was just a tour operator with a camera, and let’s just say... it showed. A real wildlife photography mentor doesn’t just know their way around a camera; they understand animal behavior, lighting conditions and how to adapt when nature doesn’t cooperate (because trust me, it won’t always).
Look for workshops led by photographers with actual field experience - not just in photography, but in the specific environment you’re visiting. Someone who has spent years photographing African lions or Arctic foxes will have a sixth sense for when and where to be for the best action. They’ll teach you how to anticipate behavior, work with natural light, and fine-tune your settings in real time. That kind of expertise is invaluable.
Prime Locations with Diverse Wildlife Populations
You can be the best photographer in the world but if the location isn’t right, you won’t get the shots. I’ve made the mistake before - signing up for a trip that promised incredible wildlife but delivered little more than distant specks through a telephoto lens.
A great workshop takes you to prime locations during the best seasons. Think of the Serengeti during the Great Migration, the Pantanal for jaguars or Alaska for grizzly bears fishing in rivers. These aren’t just scenic places - they're where you’ll have the highest probability of witnessing jaw-dropping animal behavior.
And don’t overlook local knowledge. The best workshops often partner with expert guides who live in the area, ensuring you get to the right spot at the right time. A workshop that skimps on local expertise? Big red flag.

Wild camping in Damaraland, Namibia. I visited the country more than 20 times before I led my first workshop there.
Small Group Sizes for Personalized Attention
This one’s non-negotiable. I’ve been on trips where there were too many photographers crammed into a single safari vehicle, and it was a mess - elbows knocking, lenses clashing and everyone fighting for the same angle.
A great wildlife photography workshop keeps group sizes small, usually around 4 to 6 participants. This ensures that the instructor has time to give personalized feedback and that everyone gets a fair shot (literally). Small groups also mean more flexibility. If a leopard suddenly appears on the opposite side of the vehicle, you want to be able to reposition quickly - not wait for five people to shuffle out of the way.
Ethical Wildlife Photography Practices
This is a big one. I’ve seen workshops where photographers push too close, bait animals, or otherwise disrupt wildlife just to get “the shot.” It’s frustrating and, frankly, unethical.
A responsible wildlife photography workshop follows ethical guidelines, keeping a respectful distance, never baiting or disturbing animals, and educating participants on how to capture images without causing harm. If a workshop doesn’t have a clear stance on ethics, that’s a major red flag. The best leaders prioritize conservation and responsible storytelling over sensationalist images.
Ideal Seasons for Capturing Stunning Animal Behavior
Timing is everything in wildlife photography. If you’re hoping to photograph brown bears fishing for salmon, you need to go in late summer. Want snow leopards? Winter in the Himalayas is your best bet. Migration patterns, mating seasons, and even daily weather conditions affect what you’ll see and how you’ll photograph it.
A high-quality workshop isn’t just set in the right location—it’s scheduled during the ideal time to capture dynamic wildlife moments. A good leader will also help you understand how to work with the seasonal conditions, whether it’s low light in the Arctic winter or the harsh midday sun in the savanna.

Our local guide looking for animals on the banks of Chobe river, Botswana.
Best Locations for Wildlife Photography Workshops in 2025
Wildlife photography workshops are one of the best ways to improve your skills while immersing yourself in some of the most incredible natural environments on the planet. Whether you’re after big cats on the hunt or mountain wildlife in the Alps, 2025 is shaping up to be an exceptional year for wildlife photography. Here are the top destinations for workshops, each offering something unique for photographers of all levels.
1. Serengeti National Park, Tanzania
If there’s one place that consistently delivers mind-blowing wildlife photography opportunities, it’s the Serengeti. This iconic park is home to the Great Migration, where over a million wildebeest, zebras, and gazelles thunder across the plains, pursued by lions, cheetahs, and crocodiles lurking in the rivers. The sheer density of wildlife means incredible sightings are almost guaranteed.
Best time to visit: January to March is prime time if you want to photograph the baby boom—when thousands of wildebeest calves are born each day, attracting big cats and scavengers. The lush green season offers stunning contrasts, dramatic skies, and fewer crowds.
A well-planned workshop here will take you to key areas where the action is unfolding, ensuring you get the best vantage points for predator-prey interactions, intimate portraits, and stunning landscape shots with wildlife in scale.
2. Damaraland and Etosha National Park, Namibia
Namibia is wild, remote, and surreal - a true photographer’s paradise. The combination of rugged desert landscapes and unique wildlife makes it one of the most special places for a wildlife photography workshop. Damaraland, in particular offers a rare chance to track desert-adapted elephants and rhinos across Mars-like terrain, while Etosha National Park provides incredible wildlife congregations around the waterholes.

Waterhole scene in Etosha.
Best time to visit: May to October is the dry season, when wildlife congregates around water sources, making sightings more predictable.
A workshop here often includes exclusive access to off-the-grid locations - far from tourists, where you can spend time tracking animals, photographing against Namibia’s golden light and capturing scenes that feel truly untouched. Then, there’s Etosha, famous for its mirage-like salt pan, where lions, oryx, and giraffes gather in striking compositions.
See my full Etosha NP photography guide

Desert elephants in Damaraland.
3. Yellowstone National Park, USA
I’ve not been there myself yet, but according to a few trusted friends and fellow photographers, Yellowstone is America’s crown jewel for wildlife photography. The mix of majestic landscapes and powerful wildlife makes it an incredible destination. Bison moving through steam-filled geysers, wolves in the early morning mist, and grizzly bears hunting in meadows—this place is pure magic.
Best time to visit: Winter. It’s cold, challenging, and absolutely worth it. The snow-covered landscapes create the perfect contrast for wildlife, and the animals are more active in their search for food.
Winter workshops focus on capturing the raw beauty of wildlife in extreme conditions, perfect for honing skills in exposure, composition, and storytelling. If you want those National Geographic-style shots of a wolf piercing through the white-out conditions, this is your place.
More Yellowstone infos here

After sunset during a workshop in South Luangwa, Zambia.
4. South Luangwa National Park, Zambia
Leopards are notoriously elusive…except in South Luangwa. This park is one of the best places in the world for spotting and photographing these sleek, nocturnal hunters. It’s also home to wild dogs, one of Africa’s rarest and most exciting predators to photograph.
Best time to visit: The dry season (July - October) is the best time for photography, as water sources shrink and wildlife congregates. During the wet season (December to April) most camps and lodges are closed due to access and flooding problems.
A standout feature of workshops here is the option for walking safaris, a totally different experience from photographing from a vehicle. You’ll learn to anticipate animal behavior, practice low-light photography and capture intimate images without disturbing the scene.

Leopardess with her meal on a tree in South Luangwa NP, Zambia.
5. Svalbard, Norway (Arctic Wildlife)
On of my top-of-the-list destinations for 2025, Svalbard is as wild as it gets. It’s one of the few places on earth where you can photograph polar bears in their natural habitat, along with walruses, Arctic foxes, and breathtaking ice landscapes.
Best time to visit: April - September, when there’s still plenty of ice, but enough daylight for long shooting hours.
Workshops here teach the unique challenges of cold-weather photography, ensuring your gear doesn’t fail when you’re face-to-face with a polar bear on the ice. The Arctic light is soft and ethereal, making even the simplest shots look otherworldly.
6. Torres del Paine National Park, Chile
If you dream of photographing a wild puma in Patagonia, this is where you need to be. Torres del Paine is the world’s best location for puma tracking, with skilled local guides knowing exactly where to find these elusive big cats.

A female puma during my last trip to Patagonia.
Best time to visit: October to May, when pumas are most visible, and the landscapes are at their most dramatic.
In addition to pumas you’ll photograph guanacos, Andean condors, foxes, and jaw-dropping mountains, often with dynamic weather adding an extra layer of drama to your shots.
7. Europe
Europe might not always come to mind first for wildlife photography, but it offers a diverse range of incredible workshops:

Fox in Gran Paradiso National Park, Italy.
Slovenia, Slovakia, Croatia, and Finland: Perfect for brown bear photography, using professional hides to capture natural behavior.
The Alps (Italy, France, Switzerland): Stunning backdrops for ibex, chamois, golden eagles, and bearded vultures.
Spain: The Iberian lynx, one of the rarest wild cats in the world, is an absolute must-photograph.
Norway: Musk oxen in Dovrefjell, an experience that takes patience and endurance.
Finland and Sweden: Wolves, owls, and birds of prey, often from hides designed for ultra-close encounters.
Best time to visit: Varies depending on the species—winter for owls, summer and autumn for bears, early spring for ibex, early winter for chamois. Most of these environments are close to human settlements so workshops here often involve tracking skills, long-lens techniques, and ethical photography practices.

Brown bear in Slovenia.
8. Antarctica
This is the ultimate adventure for wildlife photographers. You’ll find yourself surrounded by thousands of penguins, seals, and ice formations that defy imagination.
Best time to visit: November - March, when the Antarctic summer provides better access and light.
Workshops here focus on extreme environment photography, capturing the essence of isolation, survival, and untouched beauty.
9. Central Kalahari Game Reserve, Botswana
The Central Kalahari is raw, untamed, and utterly mesmerizing. This vast, arid wilderness is home to the famous black-maned lions, cheetahs, and desert-adapted wildlife that thrive in one of the toughest ecosystems on Earth.
Best time to visit: December - April for the zebra migration and lush landscapes, but year-round for incredible wildlife encounters.
Workshops here emphasize tracking skills, patience, and understanding light in a harsh environment. It’s an exclusive, off-the-beaten-path experience—perfect for those wanting a truly wild adventure.
Want expert guidance and a front-row seat to some of the best wildlife encounters on the planet?
Check out my upcoming wildlife photography workshops and join me on an unforgettable journey to capture nature’s most extraordinary moments!
How to Choose the Right Wildlife Photography Workshop
Picking the right wildlife photography workshop isn’t just about finding an exciting destination; it’s about choosing an experience that matches your skill level, goals, and expectations. Trust me, I’ve seen photographers make the mistake of jumping into a trip that was way beyond their ability, and it can be frustrating. You don’t want to be that person struggling with camera settings while everyone else is nailing the shot of a lifetime.
Consider Your Skill Level

Paolo looking for ibex during a recent workshop in Gran Paradiso National Park, Italy.
This is the first and probably most important factor. If you’re a beginner, avoid workshops that focus on highly technical or fast-paced photography, like birds in flight or nocturnal predators. I’ve met people who booked expensive safaris to places like Svalbard, only to realize they had no idea how to track focus on a polar bear, let alone the abundant birds you can find up there. Start with something more forgiving, like bear photography in Europe or a trip to Etosha in Namibia, where stationary wildlife around waterhole makes conditions not as challenging and where you can practice composition and settings without too much pressure.
Intermediate photographers can take on slightly more challenging environments, where light, speed, and weather conditions become more unpredictable. This might mean photographing predators on the hunt or learning to work in low-light conditions. And if you’re advanced, you’ll likely want a workshop that offers more than just photography basics - think specialized trips focusing on rare wildlife behaviors, remote locations, or advanced post-processing techniques.
Group Size Matters
Bigger isn’t better when it comes to photography workshops. A small group means more one-on-one instruction, better shooting positions, and a more immersive experience. I once joined a 12-person workshop in Africa, and let’s just say it wasn’t ideal—half the time, we were fighting over space in the vehicle, and the instructor barely had time for individual feedback. Now, I always recommend workshops with six participants or fewer, especially if you’re serious about improving.
Choose an Instructor Who Knows Photography, Not Just Wildlife
Not all guides are photographers and not all photographers are good teachers. Look for workshops led by professionals with strong wildlife photography experience - someone who understands camera settings, light, and composition in tough environments. The best instructors blend technical expertise with field experience, ensuring you’re in the right place at the right time and can actually get the shot.
Pay Attention to Seasonal Factors
Wildlife photography is all about timing. Seasons affect everything, from migration patterns to breeding behaviors to light quality. A winter trip to Yellowstone, for example, gives you dramatic snowy landscapes and frost-covered bison, while the same location in summer might feel overcrowded and uninspiring. If you’re after specific animal behavior, research the best time of year to see it. Many pros schedule workshops around peak action, like the wildebeest migration in the Serengeti or the puffin breeding season in Iceland.
Prioritize Ethical Wildlife Photography
Finally, choose workshops that respect wildlife and their habitats. Ethical wildlife photography means no baiting, no disturbing animals for the shot, and no overcrowding sensitive areas. I once saw a group of photographers surround a stressed-out fox just for a close-up—completely unacceptable. Responsible workshops follow ethical guidelines, keep a respectful distance, and focus on conservation. Some even contribute to local projects, ensuring that your trip supports wildlife protection rather than exploitation.

Not only wildlife…here our safari vehicle during a transfer between locations in Namibia.
Do Research on the Location and Species You’ll Photograph
One of the biggest mistakes I see people make is showing up unprepared. If you’re heading to the Maasai Mara, for example, you should know that early mornings are prime time for lion activity. If you’re doing a wildlife photography workshop in Borneo, understanding the habits of orangutans will help you anticipate their movements.
Before your trip, dig into the details of your destination. What time of year offers the best sightings? What’s the typical behavior of the animals you’ll be photographing? I remember my first trips to Namibia, when I was struggling a lot to find any big cats. Back then I thought it was just a matter of driving around and hoping for the best. Now I know the truth: back then I had no idea where to look. If I had done more research, I would have avoided midday hours as lions and leopards are hiding in the shade at that time of the day. I would have then looked for waterholes in late evenings, or checked on scavengers activity to locate lions kills.
A little prep goes a long way. Watch documentaries, read wildlife guides and check recent trip reports from photographers who have been there. This kind of groundwork means you won’t waste time figuring things out when you’re already in the field.
Practice Camera Settings Before the Trip to Avoid Missing Shots
Wildlife doesn’t wait for you to fumble with your camera. I’ve seen it happen too many times. Someone spots a cheetah sprinting across the plains, they raise their camera… and miss the shot because they were still in landscape mode from the day before.
Before your workshop, practice adjusting settings on the fly. Get comfortable switching between shutter speeds, ISO, and aperture without looking. A good exercise? Go to a park within your city and photograph birds in flight; it’ll teach you how to track fast-moving subjects and adjust settings quickly.
Be Patient—Wildlife Photography Requires Time and Persistence
Patience isn’t just helpful, it’s essential. Unlike landscape photography, where mountains don’t run away, wildlife photography is unpredictable. You could wait hours for a leopard to descend from a tree or a bear to step into the perfect patch of light.
During a wildlife photography tour in Zambia, I spent three days tracking a pride of lions. Just when we thought we’d lost them, they suddenly appeared at sunset, playing in golden light. That one moment made all the waiting worth it.
Bring a mindset that embraces the process. Enjoy the quiet moments in nature. Even if the perfect shot doesn’t happen, you’re still experiencing something incredible.

Boat safari on the Kwando river, Namibia.
Engage with Instructors and Fellow Photographers for Learning Opportunities
Your instructor has years of experience, so don’t be shy about asking questions. Need help with wildlife photography camera settings? Ask. Curious about composition techniques? Pick their brain. And don’t overlook your fellow participants. Some of the best tips I’ve picked up have come from chatting with other photographers over dinner.
Respect the Wildlife and Follow Ethical Photography Guidelines
No photo is worth disturbing an animal. Ethical wildlife photography means keeping a respectful distance, avoiding baiting and not stressing animals for the sake of a shot. In national parks, follow guidelines and listen to guides; they’re there to protect the wildlife as much as to help you get great images.
A simple rule? If an animal changes its behavior because of you, you’re too close. I once watched a photographer in Chobe NP, Botswana, get too close to a desert elephant. The elephant flared its ears - a clear warning - but the guy didn’t back off. Moments later, the elephant mock-charged, sending dust flying. It could’ve ended badly.
Be patient, stay respectful, and you’ll capture authentic, natural moments—without harming the animals in the process.
Conclusion
Wildlife photography workshops are more than just a chance to take amazing pictures—they’re immersive experiences that push you to grow as a photographer while exploring some of the world’s most breathtaking ecosystems. Whether you’re tracking pumas in Patagonia, waiting for the perfect shot of a lion in the golden light of the Serengeti or braving the Arctic chill to capture polar bears on the sea ice, the right workshop can elevate your skills and deepen your connection to the wild.
The best part? You don’t have to go at it alone. A well-structured workshop puts you in the right place at the right time, surrounded by like-minded photographers and experienced guides who can help you refine your craft. You’ll return home not just with stunning images, but with new techniques, a sharper creative eye, and unforgettable memories.
Want expert guidance and a front-row seat to some of the best wildlife encounters on the planet?
Check out my upcoming wildlife photography workshops and join me on an unforgettable journey to capture nature’s most extraordinary moments!

Seasonal Guide: Best Times to Photograph Wildlife in Africa
Discover the best times to photograph wildlife in Africa with this seasonal guide. Learn when to visit for iconic migrations, predator action, and stunning landscapes for wildlife photography.
Africa is a paradise for wildlife photographers, but timing is everything! Whether you're chasing the Great Migration, looking for big cat action or dreaming of misty rainforest shots, each season offers something unique. In this guide, I'll break down the best times to visit Africa for wildlife photography, helping you plan your next epic adventure.

Dry season in South Luangwa NP, Zambia
Why Timing Matters in Wildlife Photography
If there's one lesson wildlife photography has hammered into me, it's that timing is everything. I learned this the hard way during my first trips to Africa. I had imagined golden sunsets, crisp shots of big cats, and dramatic landscapes. Instead, I arrived right after the wet season; while it was technically a good time of the year for safari, thick vegetation hid most of the animals and the abundant water sources deep in the bush veld kept most predators from coming closer to the camps waterholes. Sure, it had its own beauty—lush green backdrops and dramatic skies—but I quickly realized that knowing the right season for photography makes or breaks a trip.

A shot from my first every night on a safari camp. Okaukejo, Etosha National Park, Namibia
The Role of Seasons in Wildlife Behavior and Photographic Opportunities
Seasons dictate everything in the animal kingdom—movement, feeding, mating, and even the way animals interact with their surroundings. If you’re after predator-prey action, for example, you’ll want to be around when young animals are born. In places like the Serengeti and Masai Mara, the calving season (January–March) is a feast for lions and cheetahs, making it the perfect time to capture intense moments of survival.
Migration patterns also change with the seasons. The Great Migration, one of the most jaw-dropping wildlife spectacles, peaks in July–October when millions of wildebeest cross crocodile-infested rivers. But if you show up in the same spot in December? You’ll just get endless plains of grass with barely a hoof in sight.
Also for bird photographers seasons are just as critical. Wet seasons (November–April) bring an explosion of migratory bird species, with colorful flocks arriving from Europe and Asia. You’ll get vibrant plumage, dramatic mating displays, and a chance to shoot rare species in their breeding grounds.
Dry Season vs. Wet Season: How Conditions Affect Animal Visibility
Every photographer wants clear, uninterrupted shots of animals in their natural environment. But what many don’t realize is how much the seasons affect visibility.
Dry Season (May–October)
Animals gather around water sources; this happens more and more as dry season progress and makes it easier to locate and photograph wildlife
Shorter grass and bare trees mean less obstruction for clean compositions
There’s usually a lot of dust in the air, making for stunning golden backlit shots but also potential lens issues
The harsh midday light is very challenging for exposure, but is not a big problem as it’s also the part of the day when wildlife is less active; on the opposite, sunrise and sunset are just magical
Wet Season (November–April)
Thick foliage makes it tougher to spot and photograph animals
One of the advantages of traveling in the wet season is that there are much less visitors around, making for more intimate shooting experiences
We can see stunning green landscapes, dramatic skies, and baby animals
Rain and humidity can be challenging, so gear protection is a must, and slippery and muddy roads can make travel harder.

Green season in Namibia. While it makes for vibrant colors, spotting animals is much more difficult in the thick vegetation
Impact of Light, Dust, and Weather on Photography
Also the light changes dramatically across seasons and understanding its impact is key to getting pro-level shots. During the dry season, dust in the air creates gorgeous warm glows during golden hour but can also lead to hazy, washed-out images if you’re not careful. A polarizer can sometimes help cut down the glare and improve contrast, but it’s not easy to use such a filter when shooting wildlife.
In the wet season the clouds act like a natural diffuser, softening harsh sunlight and allowing for even exposure throughout the day. This is great for capturing fine details in fur and feathers without harsh shadows. The downside? Rain can ruin your gear if you’re not prepared. A simple rain cover and a microfiber cloth for wiping your lens can save your shoot.
Dry vs. Wet Season Photography in Africa
Africa is one of those places where the time of year completely changes the photographic experience. I’ve shot in both the dry and wet seasons, and each has its own magic—and challenges. If you're planning a photography trip, knowing what to expect in each season can help you maximize your shots and avoid frustrating surprises. Let’s see more in detail.

Sunset in Etosha NP in October
Dry Season: Best for Visibility & Big Game
The dry season (usually from May to October, depending on the region) is prime time for wildlife photography. The reason is simple: animals need water. As rivers dry up, wildlife is forced to gather around the few remaining water sources, making it much easier to find and photograph them. If you’ve ever dreamt of classic safari images - elephants dust-bathing, lions lounging by a waterhole, or a leopard descending from an acacia tree - this is the season to go.
One of the biggest advantages? Crystal-clear skies every day. With little humidity, the air is crisp, meaning sharp images with fewer atmospheric distortions. Sunrise and sunset produce warm, glowing hues that make everything look cinematic and magic. Since it rarely rains, you don’t have to worry about sudden storms cutting your golden hour short.
But it's not all perfect. The midday light is brutal—harsh, flat, and unflattering. If you’re shooting during those hours, expect strong shadows and high contrast, which can be tricky to expose properly. Also, the dryness means dust—lots of it. If you're changing lenses frequently, that fine dust will find its way into every crevice of your gear. A simple tip? Bring a rain cover for your camera (yes, even in the dry season) and a blower to keep your sensor clean.
Another downside? More tourists. National parks get crowded, and during peak times, you might have 10+ vehicles surrounding a big cat sighting. If you want more exclusivity, consider private reserves or lesser-known parks where sightings are still excellent but without the traffic jams.

A young lion in full dry season. Etosha NP, Namibia
Wet Season: Best for Colors, Unique Shots & Fewer Crowds
Come November, the first rains hit, and everything changes. Dry, brown landscapes transform into lush green paradises. For photographers who love vibrant color and dramatic skies this season is a dream. The air is fresher, the skies are often filled with dramatic cloud formations, and the golden light reflects beautifully on the wet ground, creating unique compositions.
Another major perk? Baby animals. Many species give birth during the wet season, meaning you’ll see wobbly-legged zebras, playful lion cubs, and curious young elephants. This is a jackpot for storytelling images—capturing the softer, more intimate side of wildlife.
For bird photographers this is peak season. Migratory birds arrive in massive numbers and species that are harder to spot in the dry season (like colorful bee-eaters) become much more visible. The contrast of bright feathers against deep green foliage makes for spectacular shots.
However, the wet season does come with some challenges. Muddy roads can make certain areas inaccessible, especially in parks with black cotton soil (which turns into a slippery mess). If you’re self-driving a proper 4x4 and recovery gear are a must. The thicker vegetation can also make spotting wildlife trickier, as animals have more places to hide. You might hear a lion roaring nearby but struggle to get a clear shot through the dense bush.
On the plus side? Fewer crowds. Many tourists avoid the wet season, meaning you’ll often have sightings all to yourself. And honestly, that alone can be worth the occasional downpour.
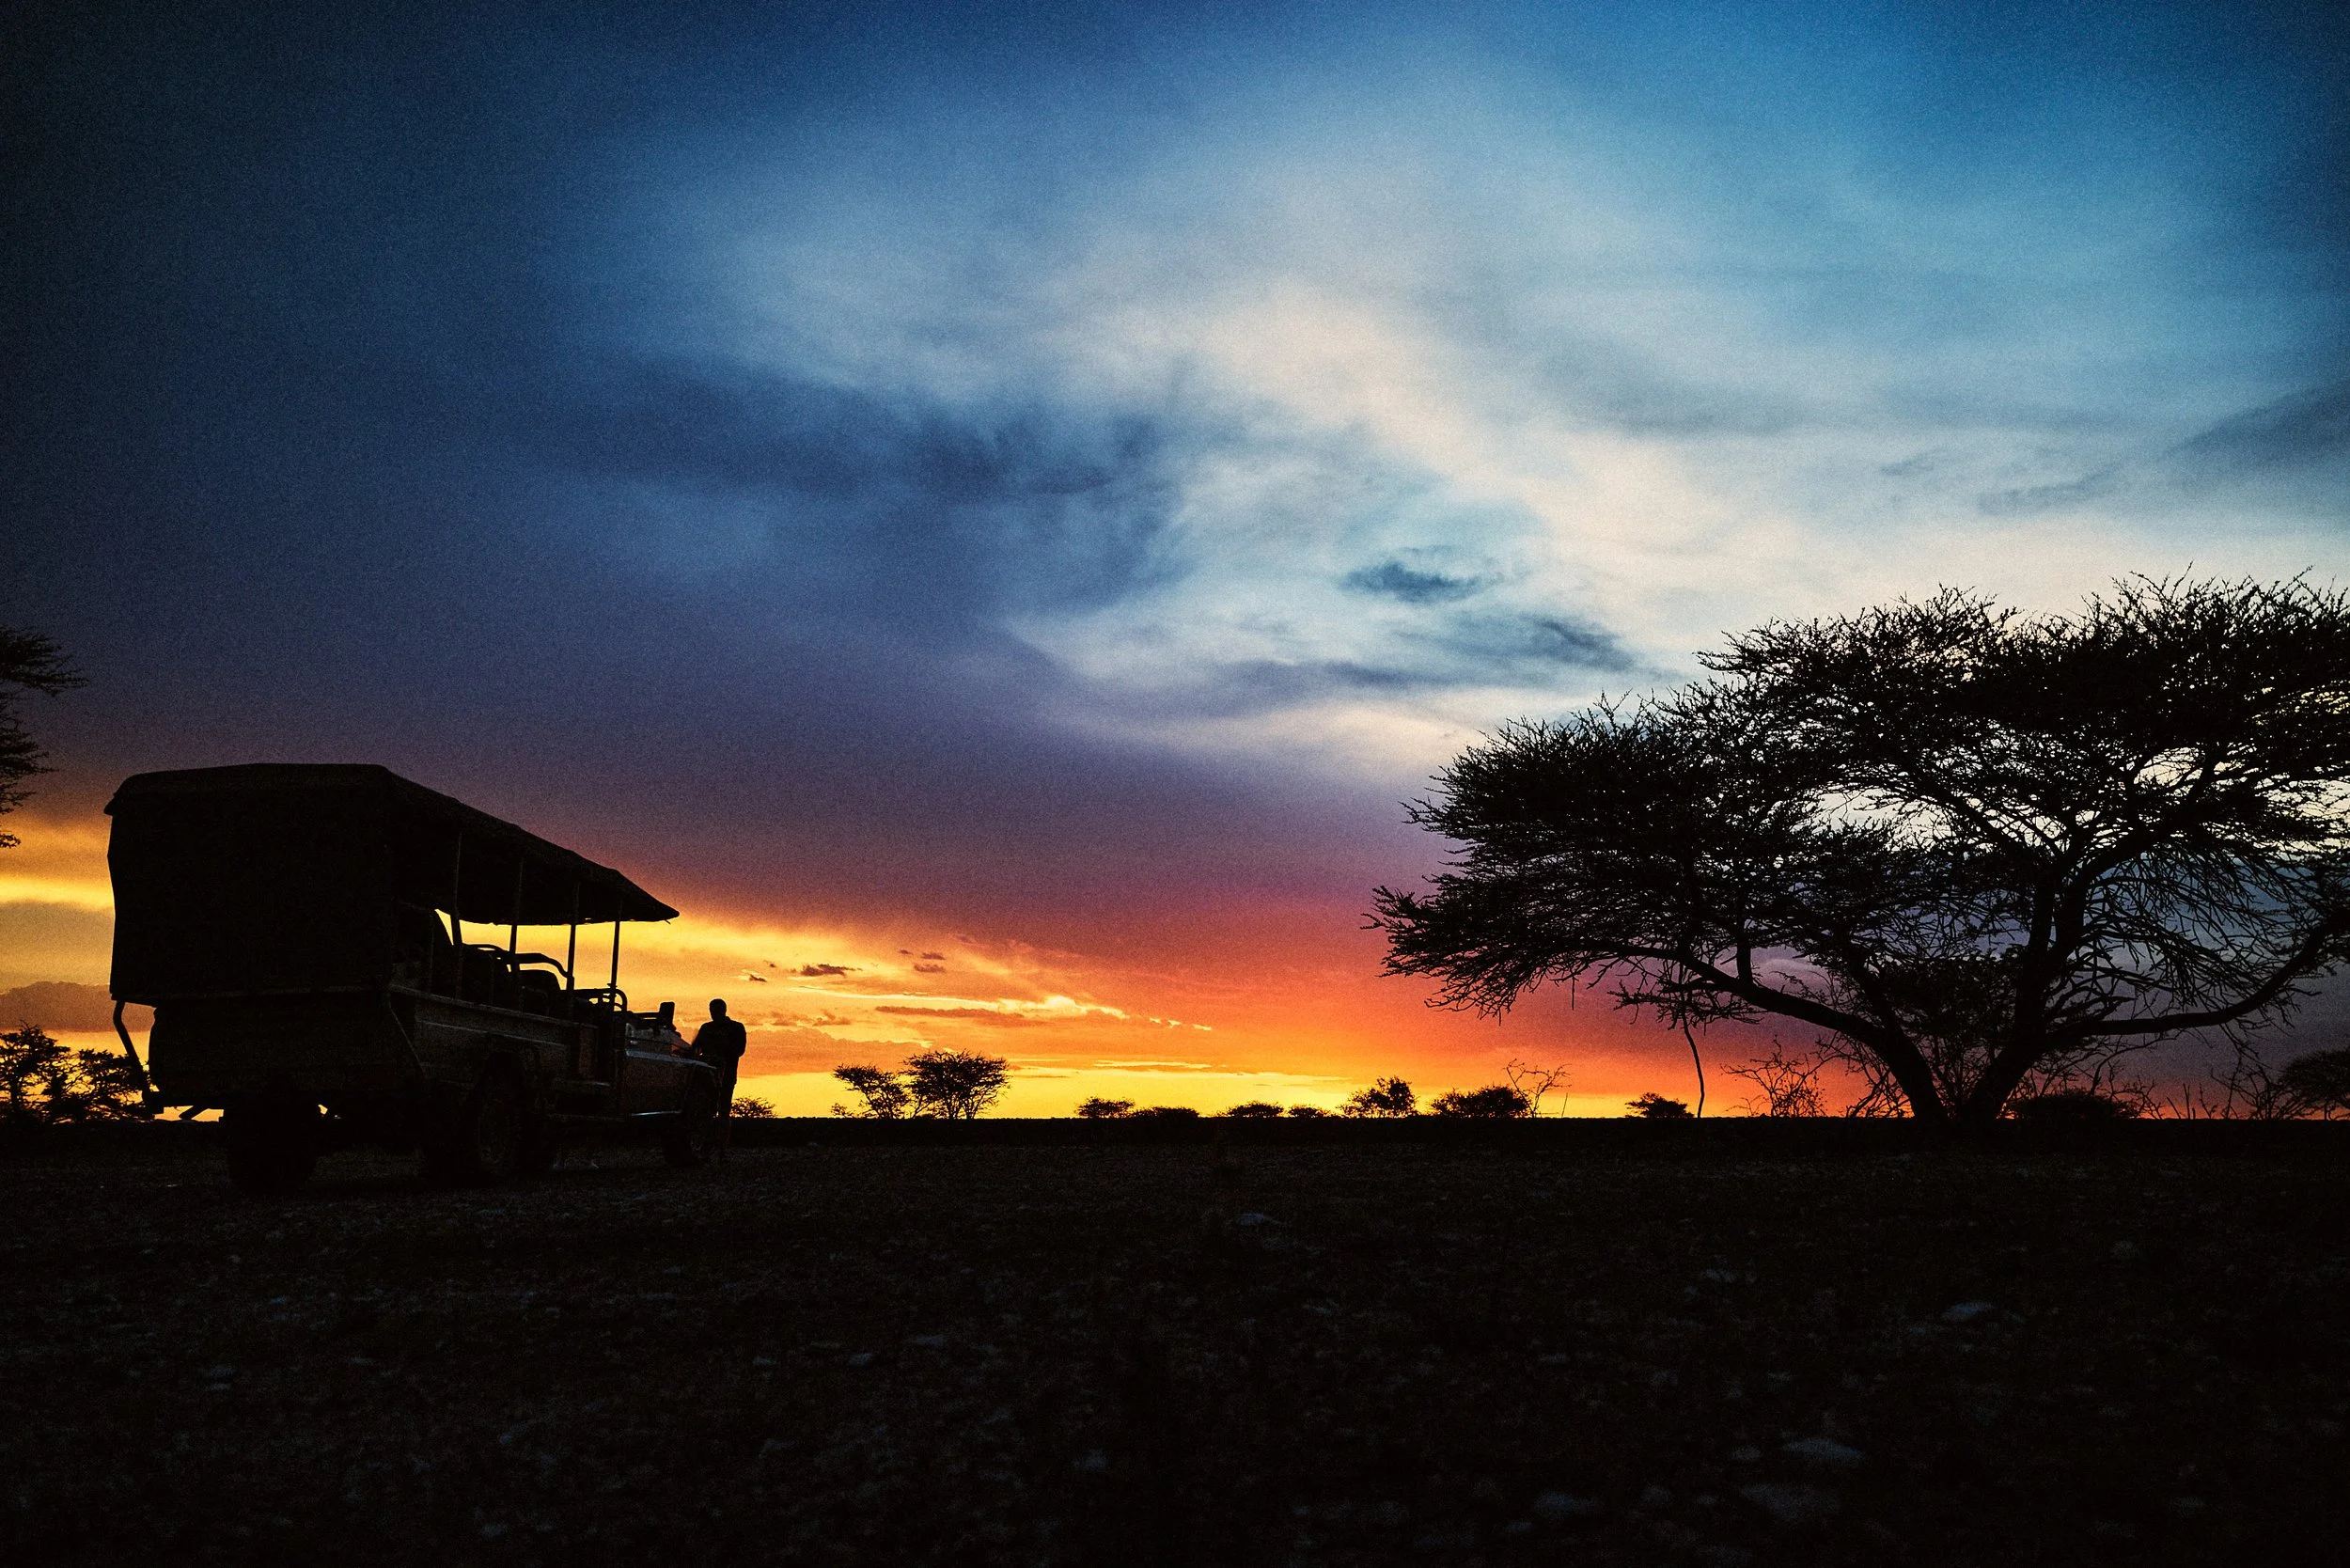
During the wet season you can expect very dramatic skies. Central Namibia, February 2024
Best Time for Wildlife Photography by Region
Now that you understand the differences between seasons in Africa let’s see the different destinations more in detail.
East Africa (Kenya, Tanzania, Uganda, Rwanda)
Great Migration (June–October):
If there’s one event that defines East African wildlife photography, it’s the Great Migration. Watching thousands of wildebeest and zebras thunder across the Serengeti and Masai Mara is unreal. But if you want the shot—crocodiles lunging in the Mara River or chaotic stampedes—it’s all about timing. The crossings typically peak between July and September, though nature doesn’t run on a schedule.
Calving Season (January–March):
This is the hidden gem of the Serengeti. The southern plains explode with life as thousands of wildebeest calves drop within weeks. With all this new life comes a surge of predators—lions, cheetahs, and hyenas locked in an endless game of survival. This is where you get those dramatic hunting sequences. The golden grass, dramatic chases, and adorable calves make this one of my favorite times to shoot. It’s also less crowded than peak migration months.
Mountain Gorillas (Year-round, but best June–September):
Trekking through Rwanda’s Volcanoes National Park or Uganda’s Bwindi Impenetrable Forest is no easy feat. Rain can turn trails into mudslides, and dense foliage makes shooting tough. June to September offers the driest conditions, meaning clearer views, better hiking, and less mist on your lens. But let’s be real—any gorilla encounter is magical. Just keep your ISO high (800–3200) to compensate for the low light under the canopy.
Southern Africa (Botswana, South Africa, Namibia, Zambia, Zimbabwe)
Dry Season (May–October):
This is when Africa’s wilderness turns into a photographer’s dream. Water sources shrink, forcing animals to congregate at rivers and waterholes. If you want crisp, clean shots of big game—elephants in Chobe, lions in the Okavango Delta, leopards in South Luangwa—this is the time to go. With less foliage, animals are easier to spot, and the golden light at sunrise and sunset is unreal.
Green Season (November–April):
Now, if you love moody skies, lush landscapes, and baby animals, this is your season. Well, almost. I would still personally avoid November and December as temperatures are incredibly hot and vegetation is still very dry. The best is from mid January to mid March, before the vegetation will grow too much. The rains bring life to the land, and suddenly, everything is vibrant. Sure, tracking big cats in tall grass can be tricky, but the reward? Scenes straight out of a painting—stormy skies, soft light, and zero crowds. Plus, bird lovers will find migratory species in full display. Just pack a rain cover for your gear.
Victoria Falls & Zambezi Wildlife (April–June):
Timing Victoria Falls is a delicate dance. If you go too early, the falls aren’t at full power. Too late, and the mist is so thick it’ll soak your camera. April and May is the sweet spot—enough water for drama, but not so much that visibility is a nightmare. The added bonus? Wildlife viewing along the Zambezi is fantastic, with elephants, hippos, and crocodiles making for prime subjects.
Central Africa (Congo, Gabon, Central African Republic)
Dry Season (June–September):
Central Africa’s rainforests are another world entirely. Lowland gorillas, forest elephants, and bongo antelopes roam in the shadows, but getting a clear shot? That’s a challenge. The dry season offers slightly better visibility, as animals gather at bai clearings to drink. But even then, expect dim light and high humidity - fast lenses (f/2.8 or lower) are your best friend here.
Rainy Season (October–May):
If you’re after the most dramatic rainforest shots, this is when to go. Lush greens, misty mornings, and an explosion of insect and bird life make for incredible compositions. The downside? Mud. Lots of it. Trekking in this season is not for the faint of heart, but the rewards—intimate gorilla portraits in dewy undergrowth—are unmatched.
Photography Tips for Each Season
Dry Season: Use a Longer Lens for Distant Subjects, Embrace the Dust for Creative Effects
The dry season is a dream for wildlife photographers, but it comes with its own set of challenges. Water sources shrink, making animals congregate around the few remaining pools—perfect for getting dramatic action shots. But with less foliage, animals also tend to keep their distance, which is why a longer telephoto lens (like a 400mm or 600mm) becomes essential. I once made the mistake of heading into Etosha National Park with only a 70-200mm, thinking I'd get close enough to elephants at a waterhole. Spoiler alert: I didn’t. They stayed at least 50 meters away, and I ended up cropping most of my shots to oblivion.
Another unique aspect of the dry season? Dust. Lots of it. And while that might sound like a photographer’s nightmare, it can actually be a creative goldmine. Shooting against the light, especially in the late afternoon, dust in the air can add a golden, ethereal glow to your images. If animals are moving through it, their silhouettes become even more dramatic. The trick is to slightly underexpose your shot so the highlights don’t get blown out. And yes, dust is brutal on gear, so always carry a blower and microfiber cloth to keep your lens and sensor clean.

Dry season in Zambia.
Wet Season: Use a Rain Cover, Focus on Vivid Colors & Dramatic Cloud Formations
Most people avoid the wet season because, well, it’s wet. But honestly? Some of the most breathtaking, vibrant wildlife and landscape shots I’ve ever captured were during a heavy downpour. Rain brings out deep greens in foliage, darkens animal coats, and makes colors pop like crazy. Think about how stunning a leopard looks with rain droplets glistening on its fur, or how an elephant covered in mud takes on deep, rich textures.
The trick is to be prepared for the elements. A rain cover for your camera is a must—I learned this the hard way when my camera body got completely drenched in a surprise storm in the Serengeti. If you don’t have a rain cover, even a simple plastic bag with a hole cut for the lens can work in a pinch. Also, use a lens hood to keep raindrops off the front element.
Another underrated advantage of the wet season? Sky drama. With heavy rain clouds rolling in, sun rays breaking through, and sudden downpours, the sky becomes a major player in composition. Try using a polarizing filter to enhance contrast and cut through glare when the light is harsh after a storm. Some of my favorite shots of lions and cheetahs were taken with massive storm clouds looming in the background—it just adds a cinematic feel you don’t get in the dry season.

Golden Hour & Blue Hour Magic: Plan Around Sunrise/Sunset for Best Light
Golden hour is the holy grail of natural light photography, and for good reason. The low angle of the sun creates soft, warm hues, long shadows, and rich textures that make wildlife and landscapes look absolutely stunning. But getting the best golden hour shots takes planning—you don’t just show up and hope for the best.
One of the most useful habits I developed is scouting locations in advance. If I’m in a national park or a new area, I’ll spend midday looking for good vantage points so I know exactly where to be when the light is perfect. I also use apps like PhotoPills to track the sun’s position and see where the light will fall at different times.
And let’s not forget about blue hour—that brief period just before sunrise and after sunset when the world is bathed in cool, moody tones. It’s perfect for creating a sense of mystery and drama, especially when shooting landscapes with mist or wildlife in silhouette. If you’re shooting during this time you will likely use high ISO and a slower shutter speed to make the most of the low light.
Conclusion: Making the Most of Africa’s Seasons for Wildlife Photography
Africa offers mind-blowing wildlife photography opportunities year-round, but knowing the seasons can be the difference between an average trip and a truly unforgettable one. Whether you’re capturing the Great Migration in the Serengeti, navigating the flooded channels of the Okavango Delta, or trekking through misty forests in search of mountain gorillas, timing is everything.
Wanna join me on one of my exclusive wildlife photography workshops or safari trips?
I regularly organize guided photographic safaris and workshops to incredible locations, including Namibia, Botswana, Zambia and other amazing destinations worldwide. These trips are designed to offer photographers of all levels the chance to apply these techniques in the field, all while receiving personalized coaching and feedback.
Ready to embark on the photography adventure of a lifetime? Check out my upcoming photography trips and workshops and book your spot today:

Best Telephoto Safari Lenses: Ultimate Guide for Wildlife Photography in 2025
Discover the best telephoto safari lenses of 2024 that capture stunning wildlife moments without breaking the bank. Our expert guide compares top options for every budget and camera system.
When you're bouncing along in a safari vehicle, the heart racing as a lioness stalks her prey in the distance, the last thing you want is inadequate zoom capability! I've been there - squinting through my viewfinder, desperately wishing I had those extra millimeters of reach. According to a recent wildlife photography survey, 78% of safari photographers cite their telephoto lens as the single most important equipment investment. The right telephoto lens transforms distant wildlife from mere specks into frame-filling, detail-rich subjects that tell compelling stories. Whether you're planning your first African adventure or upgrading your existing safari kit, this comprehensive guide will help you find the perfect telephoto lens to bring those magnificent animals up close.

Cape buffalo on the banks of Chobe river. Canon R5, 600mm f4
What Makes a Great Safari Telephoto Lens?
I still remember my first safari in Namibia like it was yesterday. I'd saved up to rent what I thought was an old but decent 200-500mm f5.6-7.1 lens, feeling pretty confident as I boarded the plane. Man, was I in for a reality check! By day two, I was practically begging to borrow gear from a fellow photographer within our group who owned a 500mm f4 and a 400mm f2.8.
After that humbling experience (and several safaris later), I've learned exactly what separates an okay telephoto lens from one that'll actually get you those National Geographic-worthy shots. Let me break it down for you.

In the field with a 100-500mm Canon RF lens
Focal Length: The Magic Number
For most wildlife photography on safari you're gonna need at least 400mm of reach and sometimes even a 600mm would help. But how do we know what to use?

Bee eater at 840mm f/5.6
For big mammals like elephants, giraffes and big cats 200-400mm is usually sufficient, especially when the animals are relatively close to the vehicle. But when those leopards are lounging in distant trees or, even more, when you're trying to capture birds, having 500-600mm or more becomes essential. During my South Luangwa trip last year I captured a series of bee-eaters shots and even at 600mm + 1.4TC (that makes 840mm!), I still had to crop the image.
Different parks also require different focal lengths. Etosha National Park in Namibia has more open roads where animals might stay further away, demanding more reach. Meanwhile, in places like South Luangwa or Mana Pools the wildlife can get surprisingly close.
Image Stabilization - Not Optional!
Trust me on this one - image stabilization isn't a luxury feature; it's absolutely critical. Safari vehicles aren't exactly smooth rides and you're often shooting from a stopped but idling vehicle that's vibrating like crazy. Also, having other people moving in the car doesn’t help.
I learned this lesson the hard way during my first safari trips, where most of my shots came back with subtle motion blur despite using fast shutter speeds. Modern lens stabilization systems can give you 4-5 stops of compensation, which makes a massive difference when you're handholding a heavy telephoto lens at sunset.
Weather Sealing: Dust Is Your Enemy
The African savanna is DUSTY. Like, next-level dusty. During every trip, especially in dry season, fine dust infiltrates everything that isn’t properly sealed. My camera bag, my luggage and even sealed food containers somehow ended up with a fine layer of dust.
A good safari telephoto lens needs robust weather sealing around all moving parts, otherwise you’ll have to send your lens for specialized cleaning after every trip. Luckily most high-end telephotos are very good in their sealing properties.
Weight Considerations: Your Back Will Thank You
Many small safari planes enforce strict weight limits - sometimes as low as 15kg (33lbs) for ALL your luggage. I've literally had to wear multiple layers of clothes onto planes to make weight restrictions!
While that 600mm f/4 prime lens might give amazing results, lugging a 3kg (6.6lb) lens around isn't practical. I've found the sweet spot to be zoom lenses in the 2kg (4.4lb) range. My current go-to is a 150-600mm that weighs just under 2kg and fits in my carry-on camera backpack.
Aperture: Balancing Speed with Practicality
Wildlife is most active during dawn and dusk - precisely when light levels are lowest. While an f/2.8 aperture would be ideal, those lenses are prohibitively expensive and heavy at longer focal lengths.
In reality, most wildlife photographers compromise with f/5.6-6.3 or more variable aperture zooms. I use my RF 100-500mm f4.5/7.1 a lot and compensate by being comfortable shooting at higher ISOs (modern cameras handle ISO remarkably well and I shoot at up to 50k ISO with my canon R3) and stabilizing my lens whenever possible. During a magical sunset elephant encounter in Etosha last year I was shooting at f/6.3, 1/200s, ISO 20000 with my R5 and the images still came out beautifully printable.

With modern cameras we can still get great results even with crazy high ISO. Canon R5, 100-500mm, f6.3, 1/200s, ISO 20000
Autofocus: Speed Matters
When a cheetah suddenly breaks into a sprint or birds take flight, you have split seconds to nail focus. I've missed countless shots waiting for sluggish autofocus to catch up.
Modern telephoto lenses with ultrasonic or linear motors focus significantly faster. Focus limiting switches are also incredibly useful, allowing you to restrict the focus range to distant subjects and avoid the lens hunting through the entire range.
The difference between a good safari lens and a great one often comes down to these practical considerations that you only discover after hours in the field. Trust me, investing in the right telephoto lens will transform your safari photography experience!

A cheetah sprinting after a springbok. My R3 with 600mm f4 kept the subject in focus despite the sudden acceleration and even though some bushes in the foreground. These are the situations where top-end gear really makes the difference.
Entry level telephoto zoom lenses
1. Sigma 150-600mm f/5-6.3 DG DN OS Sports
Technical Specifications:
Focal Length: 150-600mm
Maximum Aperture: f/5-6.3
Lens Mounts: Sony E, Leica L
Optical Stabilization: Yes
Minimum Focus Distance: 58 cm
Filter Size: 95 mm
Weight: 2,100 grams
Price: Approximately €1,300
Overview:
The Sigma 150-600mm f/5-6.3 DG DN OS Sports lens is designed specifically for full-frame mirrorless cameras. It boasts a robust build quality suitable for challenging environments, making it ideal for safari photography. The lens features a quiet and optimized Hyper Sonic Motor (HSM) and a new Optical Stabilizer (OS) with an accelerometer for improved panning photography both vertically and horizontally.
Pros:
Excellent build quality suitable for rugged conditions.
Effective optical stabilization for handheld shooting.
Fast and accurate autofocus performance.
Cons:
Relatively heavy, which may require support during extended use.
The zoom ring requires a firm twist, which might take some getting used to.
2. Tamron SP 150-600mm f/5-6.3 Di VC USD G2
Technical Specifications:
Focal Length: 150-600mm
Maximum Aperture: f/5-6.3
Lens Mounts: Canon EF, Nikon F, Sony E
Vibration Compensation (VC): Yes
Minimum Focus Distance: 2.2 meters
Filter Size: 95 mm
Weight: 2,010 grams
Price: Approximately €1,200
Overview:
The Tamron SP 150-600mm G2 is an upgraded version of its predecessor, featuring improved optics and faster autofocus. Its Vibration Compensation system is highly effective, providing sharp images even in low-light conditions.The lens also has a moisture-resistant construction, making it suitable for various weather conditions encountered during safaris.
Pros:
Effective Vibration Compensation system for handheld shooting.
Improved optical design for better image quality.
Moisture-resistant construction suitable for various weather conditions.
Cons:
Slight drop in sharpness beyond 500mm.
Heavy weight may require additional support during extended use.
3. Nikon Z 180-600mm f/5.6-6.3 VR
Technical Specifications:
Focal Length: 180-600mm
Maximum Aperture: f/5.6-6.3
Lens Mount: Nikon Z
Vibration Reduction (VR): Yes
Minimum Focus Distance: 1.3 meters
Filter Size: 95 mm
Weight: 1,960 grams
Price: Approximately €2,000
Overview:
The Nikon Z 180-600mm f/5.6-6.3 VR is designed for Nikon's Z-mount mirrorless cameras. It offers a versatile focal range suitable for various wildlife photography scenarios. The lens features Nikon's Vibration Reduction technology, providing stable handheld shooting experiences. Its internal zoom mechanism prevents dust and moisture from entering the lens, which is beneficial in the often dusty safari environments.
Pros:
Versatile focal range suitable for various wildlife photography scenarios.
Effective Vibration Reduction technology for stable handheld shooting.
Internal zoom mechanism prevents dust and moisture entry.
Cons:
Not as sharp as higher end lenses.
Higher price point compared to other options.
4. Canon RF 100-400mm f/5.6-8 IS USM
Technical Specifications:
Focal Length: 100-400mm
Maximum Aperture: f/5.6-8
Lens Mount: Canon RF
Image Stabilization (IS): Yes
Minimum Focus Distance: 0.88 meters
Filter Size: 67 mm
Weight: 635 grams
Price: Approximately €700
Overview:
The Canon RF 100-400mm f/5.6-8 IS USM is a lightweight and compact telephoto zoom lens designed for Canon's RF-mount mirrorless cameras. Its portability is outstanding for that kind of focal length. However the autofocus performance doesn’t make it suitable for fast subjects like birds and the aperture of f/8 is kind of limiting in low light conditions, especially if paired with an entry level camera. Overall the price makes it a very good entry level choice.
Pros:
Very compact and lightweight.
Cheap option.
Cons:
Not as sharp as higher end lenses.
Limited to 400mm
Narrow aperture, not good for low light.
Slow autofocus.
Mid range telephoto zoom lenses
1. Sony FE 200-600mm f/5.6-6.3 G OSS
This lens is renowned for its impressive zoom range and sharpness throughout. Its internal zoom mechanism ensures consistent balance, making it easier to handle during extended shooting sessions. The Optical SteadyShot image stabilization is particularly beneficial for handheld shots, minimizing motion blur. Priced around €2,000, it offers excellent value for its capabilities. For Sony shooters this is definitely a must have.
2. Canon RF 100-500mm F4.5-7.1 L IS USM
As my personal favorite, this lens stands out for its compact and lightweight design, making it highly portable for on-the-go shooting. The 100-500mm focal range provides versatility, allowing for both close-up and distant shots without the need to switch lenses. Its weather-sealed construction ensures durability in various environmental conditions. With a price tag of approximately €3,000, it balances performance with portability. While the aperture is not the best (4.5 at 100mm and 7.1 at 500mm) the form factor and usability makes it my go-to safari lens.
3. Nikon Z 100-400mm f/4.5-5.6 VR S
While I haven't personally used this lens, it has garnered positive reviews for its sharpness and fast autofocus capabilities. The 100-400mm range, combined with Vibration Reduction (VR), aids in capturing steady images, especially in handheld scenarios. Its build quality aligns with Nikon's professional standards, ensuring reliability in the field. This lens is priced around €2,700.
🎯 Want to take your photography further without new gear?
My workshops are built around smart technique, not flashy upgrades. Join a tour and learn how to get pro-level results with the gear you already have.
Considerations for Prime Telephoto Lenses (400mm, 500mm, 600mm)
Prime telephoto lenses are known for their superior image quality and wider apertures, which are advantageous in low-light conditions and for achieving a shallow depth of field. However, they come with considerations:

Looking for ibex with a 600mm f4
Price: Professional-grade prime lenses are a significant investment. For instance:
Canon EF 400mm f/2.8L IS III USM: Approximately €12,000
Nikon AF-S 500mm f/4E FL ED VR: Around €10,500
Sony FE 600mm f/4 GM OSS: Close to €13,000
Weight and Portability: These lenses are often heavy and may require additional support, such as monopods or tripods, limiting mobility.
Versatility: Fixed focal lengths can be restrictive in dynamic environments where subjects may move unpredictably.
Cost-Benefit Analysis of Investing in Professional-Grade Glass
Investing in high-quality lenses is crucial for achieving sharp, vibrant images. Professional-grade lenses typically offer better build quality, weather sealing, and advanced optical elements that reduce aberrations. However, the substantial financial investment requires careful consideration:
Assess Needs: Determine the primary use-case scenarios. If wildlife photography is a frequent endeavor, the investment may be justified.
Alternatives: High-quality zoom lenses, like the ones mentioned above, offer flexibility and excellent image quality at a more accessible price point.
Resale Value: Professional lenses often retain value over time, making them a potential long-term investment.
💡 Curious about one of the few lenses that actually did change how I shoot? Here’s why I bought the Canon RF 100–300mm f/2.8 — and how it replaced two of my favorite zooms.

Handheld shooting with my 600mm f4
In conclusion, while prime telephoto lenses provide exceptional performance, modern zoom lenses have narrowed the gap, offering versatility and impressive image quality. Photographers should weigh the benefits against the costs and consider how each lens aligns with their shooting style and requirements. My advice if you are a beginner or intermediate is to invest in a good zoom, like the Sony 200-600 or the Canon 100-500. After a while you will realize if you really fell the need for a more expensive fixed lens.
📸 The Best Upgrade You Can Make? Experience.
After 15 years shooting in the wild, I’ve learned this: new cameras don’t change your vision. Field time does.
Join one of my 2026 workshops — from Namibia to Zambia — and unlock the next level of your photography.

Never Miss the Shot Again: How to Use the Focus Preset Feature for Wildlife Photography
When photographing wildlife very often speed is critical. You've likely experienced the frustration of missing focus on fast-moving animals, even with high-end telephoto lenses and the latest camera systems. And the worse situation is when your autofocus is stuck on the background and refuses to jump back and lock into a subject just in front of you. This happens especially with the longest focal lengths, as the foreground can sometimes be so blurred that the camera’s brain can’t recognize a subject close to us.
When photographing wildlife very often speed is critical. You've likely experienced the frustration of missing focus on fast-moving animals, even with high-end telephoto lenses and the latest camera systems. And the worse situation is when your autofocus is stuck on the background and refuses to jump back and lock into a subject just in front of you. This happens especially with the longest focal lengths, as the foreground can sometimes be so blurred that the camera’s brain can’t recognize a subject close to us.
Luckily there's an incredibly useful feature designed exactly for these situations—yet surprisingly overlooked by beginner and intermediate photographers: the Focus Preset.
What is the Focus Preset?
Most high-end telephoto lenses have a built-in focus preset ring and button. This handy feature allows you to instantly recall a pre-set focus distance without waiting for the camera and lens to hunt for focus again. This will force your autofocus back in a fraction of a second. Despite being incredibly useful it remains one of the less-known tools in wildlife photography.

How to Set Up and Use the Focus Preset (for Canon)
Most high-end Canon, Nikon and Sony telephoto lenses come equipped with this feature (check the full lens list at the bottom).
Here's how to quickly set up and use Focus Preset on your lens:
Activate: Make sure the focus preset selector on your lens is set to ON.
Focus (either auto or manual focus, doesn’t matter) on the spot where you expect your subject to appear—like a common perch or the edge of a waterhole.
Press and hold the pre-focus set button for a couple of seconds to save that distance.
Now anytime your subject moves back into that predetermined area you can simply turn the preset ring or press the recall button and your lens will immediately snap back to your saved distance.
It’s also possible to set two different pre-focused distances that you will then access by rotating the pre-focus ring either left or right.
NOTE that if you are a Nikon or Sony user the setting process might be slightly different; check your lens user manual.
When to Use the Focus Preset
Birds on Perches or at Waterholes: Set your preset to a branch or landing spot to instantly capture birds as they land.
Birds in Flight: Save a pre-focused distance at the expected landing area, allowing instant focus acquisition.
Fast-Moving Animals: Set a focus point in the foreground or background so you can rapidly switch between close and distant subjects without delay.


Example Scenario
Imagine you're photographing eagles from a hide. You focus precisely on the perch where you anticipate them to be. By using the focus preset, the moment the eagle comes into your frame, you instantly achieve focus without delay—capturing sharp, perfectly composed images every time.
Watch the Full Tutorial
For more detailed insights and a visual walkthrough of the focus preset feature, check out this complete guide.
Compatible Telephoto Lenses
Here's a comprehensive list of lenses featuring the Focus Preset button:
Canon Lenses:
RF 100-300mm f/2.8 L IS USM
RF 200-800mm f/6.3-9 IS USM
RF 400mm f/2.8 L IS USM
EF 300mm f/2.8 L IS II USM
EF 400mm f/2.8 L IS III USM
EF 500mm f/4 L IS II USM
EF 600mm f/4 L IS III USM
Nikon Lenses:
AF-S 400mm f/2.8E FL ED VR
AF-S 500mm f/4E FL ED VR
AF-S 600mm f/4E FL ED VR
AF-S 800mm f/5.6E FL ED VR
Sony Lenses
Sony FE 400mm f/2.8 GM OSS
Sony FE 600mm f/4 GM OSS
Sony FE 300mm f/2.8 GM OSS
Final Thoughts
Mastering the focus preset feature can significantly increase your keeper rate in wildlife photography, making your expensive telephoto lenses even more valuable. Give this powerful feature a try on your next outing—your photography will never be the same!
Enhance Your Autofocus Skills
To further improve your photography, consider mastering back button autofocus—a technique that separates focusing from the shutter button, offering greater control and precision. Learn more in our detailed guide: Mastering Back Button Autofocus: A Game-Changer for Your Photography
Ready to Take Your Wildlife Photography Further?
Put these techniques into action on an unforgettable adventure! Join me on one of my guided wildlife photography workshops or safari trips to Namibia, Botswana, Zambia and other incredible destinations worldwide.
You’ll receive personalized instruction, visit spectacular wildlife hotspots, and dramatically improve your photography in a once-in-a-lifetime adventure.


Ultimate Guide to Safari Photography: Tips and Techniques for Capturing Amazing Wildlife Photos
A photo safari is one of the most rewarding experiences for photographers. It offers incredible opportunities to photograph wildlife in their natural habitat, but it also comes with challenges unique to this environment. After more than ten years as a professional wildlife and nature photographer, I've gathered techniques that significantly improved my photography during safaris—and today, I'm sharing these insights with you.
A photo safari is one of the most rewarding experiences for photographers. It offers incredible opportunities to photograph wildlife in their natural habitat, but it also comes with challenges unique to this environment. After more than ten years as a professional wildlife and nature photographer, I've gathered techniques that significantly improved my photography during safaris—and today, I'm sharing these insights with you.
In this comprehensive guide I'll cover essential tips including equipment recommendations, optimal camera settings, practical advice for the field, and advanced composition techniques. Let's dive in!

Timing is Everything: Early Mornings and Late Afternoons
Wildlife is most active during the early morning and late afternoon hours. Unfortunately, this is precisely when many photographers would rather rest. Resist the temptation! The golden hours of sunrise and sunset provide the best natural lighting conditions, dynamic animal behavior, and increased activity.
In contrast, midday brings harsh, high-contrast light, often causing your subjects—particularly big cats—to seek shade. While you might spot wildlife, capturing compelling images will be difficult due to harsh shadows and static animals.
My recommendation:
Wake up early, capture stunning photos, then rest during midday when wildlife activity declines.
Plan your photography outings around animal behavior—not your comfort.

Too often, photographers head out too late, staying out during the harsh midday sun, resulting in missed opportunities and less appealing lighting. Instead, structure your day around the wildlife schedule:
Early Morning Session: Head out before sunrise for active wildlife and optimal lighting conditions.
Midday Rest: Return to your lodge or camp during midday for rest and meal breaks.
Afternoon Session: Head out again in the late afternoon, staying as late as possible.
Adhering to this schedule significantly improves your odds of capturing memorable wildlife encounters in beautiful, soft light.

The Advantage of Booking Guided Game Drives
Booking game drives with professional safari guides is highly beneficial for photographers. Guides have extensive training and experience spotting wildlife, often seeing animals that you might miss. They also enjoy privileges like extended park hours and access to restricted areas not available to regular visitors.
Your experience (and results) will dramatically improve by joining guided safari tours. Guides have insider knowledge of animal behavior, preferred locations, and access to private areas or extended park hours.
Benefits of guided safari photography tours:
Extended Access: Professional guides often have permits allowing them to stay longer or enter exclusive wildlife areas.
Better Mobility: Shooting from an open safari vehicle allows unrestricted movement with your gear, offering more angles and fewer distractions.
Focus on Photography: Without worrying about driving, you can fully dedicate yourself to capturing the perfect shot.
Time Control: Choosing private or small-group tours ensures you’re not rushed, allowing you to patiently wait for action to unfold without frustrating fellow travelers.
If possible, choose private game drives or join a group of fellow photographers to ensure everyone's objectives align. Non-photographers typically prefer to move quickly between sightings, whereas photographers benefit from extended stays, allowing scenes and behaviors to unfold naturally.

Choosing the Right Equipment: The Power of Telephoto Zooms
While many photographers associate safari photography with giant prime telephotos these lenses, although powerful, aren't always the most practical option. Instead, a high-quality telephoto zoom lens such as a 100-500mm or a 200-600mm provides superior flexibility, lightweight handling, and faster reaction times.
Telephoto zoom lenses allow you to quickly adapt to changing wildlife situations without the burden of carrying and maneuvering heavy gear. A lens offering at least a 400mm reach is sufficient for most scenarios.
A recommended setup for maximum versatility is:
Primary Camera: Equipped with a versatile zoom lens (100-500mm or 200-600mm).
Secondary Camera: (optional) Fitted with a long prime lens (400mm f2.8 or 600mm f4) for specialized situations.
For more details on what I bring on a safari trip check out this video:
Essential Camera Settings for Safari Photography
Being ready for anything is crucial on safari. Using manual mode with Auto ISO offers an ideal balance between creative control and ease of use. This mode allows you to adjust your aperture and shutter speed manually while the camera compensates for changes in lighting through ISO adjustments.
Here's a quick breakdown:
Manual Mode + Auto ISO: Allows consistent creative control and correct exposure.
Exposure Compensation: Adjust exposure for challenging lighting conditions.
Sidelit/Backlit Subjects: Slightly underexpose.
Low Light Situations: Slightly overexpose to capture sufficient detail and improve post-production flexibility.

Mastering Composition from a Safari Vehicle
One major challenge on safari is achieving compelling compositions from within a vehicle. Typically, we want eye-level perspectives for natural, engaging images, which are difficult to achieve when restricted to a vehicle's elevated vantage point. Here are techniques to help overcome these constraints:
Front Row Seating: Sit in the front seats of the safari vehicle, usually lower, to improve your angle.
Vehicle Positioning: Position the vehicle in depressions or low points to achieve eye-level perspectives. Alternatively, position yourself further from your subject to reduce angle steepness.
Utilize Elevated Subjects: When wildlife is elevated (on trees or termite mounds), your angle improves significantly, enhancing your composition.
Always respect park regulations and wildlife by never leaving your vehicle unless explicitly permitted.
Tackling Low Light Photography
Much wildlife activity occurs during low light hours. Mastering low-light photography techniques is crucial to maximizing photographic opportunities at dawn and dusk.
Mastering low-light techniques will set you apart:
Use fast lenses (wide aperture lenses, e.g., f/2.8 or f/4) to gather maximum light.
Increase ISO strategically: Modern cameras handle higher ISOs well. Choose ISO settings carefully to balance shutter speed and image quality.
Shoot in RAW: This format allows better flexibility to correct exposure and reduce noise during post-processing.
For a deeper dive, check out this dedicated low-light photography guide.


Free Wildlife Photography E-book
Planning a safari? Get fully prepared by downloading our free e-book covering everything from gear selection, camera settings, composition, and how to handle various lighting conditions.
Download your Free Wildlife Photography Guide.
Ready for your safari?
The techniques shared above have transformed my own wildlife photography over the years. Remember:
Wake up early for the best lighting.
Take advantage of local guides.
Choose versatile gear for maximum flexibility.
Master your camera settings and be ready for any situation.
Carefully plan your compositions for stronger images.
Wanna join me on one of my exclusive wildlife photography workshops or safari trips?
I regularly organize guided photographic safaris and workshops to incredible locations, including Namibia, Botswana, Zambia and other amazing destinations worldwide. These trips are designed to offer photographers of all levels the chance to apply these techniques in the field, all while receiving personalized coaching and feedback.
Ready to embark on the photography adventure of a lifetime? Check out my upcoming photography trips and workshops and book your spot today:


Stop editing your photos like this
Editing wildlife photos can be a tricky process. While capturing the image in-camera is essential, the real magic often happens during post-production. But without a structured workflow, it’s easy to feel overwhelmed—or worse, ruin a great shot with poor editing choices.
Editing wildlife photos can be a tricky process. While capturing the image in-camera is essential, the real magic often happens during post-production. But without a structured workflow, it’s easy to feel overwhelmed—or worse, ruin a great shot with poor editing choices.
In my latest YouTube video, I reveal the 5 most common editing mistakes photographers make and how to avoid them. If you want to elevate your editing game, this is a must-watch!

Here’s what you’ll learn:
🗂️ How to create a consistent folder structure to stay organized and find your files easily.
✂️ The best way to cull and select your top images efficiently.
🎨 How to “listen” to what each image needs and apply the right adjustments.
🚫 Why over-editing can harm your photos—and how to keep it natural.
📸 The importance of focusing on better shots in-camera instead of trying to rescue bad ones.
These tips work with any editing software, whether you’re using Lightroom, Photoshop, Capture One, or something else.


![Master Low-Light Photography [video tutorial]](https://images.squarespace-cdn.com/content/v1/5b6af1cd5417fcbf0a92bc2e/cd397a66-2e37-42ac-bbec-f2ddbfb37b31/24-10-02_SARTORI_8912.jpg)
Master Low-Light Photography [video tutorial]
Have you ever faced the frustration of shooting in low light, only to find your photos ruined by noise or lack of detail? Whether it’s wildlife at dusk, action shots in dim environments, or nighttime landscapes, low-light conditions can push even the best photographers to their limits.
Have you ever faced the frustration of shooting in low light, only to find your photos ruined by noise or lack of detail? Whether it’s wildlife at dusk, action shots in dim environments, or nighttime landscapes, low-light conditions can push even the best photographers to their limits.
In this video I break down practical tips and tricks to tackle low-light challenges and capture stunning images, even at high ISO settings.

Here's what you'll learn:
🌌 Why noise isn't just about ISO—and how to manage it effectively.
🌌 How to balance shutter speed, aperture, and ISO for the best results.
🌌 Techniques for stabilizing your camera to maximize light capture.
🌌 Real-world examples, including how I shot a clean photo at ISO 12800.
🌌 Pro strategies for testing and understanding your camera’s low-light limits.
Check it out!

Struggling to Get Sharp Photos? Watch This!
Tired of soft or blurry photos? Master sharpness with pro tips on settings, tripod techniques, and freezing motion. Learn how to balance technical precision with artistic storytelling.

Have you ever returned from an incredible photography session excited to review your shots, only to find that they’re soft or blurry? It’s a frustrating experience every photographer has faced at some point. But don’t worry—sharp photos aren’t just about having expensive gear; it’s about understanding and applying the right techniques.
In this video I dive deep into the common mistakes that lead to blurry images and share actionable tips to ensure you capture tack-sharp photos every time.
Here's a sneak peek of what you'll learn:
📸 The importance of shutter speed and how it affects sharpness.
📸 How to freeze motion with the right settings.
📸 Why aperture and ISO settings impact sharpness—and how to optimize them.
📸 Pro tips for using a tripod effectively, even in challenging conditions.
And finally, I remind you why sharpness, while important, isn’t everything. Crafting an engaging image goes beyond technical perfection!