
Wildlife Photography Workshops: Best Locations to Elevate Your Skills in 2026
Discover the best locations for wildlife photography workshops in 2026! From the vast savannas of Africa to the icy landscapes of the Arctic, find top destinations to refine your skills, capture stunning wildlife shots, and learn from expert photographers.
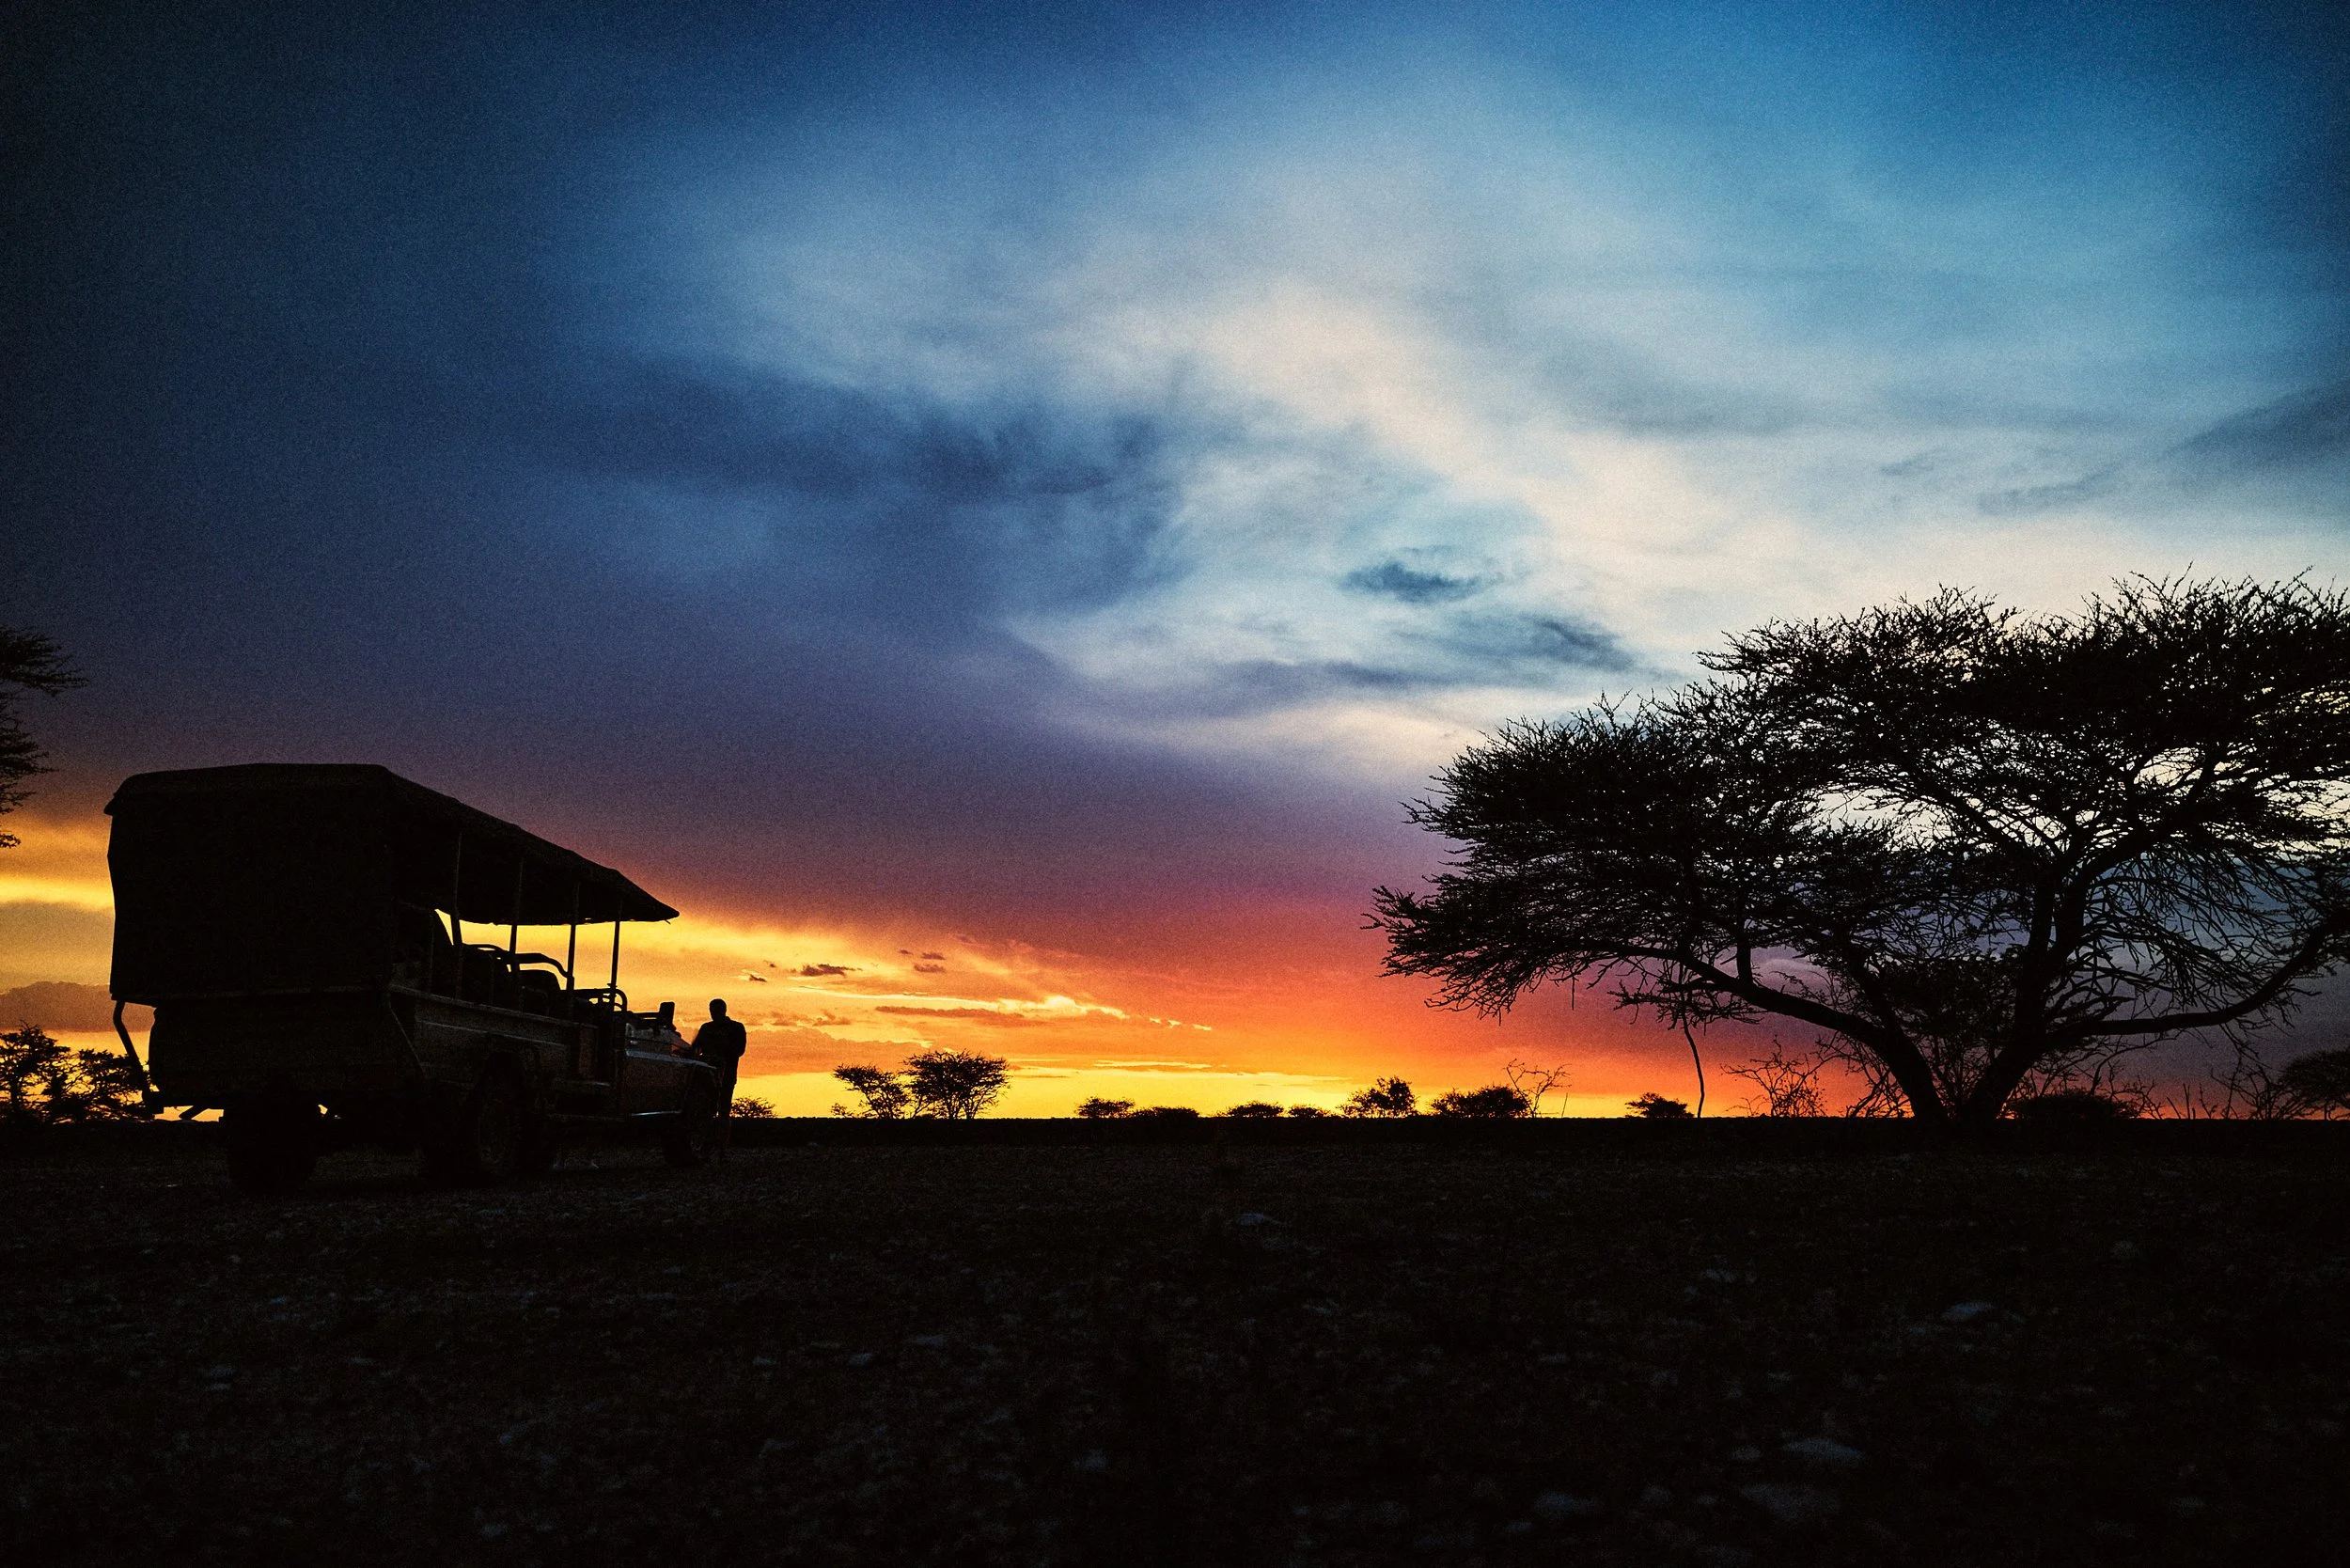
Imagine standing in the middle of the Serengeti, camera in hand, as a pride of lions moves through the golden grass at sunrise. Or capturing the mesmerizing dance of the Northern Lights above a herd of reindeer in Svalbard. Wildlife photography workshops offer the perfect blend of adventure, learning, and hands-on experience in breathtaking locations around the world!
In this guide we’ll explore the best destinations for wildlife photography workshops, detailing what makes each location unique, what wildlife you can expect to photograph, and key factors to consider when choosing the right workshop for your skill level.
Whether you’re a beginner looking to master camera settings or a seasoned pro seeking rare wildlife encounters, these destinations will take your photography to the next level!

A young ibex in the Italian Alps
What Makes a Great Wildlife Photography Workshop?
I’ve been on both sides of a wildlife photography workshop - first as an eager participant, then as an instructor leading groups into some of the world’s most breathtaking ecosystems. And let me tell you, not all workshops are created equal. A great wildlife photography workshop isn’t just about snapping cool pictures; it’s about learning, growing, coming home with shots you never thought you’d be able to capture and with memories you’ll cherish for a lifetime. But what is that separates an unforgettable experience from a mediocre one?
Expert Guidance from Seasoned Wildlife Photographers
A workshop is only as good as the person leading it. I’ve been on trips where the “guide” was just a tour operator with a camera, and let’s just say... it showed. A real wildlife photography mentor doesn’t just know their way around a camera; they understand animal behavior, lighting conditions and how to adapt when nature doesn’t cooperate (because trust me, it won’t always).
Look for workshops led by photographers with actual field experience - not just in photography, but in the specific environment you’re visiting. Someone who has spent years photographing African lions or Arctic foxes will have a sixth sense for when and where to be for the best action. They’ll teach you how to anticipate behavior, work with natural light, and fine-tune your settings in real time. That kind of expertise is invaluable.
Prime Locations with Diverse Wildlife Populations
You can be the best photographer in the world but if the location isn’t right, you won’t get the shots. I’ve made the mistake before - signing up for a trip that promised incredible wildlife but delivered little more than distant specks through a telephoto lens.
A great workshop takes you to prime locations during the best seasons. Think of the Serengeti during the Great Migration, the Pantanal for jaguars or Alaska for grizzly bears fishing in rivers. These aren’t just scenic places - they're where you’ll have the highest probability of witnessing jaw-dropping animal behavior.
And don’t overlook local knowledge. The best workshops often partner with expert guides who live in the area, ensuring you get to the right spot at the right time. A workshop that skimps on local expertise? Big red flag.

Wild camping in Damaraland, Namibia. I visited the country more than 20 times before I led my first workshop there.
Small Group Sizes for Personalized Attention
This one’s non-negotiable. I’ve been on trips where there were too many photographers crammed into a single safari vehicle, and it was a mess - elbows knocking, lenses clashing and everyone fighting for the same angle.
A great wildlife photography workshop keeps group sizes small, usually around 4 to 6 participants. This ensures that the instructor has time to give personalized feedback and that everyone gets a fair shot (literally). Small groups also mean more flexibility. If a leopard suddenly appears on the opposite side of the vehicle, you want to be able to reposition quickly - not wait for five people to shuffle out of the way.
Ethical Wildlife Photography Practices
This is a big one. I’ve seen workshops where photographers push too close, bait animals, or otherwise disrupt wildlife just to get “the shot.” It’s frustrating and, frankly, unethical.
A responsible wildlife photography workshop follows ethical guidelines, keeping a respectful distance, never baiting or disturbing animals, and educating participants on how to capture images without causing harm. If a workshop doesn’t have a clear stance on ethics, that’s a major red flag. The best leaders prioritize conservation and responsible storytelling over sensationalist images.
Ideal Seasons for Capturing Stunning Animal Behavior
Timing is everything in wildlife photography. If you’re hoping to photograph brown bears fishing for salmon, you need to go in late summer. Want snow leopards? Winter in the Himalayas is your best bet. Migration patterns, mating seasons, and even daily weather conditions affect what you’ll see and how you’ll photograph it.
A high-quality workshop isn’t just set in the right location—it’s scheduled during the ideal time to capture dynamic wildlife moments. A good leader will also help you understand how to work with the seasonal conditions, whether it’s low light in the Arctic winter or the harsh midday sun in the savanna.

Our local guide looking for animals on the banks of Chobe river, Botswana.
Best Locations for Wildlife Photography Workshops in 2025
Wildlife photography workshops are one of the best ways to improve your skills while immersing yourself in some of the most incredible natural environments on the planet. Whether you’re after big cats on the hunt or mountain wildlife in the Alps, 2025 is shaping up to be an exceptional year for wildlife photography. Here are the top destinations for workshops, each offering something unique for photographers of all levels.
1. Serengeti National Park, Tanzania
If there’s one place that consistently delivers mind-blowing wildlife photography opportunities, it’s the Serengeti. This iconic park is home to the Great Migration, where over a million wildebeest, zebras, and gazelles thunder across the plains, pursued by lions, cheetahs, and crocodiles lurking in the rivers. The sheer density of wildlife means incredible sightings are almost guaranteed.
Best time to visit: January to March is prime time if you want to photograph the baby boom—when thousands of wildebeest calves are born each day, attracting big cats and scavengers. The lush green season offers stunning contrasts, dramatic skies, and fewer crowds.
A well-planned workshop here will take you to key areas where the action is unfolding, ensuring you get the best vantage points for predator-prey interactions, intimate portraits, and stunning landscape shots with wildlife in scale.
2. Damaraland and Etosha National Park, Namibia
Namibia is wild, remote, and surreal - a true photographer’s paradise. The combination of rugged desert landscapes and unique wildlife makes it one of the most special places for a wildlife photography workshop. Damaraland, in particular offers a rare chance to track desert-adapted elephants and rhinos across Mars-like terrain, while Etosha National Park provides incredible wildlife congregations around the waterholes.

Waterhole scene in Etosha.
Best time to visit: May to October is the dry season, when wildlife congregates around water sources, making sightings more predictable.
A workshop here often includes exclusive access to off-the-grid locations - far from tourists, where you can spend time tracking animals, photographing against Namibia’s golden light and capturing scenes that feel truly untouched. Then, there’s Etosha, famous for its mirage-like salt pan, where lions, oryx, and giraffes gather in striking compositions.
See my full Etosha NP photography guide

Desert elephants in Damaraland.
3. Yellowstone National Park, USA
I’ve not been there myself yet, but according to a few trusted friends and fellow photographers, Yellowstone is America’s crown jewel for wildlife photography. The mix of majestic landscapes and powerful wildlife makes it an incredible destination. Bison moving through steam-filled geysers, wolves in the early morning mist, and grizzly bears hunting in meadows—this place is pure magic.
Best time to visit: Winter. It’s cold, challenging, and absolutely worth it. The snow-covered landscapes create the perfect contrast for wildlife, and the animals are more active in their search for food.
Winter workshops focus on capturing the raw beauty of wildlife in extreme conditions, perfect for honing skills in exposure, composition, and storytelling. If you want those National Geographic-style shots of a wolf piercing through the white-out conditions, this is your place.
More Yellowstone infos here

After sunset during a workshop in South Luangwa, Zambia.
4. South Luangwa National Park, Zambia
Leopards are notoriously elusive…except in South Luangwa. This park is one of the best places in the world for spotting and photographing these sleek, nocturnal hunters. It’s also home to wild dogs, one of Africa’s rarest and most exciting predators to photograph.
Best time to visit: The dry season (July - October) is the best time for photography, as water sources shrink and wildlife congregates. During the wet season (December to April) most camps and lodges are closed due to access and flooding problems.
A standout feature of workshops here is the option for walking safaris, a totally different experience from photographing from a vehicle. You’ll learn to anticipate animal behavior, practice low-light photography and capture intimate images without disturbing the scene.

Leopardess with her meal on a tree in South Luangwa NP, Zambia.
5. Svalbard, Norway (Arctic Wildlife)
On of my top-of-the-list destinations for 2025, Svalbard is as wild as it gets. It’s one of the few places on earth where you can photograph polar bears in their natural habitat, along with walruses, Arctic foxes, and breathtaking ice landscapes.
Best time to visit: April - September, when there’s still plenty of ice, but enough daylight for long shooting hours.
Workshops here teach the unique challenges of cold-weather photography, ensuring your gear doesn’t fail when you’re face-to-face with a polar bear on the ice. The Arctic light is soft and ethereal, making even the simplest shots look otherworldly.
6. Torres del Paine National Park, Chile
If you dream of photographing a wild puma in Patagonia, this is where you need to be. Torres del Paine is the world’s best location for puma tracking, with skilled local guides knowing exactly where to find these elusive big cats.

A female puma during my last trip to Patagonia.
Best time to visit: October to May, when pumas are most visible, and the landscapes are at their most dramatic.
In addition to pumas you’ll photograph guanacos, Andean condors, foxes, and jaw-dropping mountains, often with dynamic weather adding an extra layer of drama to your shots.
7. Europe
Europe might not always come to mind first for wildlife photography, but it offers a diverse range of incredible workshops:

Fox in Gran Paradiso National Park, Italy.
Slovenia, Slovakia, Croatia, and Finland: Perfect for brown bear photography, using professional hides to capture natural behavior.
The Alps (Italy, France, Switzerland): Stunning backdrops for ibex, chamois, golden eagles, and bearded vultures.
Spain: The Iberian lynx, one of the rarest wild cats in the world, is an absolute must-photograph.
Norway: Musk oxen in Dovrefjell, an experience that takes patience and endurance.
Finland and Sweden: Wolves, owls, and birds of prey, often from hides designed for ultra-close encounters.
Best time to visit: Varies depending on the species—winter for owls, summer and autumn for bears, early spring for ibex, early winter for chamois. Most of these environments are close to human settlements so workshops here often involve tracking skills, long-lens techniques, and ethical photography practices.

Brown bear in Slovenia.
8. Antarctica
This is the ultimate adventure for wildlife photographers. You’ll find yourself surrounded by thousands of penguins, seals, and ice formations that defy imagination.
Best time to visit: November - March, when the Antarctic summer provides better access and light.
Workshops here focus on extreme environment photography, capturing the essence of isolation, survival, and untouched beauty.
9. Central Kalahari Game Reserve, Botswana
The Central Kalahari is raw, untamed, and utterly mesmerizing. This vast, arid wilderness is home to the famous black-maned lions, cheetahs, and desert-adapted wildlife that thrive in one of the toughest ecosystems on Earth.
Best time to visit: December - April for the zebra migration and lush landscapes, but year-round for incredible wildlife encounters.
Workshops here emphasize tracking skills, patience, and understanding light in a harsh environment. It’s an exclusive, off-the-beaten-path experience—perfect for those wanting a truly wild adventure.
Want expert guidance and a front-row seat to some of the best wildlife encounters on the planet?
Check out my upcoming wildlife photography workshops and join me on an unforgettable journey to capture nature’s most extraordinary moments!
How to Choose the Right Wildlife Photography Workshop
Picking the right wildlife photography workshop isn’t just about finding an exciting destination; it’s about choosing an experience that matches your skill level, goals, and expectations. Trust me, I’ve seen photographers make the mistake of jumping into a trip that was way beyond their ability, and it can be frustrating. You don’t want to be that person struggling with camera settings while everyone else is nailing the shot of a lifetime.
Consider Your Skill Level

Paolo looking for ibex during a recent workshop in Gran Paradiso National Park, Italy.
This is the first and probably most important factor. If you’re a beginner, avoid workshops that focus on highly technical or fast-paced photography, like birds in flight or nocturnal predators. I’ve met people who booked expensive safaris to places like Svalbard, only to realize they had no idea how to track focus on a polar bear, let alone the abundant birds you can find up there. Start with something more forgiving, like bear photography in Europe or a trip to Etosha in Namibia, where stationary wildlife around waterhole makes conditions not as challenging and where you can practice composition and settings without too much pressure.
Intermediate photographers can take on slightly more challenging environments, where light, speed, and weather conditions become more unpredictable. This might mean photographing predators on the hunt or learning to work in low-light conditions. And if you’re advanced, you’ll likely want a workshop that offers more than just photography basics - think specialized trips focusing on rare wildlife behaviors, remote locations, or advanced post-processing techniques.
Group Size Matters
Bigger isn’t better when it comes to photography workshops. A small group means more one-on-one instruction, better shooting positions, and a more immersive experience. I once joined a 12-person workshop in Africa, and let’s just say it wasn’t ideal—half the time, we were fighting over space in the vehicle, and the instructor barely had time for individual feedback. Now, I always recommend workshops with six participants or fewer, especially if you’re serious about improving.
Choose an Instructor Who Knows Photography, Not Just Wildlife
Not all guides are photographers and not all photographers are good teachers. Look for workshops led by professionals with strong wildlife photography experience - someone who understands camera settings, light, and composition in tough environments. The best instructors blend technical expertise with field experience, ensuring you’re in the right place at the right time and can actually get the shot.
Pay Attention to Seasonal Factors
Wildlife photography is all about timing. Seasons affect everything, from migration patterns to breeding behaviors to light quality. A winter trip to Yellowstone, for example, gives you dramatic snowy landscapes and frost-covered bison, while the same location in summer might feel overcrowded and uninspiring. If you’re after specific animal behavior, research the best time of year to see it. Many pros schedule workshops around peak action, like the wildebeest migration in the Serengeti or the puffin breeding season in Iceland.
Prioritize Ethical Wildlife Photography
Finally, choose workshops that respect wildlife and their habitats. Ethical wildlife photography means no baiting, no disturbing animals for the shot, and no overcrowding sensitive areas. I once saw a group of photographers surround a stressed-out fox just for a close-up—completely unacceptable. Responsible workshops follow ethical guidelines, keep a respectful distance, and focus on conservation. Some even contribute to local projects, ensuring that your trip supports wildlife protection rather than exploitation.

Not only wildlife…here our safari vehicle during a transfer between locations in Namibia.
Do Research on the Location and Species You’ll Photograph
One of the biggest mistakes I see people make is showing up unprepared. If you’re heading to the Maasai Mara, for example, you should know that early mornings are prime time for lion activity. If you’re doing a wildlife photography workshop in Borneo, understanding the habits of orangutans will help you anticipate their movements.
Before your trip, dig into the details of your destination. What time of year offers the best sightings? What’s the typical behavior of the animals you’ll be photographing? I remember my first trips to Namibia, when I was struggling a lot to find any big cats. Back then I thought it was just a matter of driving around and hoping for the best. Now I know the truth: back then I had no idea where to look. If I had done more research, I would have avoided midday hours as lions and leopards are hiding in the shade at that time of the day. I would have then looked for waterholes in late evenings, or checked on scavengers activity to locate lions kills.
A little prep goes a long way. Watch documentaries, read wildlife guides and check recent trip reports from photographers who have been there. This kind of groundwork means you won’t waste time figuring things out when you’re already in the field.
Practice Camera Settings Before the Trip to Avoid Missing Shots
Wildlife doesn’t wait for you to fumble with your camera. I’ve seen it happen too many times. Someone spots a cheetah sprinting across the plains, they raise their camera… and miss the shot because they were still in landscape mode from the day before.
Before your workshop, practice adjusting settings on the fly. Get comfortable switching between shutter speeds, ISO, and aperture without looking. A good exercise? Go to a park within your city and photograph birds in flight; it’ll teach you how to track fast-moving subjects and adjust settings quickly.
Be Patient—Wildlife Photography Requires Time and Persistence
Patience isn’t just helpful, it’s essential. Unlike landscape photography, where mountains don’t run away, wildlife photography is unpredictable. You could wait hours for a leopard to descend from a tree or a bear to step into the perfect patch of light.
During a wildlife photography tour in Zambia, I spent three days tracking a pride of lions. Just when we thought we’d lost them, they suddenly appeared at sunset, playing in golden light. That one moment made all the waiting worth it.
Bring a mindset that embraces the process. Enjoy the quiet moments in nature. Even if the perfect shot doesn’t happen, you’re still experiencing something incredible.

Boat safari on the Kwando river, Namibia.
Engage with Instructors and Fellow Photographers for Learning Opportunities
Your instructor has years of experience, so don’t be shy about asking questions. Need help with wildlife photography camera settings? Ask. Curious about composition techniques? Pick their brain. And don’t overlook your fellow participants. Some of the best tips I’ve picked up have come from chatting with other photographers over dinner.
Respect the Wildlife and Follow Ethical Photography Guidelines
No photo is worth disturbing an animal. Ethical wildlife photography means keeping a respectful distance, avoiding baiting and not stressing animals for the sake of a shot. In national parks, follow guidelines and listen to guides; they’re there to protect the wildlife as much as to help you get great images.
A simple rule? If an animal changes its behavior because of you, you’re too close. I once watched a photographer in Chobe NP, Botswana, get too close to a desert elephant. The elephant flared its ears - a clear warning - but the guy didn’t back off. Moments later, the elephant mock-charged, sending dust flying. It could’ve ended badly.
Be patient, stay respectful, and you’ll capture authentic, natural moments—without harming the animals in the process.
Conclusion
Wildlife photography workshops are more than just a chance to take amazing pictures—they’re immersive experiences that push you to grow as a photographer while exploring some of the world’s most breathtaking ecosystems. Whether you’re tracking pumas in Patagonia, waiting for the perfect shot of a lion in the golden light of the Serengeti or braving the Arctic chill to capture polar bears on the sea ice, the right workshop can elevate your skills and deepen your connection to the wild.
The best part? You don’t have to go at it alone. A well-structured workshop puts you in the right place at the right time, surrounded by like-minded photographers and experienced guides who can help you refine your craft. You’ll return home not just with stunning images, but with new techniques, a sharper creative eye, and unforgettable memories.
Want expert guidance and a front-row seat to some of the best wildlife encounters on the planet?
Check out my upcoming wildlife photography workshops and join me on an unforgettable journey to capture nature’s most extraordinary moments!


Seasonal Guide: Best Times to Photograph Wildlife in Africa
Discover the best times to photograph wildlife in Africa with this seasonal guide. Learn when to visit for iconic migrations, predator action, and stunning landscapes for wildlife photography.
Africa is a paradise for wildlife photographers, but timing is everything! Whether you're chasing the Great Migration, looking for big cat action or dreaming of misty rainforest shots, each season offers something unique. In this guide, I'll break down the best times to visit Africa for wildlife photography, helping you plan your next epic adventure.

Dry season in South Luangwa NP, Zambia
Why Timing Matters in Wildlife Photography
If there's one lesson wildlife photography has hammered into me, it's that timing is everything. I learned this the hard way during my first trips to Africa. I had imagined golden sunsets, crisp shots of big cats, and dramatic landscapes. Instead, I arrived right after the wet season; while it was technically a good time of the year for safari, thick vegetation hid most of the animals and the abundant water sources deep in the bush veld kept most predators from coming closer to the camps waterholes. Sure, it had its own beauty—lush green backdrops and dramatic skies—but I quickly realized that knowing the right season for photography makes or breaks a trip.

A shot from my first every night on a safari camp. Okaukejo, Etosha National Park, Namibia
The Role of Seasons in Wildlife Behavior and Photographic Opportunities
Seasons dictate everything in the animal kingdom—movement, feeding, mating, and even the way animals interact with their surroundings. If you’re after predator-prey action, for example, you’ll want to be around when young animals are born. In places like the Serengeti and Masai Mara, the calving season (January–March) is a feast for lions and cheetahs, making it the perfect time to capture intense moments of survival.
Migration patterns also change with the seasons. The Great Migration, one of the most jaw-dropping wildlife spectacles, peaks in July–October when millions of wildebeest cross crocodile-infested rivers. But if you show up in the same spot in December? You’ll just get endless plains of grass with barely a hoof in sight.
Also for bird photographers seasons are just as critical. Wet seasons (November–April) bring an explosion of migratory bird species, with colorful flocks arriving from Europe and Asia. You’ll get vibrant plumage, dramatic mating displays, and a chance to shoot rare species in their breeding grounds.
Dry Season vs. Wet Season: How Conditions Affect Animal Visibility
Every photographer wants clear, uninterrupted shots of animals in their natural environment. But what many don’t realize is how much the seasons affect visibility.
Dry Season (May–October)
Animals gather around water sources; this happens more and more as dry season progress and makes it easier to locate and photograph wildlife
Shorter grass and bare trees mean less obstruction for clean compositions
There’s usually a lot of dust in the air, making for stunning golden backlit shots but also potential lens issues
The harsh midday light is very challenging for exposure, but is not a big problem as it’s also the part of the day when wildlife is less active; on the opposite, sunrise and sunset are just magical
Wet Season (November–April)
Thick foliage makes it tougher to spot and photograph animals
One of the advantages of traveling in the wet season is that there are much less visitors around, making for more intimate shooting experiences
We can see stunning green landscapes, dramatic skies, and baby animals
Rain and humidity can be challenging, so gear protection is a must, and slippery and muddy roads can make travel harder.

Green season in Namibia. While it makes for vibrant colors, spotting animals is much more difficult in the thick vegetation
Impact of Light, Dust, and Weather on Photography
Also the light changes dramatically across seasons and understanding its impact is key to getting pro-level shots. During the dry season, dust in the air creates gorgeous warm glows during golden hour but can also lead to hazy, washed-out images if you’re not careful. A polarizer can sometimes help cut down the glare and improve contrast, but it’s not easy to use such a filter when shooting wildlife.
In the wet season the clouds act like a natural diffuser, softening harsh sunlight and allowing for even exposure throughout the day. This is great for capturing fine details in fur and feathers without harsh shadows. The downside? Rain can ruin your gear if you’re not prepared. A simple rain cover and a microfiber cloth for wiping your lens can save your shoot.
Dry vs. Wet Season Photography in Africa
Africa is one of those places where the time of year completely changes the photographic experience. I’ve shot in both the dry and wet seasons, and each has its own magic—and challenges. If you're planning a photography trip, knowing what to expect in each season can help you maximize your shots and avoid frustrating surprises. Let’s see more in detail.

Sunset in Etosha NP in October
Dry Season: Best for Visibility & Big Game
The dry season (usually from May to October, depending on the region) is prime time for wildlife photography. The reason is simple: animals need water. As rivers dry up, wildlife is forced to gather around the few remaining water sources, making it much easier to find and photograph them. If you’ve ever dreamt of classic safari images - elephants dust-bathing, lions lounging by a waterhole, or a leopard descending from an acacia tree - this is the season to go.
One of the biggest advantages? Crystal-clear skies every day. With little humidity, the air is crisp, meaning sharp images with fewer atmospheric distortions. Sunrise and sunset produce warm, glowing hues that make everything look cinematic and magic. Since it rarely rains, you don’t have to worry about sudden storms cutting your golden hour short.
But it's not all perfect. The midday light is brutal—harsh, flat, and unflattering. If you’re shooting during those hours, expect strong shadows and high contrast, which can be tricky to expose properly. Also, the dryness means dust—lots of it. If you're changing lenses frequently, that fine dust will find its way into every crevice of your gear. A simple tip? Bring a rain cover for your camera (yes, even in the dry season) and a blower to keep your sensor clean.
Another downside? More tourists. National parks get crowded, and during peak times, you might have 10+ vehicles surrounding a big cat sighting. If you want more exclusivity, consider private reserves or lesser-known parks where sightings are still excellent but without the traffic jams.

A young lion in full dry season. Etosha NP, Namibia
Wet Season: Best for Colors, Unique Shots & Fewer Crowds
Come November, the first rains hit, and everything changes. Dry, brown landscapes transform into lush green paradises. For photographers who love vibrant color and dramatic skies this season is a dream. The air is fresher, the skies are often filled with dramatic cloud formations, and the golden light reflects beautifully on the wet ground, creating unique compositions.
Another major perk? Baby animals. Many species give birth during the wet season, meaning you’ll see wobbly-legged zebras, playful lion cubs, and curious young elephants. This is a jackpot for storytelling images—capturing the softer, more intimate side of wildlife.
For bird photographers this is peak season. Migratory birds arrive in massive numbers and species that are harder to spot in the dry season (like colorful bee-eaters) become much more visible. The contrast of bright feathers against deep green foliage makes for spectacular shots.
However, the wet season does come with some challenges. Muddy roads can make certain areas inaccessible, especially in parks with black cotton soil (which turns into a slippery mess). If you’re self-driving a proper 4x4 and recovery gear are a must. The thicker vegetation can also make spotting wildlife trickier, as animals have more places to hide. You might hear a lion roaring nearby but struggle to get a clear shot through the dense bush.
On the plus side? Fewer crowds. Many tourists avoid the wet season, meaning you’ll often have sightings all to yourself. And honestly, that alone can be worth the occasional downpour.
During the wet season you can expect very dramatic skies. Central Namibia, February 2024
Best Time for Wildlife Photography by Region
Now that you understand the differences between seasons in Africa let’s see the different destinations more in detail.
East Africa (Kenya, Tanzania, Uganda, Rwanda)
Great Migration (June–October):
If there’s one event that defines East African wildlife photography, it’s the Great Migration. Watching thousands of wildebeest and zebras thunder across the Serengeti and Masai Mara is unreal. But if you want the shot—crocodiles lunging in the Mara River or chaotic stampedes—it’s all about timing. The crossings typically peak between July and September, though nature doesn’t run on a schedule.
Calving Season (January–March):
This is the hidden gem of the Serengeti. The southern plains explode with life as thousands of wildebeest calves drop within weeks. With all this new life comes a surge of predators—lions, cheetahs, and hyenas locked in an endless game of survival. This is where you get those dramatic hunting sequences. The golden grass, dramatic chases, and adorable calves make this one of my favorite times to shoot. It’s also less crowded than peak migration months.
Mountain Gorillas (Year-round, but best June–September):
Trekking through Rwanda’s Volcanoes National Park or Uganda’s Bwindi Impenetrable Forest is no easy feat. Rain can turn trails into mudslides, and dense foliage makes shooting tough. June to September offers the driest conditions, meaning clearer views, better hiking, and less mist on your lens. But let’s be real—any gorilla encounter is magical. Just keep your ISO high (800–3200) to compensate for the low light under the canopy.
Southern Africa (Botswana, South Africa, Namibia, Zambia, Zimbabwe)
Dry Season (May–October):
This is when Africa’s wilderness turns into a photographer’s dream. Water sources shrink, forcing animals to congregate at rivers and waterholes. If you want crisp, clean shots of big game—elephants in Chobe, lions in the Okavango Delta, leopards in South Luangwa—this is the time to go. With less foliage, animals are easier to spot, and the golden light at sunrise and sunset is unreal.
Green Season (November–April):
Now, if you love moody skies, lush landscapes, and baby animals, this is your season. Well, almost. I would still personally avoid November and December as temperatures are incredibly hot and vegetation is still very dry. The best is from mid January to mid March, before the vegetation will grow too much. The rains bring life to the land, and suddenly, everything is vibrant. Sure, tracking big cats in tall grass can be tricky, but the reward? Scenes straight out of a painting—stormy skies, soft light, and zero crowds. Plus, bird lovers will find migratory species in full display. Just pack a rain cover for your gear.
Victoria Falls & Zambezi Wildlife (April–June):
Timing Victoria Falls is a delicate dance. If you go too early, the falls aren’t at full power. Too late, and the mist is so thick it’ll soak your camera. April and May is the sweet spot—enough water for drama, but not so much that visibility is a nightmare. The added bonus? Wildlife viewing along the Zambezi is fantastic, with elephants, hippos, and crocodiles making for prime subjects.
Central Africa (Congo, Gabon, Central African Republic)
Dry Season (June–September):
Central Africa’s rainforests are another world entirely. Lowland gorillas, forest elephants, and bongo antelopes roam in the shadows, but getting a clear shot? That’s a challenge. The dry season offers slightly better visibility, as animals gather at bai clearings to drink. But even then, expect dim light and high humidity - fast lenses (f/2.8 or lower) are your best friend here.
Rainy Season (October–May):
If you’re after the most dramatic rainforest shots, this is when to go. Lush greens, misty mornings, and an explosion of insect and bird life make for incredible compositions. The downside? Mud. Lots of it. Trekking in this season is not for the faint of heart, but the rewards—intimate gorilla portraits in dewy undergrowth—are unmatched.
Photography Tips for Each Season
Dry Season: Use a Longer Lens for Distant Subjects, Embrace the Dust for Creative Effects
The dry season is a dream for wildlife photographers, but it comes with its own set of challenges. Water sources shrink, making animals congregate around the few remaining pools—perfect for getting dramatic action shots. But with less foliage, animals also tend to keep their distance, which is why a longer telephoto lens (like a 400mm or 600mm) becomes essential. I once made the mistake of heading into Etosha National Park with only a 70-200mm, thinking I'd get close enough to elephants at a waterhole. Spoiler alert: I didn’t. They stayed at least 50 meters away, and I ended up cropping most of my shots to oblivion.
Another unique aspect of the dry season? Dust. Lots of it. And while that might sound like a photographer’s nightmare, it can actually be a creative goldmine. Shooting against the light, especially in the late afternoon, dust in the air can add a golden, ethereal glow to your images. If animals are moving through it, their silhouettes become even more dramatic. The trick is to slightly underexpose your shot so the highlights don’t get blown out. And yes, dust is brutal on gear, so always carry a blower and microfiber cloth to keep your lens and sensor clean.

Dry season in Zambia.
Wet Season: Use a Rain Cover, Focus on Vivid Colors & Dramatic Cloud Formations
Most people avoid the wet season because, well, it’s wet. But honestly? Some of the most breathtaking, vibrant wildlife and landscape shots I’ve ever captured were during a heavy downpour. Rain brings out deep greens in foliage, darkens animal coats, and makes colors pop like crazy. Think about how stunning a leopard looks with rain droplets glistening on its fur, or how an elephant covered in mud takes on deep, rich textures.
The trick is to be prepared for the elements. A rain cover for your camera is a must—I learned this the hard way when my camera body got completely drenched in a surprise storm in the Serengeti. If you don’t have a rain cover, even a simple plastic bag with a hole cut for the lens can work in a pinch. Also, use a lens hood to keep raindrops off the front element.
Another underrated advantage of the wet season? Sky drama. With heavy rain clouds rolling in, sun rays breaking through, and sudden downpours, the sky becomes a major player in composition. Try using a polarizing filter to enhance contrast and cut through glare when the light is harsh after a storm. Some of my favorite shots of lions and cheetahs were taken with massive storm clouds looming in the background—it just adds a cinematic feel you don’t get in the dry season.

Golden Hour & Blue Hour Magic: Plan Around Sunrise/Sunset for Best Light
Golden hour is the holy grail of natural light photography, and for good reason. The low angle of the sun creates soft, warm hues, long shadows, and rich textures that make wildlife and landscapes look absolutely stunning. But getting the best golden hour shots takes planning—you don’t just show up and hope for the best.
One of the most useful habits I developed is scouting locations in advance. If I’m in a national park or a new area, I’ll spend midday looking for good vantage points so I know exactly where to be when the light is perfect. I also use apps like PhotoPills to track the sun’s position and see where the light will fall at different times.
And let’s not forget about blue hour—that brief period just before sunrise and after sunset when the world is bathed in cool, moody tones. It’s perfect for creating a sense of mystery and drama, especially when shooting landscapes with mist or wildlife in silhouette. If you’re shooting during this time you will likely use high ISO and a slower shutter speed to make the most of the low light.
Conclusion: Making the Most of Africa’s Seasons for Wildlife Photography
Africa offers mind-blowing wildlife photography opportunities year-round, but knowing the seasons can be the difference between an average trip and a truly unforgettable one. Whether you’re capturing the Great Migration in the Serengeti, navigating the flooded channels of the Okavango Delta, or trekking through misty forests in search of mountain gorillas, timing is everything.
Wanna join me on one of my exclusive wildlife photography workshops or safari trips?
I regularly organize guided photographic safaris and workshops to incredible locations, including Namibia, Botswana, Zambia and other amazing destinations worldwide. These trips are designed to offer photographers of all levels the chance to apply these techniques in the field, all while receiving personalized coaching and feedback.
Ready to embark on the photography adventure of a lifetime? Check out my upcoming photography trips and workshops and book your spot today:

Best Telephoto Safari Lenses: Ultimate Guide for Wildlife Photography in 2025
Discover the best telephoto safari lenses of 2024 that capture stunning wildlife moments without breaking the bank. Our expert guide compares top options for every budget and camera system.
When you're bouncing along in a safari vehicle, the heart racing as a lioness stalks her prey in the distance, the last thing you want is inadequate zoom capability! I've been there - squinting through my viewfinder, desperately wishing I had those extra millimeters of reach. According to a recent wildlife photography survey, 78% of safari photographers cite their telephoto lens as the single most important equipment investment. The right telephoto lens transforms distant wildlife from mere specks into frame-filling, detail-rich subjects that tell compelling stories. Whether you're planning your first African adventure or upgrading your existing safari kit, this comprehensive guide will help you find the perfect telephoto lens to bring those magnificent animals up close.

Cape buffalo on the banks of Chobe river. Canon R5, 600mm f4
What Makes a Great Safari Telephoto Lens?
I still remember my first safari in Namibia like it was yesterday. I'd saved up to rent what I thought was an old but decent 200-500mm f5.6-7.1 lens, feeling pretty confident as I boarded the plane. Man, was I in for a reality check! By day two, I was practically begging to borrow gear from a fellow photographer within our group who owned a 500mm f4 and a 400mm f2.8.
After that humbling experience (and several safaris later), I've learned exactly what separates an okay telephoto lens from one that'll actually get you those National Geographic-worthy shots. Let me break it down for you.

In the field with a 100-500mm Canon RF lens
Focal Length: The Magic Number
For most wildlife photography on safari you're gonna need at least 400mm of reach and sometimes even a 600mm would help. But how do we know what to use?

Bee eater at 840mm f/5.6
For big mammals like elephants, giraffes and big cats 200-400mm is usually sufficient, especially when the animals are relatively close to the vehicle. But when those leopards are lounging in distant trees or, even more, when you're trying to capture birds, having 500-600mm or more becomes essential. During my South Luangwa trip last year I captured a series of bee-eaters shots and even at 600mm + 1.4TC (that makes 840mm!), I still had to crop the image.
Different parks also require different focal lengths. Etosha National Park in Namibia has more open roads where animals might stay further away, demanding more reach. Meanwhile, in places like South Luangwa or Mana Pools the wildlife can get surprisingly close.
Image Stabilization - Not Optional!
Trust me on this one - image stabilization isn't a luxury feature; it's absolutely critical. Safari vehicles aren't exactly smooth rides and you're often shooting from a stopped but idling vehicle that's vibrating like crazy. Also, having other people moving in the car doesn’t help.
I learned this lesson the hard way during my first safari trips, where most of my shots came back with subtle motion blur despite using fast shutter speeds. Modern lens stabilization systems can give you 4-5 stops of compensation, which makes a massive difference when you're handholding a heavy telephoto lens at sunset.
Weather Sealing: Dust Is Your Enemy
The African savanna is DUSTY. Like, next-level dusty. During every trip, especially in dry season, fine dust infiltrates everything that isn’t properly sealed. My camera bag, my luggage and even sealed food containers somehow ended up with a fine layer of dust.
A good safari telephoto lens needs robust weather sealing around all moving parts, otherwise you’ll have to send your lens for specialized cleaning after every trip. Luckily most high-end telephotos are very good in their sealing properties.
Weight Considerations: Your Back Will Thank You
Many small safari planes enforce strict weight limits - sometimes as low as 15kg (33lbs) for ALL your luggage. I've literally had to wear multiple layers of clothes onto planes to make weight restrictions!
While that 600mm f/4 prime lens might give amazing results, lugging a 3kg (6.6lb) lens around isn't practical. I've found the sweet spot to be zoom lenses in the 2kg (4.4lb) range. My current go-to is a 150-600mm that weighs just under 2kg and fits in my carry-on camera backpack.
Aperture: Balancing Speed with Practicality
Wildlife is most active during dawn and dusk - precisely when light levels are lowest. While an f/2.8 aperture would be ideal, those lenses are prohibitively expensive and heavy at longer focal lengths.
In reality, most wildlife photographers compromise with f/5.6-6.3 or more variable aperture zooms. I use my RF 100-500mm f4.5/7.1 a lot and compensate by being comfortable shooting at higher ISOs (modern cameras handle ISO remarkably well and I shoot at up to 50k ISO with my canon R3) and stabilizing my lens whenever possible. During a magical sunset elephant encounter in Etosha last year I was shooting at f/6.3, 1/200s, ISO 20000 with my R5 and the images still came out beautifully printable.

With modern cameras we can still get great results even with crazy high ISO. Canon R5, 100-500mm, f6.3, 1/200s, ISO 20000
Autofocus: Speed Matters
When a cheetah suddenly breaks into a sprint or birds take flight, you have split seconds to nail focus. I've missed countless shots waiting for sluggish autofocus to catch up.
Modern telephoto lenses with ultrasonic or linear motors focus significantly faster. Focus limiting switches are also incredibly useful, allowing you to restrict the focus range to distant subjects and avoid the lens hunting through the entire range.
The difference between a good safari lens and a great one often comes down to these practical considerations that you only discover after hours in the field. Trust me, investing in the right telephoto lens will transform your safari photography experience!

A cheetah sprinting after a springbok. My R3 with 600mm f4 kept the subject in focus despite the sudden acceleration and even though some bushes in the foreground. These are the situations where top-end gear really makes the difference.
Entry level telephoto zoom lenses
1. Sigma 150-600mm f/5-6.3 DG DN OS Sports
Technical Specifications:
Focal Length: 150-600mm
Maximum Aperture: f/5-6.3
Lens Mounts: Sony E, Leica L
Optical Stabilization: Yes
Minimum Focus Distance: 58 cm
Filter Size: 95 mm
Weight: 2,100 grams
Price: Approximately €1,300
Overview:
The Sigma 150-600mm f/5-6.3 DG DN OS Sports lens is designed specifically for full-frame mirrorless cameras. It boasts a robust build quality suitable for challenging environments, making it ideal for safari photography. The lens features a quiet and optimized Hyper Sonic Motor (HSM) and a new Optical Stabilizer (OS) with an accelerometer for improved panning photography both vertically and horizontally.
Pros:
Excellent build quality suitable for rugged conditions.
Effective optical stabilization for handheld shooting.
Fast and accurate autofocus performance.
Cons:
Relatively heavy, which may require support during extended use.
The zoom ring requires a firm twist, which might take some getting used to.
2. Tamron SP 150-600mm f/5-6.3 Di VC USD G2
Technical Specifications:
Focal Length: 150-600mm
Maximum Aperture: f/5-6.3
Lens Mounts: Canon EF, Nikon F, Sony E
Vibration Compensation (VC): Yes
Minimum Focus Distance: 2.2 meters
Filter Size: 95 mm
Weight: 2,010 grams
Price: Approximately €1,200
Overview:
The Tamron SP 150-600mm G2 is an upgraded version of its predecessor, featuring improved optics and faster autofocus. Its Vibration Compensation system is highly effective, providing sharp images even in low-light conditions.The lens also has a moisture-resistant construction, making it suitable for various weather conditions encountered during safaris.
Pros:
Effective Vibration Compensation system for handheld shooting.
Improved optical design for better image quality.
Moisture-resistant construction suitable for various weather conditions.
Cons:
Slight drop in sharpness beyond 500mm.
Heavy weight may require additional support during extended use.
3. Nikon Z 180-600mm f/5.6-6.3 VR
Technical Specifications:
Focal Length: 180-600mm
Maximum Aperture: f/5.6-6.3
Lens Mount: Nikon Z
Vibration Reduction (VR): Yes
Minimum Focus Distance: 1.3 meters
Filter Size: 95 mm
Weight: 1,960 grams
Price: Approximately €2,000
Overview:
The Nikon Z 180-600mm f/5.6-6.3 VR is designed for Nikon's Z-mount mirrorless cameras. It offers a versatile focal range suitable for various wildlife photography scenarios. The lens features Nikon's Vibration Reduction technology, providing stable handheld shooting experiences. Its internal zoom mechanism prevents dust and moisture from entering the lens, which is beneficial in the often dusty safari environments.
Pros:
Versatile focal range suitable for various wildlife photography scenarios.
Effective Vibration Reduction technology for stable handheld shooting.
Internal zoom mechanism prevents dust and moisture entry.
Cons:
Not as sharp as higher end lenses.
Higher price point compared to other options.
4. Canon RF 100-400mm f/5.6-8 IS USM
Technical Specifications:
Focal Length: 100-400mm
Maximum Aperture: f/5.6-8
Lens Mount: Canon RF
Image Stabilization (IS): Yes
Minimum Focus Distance: 0.88 meters
Filter Size: 67 mm
Weight: 635 grams
Price: Approximately €700
Overview:
The Canon RF 100-400mm f/5.6-8 IS USM is a lightweight and compact telephoto zoom lens designed for Canon's RF-mount mirrorless cameras. Its portability is outstanding for that kind of focal length. However the autofocus performance doesn’t make it suitable for fast subjects like birds and the aperture of f/8 is kind of limiting in low light conditions, especially if paired with an entry level camera. Overall the price makes it a very good entry level choice.
Pros:
Very compact and lightweight.
Cheap option.
Cons:
Not as sharp as higher end lenses.
Limited to 400mm
Narrow aperture, not good for low light.
Slow autofocus.
Mid range telephoto zoom lenses
1. Sony FE 200-600mm f/5.6-6.3 G OSS
This lens is renowned for its impressive zoom range and sharpness throughout. Its internal zoom mechanism ensures consistent balance, making it easier to handle during extended shooting sessions. The Optical SteadyShot image stabilization is particularly beneficial for handheld shots, minimizing motion blur. Priced around €2,000, it offers excellent value for its capabilities. For Sony shooters this is definitely a must have.
2. Canon RF 100-500mm F4.5-7.1 L IS USM
As my personal favorite, this lens stands out for its compact and lightweight design, making it highly portable for on-the-go shooting. The 100-500mm focal range provides versatility, allowing for both close-up and distant shots without the need to switch lenses. Its weather-sealed construction ensures durability in various environmental conditions. With a price tag of approximately €3,000, it balances performance with portability. While the aperture is not the best (4.5 at 100mm and 7.1 at 500mm) the form factor and usability makes it my go-to safari lens.
3. Nikon Z 100-400mm f/4.5-5.6 VR S
While I haven't personally used this lens, it has garnered positive reviews for its sharpness and fast autofocus capabilities. The 100-400mm range, combined with Vibration Reduction (VR), aids in capturing steady images, especially in handheld scenarios. Its build quality aligns with Nikon's professional standards, ensuring reliability in the field. This lens is priced around €2,700.
🎯 Want to take your photography further without new gear?
My workshops are built around smart technique, not flashy upgrades. Join a tour and learn how to get pro-level results with the gear you already have.
Considerations for Prime Telephoto Lenses (400mm, 500mm, 600mm)
Prime telephoto lenses are known for their superior image quality and wider apertures, which are advantageous in low-light conditions and for achieving a shallow depth of field. However, they come with considerations:

Looking for ibex with a 600mm f4
Price: Professional-grade prime lenses are a significant investment. For instance:
Canon EF 400mm f/2.8L IS III USM: Approximately €12,000
Nikon AF-S 500mm f/4E FL ED VR: Around €10,500
Sony FE 600mm f/4 GM OSS: Close to €13,000
Weight and Portability: These lenses are often heavy and may require additional support, such as monopods or tripods, limiting mobility.
Versatility: Fixed focal lengths can be restrictive in dynamic environments where subjects may move unpredictably.
Cost-Benefit Analysis of Investing in Professional-Grade Glass
Investing in high-quality lenses is crucial for achieving sharp, vibrant images. Professional-grade lenses typically offer better build quality, weather sealing, and advanced optical elements that reduce aberrations. However, the substantial financial investment requires careful consideration:
Assess Needs: Determine the primary use-case scenarios. If wildlife photography is a frequent endeavor, the investment may be justified.
Alternatives: High-quality zoom lenses, like the ones mentioned above, offer flexibility and excellent image quality at a more accessible price point.
Resale Value: Professional lenses often retain value over time, making them a potential long-term investment.
💡 Curious about one of the few lenses that actually did change how I shoot? Here’s why I bought the Canon RF 100–300mm f/2.8 — and how it replaced two of my favorite zooms.

Handheld shooting with my 600mm f4
In conclusion, while prime telephoto lenses provide exceptional performance, modern zoom lenses have narrowed the gap, offering versatility and impressive image quality. Photographers should weigh the benefits against the costs and consider how each lens aligns with their shooting style and requirements. My advice if you are a beginner or intermediate is to invest in a good zoom, like the Sony 200-600 or the Canon 100-500. After a while you will realize if you really fell the need for a more expensive fixed lens.
📸 The Best Upgrade You Can Make? Experience.
After 15 years shooting in the wild, I’ve learned this: new cameras don’t change your vision. Field time does.
Join one of my 2026 workshops — from Namibia to Zambia — and unlock the next level of your photography.

Ultimate Guide to Safari Photography: Tips and Techniques for Capturing Amazing Wildlife Photos
A photo safari is one of the most rewarding experiences for photographers. It offers incredible opportunities to photograph wildlife in their natural habitat, but it also comes with challenges unique to this environment. After more than ten years as a professional wildlife and nature photographer, I've gathered techniques that significantly improved my photography during safaris—and today, I'm sharing these insights with you.
A photo safari is one of the most rewarding experiences for photographers. It offers incredible opportunities to photograph wildlife in their natural habitat, but it also comes with challenges unique to this environment. After more than ten years as a professional wildlife and nature photographer, I've gathered techniques that significantly improved my photography during safaris—and today, I'm sharing these insights with you.
In this comprehensive guide I'll cover essential tips including equipment recommendations, optimal camera settings, practical advice for the field, and advanced composition techniques. Let's dive in!

Timing is Everything: Early Mornings and Late Afternoons
Wildlife is most active during the early morning and late afternoon hours. Unfortunately, this is precisely when many photographers would rather rest. Resist the temptation! The golden hours of sunrise and sunset provide the best natural lighting conditions, dynamic animal behavior, and increased activity.
In contrast, midday brings harsh, high-contrast light, often causing your subjects—particularly big cats—to seek shade. While you might spot wildlife, capturing compelling images will be difficult due to harsh shadows and static animals.
My recommendation:
Wake up early, capture stunning photos, then rest during midday when wildlife activity declines.
Plan your photography outings around animal behavior—not your comfort.

Too often, photographers head out too late, staying out during the harsh midday sun, resulting in missed opportunities and less appealing lighting. Instead, structure your day around the wildlife schedule:
Early Morning Session: Head out before sunrise for active wildlife and optimal lighting conditions.
Midday Rest: Return to your lodge or camp during midday for rest and meal breaks.
Afternoon Session: Head out again in the late afternoon, staying as late as possible.
Adhering to this schedule significantly improves your odds of capturing memorable wildlife encounters in beautiful, soft light.

The Advantage of Booking Guided Game Drives
Booking game drives with professional safari guides is highly beneficial for photographers. Guides have extensive training and experience spotting wildlife, often seeing animals that you might miss. They also enjoy privileges like extended park hours and access to restricted areas not available to regular visitors.
Your experience (and results) will dramatically improve by joining guided safari tours. Guides have insider knowledge of animal behavior, preferred locations, and access to private areas or extended park hours.
Benefits of guided safari photography tours:
Extended Access: Professional guides often have permits allowing them to stay longer or enter exclusive wildlife areas.
Better Mobility: Shooting from an open safari vehicle allows unrestricted movement with your gear, offering more angles and fewer distractions.
Focus on Photography: Without worrying about driving, you can fully dedicate yourself to capturing the perfect shot.
Time Control: Choosing private or small-group tours ensures you’re not rushed, allowing you to patiently wait for action to unfold without frustrating fellow travelers.
If possible, choose private game drives or join a group of fellow photographers to ensure everyone's objectives align. Non-photographers typically prefer to move quickly between sightings, whereas photographers benefit from extended stays, allowing scenes and behaviors to unfold naturally.

Choosing the Right Equipment: The Power of Telephoto Zooms
While many photographers associate safari photography with giant prime telephotos these lenses, although powerful, aren't always the most practical option. Instead, a high-quality telephoto zoom lens such as a 100-500mm or a 200-600mm provides superior flexibility, lightweight handling, and faster reaction times.
Telephoto zoom lenses allow you to quickly adapt to changing wildlife situations without the burden of carrying and maneuvering heavy gear. A lens offering at least a 400mm reach is sufficient for most scenarios.
A recommended setup for maximum versatility is:
Primary Camera: Equipped with a versatile zoom lens (100-500mm or 200-600mm).
Secondary Camera: (optional) Fitted with a long prime lens (400mm f2.8 or 600mm f4) for specialized situations.
For more details on what I bring on a safari trip check out this video:
Essential Camera Settings for Safari Photography
Being ready for anything is crucial on safari. Using manual mode with Auto ISO offers an ideal balance between creative control and ease of use. This mode allows you to adjust your aperture and shutter speed manually while the camera compensates for changes in lighting through ISO adjustments.
Here's a quick breakdown:
Manual Mode + Auto ISO: Allows consistent creative control and correct exposure.
Exposure Compensation: Adjust exposure for challenging lighting conditions.
Sidelit/Backlit Subjects: Slightly underexpose.
Low Light Situations: Slightly overexpose to capture sufficient detail and improve post-production flexibility.

Mastering Composition from a Safari Vehicle
One major challenge on safari is achieving compelling compositions from within a vehicle. Typically, we want eye-level perspectives for natural, engaging images, which are difficult to achieve when restricted to a vehicle's elevated vantage point. Here are techniques to help overcome these constraints:
Front Row Seating: Sit in the front seats of the safari vehicle, usually lower, to improve your angle.
Vehicle Positioning: Position the vehicle in depressions or low points to achieve eye-level perspectives. Alternatively, position yourself further from your subject to reduce angle steepness.
Utilize Elevated Subjects: When wildlife is elevated (on trees or termite mounds), your angle improves significantly, enhancing your composition.
Always respect park regulations and wildlife by never leaving your vehicle unless explicitly permitted.
Tackling Low Light Photography
Much wildlife activity occurs during low light hours. Mastering low-light photography techniques is crucial to maximizing photographic opportunities at dawn and dusk.
Mastering low-light techniques will set you apart:
Use fast lenses (wide aperture lenses, e.g., f/2.8 or f/4) to gather maximum light.
Increase ISO strategically: Modern cameras handle higher ISOs well. Choose ISO settings carefully to balance shutter speed and image quality.
Shoot in RAW: This format allows better flexibility to correct exposure and reduce noise during post-processing.
For a deeper dive, check out this dedicated low-light photography guide.


Free Wildlife Photography E-book
Planning a safari? Get fully prepared by downloading our free e-book covering everything from gear selection, camera settings, composition, and how to handle various lighting conditions.
Download your Free Wildlife Photography Guide.
Ready for your safari?
The techniques shared above have transformed my own wildlife photography over the years. Remember:
Wake up early for the best lighting.
Take advantage of local guides.
Choose versatile gear for maximum flexibility.
Master your camera settings and be ready for any situation.
Carefully plan your compositions for stronger images.
Wanna join me on one of my exclusive wildlife photography workshops or safari trips?
I regularly organize guided photographic safaris and workshops to incredible locations, including Namibia, Botswana, Zambia and other amazing destinations worldwide. These trips are designed to offer photographers of all levels the chance to apply these techniques in the field, all while receiving personalized coaching and feedback.
Ready to embark on the photography adventure of a lifetime? Check out my upcoming photography trips and workshops and book your spot today:
