How to Capture Birds in Flight
There are few experiences as exhilarating as watching a hawk swoop through a valley or a swallow skim the surface of a lake. Translating that energy into a photograph that feels alive is one of the enduring challenges of wildlife photography. Capturing birds in flight requires technical preparation, acute observation and a respect for the subject that goes beyond fast shutter speeds.
Understanding flight patterns
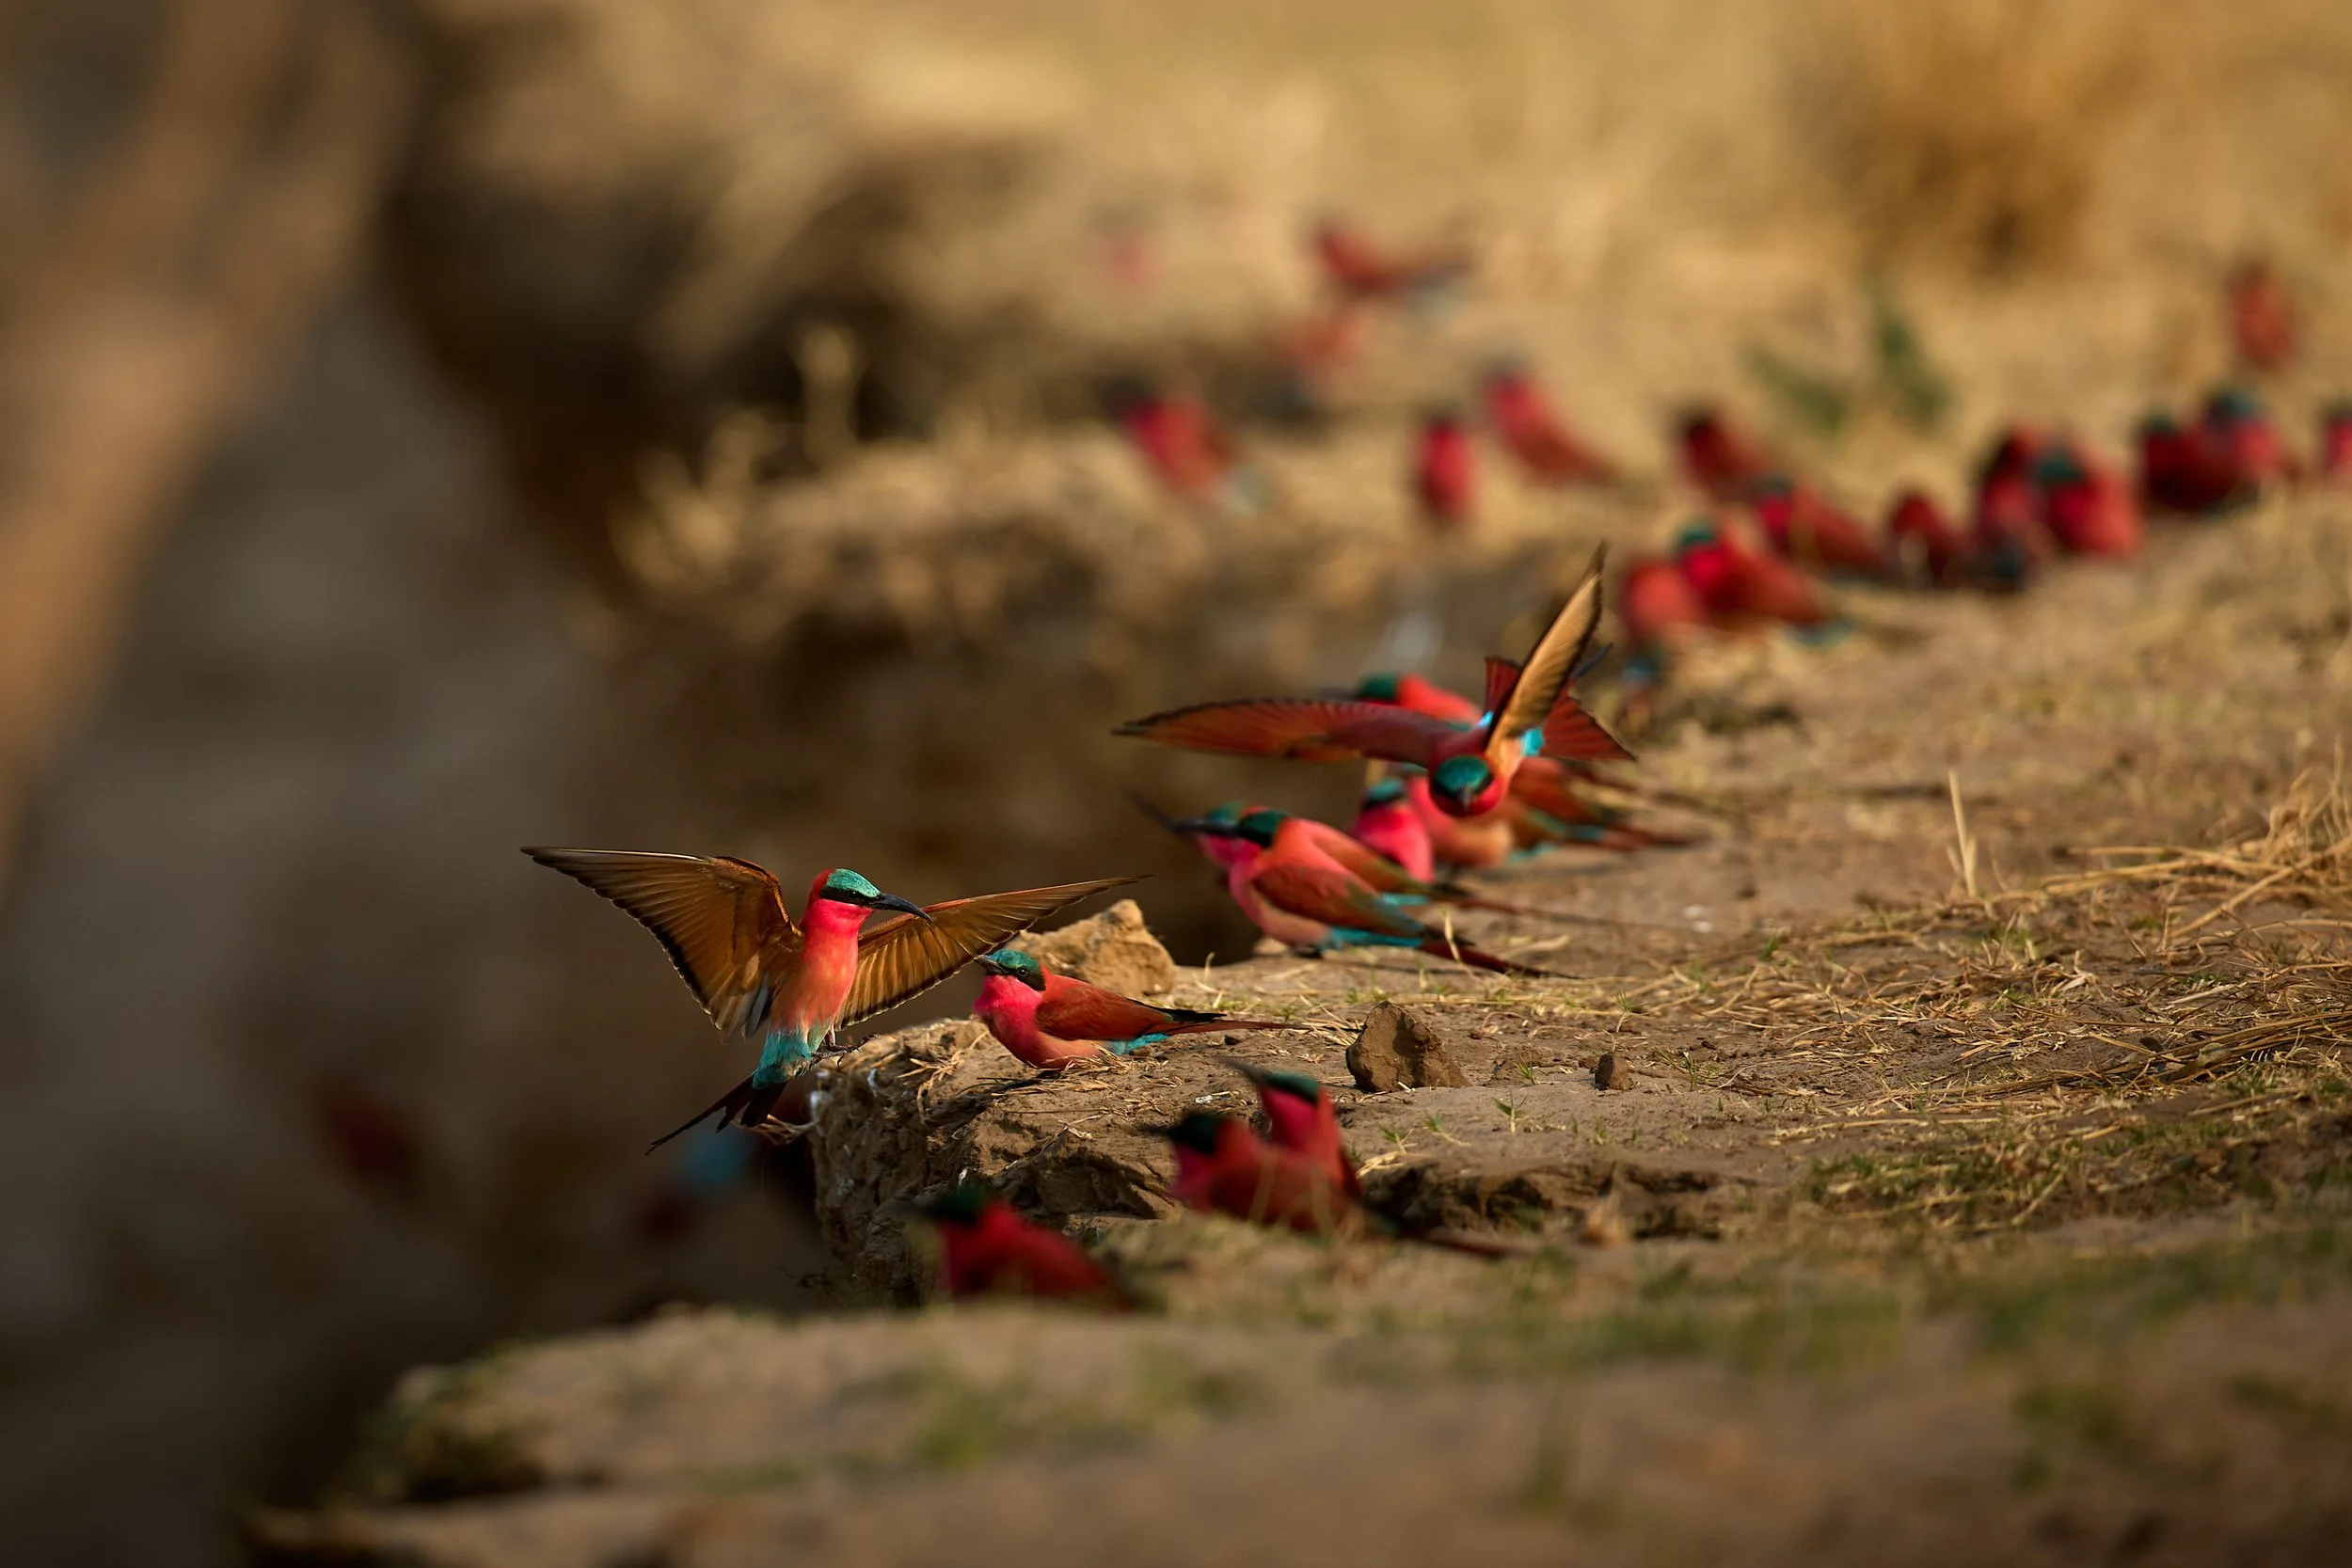
Before you raise your camera, spend time watching the birds themselves. Different species fly differently: swallows dart and weave unpredictably; herons glide with measured wingbeats; raptors often circle to gain altitude before diving. Learning these patterns helps you anticipate where the bird will be next. Position yourself with the sun at your back to illuminate the bird’s plumage and avoid shooting directly into the sky whenever possible; this keeps both the bird and the background well exposed. Note where birds regularly take off or land — a branch, a reed bed, a rock — and pre‑focus on that spot while waiting, so you’re ready when the action happens.
Autofocus settings and shutter speeds
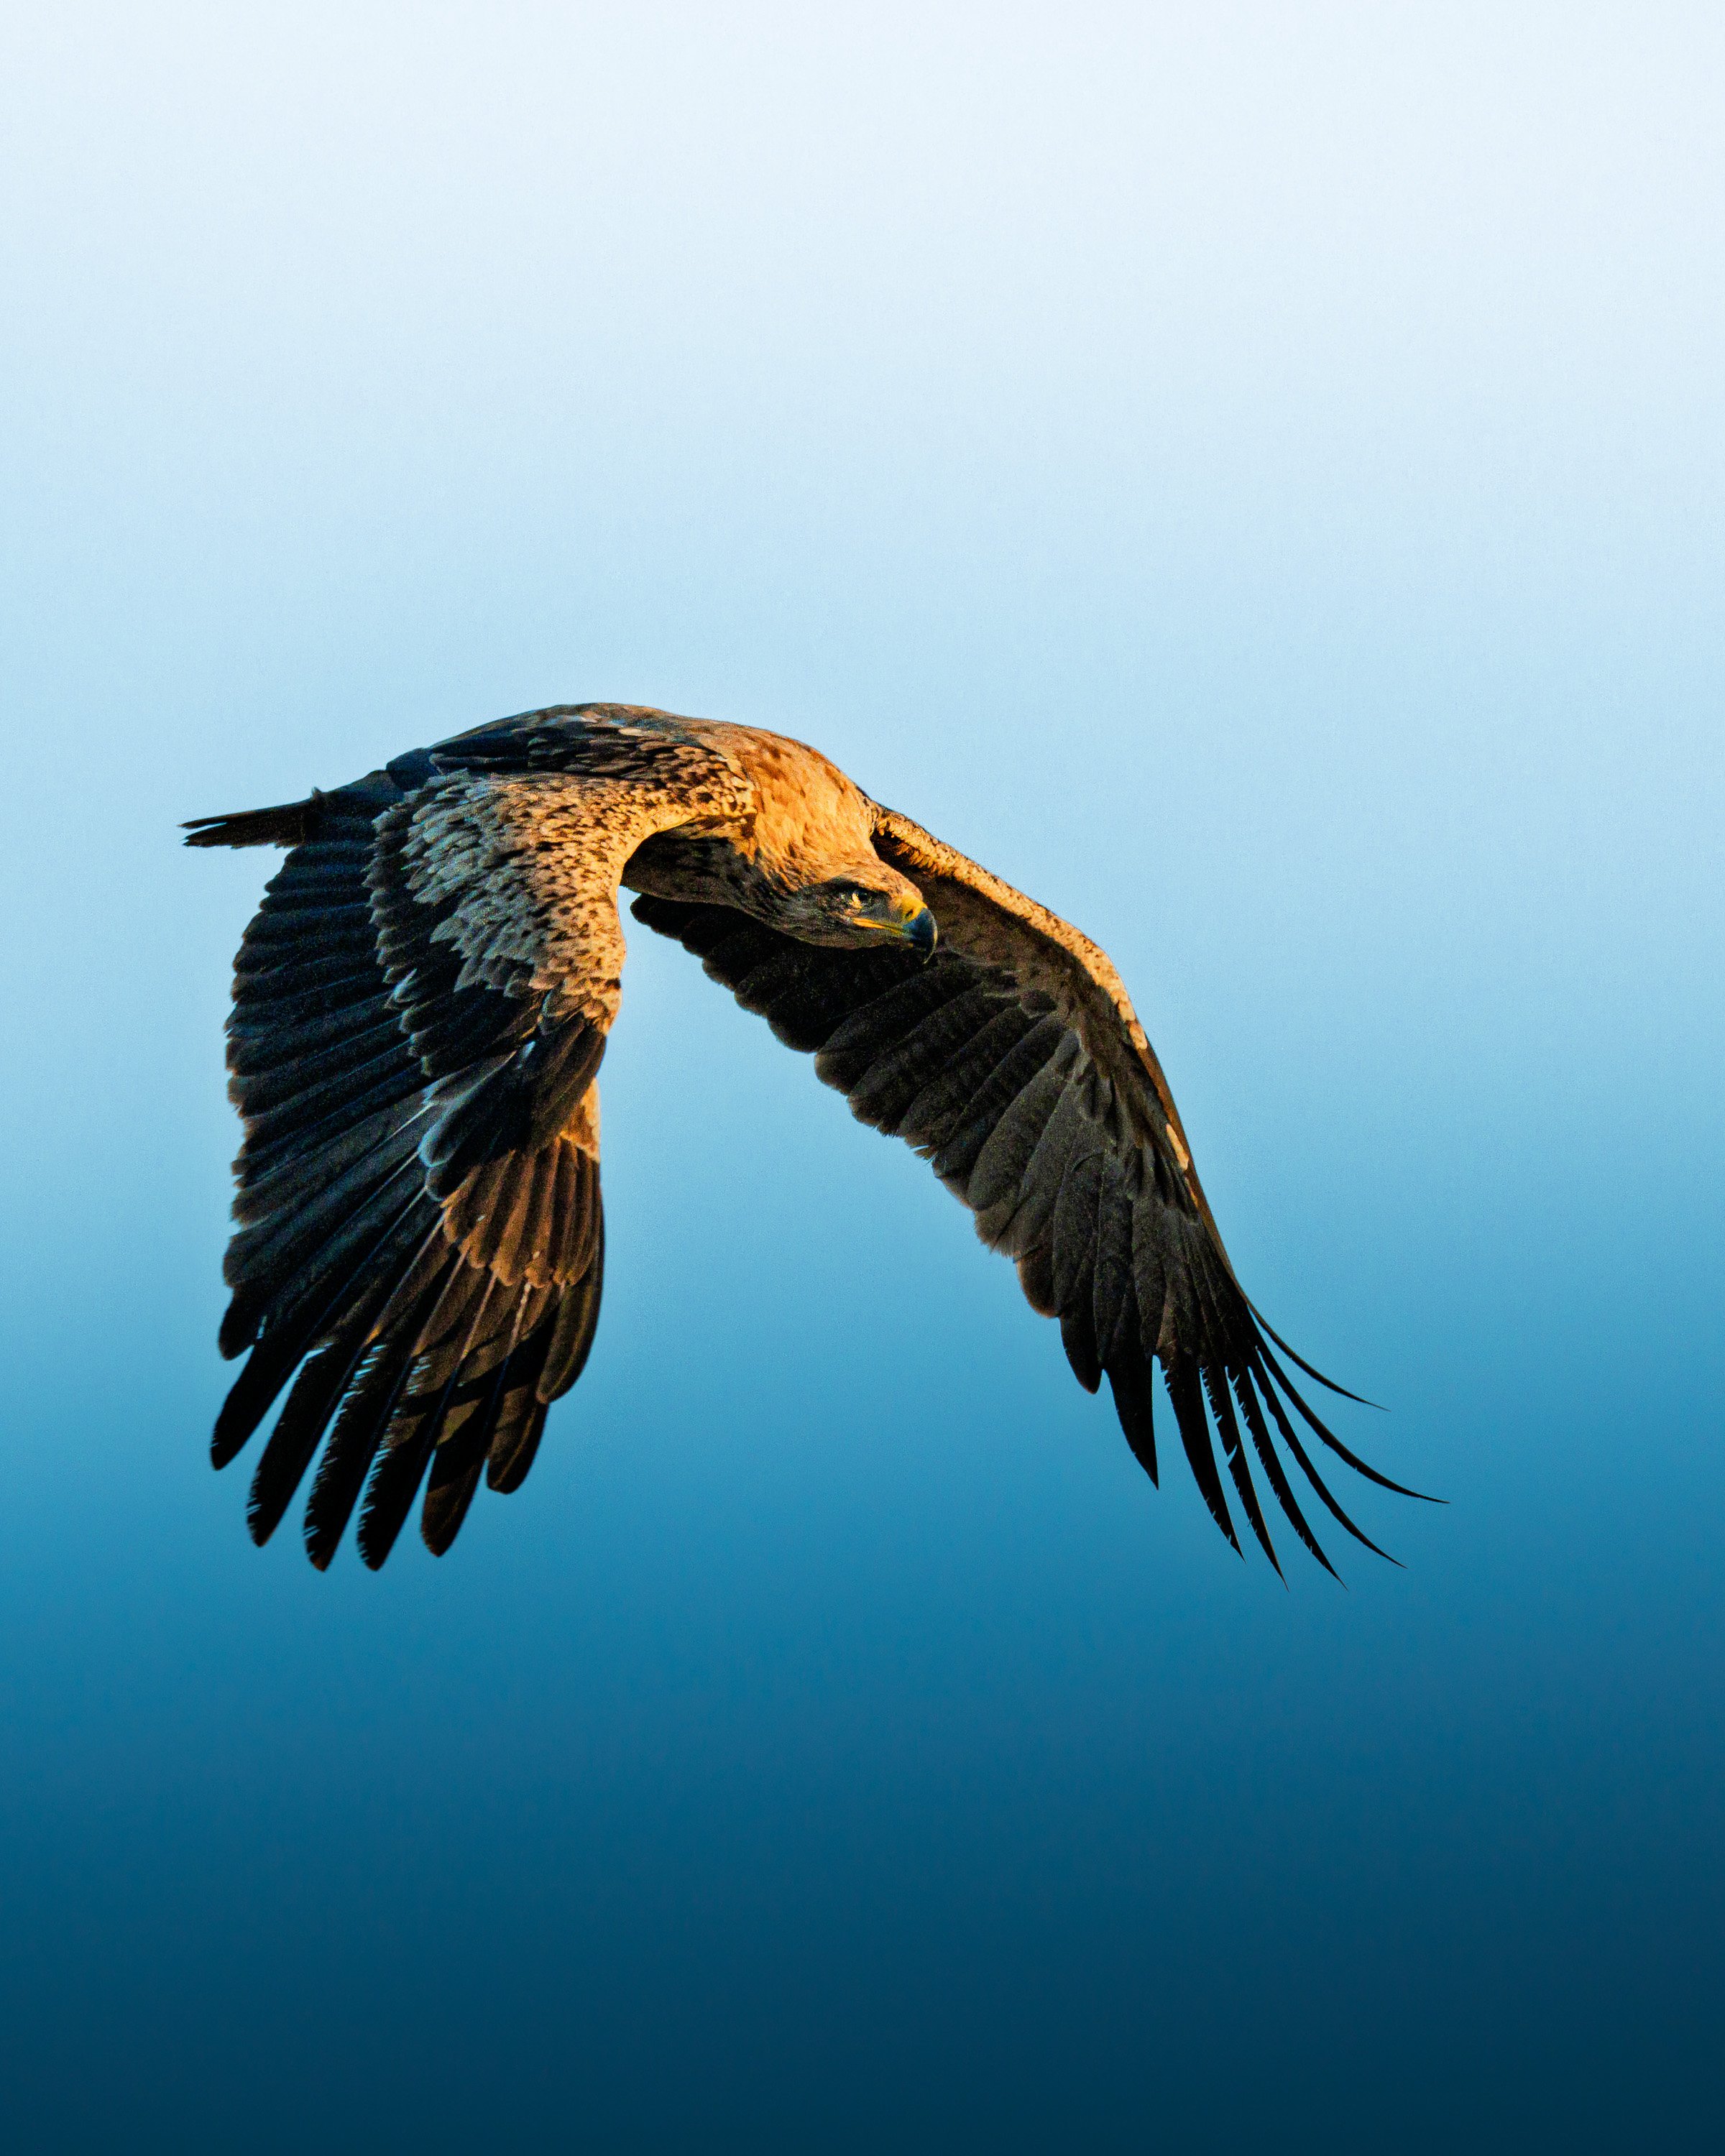
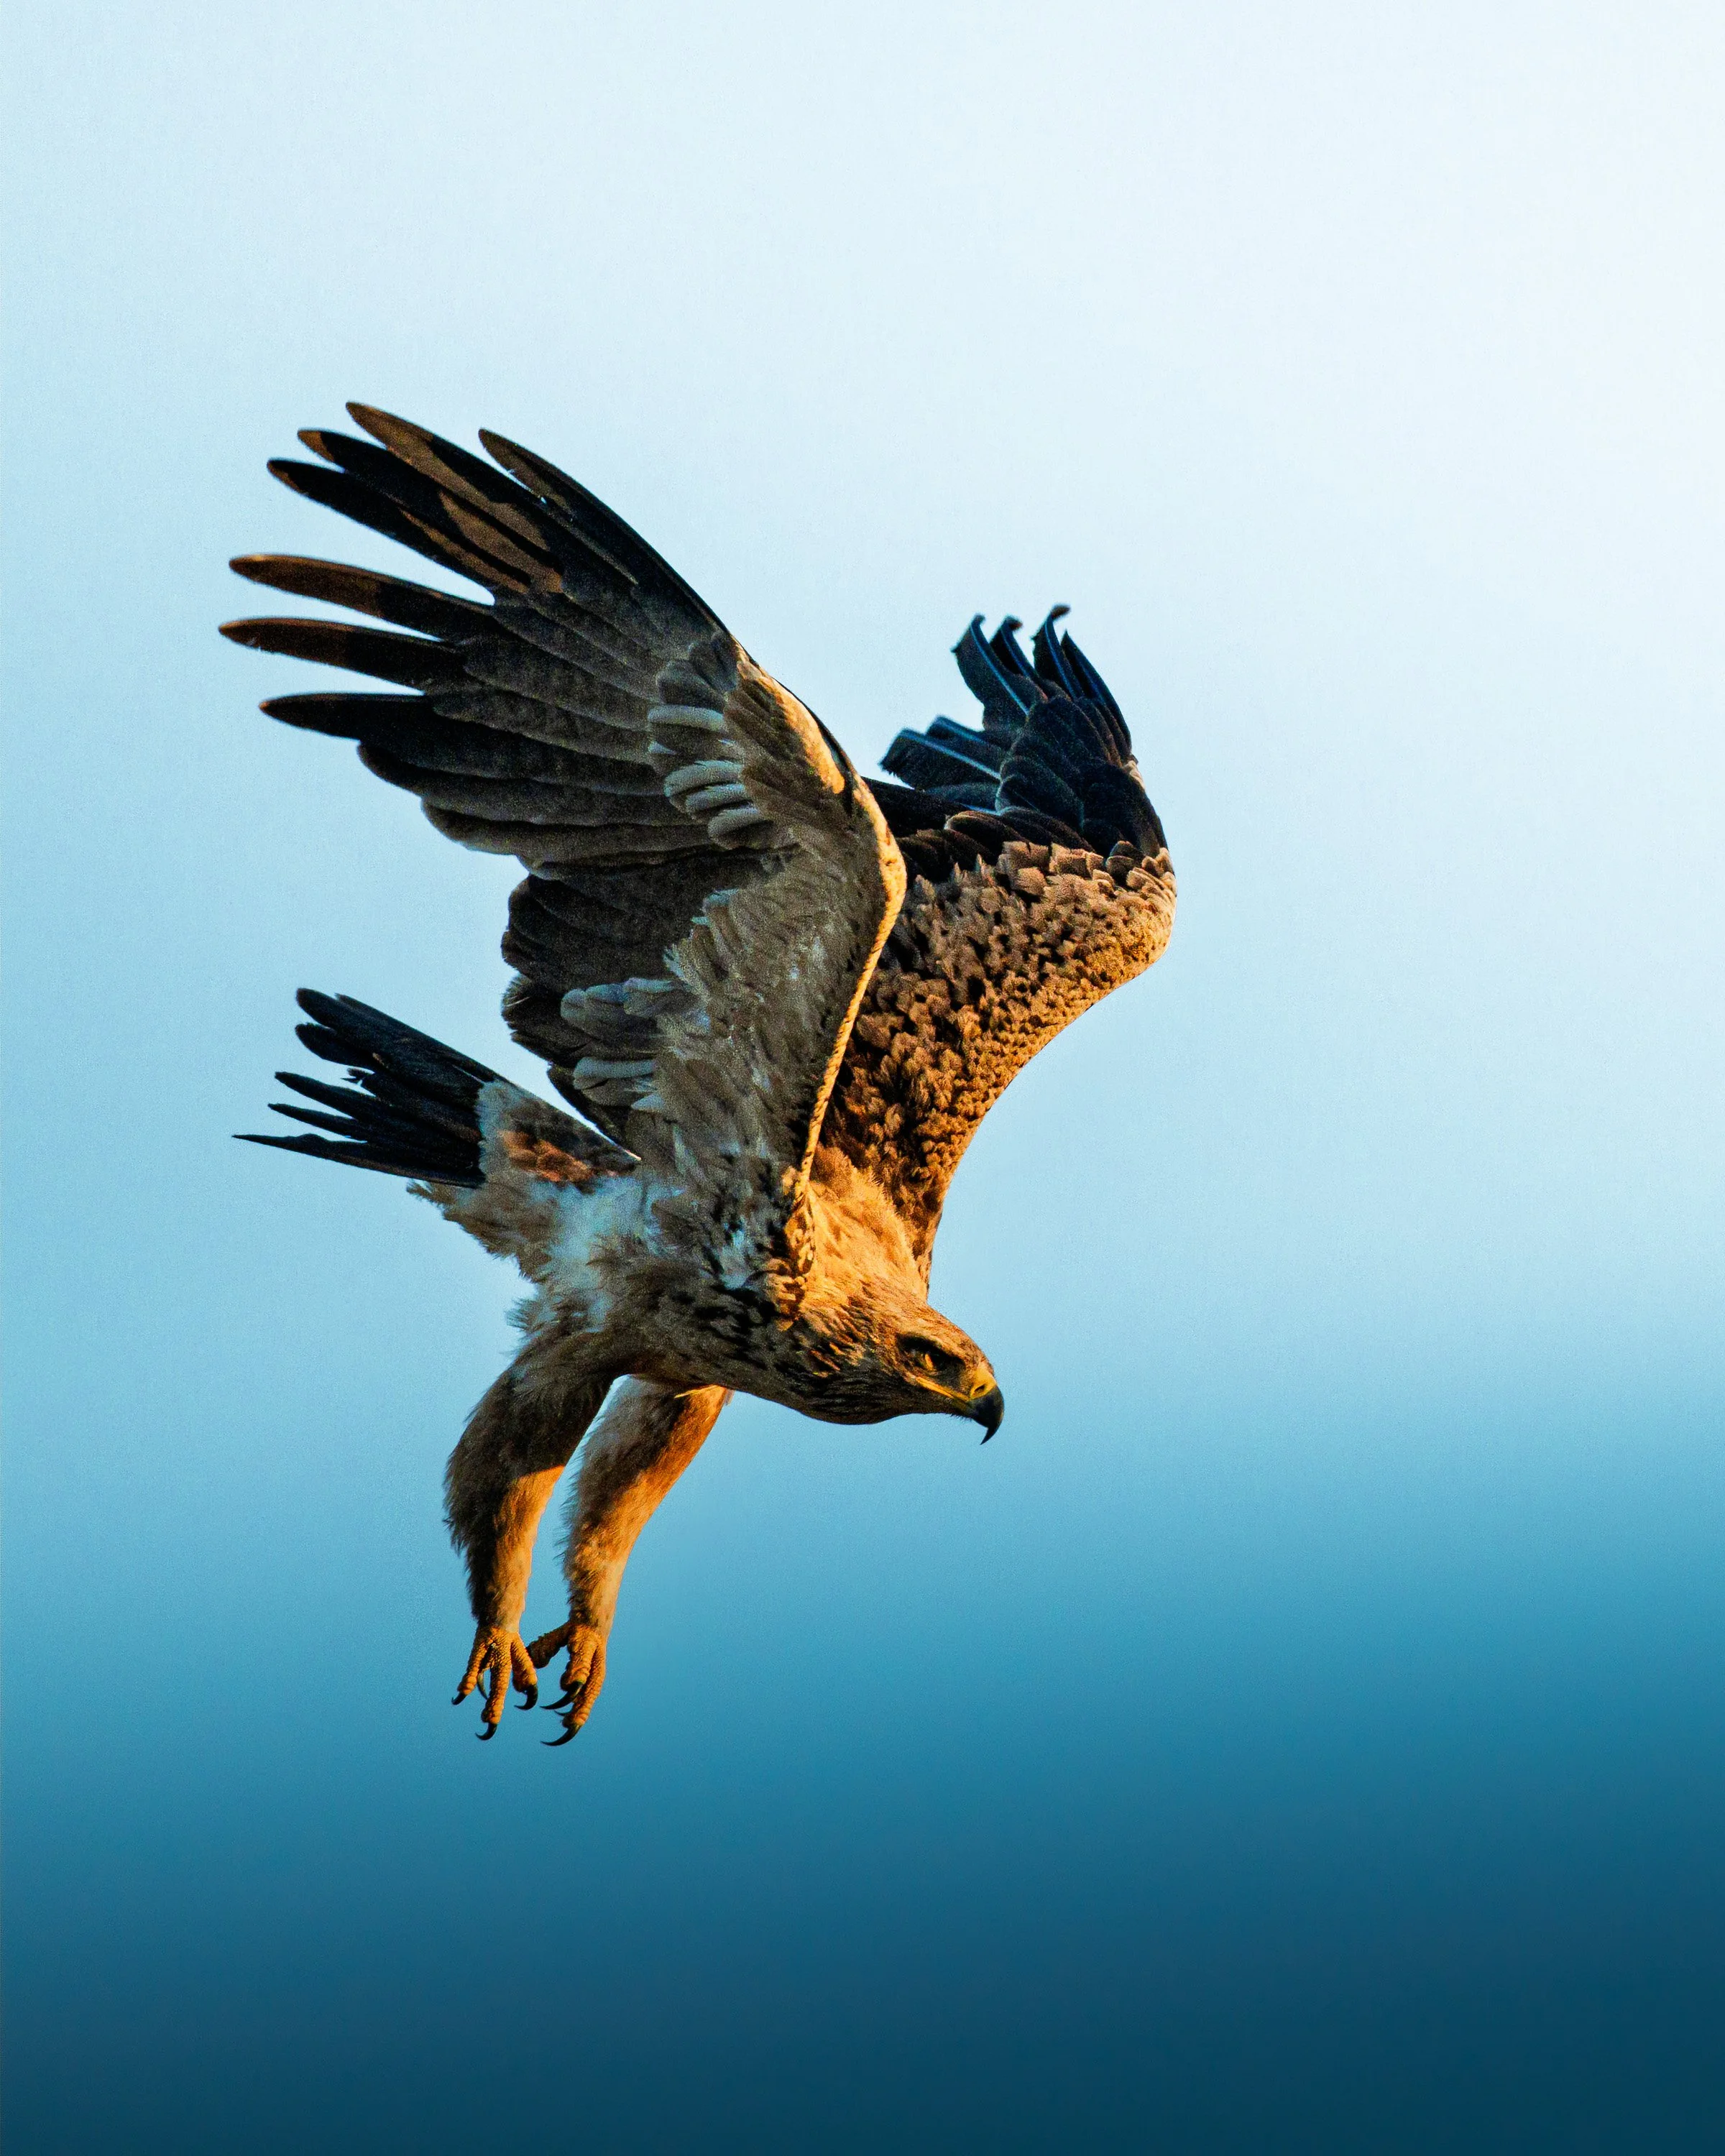
Modern cameras offer sophisticated autofocus modes, but they require thoughtful setup. For birds in flight, use continuous autofocus (AI Servo or AF‑C) with a subject detection mode if your system offers it. Expanding the focus area from a single point to a small zone helps the camera track erratic movements. Don’t rely on the largest area, which may latch onto background elements. A shutter speed of at least 1/2000 s freezes most birds’ wingbeats; smaller species or very fast wingbeats may require 1/3200 s or higher. Balance this with your aperture and ISO. On overcast days or in the golden hours just after dawn or before sunset, open your aperture wider and raise ISO rather than sacrificing shutter speed. You can reduce noise in post‑processing, but you can’t rescue motion blur.
Panning and framing
Panning — following the bird’s movement with your camera as you shoot — adds a sense of motion and increases your keeper rate. Plant your feet shoulder‑width apart, rotate from the waist and lead the bird slightly rather than trying to catch up mid‑flight. Shoot in short bursts rather than holding down the shutter continuously; this gives your autofocus time to adjust and reduces the risk of buffer slowdown. Leave room in the frame ahead of the bird so it has space to “fly into” within the photograph. Resist the temptation to centre every subject; off‑centre compositions convey direction and energy.
Ethical considerations in flight photography
As with all wildlife photography, ethics matter. Avoid flushing birds to make them take flight. If a bird is resting, let it be; patience will reward you with a natural take‑off. Be especially sensitive during nesting season when adults are expending enormous energy to feed chicks. Keep your distance and use longer lenses to avoid causing distress. The exhilaration of freezing a falcon mid‑stoop should never outweigh the welfare of the falcon itself.
Mastering birds in flight is an ongoing journey that blends technical skill with patient observation. When you finally capture that moment where the wings are caught at full extension and the eye is tack sharp, you’ll appreciate how much the process taught you about timing, restraint and the beauty of flight. If you want more in‑depth guidance, including field practice and feedback, my newsletter and workshops provide opportunities to grow alongside others who share your passion.
🕊️ Getting sharp flight shots isn’t just about gear — it’s about patience, timing, and fieldcraft.
On my workshops, we practice this together: reading flight patterns, refining camera setup, and learning how to stay calm and present when the moment unfolds.
You’ll get personalized feedback in the field, plus the chance to slow down and train your instincts — not just your autofocus system.
If that’s the kind of growth you’re looking for, you’ll feel right at home on one of my upcoming trips.


May 15 - 27, 2026