How to find the best light in the mountains
One of the questions I get asked more frequently: “How do you manage to find the best light when shooting in the mountains?”
We all know that nature is a bit unpredictable and especially in the mountains it can be hard to predict how the light will play; luckily today we can access a lot of informations directly from our phone and we can always get an accurate idea about where the sun would be and how the weather will play in the next few hours.
These are my 4 fundamental apps I use every time to successfully plan a shoot in the mountains.

Google Earth

The first thing I need when planning a photoshoot is an overall idea of the mountain’s shape and orientation. Are we going to be up on a ridge on down into a valley? Is the place facing South, meaning we will be directly sunlit for the whole day, or we will be in the complete shade of a North face (on the southern hemisphere it would be the opposite)? Are we going for the best place, or there are some much better options nearby?
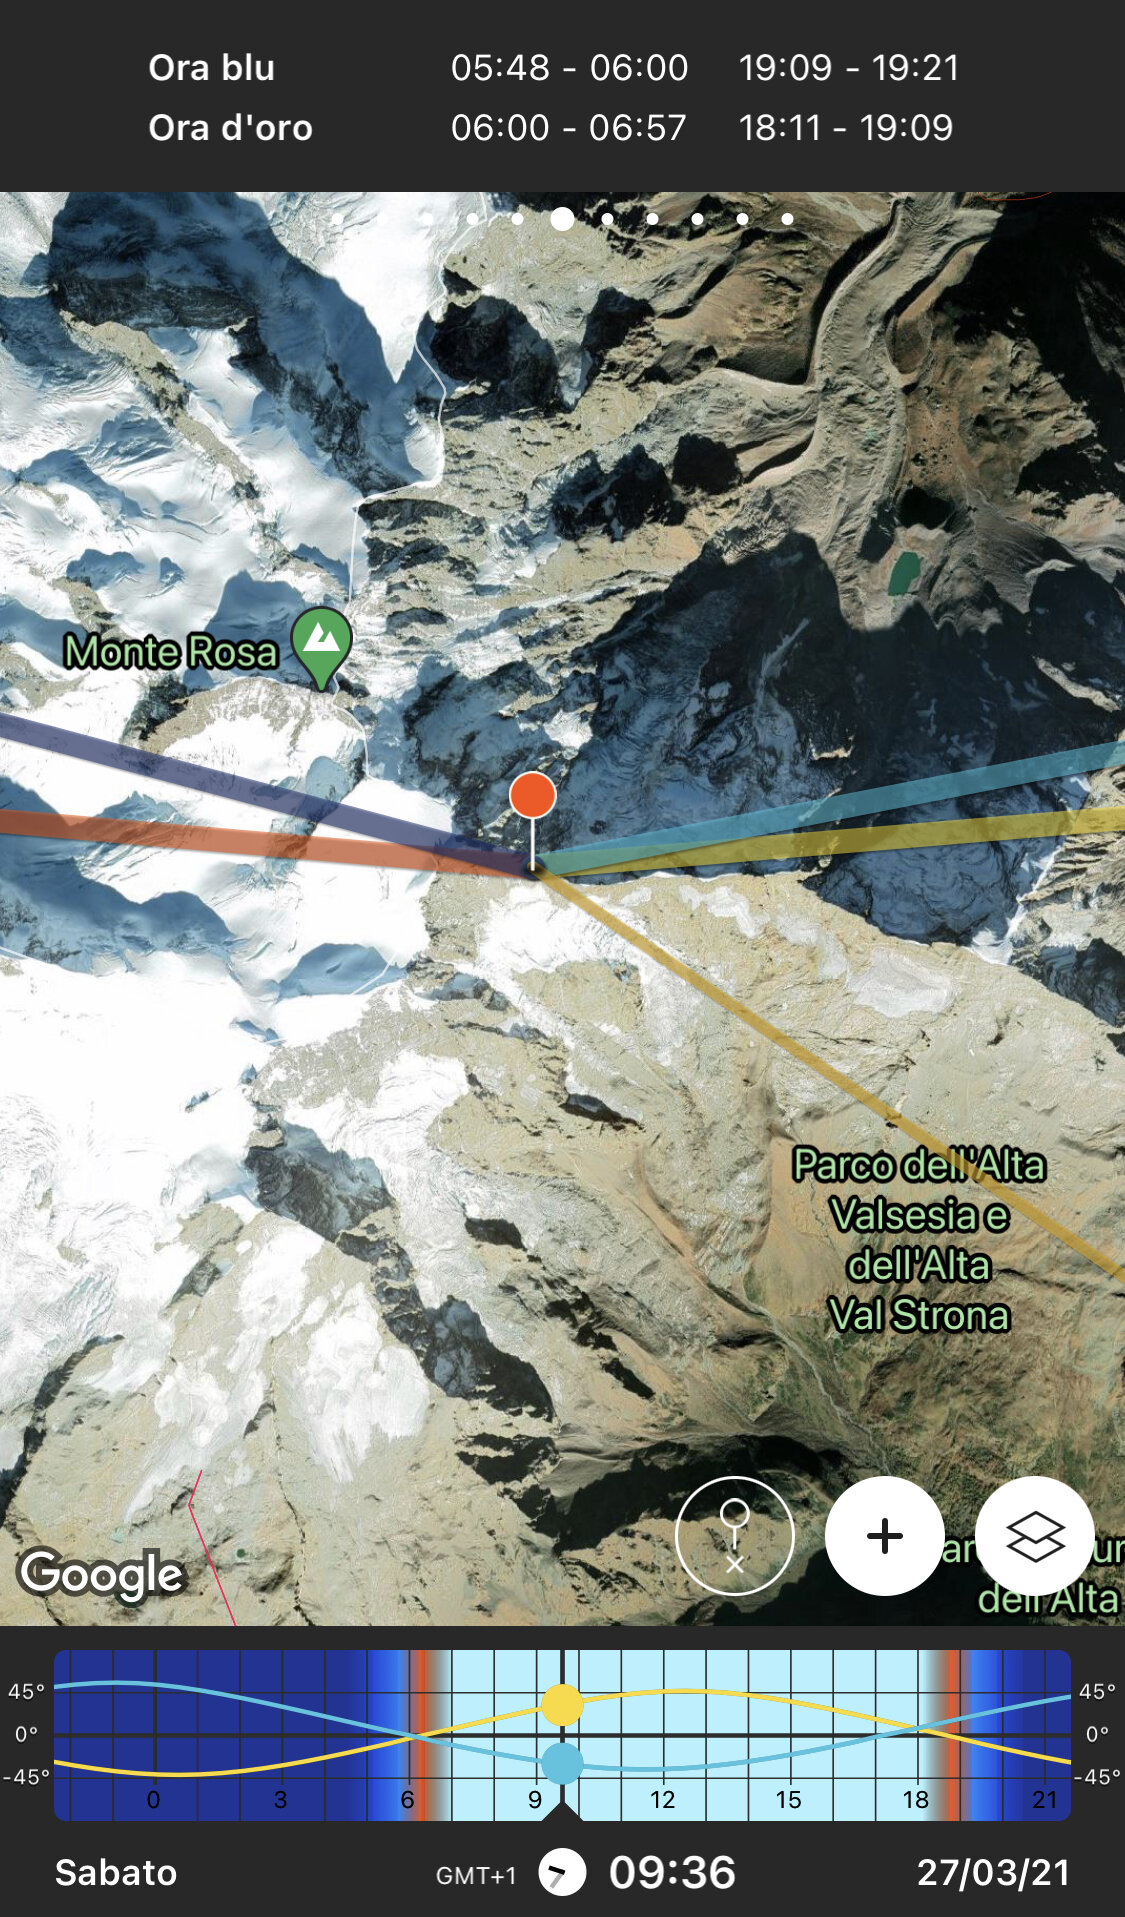
We can quickly answer to all of these questions by taking a look at the 3D render of the place on Google Earth; messing around a bit on the app it will give us a good idea of the landscape we will work with and where the sun will come from (looking at the little compass displayed at bottom).
Looking at this view, for example, we can understand the the mighty Cresta Signal on Monte Rosa is running East to West, with the South face on the left side, meaning we will always have one side in shade and one side in the sun through the whole day.
Photo Pills
Probably my favorite app, Photo Pills makes it super easy not only to understand at what time the sun will rise and set on a given location but it also shows the exact direction the light will come from at any time of the year. All we need to do is to open the planner tool, to place the pin in our chosen location and to set the date we will shoot; we will then get the time frames for golden hour, blue hour, angle of sunrise and angle of sunset.
Photo Pills is not free (it should cost around 5,00€ on the App Store) but the infos it provides makes it worth much more than that. Highly recommended.
Meteo Earth
In addition to the time of the day, the other significant factor that will effect our natural light is the weather. It can be super hard to predict sometimes and it can make or break our shoot: a little layer of fog can give us a magic, once in a lifetime light, but just a touch more would completely delete visibility.
While the only 100% accurate way to know if the weather will help us is to go out and shoot anyway, weather forecasts today are quite accurate, especially within 12-24 hours. There are countless apps and services available today; what I use when in the Alps/Europe is Meteo Blue, while when traveling internationally I found Meteo Earth to be quite reliable almost anywhere in the short term; one thing to note is that many remote places, lacking the amount of weather monitoring station we have in Europe an US, cannot provide a the same amount of real time informations to the forecasting services, resulting in much less accurate forecasts.
My advice here is to try different forecast services in your area and then to pick the one that prove to be the most reliable.

Sun Seeker
We are now on location, the sun is high and we need to know at what time it will come across that beautiful peak in front of us. What to do? Sun Seeker comes to help us in this kind of scenario: by opening the 3D view (bottom right) it will take our phone camera view, overlaying it with the sun path in the sky, showing us where it will appear at any time of the day.


Best camera for mountain photography in 2020

Zinalrothorn, Obergabelhorn, Besso and Dent Blanche at dusk. 4 seconds exposure on iPhone11 Pro.
“What camera should I buy for mountain photography?”
I can’t count how many times I’ve heard this question, and I always found difficult to reply. Every setup has pros and cons, there simply isn’t a best and a worst. Usually if you want higher quality you have to carry more weight; this makes you slower on the climb/hike, maybe so slow that you will miss the perfect moment and all that gear you carried will prove completely useless. On the other hand, you can go super light, sacrificing a bit of quality but gaining efficiency.
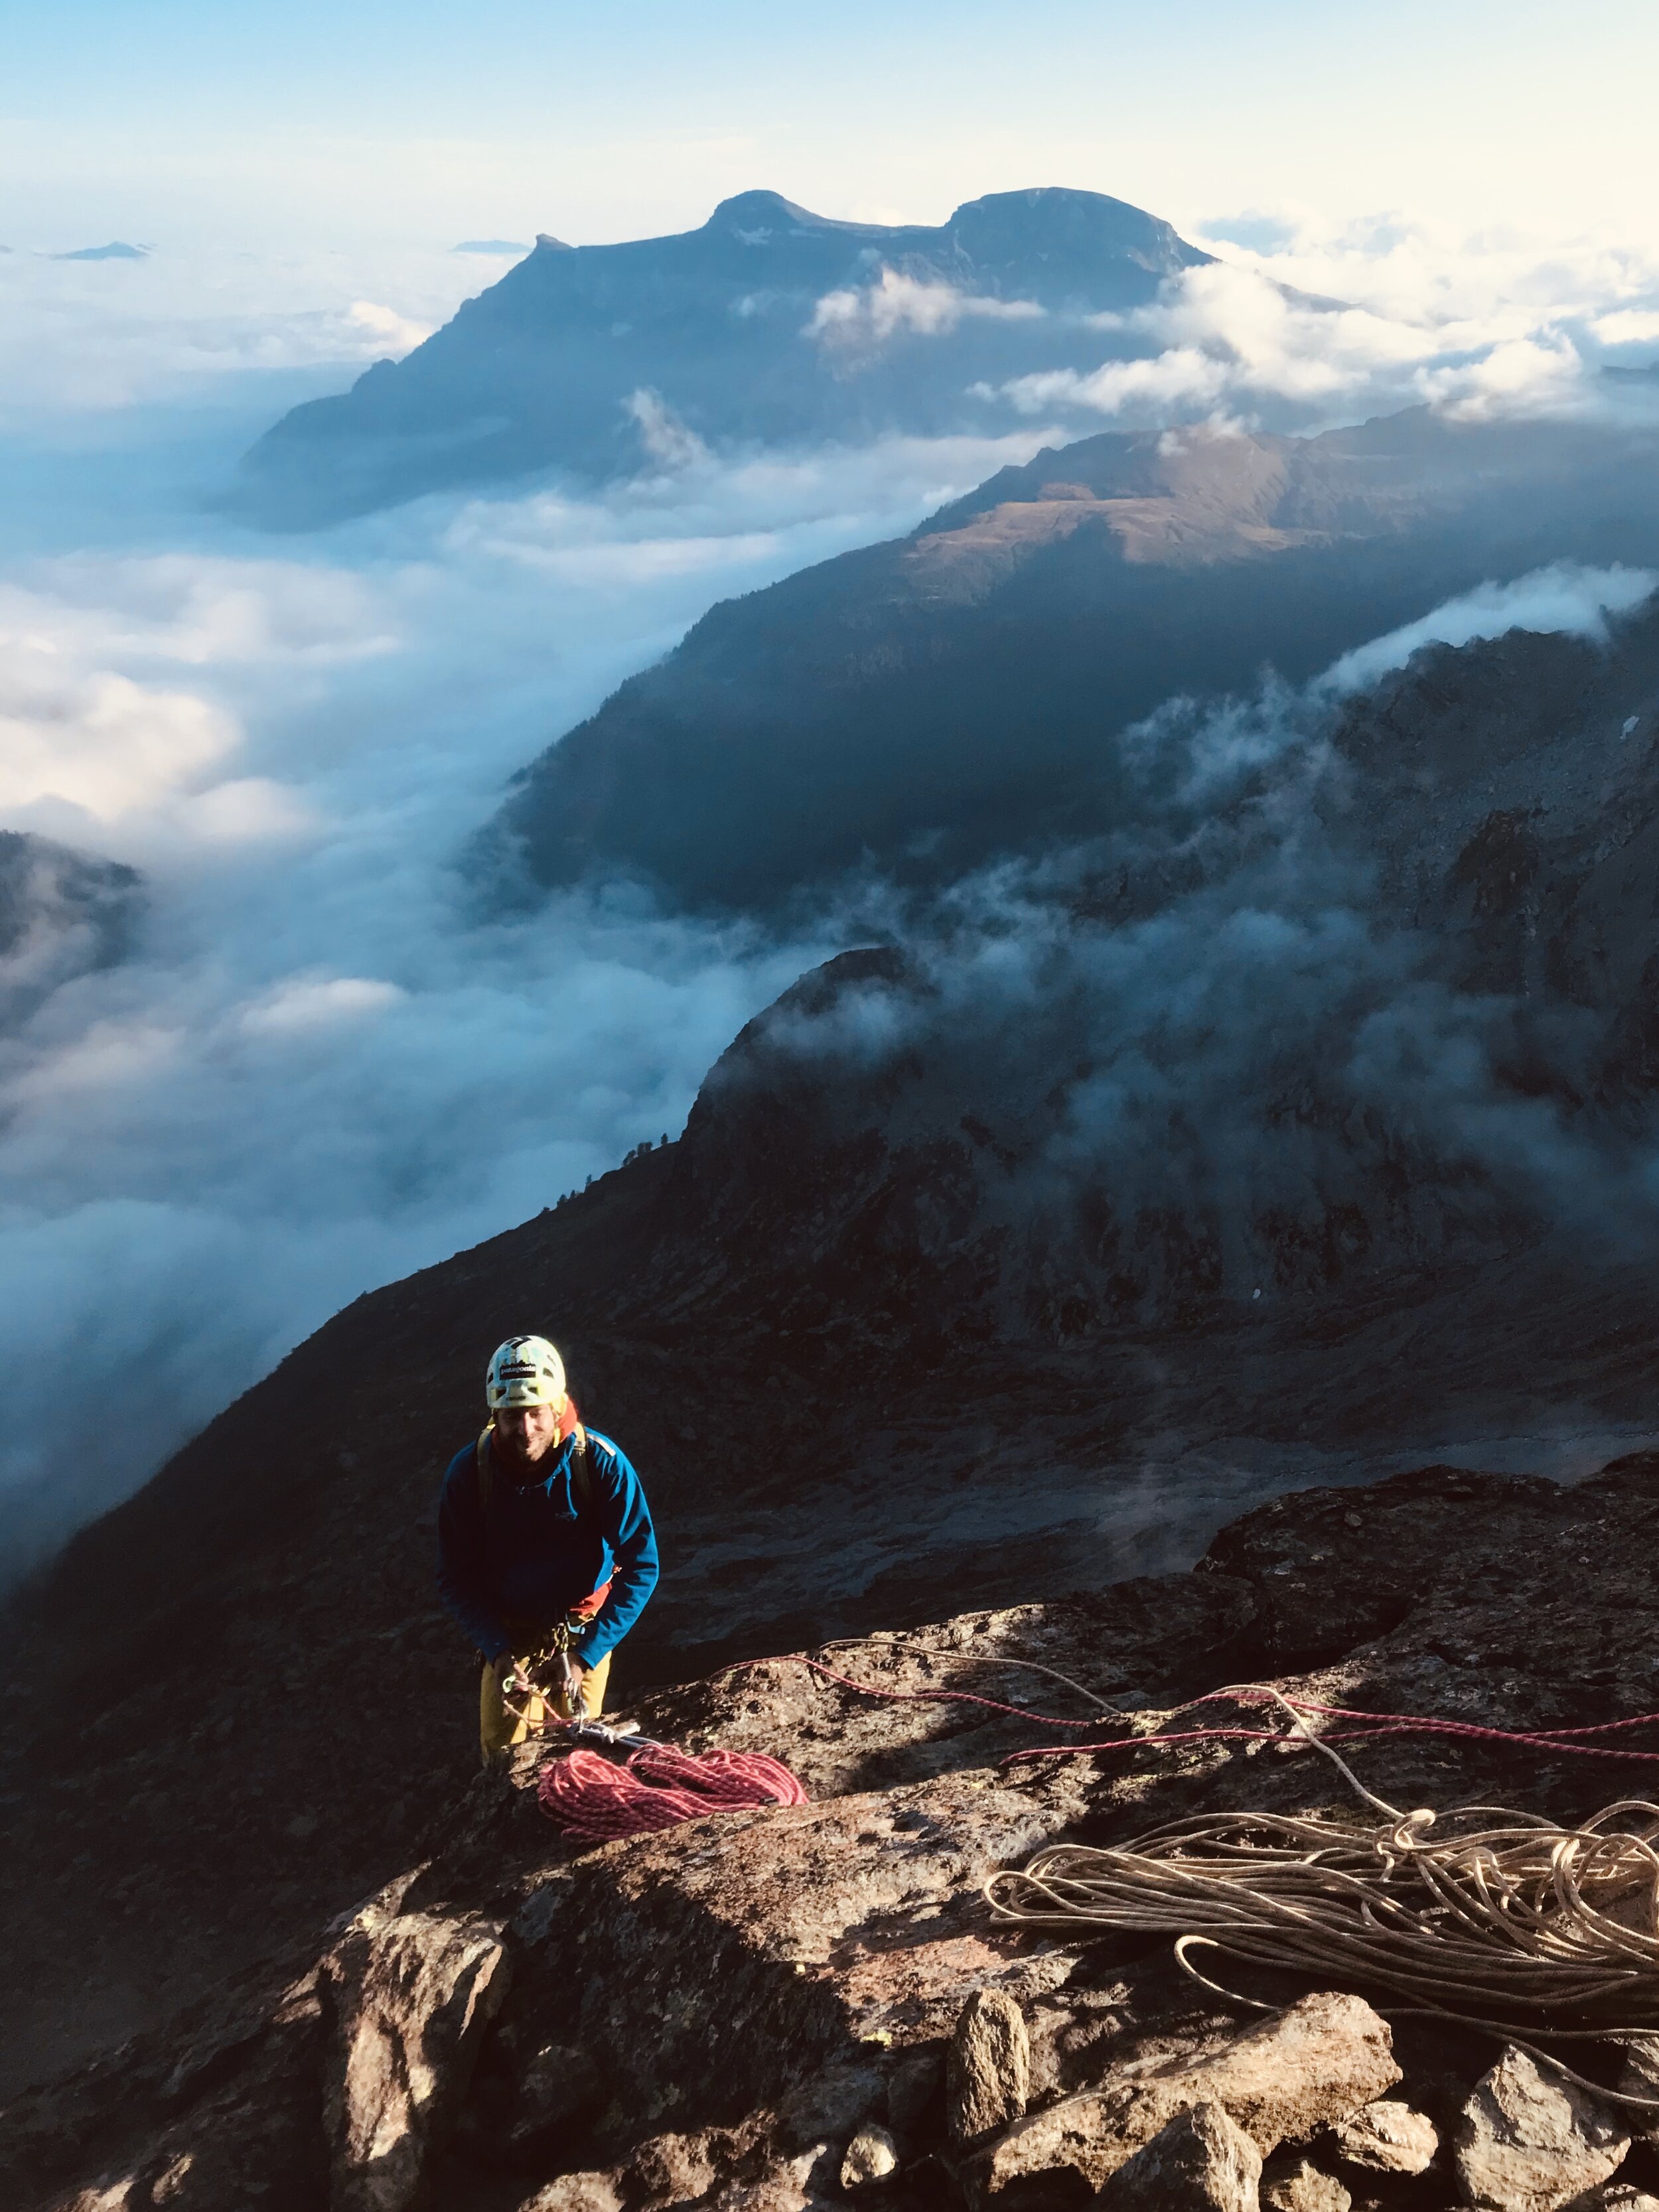
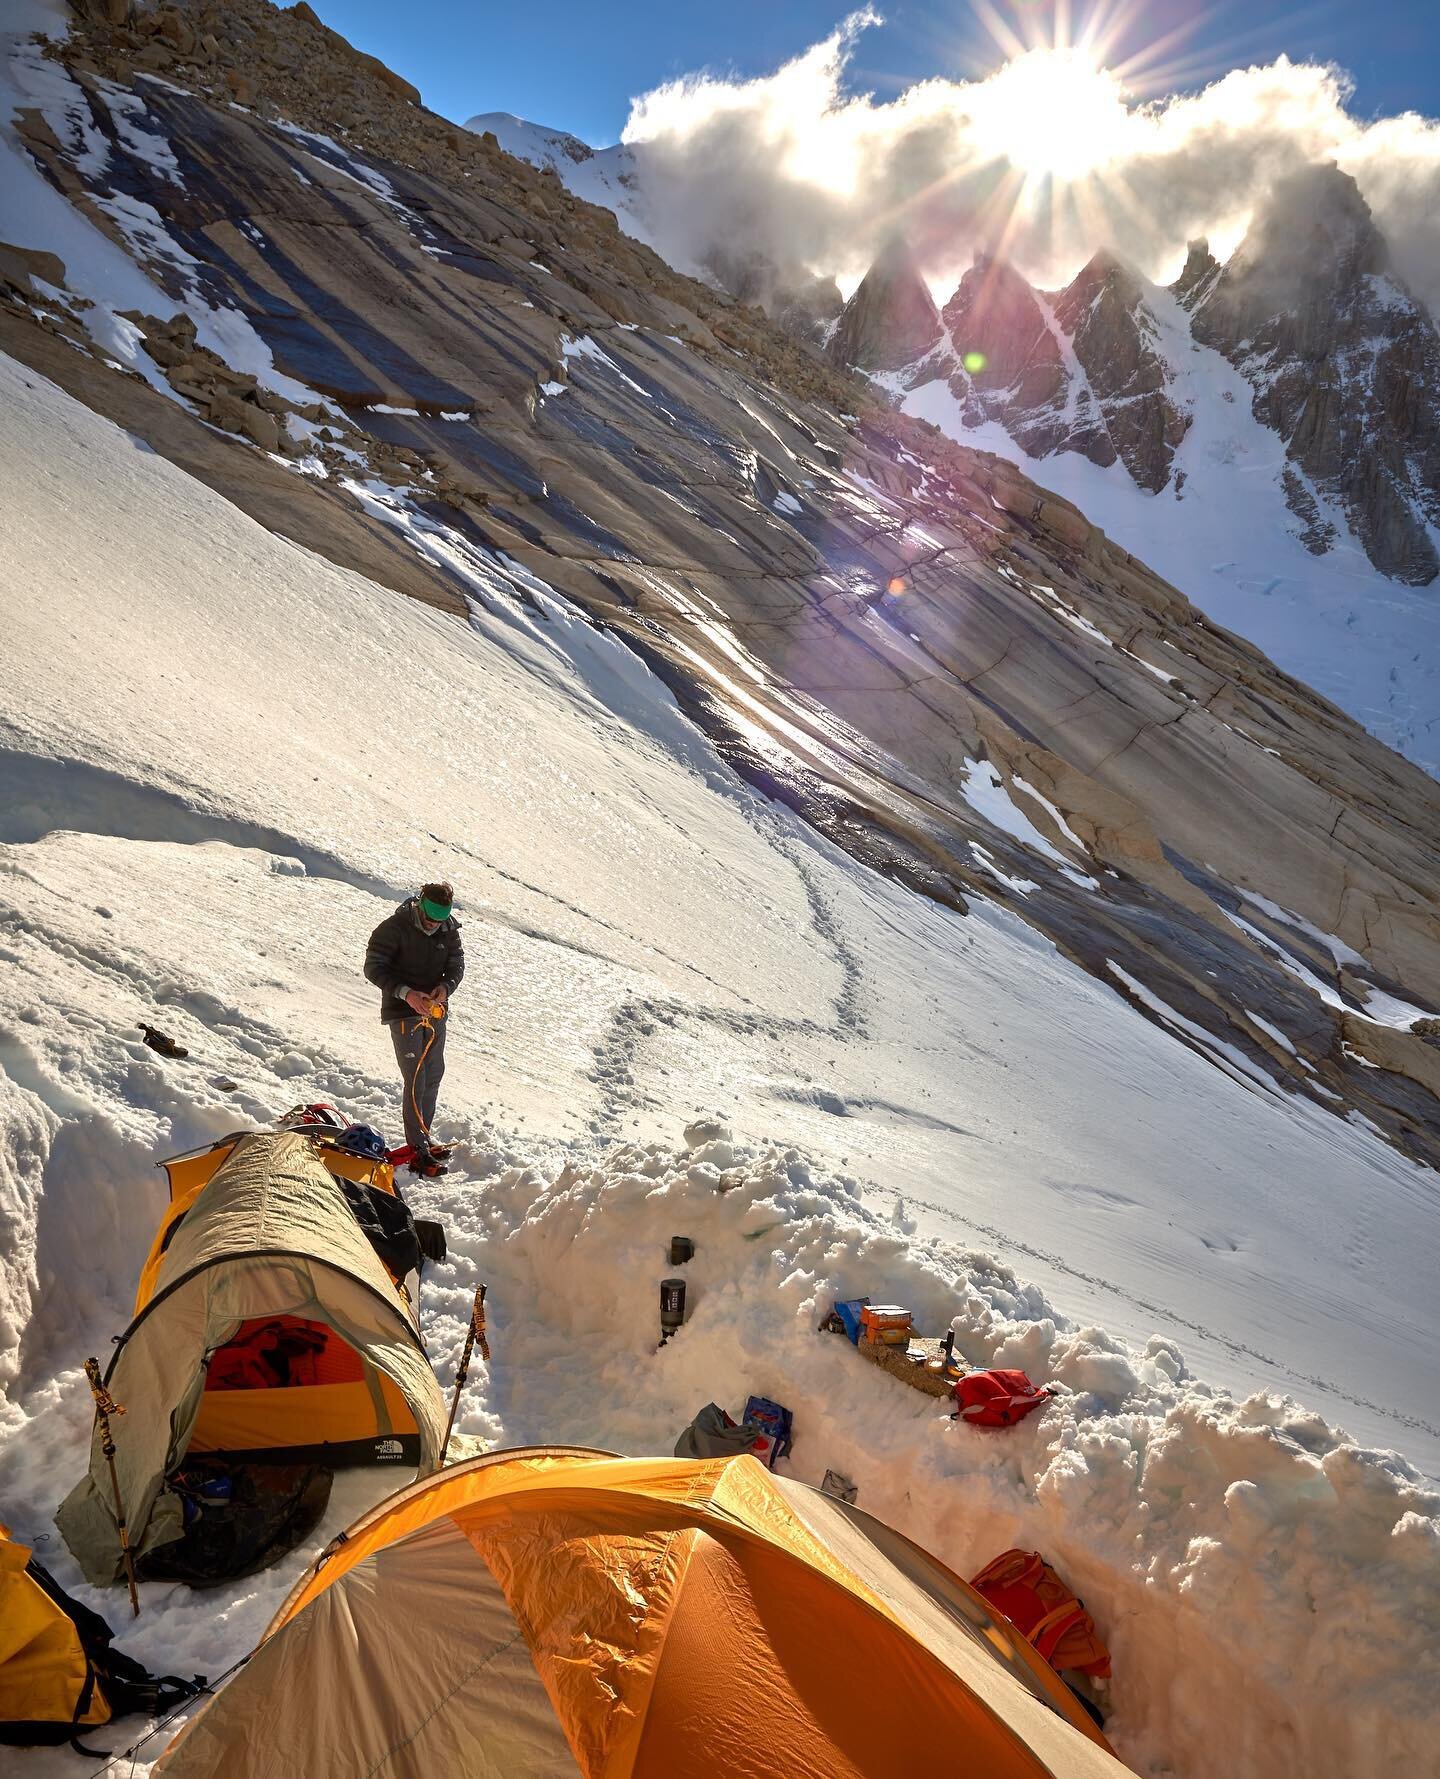
First abseil from Punta della Rossa, Alpe Devero, Italy. Shot on iPhone7
Over the years I’ve tried a lot of different cameras, from super lightweight compacts to bulky and super expensive medium format systems. I’ve shot amazing moments on my phone and lost the good light trying to haul 10kg of glass up on a wall. After many years of trial and errors, I finally have the answer you were looking for. It might be different from your expectations, but the good news is that you don’t need to buy anything expensive. You already have it in your pocket (or maybe in your hands).
Your smartphone camera is the best one you can carry in the mountains.
I think this can apply to most of the people you’ll find on the alpine, with the only exception being the ones who want to make big prints from those photos, but they are just a few. The majority just wants to create great photos to publish on social media, to show your friends or parents or to have memories of good times in the mountains.

Sunrise from Cresta Signal, Monte Rosa, Italy. Shot on iPhone11 Pro.
I know, you are disappointed by this statement, but I have some good reasons to say it:
today’s phones have cameras that are as good (if not better) than the first generation of DSLR. They can shoot videos and stills at outstanding quality with a good amount of control over your settings; in most cases now you can even select between multiple focal lengths, including ultra wide angles. Of course you can’t mount a 70-200 f2.8 on a phone, but the advantage of having virtually no weight (because I bet you would carry your smartphone anyway) is far greater than the limitations you get
the most important pieces of gear you will use to make a photograph are your eyes and the way you look at the world. It take a lot (and I mean a lot) of practice to push these little cameras to their limit, so before spending a fortune on a new DSLR or mirrorless kit try to improve your composition, the use of light, the way you position your subject in the frame, the moment you choose to capture. A bigger camera will give you more sharpness and more megapixels but won’t help with any of these points
one of the most challenging parts of shooting on a technical ascent is to keep your camera accessible. You don’t have the time (sometimes even the space) to take your camera from your backpack, so you must have it ready, and with a DSLR isn't always easy. On the other side, you can carry your smartphone on your chest pocket, always ready without even noticing it
by limiting your options when it comes to focal lengths and settings you will be forced to be more creative, and this will make you a better photographer. You will train your eye and your brain on how to create compelling images instead of relying on your brand new, super heavy zoom. Again, with a better camera you’ll get higher quality photos, not better photos
unless you’re really fit and constantly training for the mountains, you will want to carry the less weight possible. You’ll feel every gram, and you have to carry that backpack for many hours or even days. Does it make sense to put a couple kg of camera gear, if you’ll be too tired to take it out from your backpack when the moment will come?
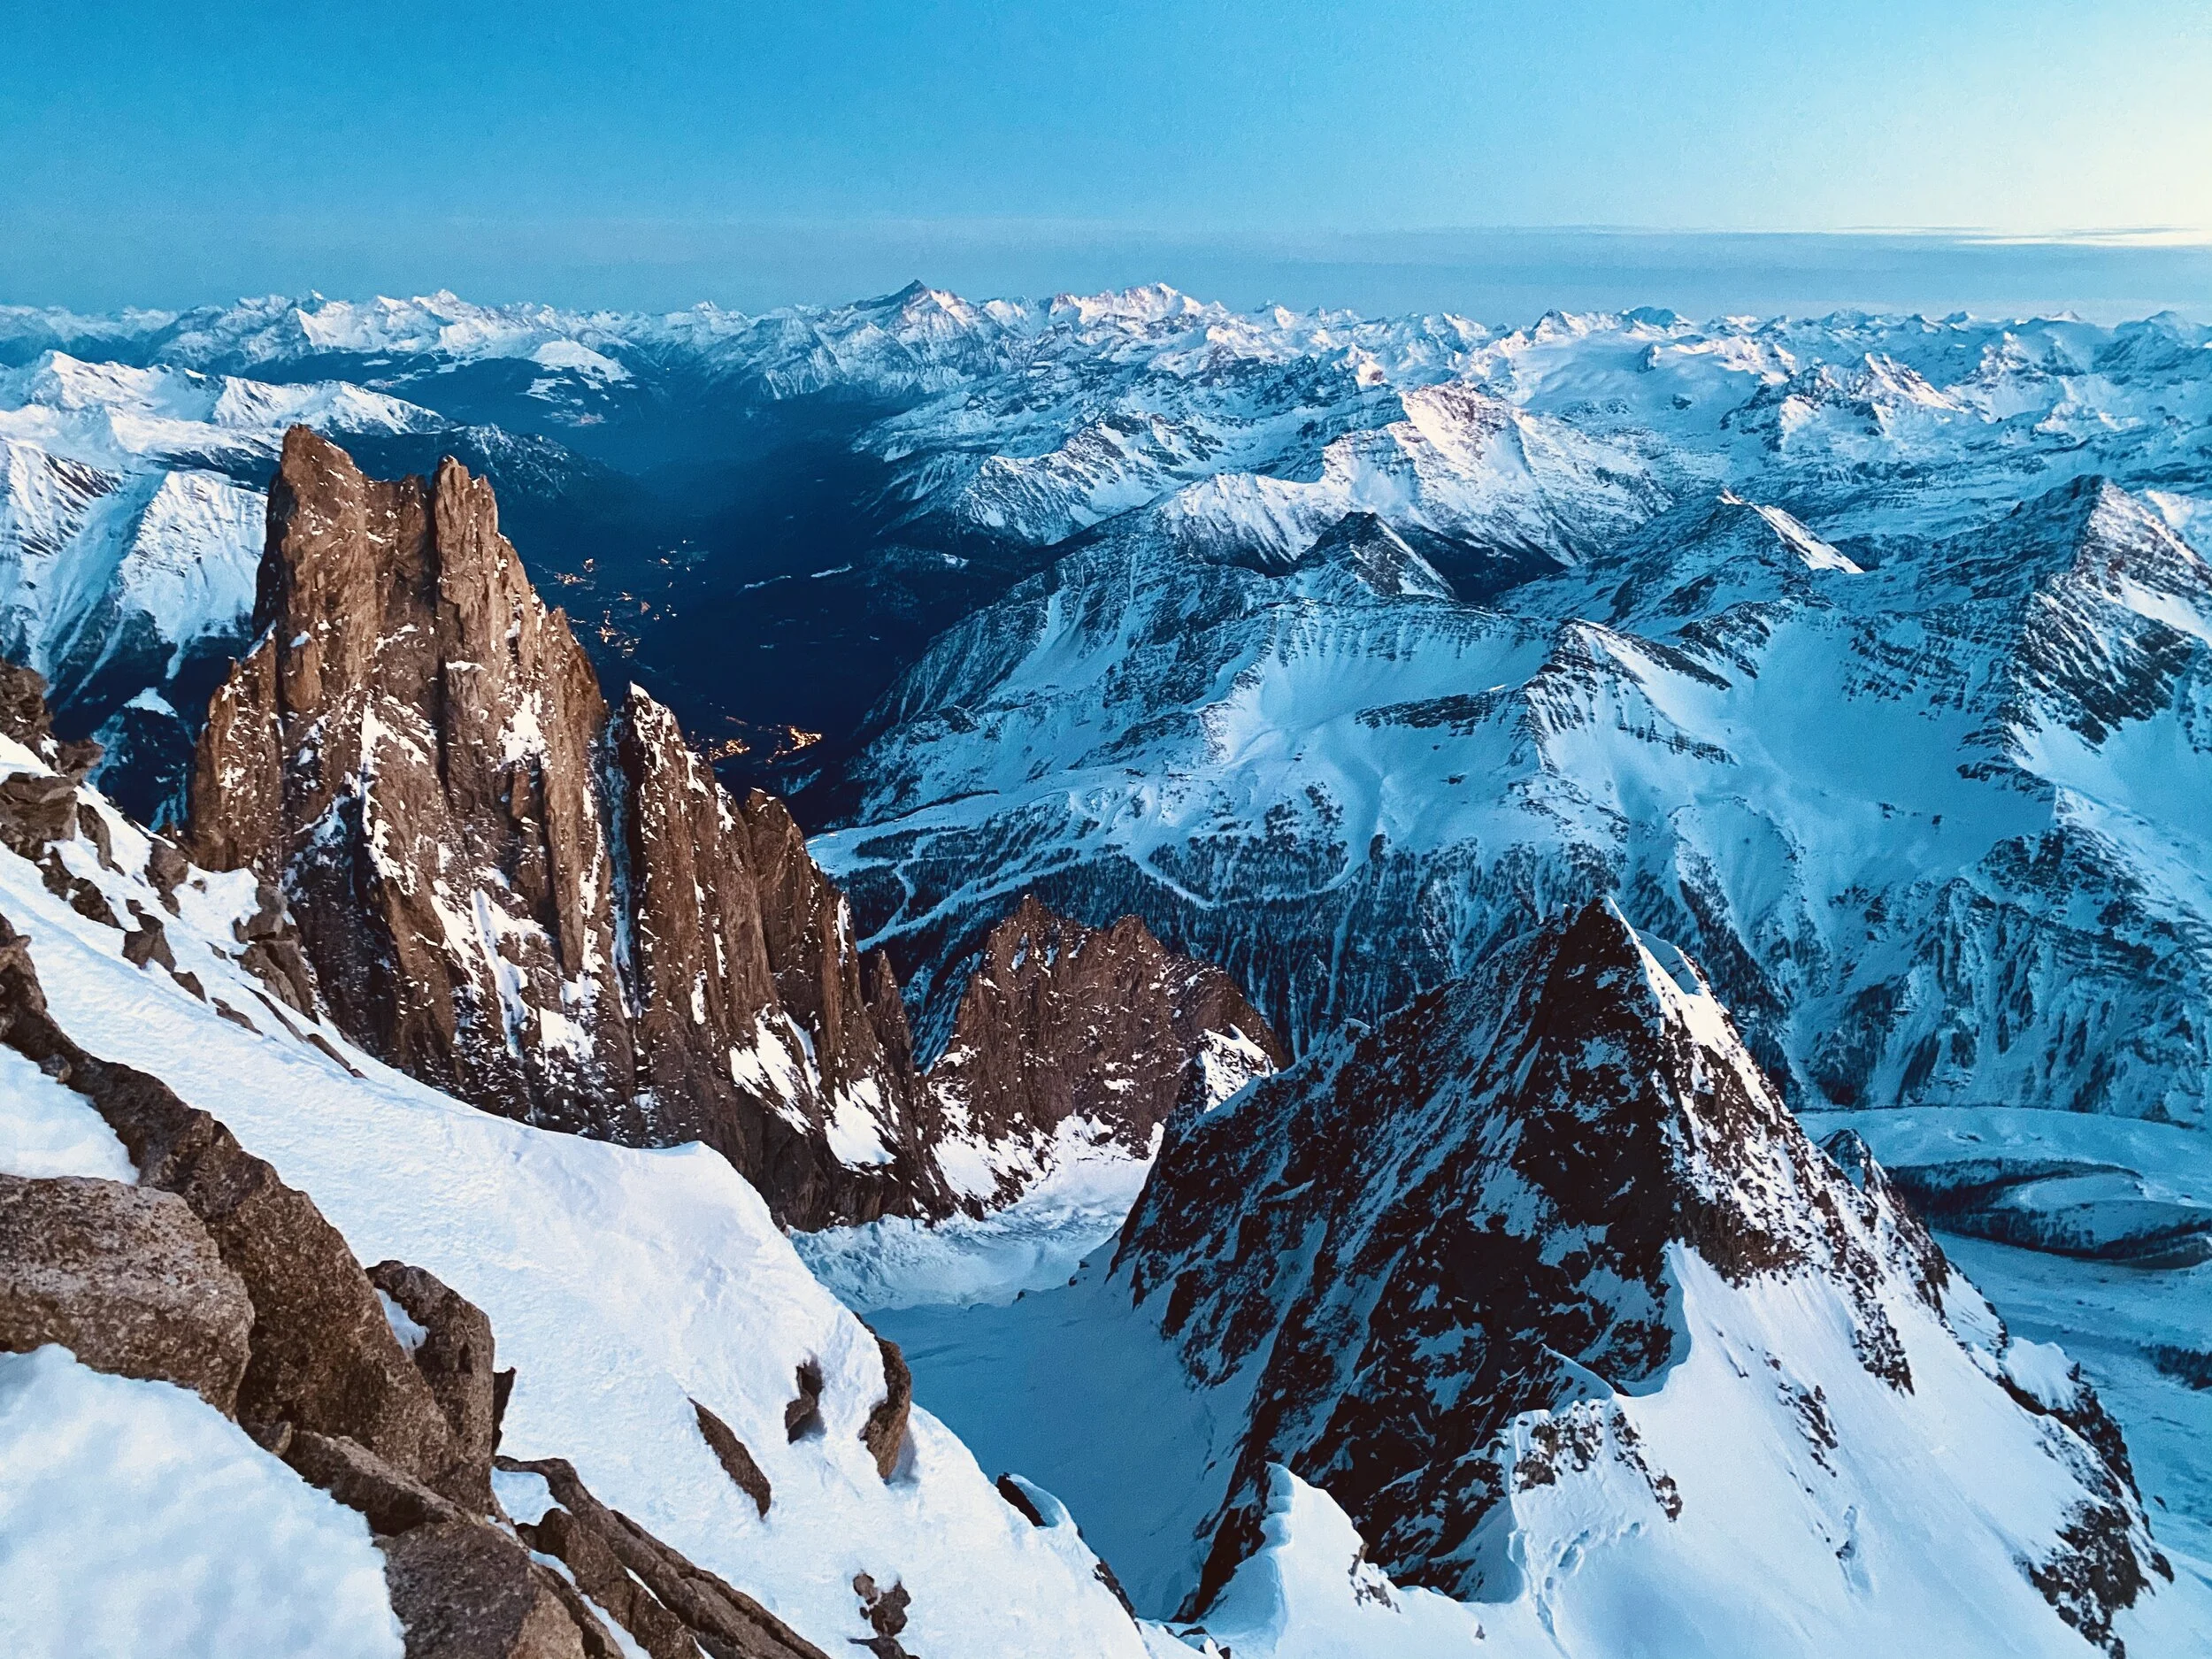
View from Eccles Bivy, Mont Blanc, Italy. Shot on iPhone11 Pro.
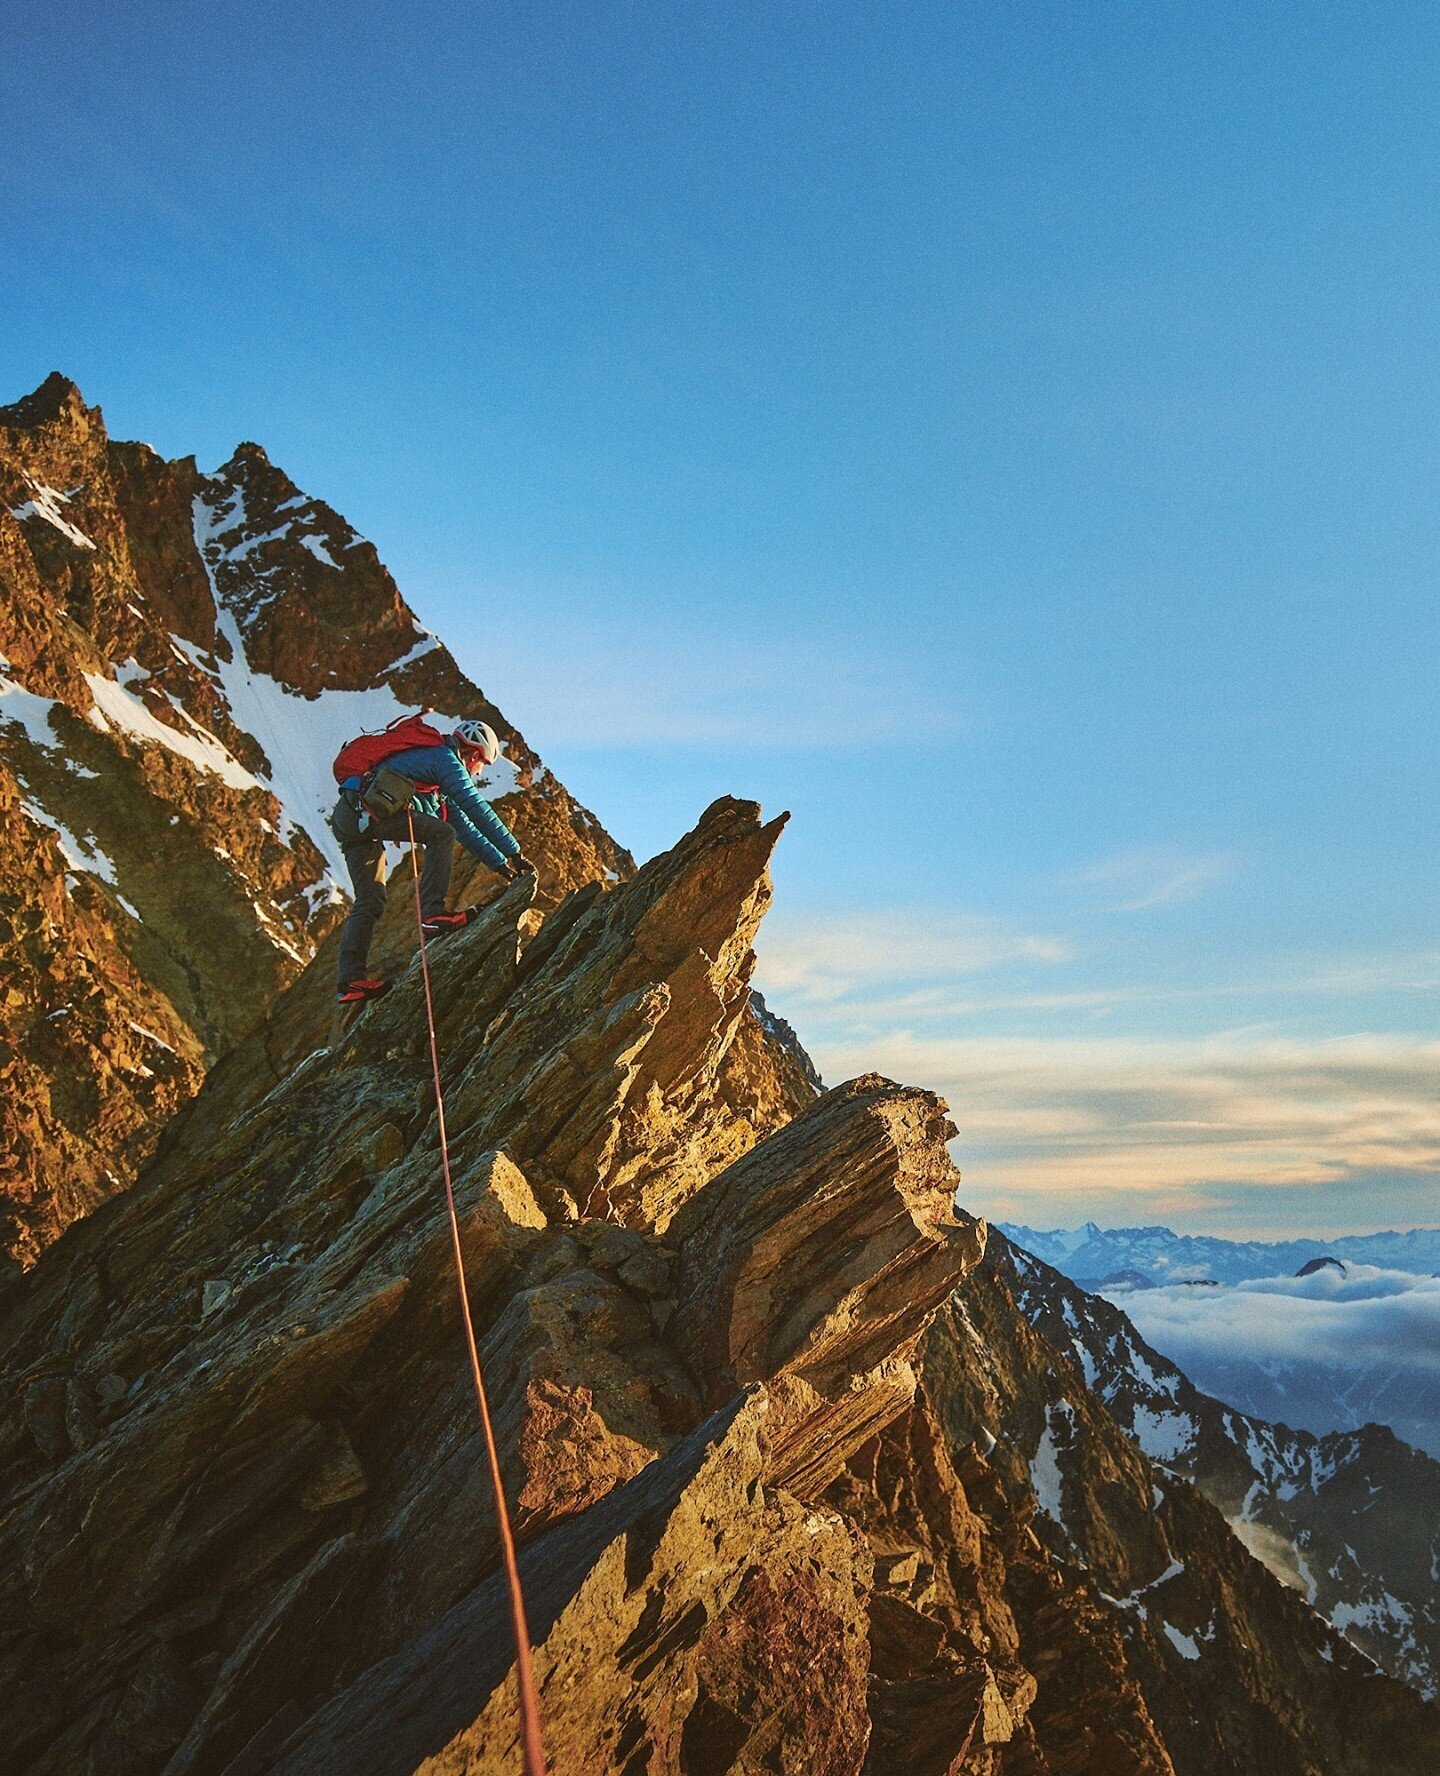
Next time you go for a mountain mission just take your smartphone and commit to use it. Take it out when things are getting harsh - most of the best shots happens there. Use it early, while you’re running up the ridge and the first rays of sun are hitting you. Use it late, when you’ll be tired and your brain will refuse to stop for taking pictures. Shoot a lot and try to be creative. When you’ll be happy with the photos you’re taking with your phone, you’ll be ready to evolve with a bigger photo setup.