
90% of the job is being there

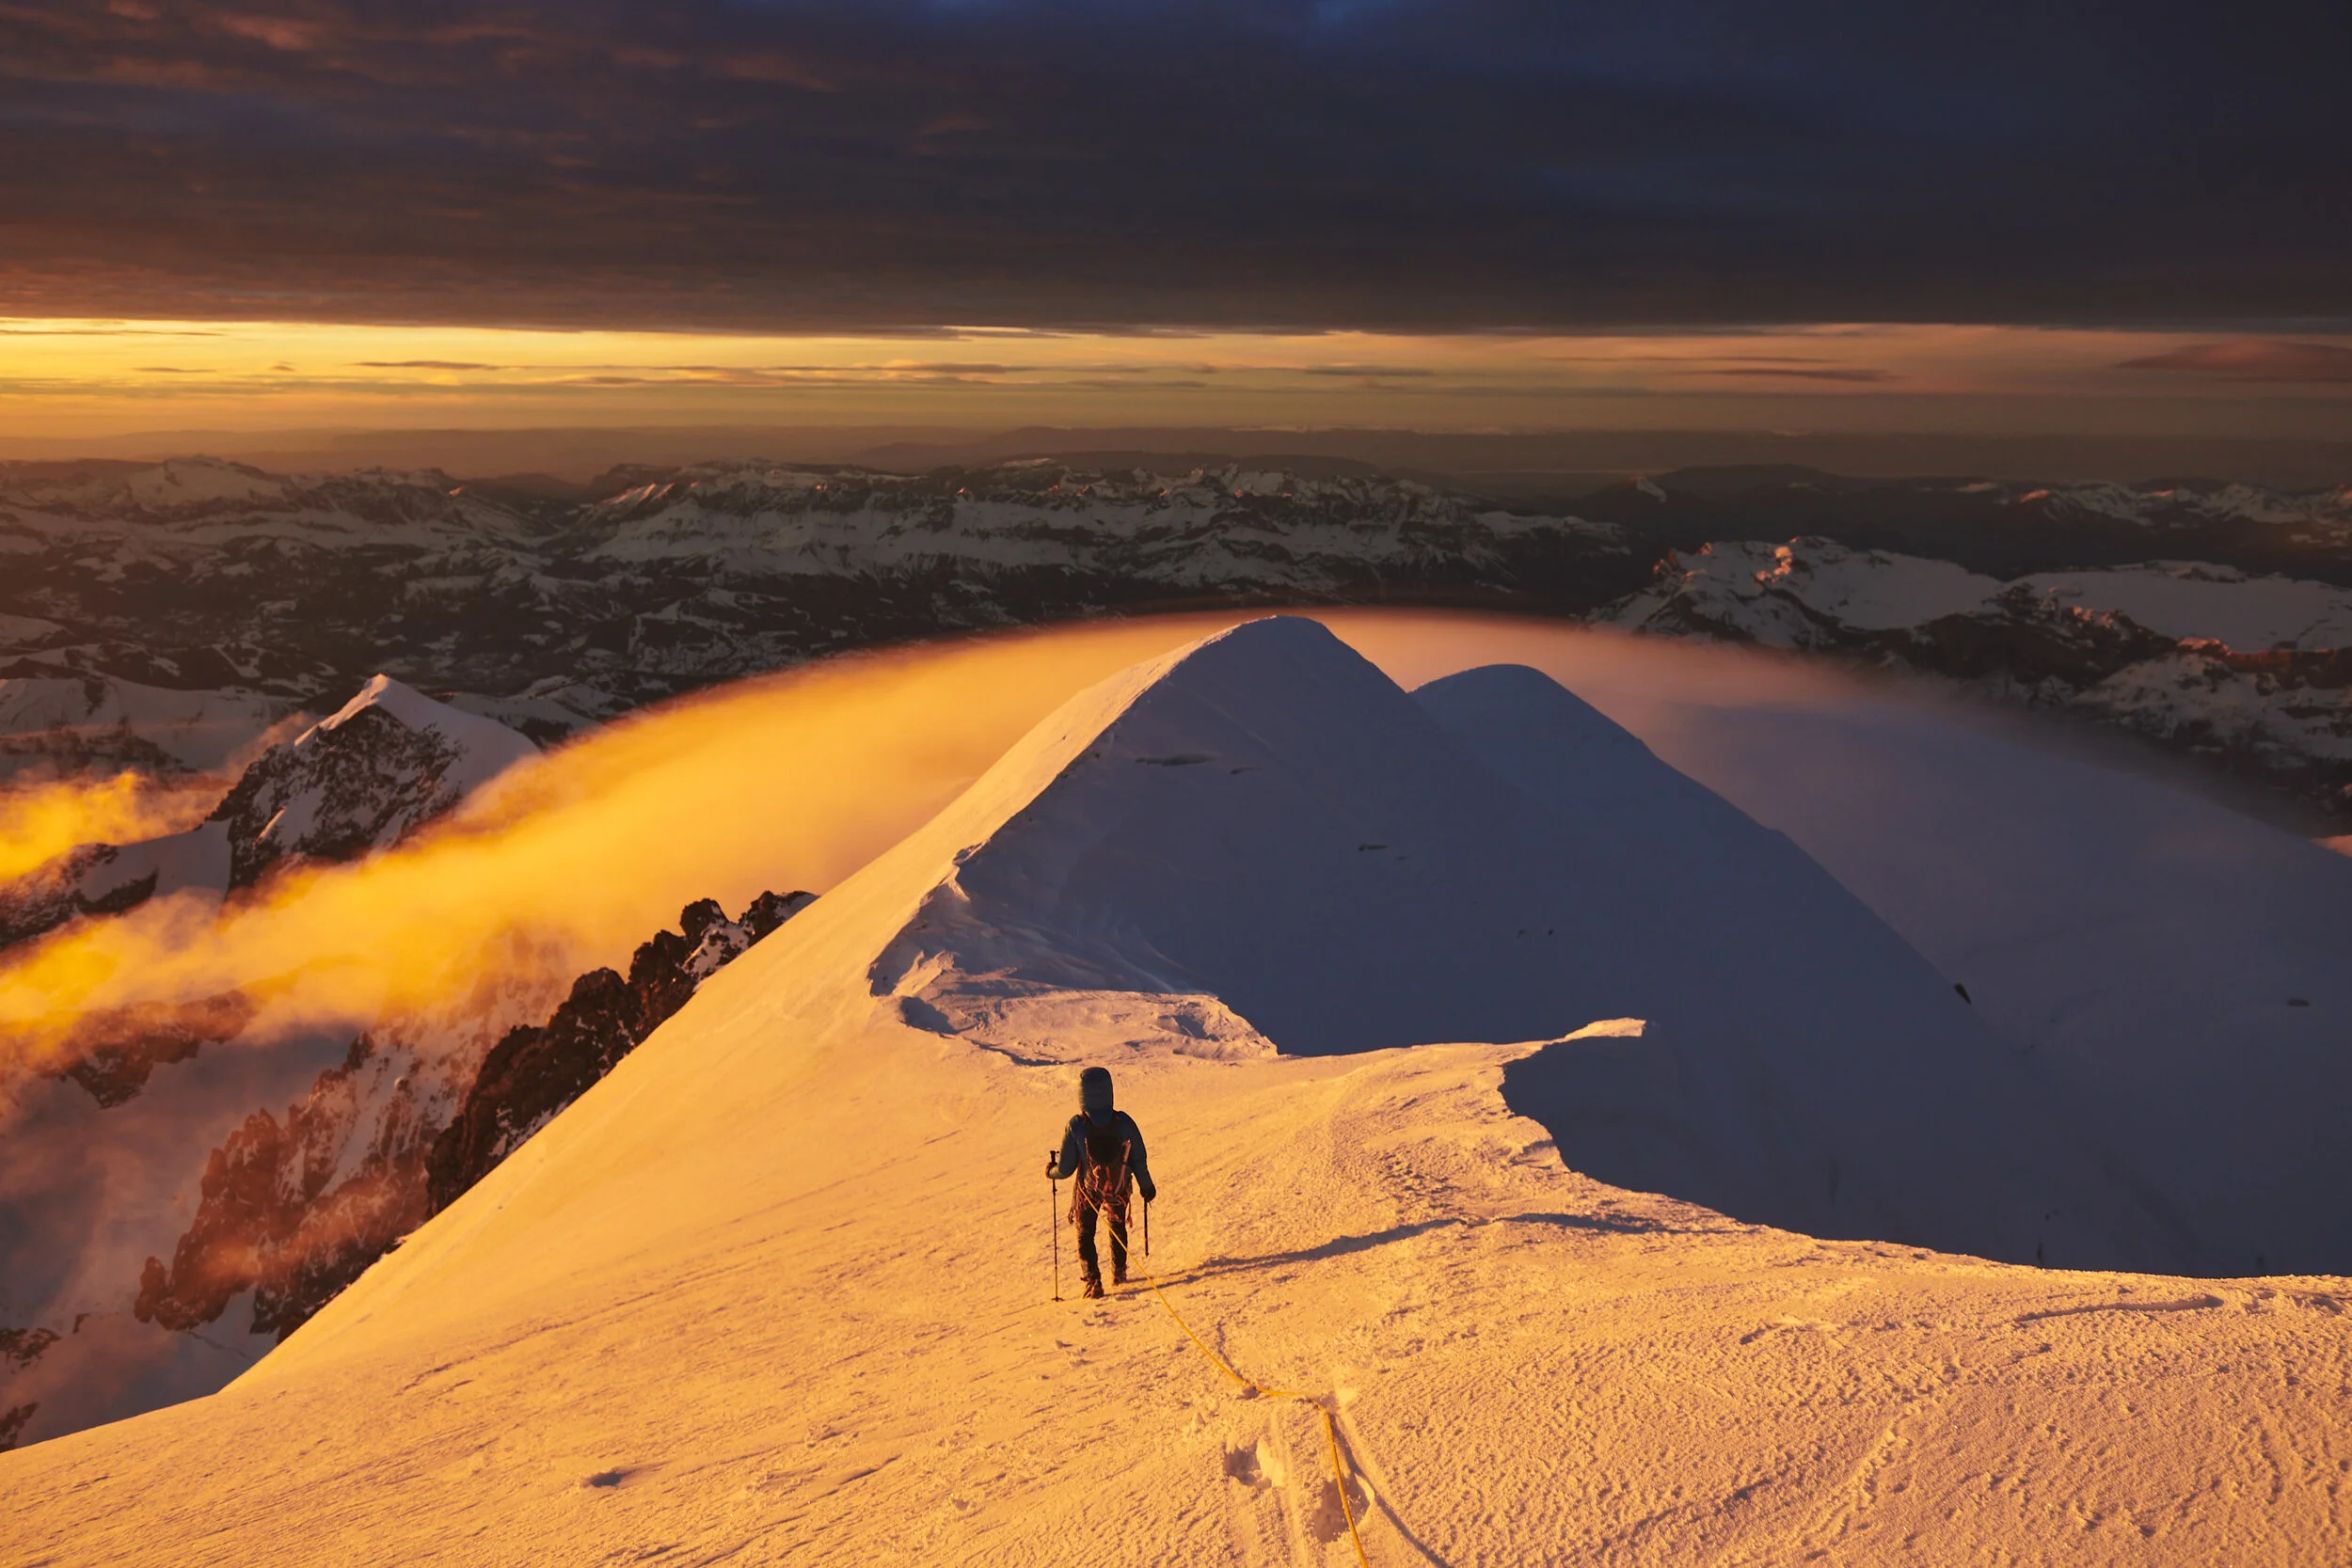
I shot this image as the first rays of sun came up. We spent a cold and sleepless night at 3000m altitude and got up when it was still dark to be in place at the right time. The previous evening I carefully scouted the location to find where the first light was coming from and how to position myself and the skier.
“If I was there at that same time, I would have taken that same photograph.”
I have heard a variation of this sentence more times that I can count. It is one of the more widespread beliefs in anyone who has a minimum of experience in outdoor photography: to get a great outdoor photograph you must be in the right place, at the right time.
Unlike many other preconceptions, this idea gets really close to reality. Outdoor photography is not taking place in a studio, where you have full control over lighting and composition. We don’t have strobes and softboxes…well, sometimes we have them too, but that’s another story. Our main light source is always either the sun or the moon; our light modifiers are clouds, fog, mountains and any other natural feature that reflect or shade the light coming from the sun. It appears obvious that we cannot move the sun as we would move a strobe on a light stand. We can’t even trim the power down one stop, or put another diffusion layer in front of it to get a softer light. We have zero control over our lighting.
So all the good outdoor photos that we see around are happening by chance? Not really. The vast majority of them comes from a savvy and accurate planning. Because it is true that we do not have the power to change anything about natural light, but it is also true that we can predict how this light will be, and when. We can know accurately where the sun will be at a given time in a given day and how the shades will fall on the landscape. By looking at weather forecasts we can understand how the sky will appear: clear, cloudy, foggy, rainy…all of these cases will affect the light quality in a different way. It is true, we do not have any chance to adjust ambient light to our needs, but with our experience we can know in advance when we will have the light we want.

Golden hour happens twice a day…we went up for the sunrise but yes, there’s also sunset. We left a bit earlier from the valley floor in order to have some spare time and make the most of the evening light.
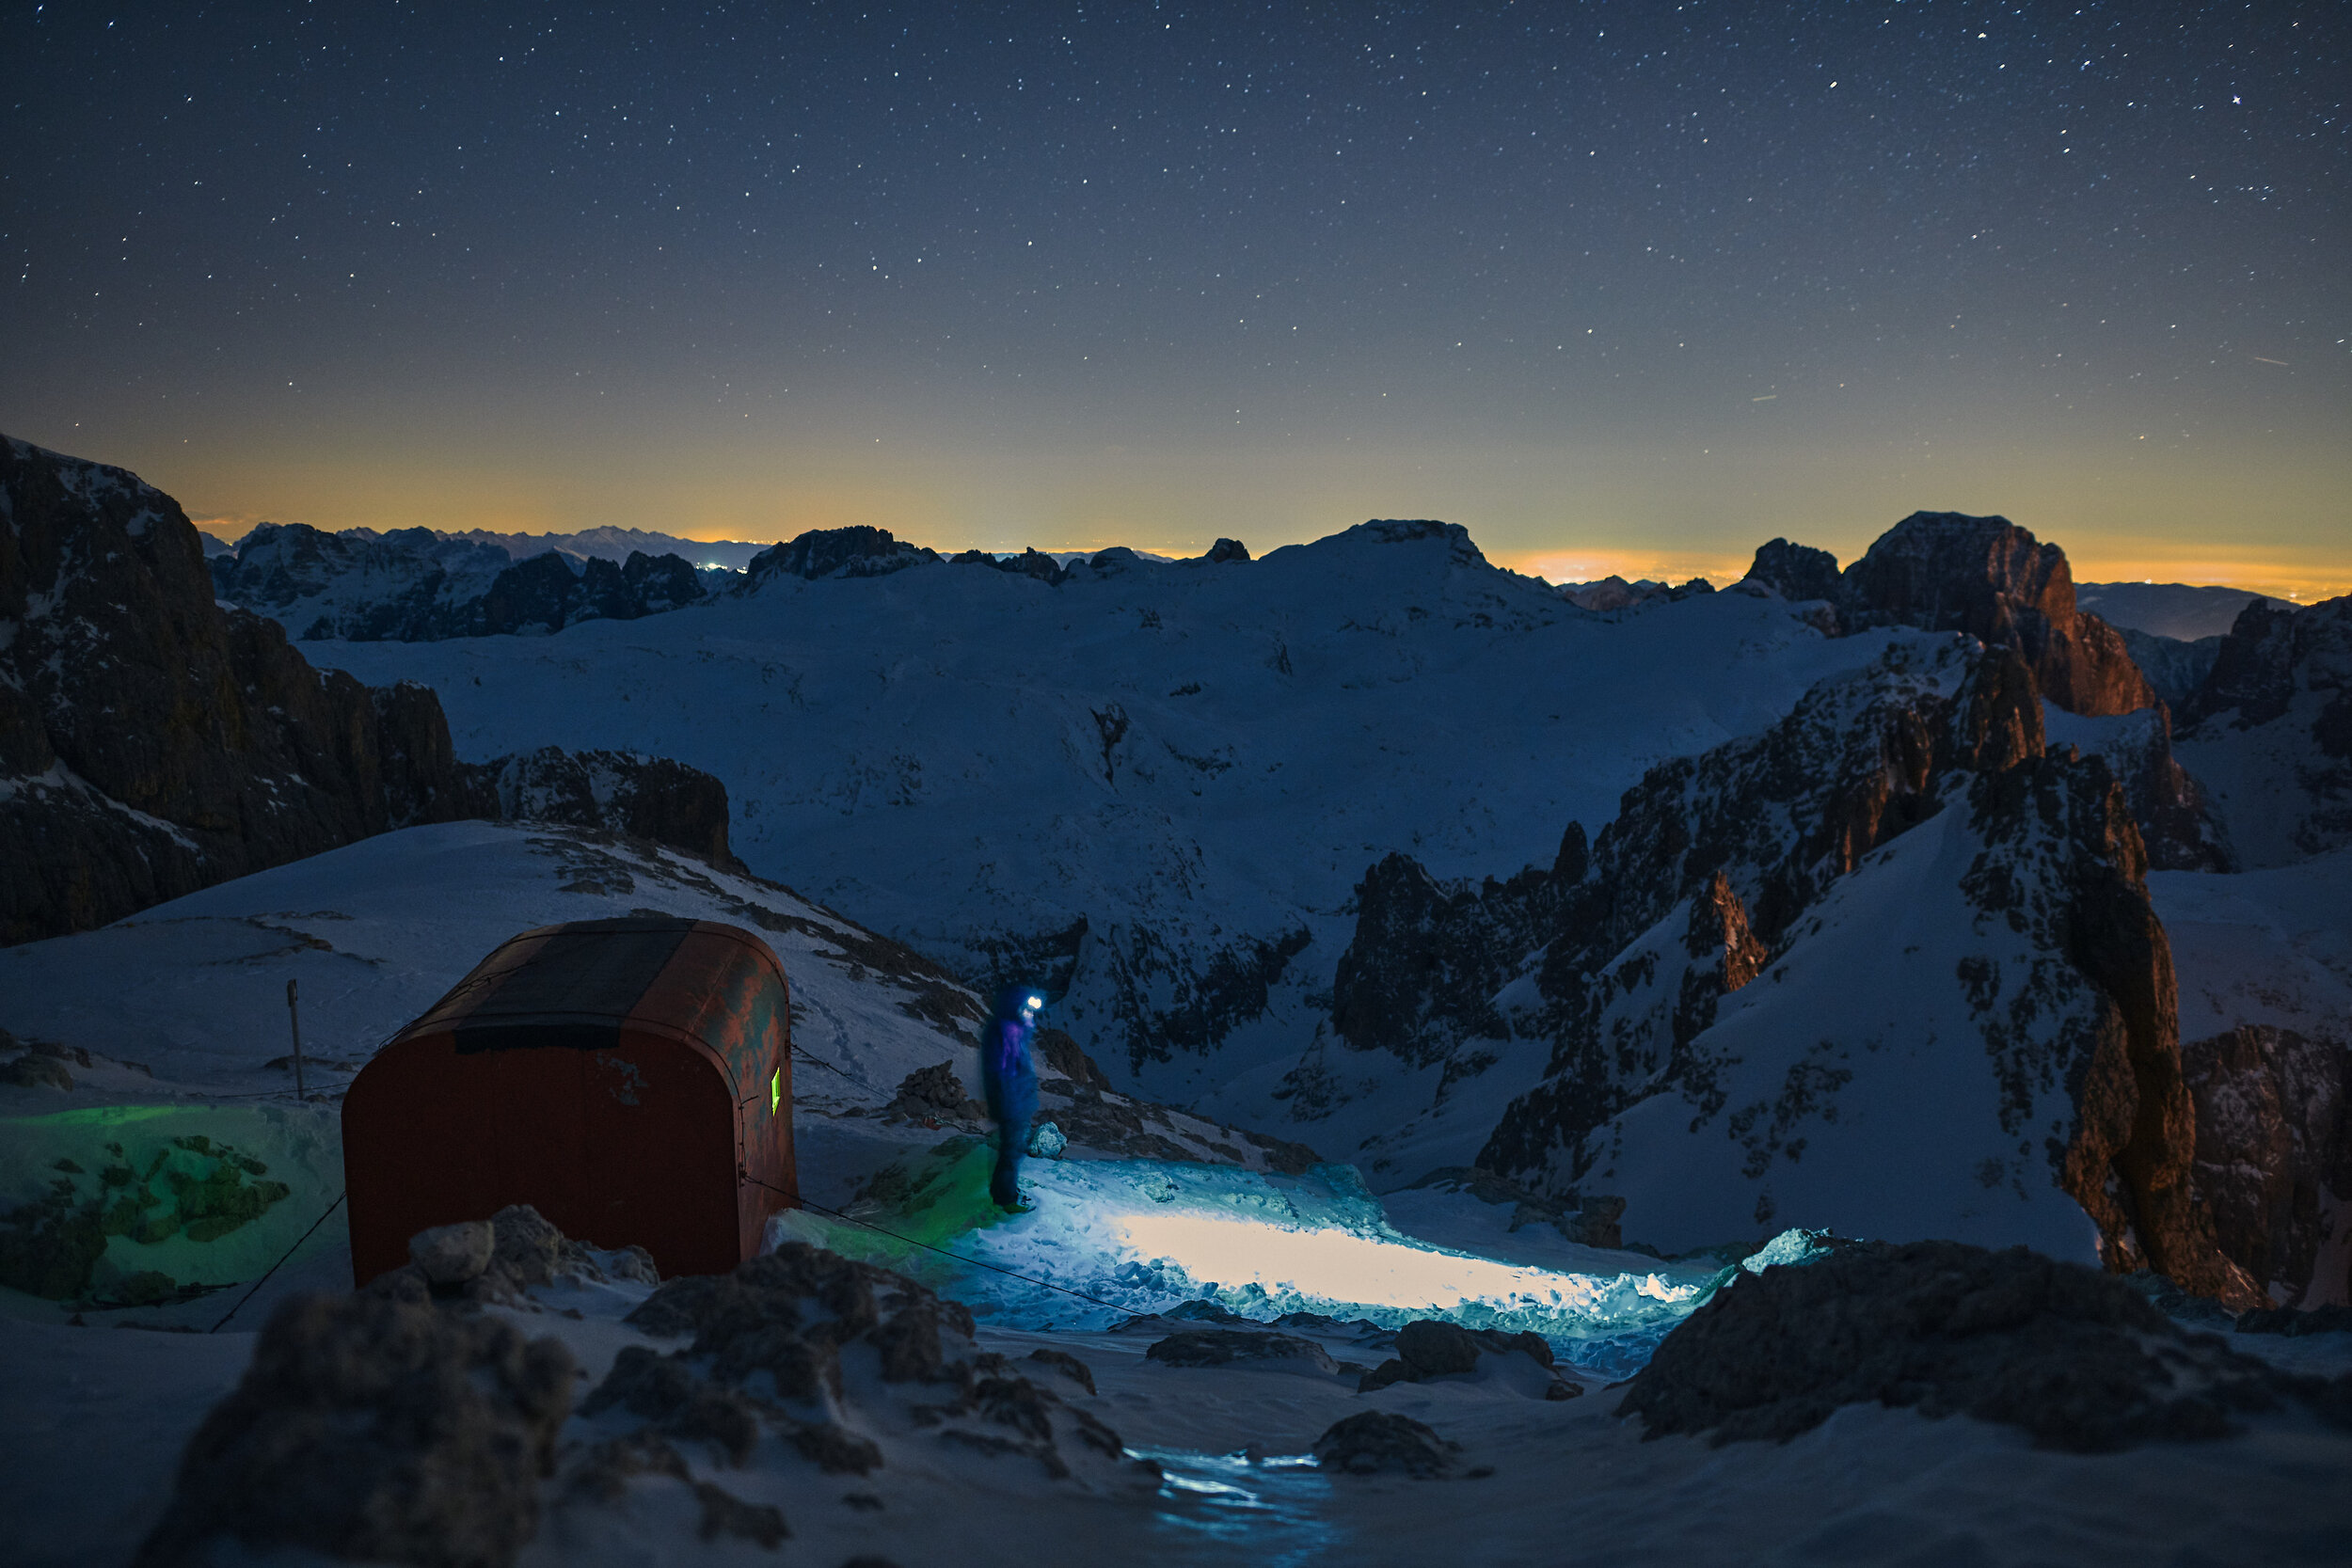
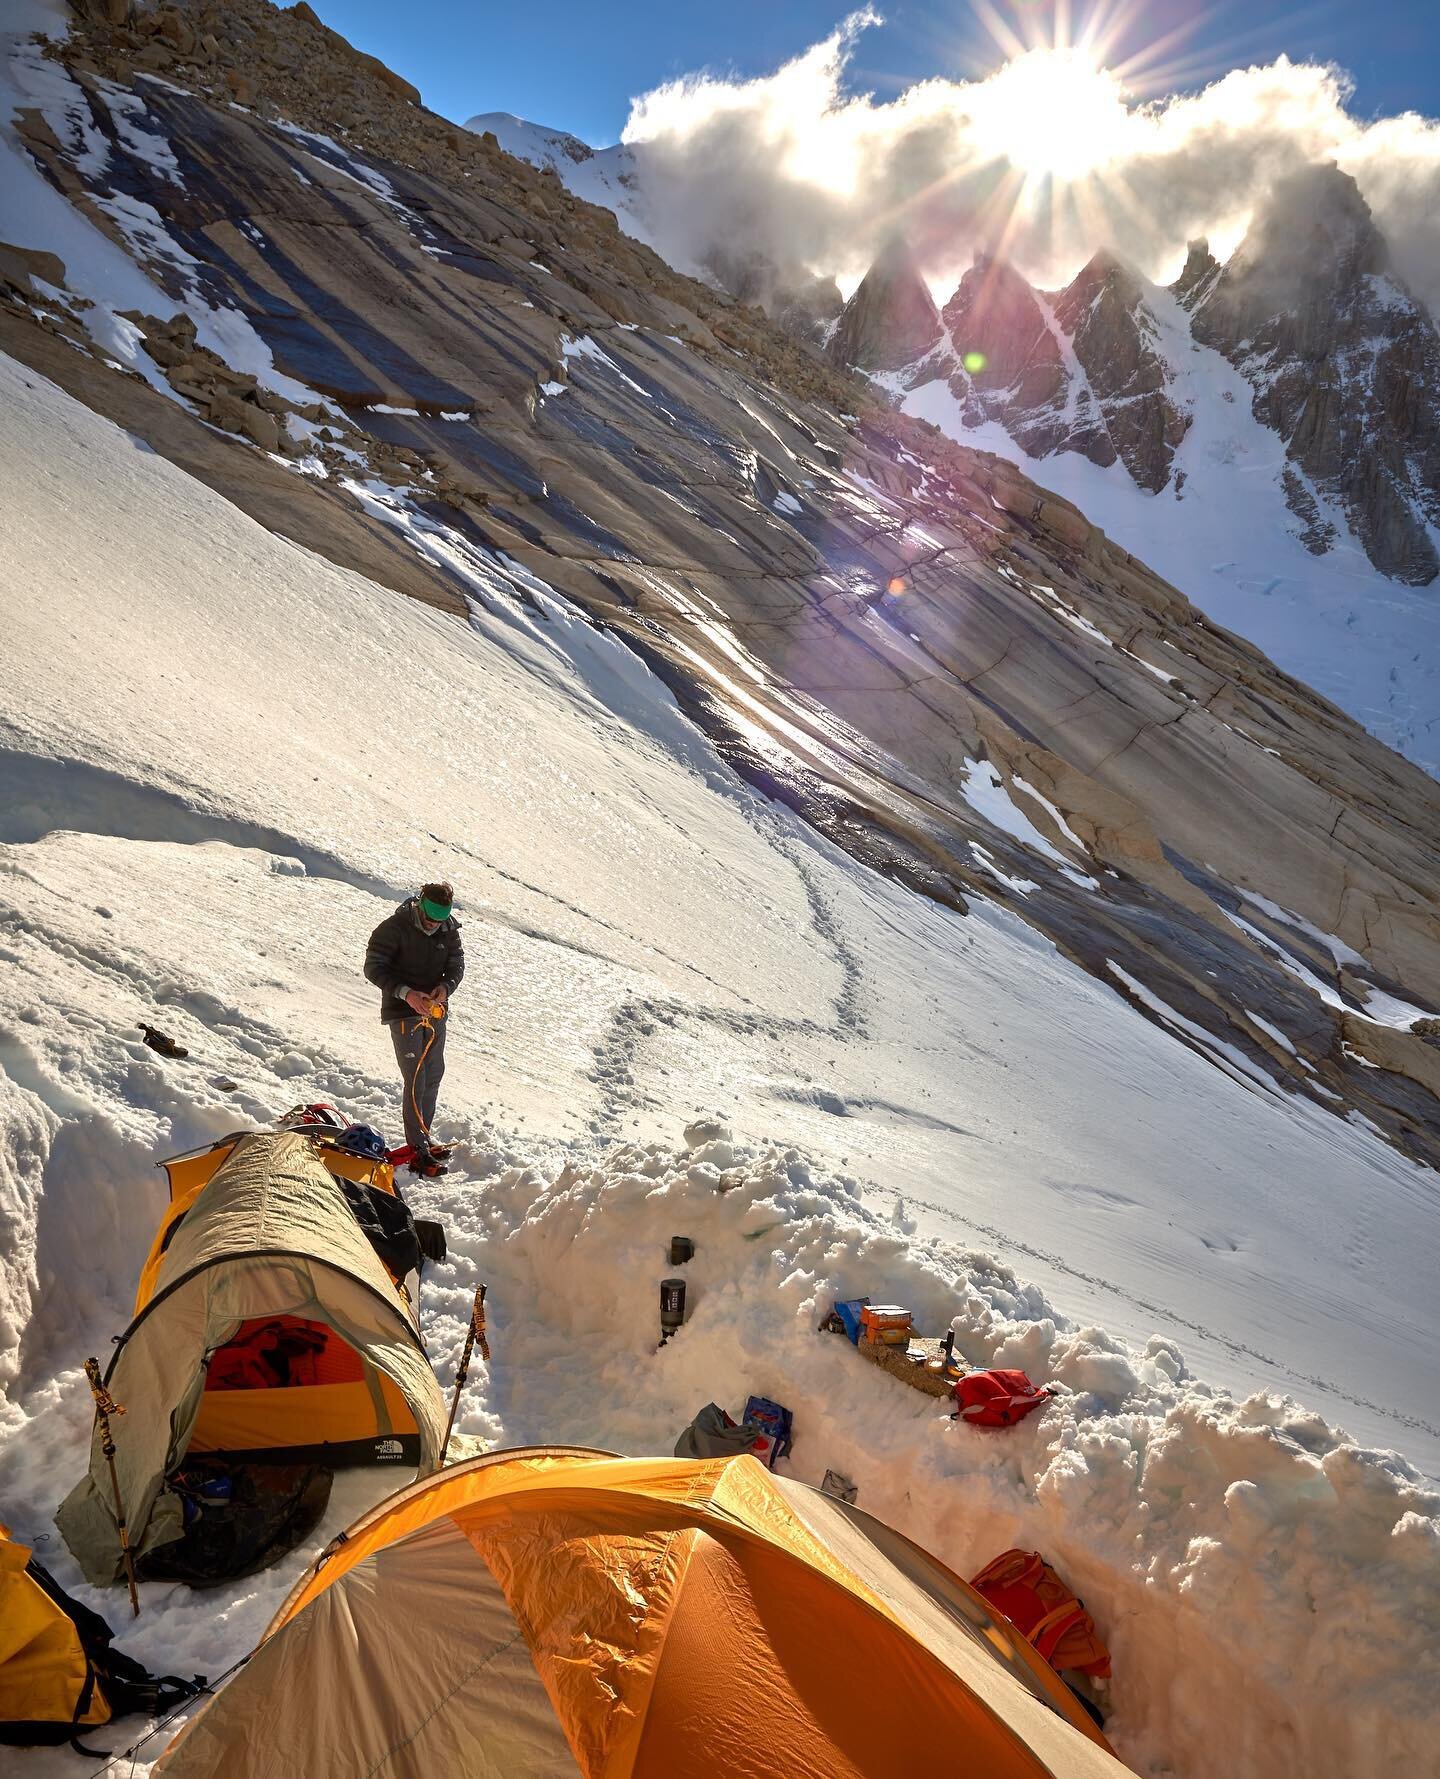
Too often people don't realize what’s behind an outdoor photo. Between sunset and sunrise (when I shot the two images above) we spent a cold and uncomfortable night in this small shelter.
Ok, we have the light. Now what?
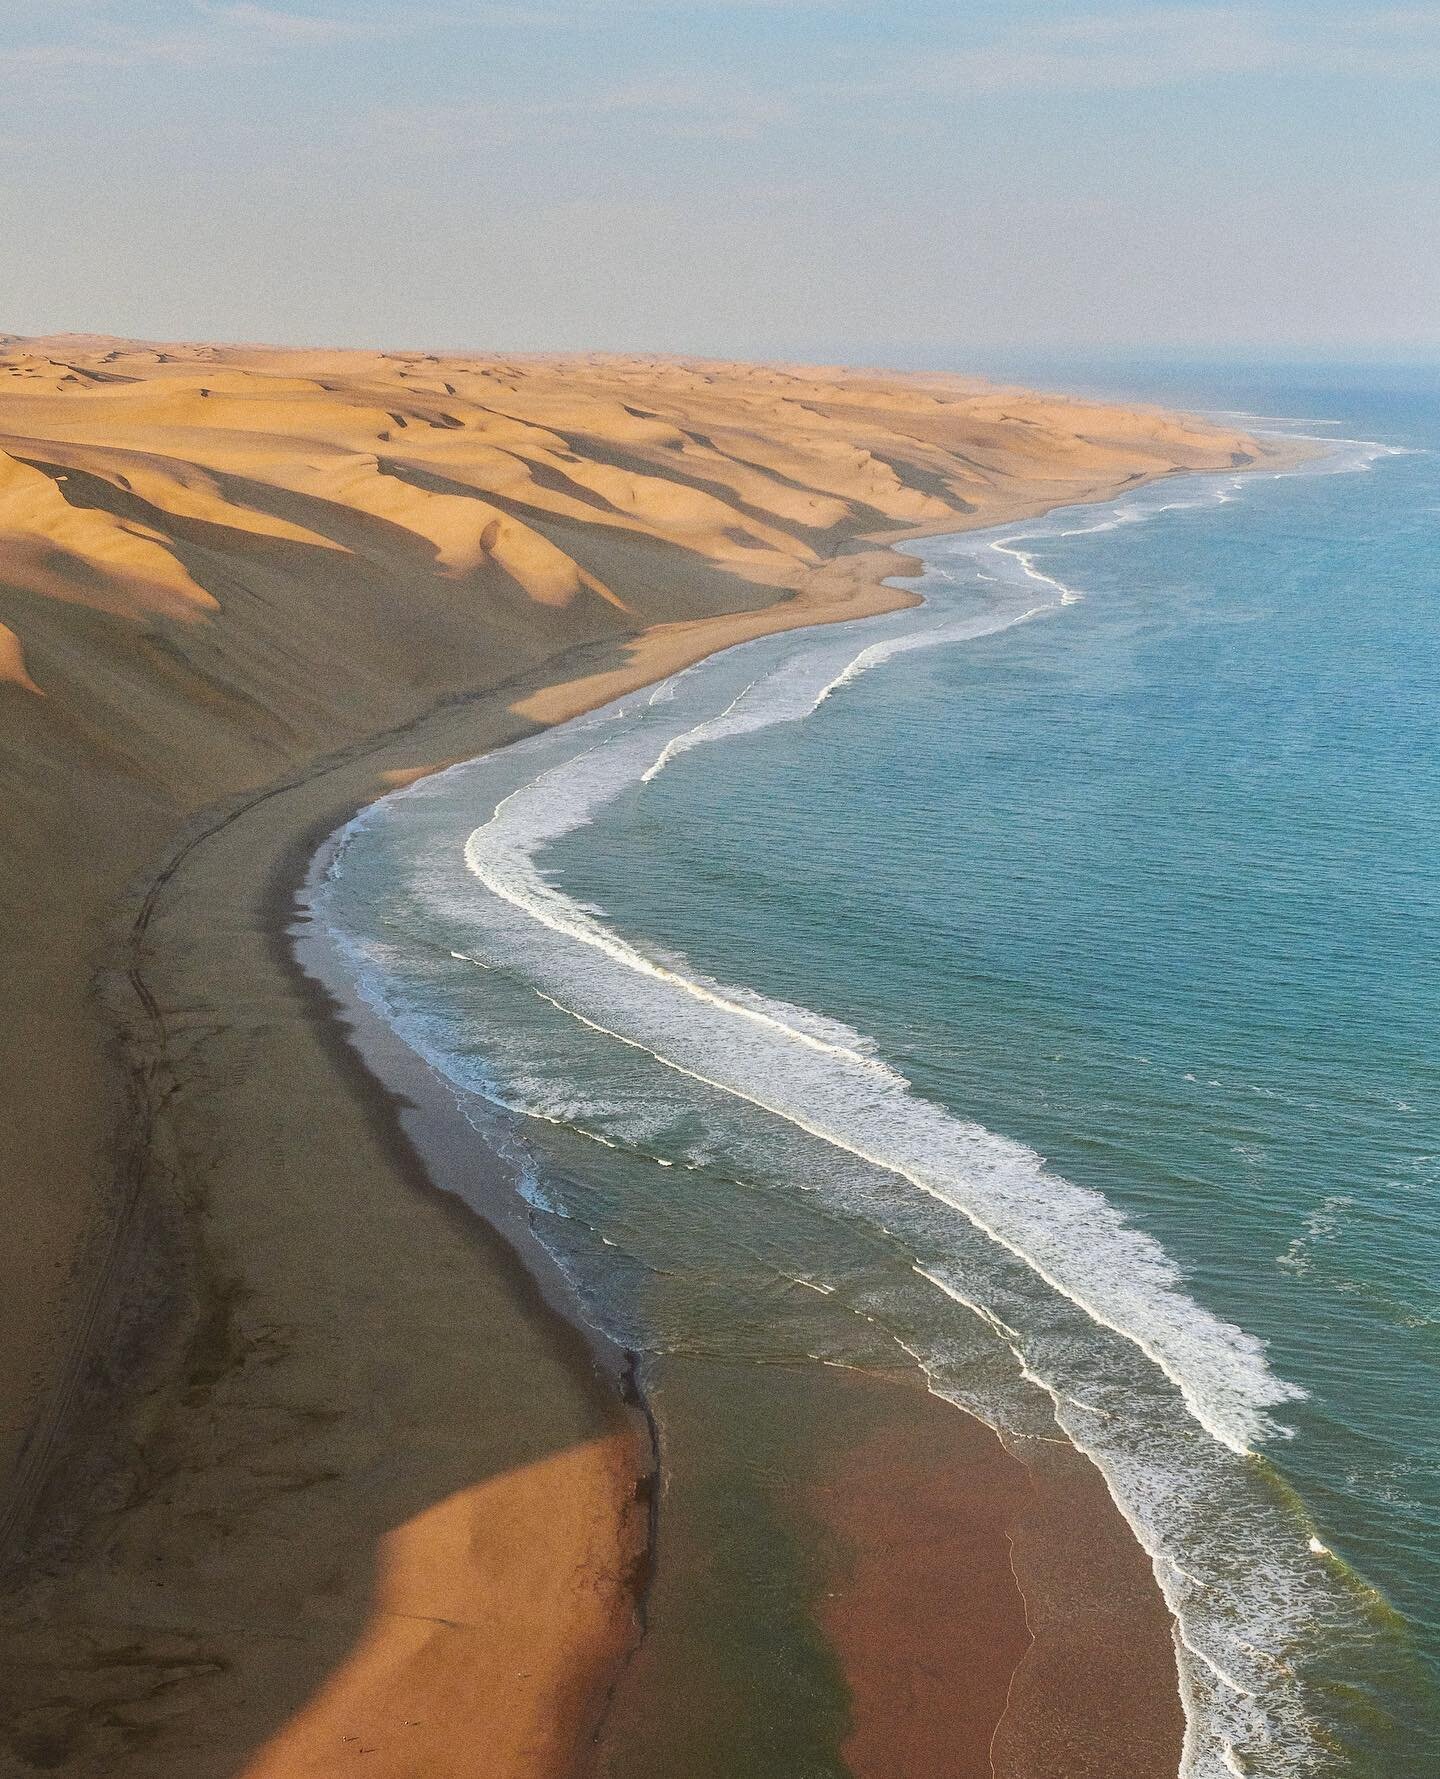
Another huge piece of the puzzle in outdoor photography is made by the location. Let's face it: there are places that are simply more photogenic than others. If you get up on a ridge at 4500m height in the Alps you have better chances of creating visually interesting shots than you could do in an average, flat place on the valley floor. Yes, there are some amazing photographers around who are capable of creating incredible photos almost anywhere. The chances of you being one of them are pretty low though (nor am I, at all). What we can do is to research and find mountain features, angles and point of views that we know will translate into a compelling image. These kind of locations in outdoor photography, especially on the mountains, are usually quite far from the beaten path and often really difficult to reach. The reason is simple: all the easiest and obvious spots are already over photographed. Some of those spots offer world-level views (think about Tunnel View or Glacier Point in Yosemite, Braies Lake, Seceda ridge, Trolltunga…the list is long) and they are more than worth the photos they get. The problem is that there’s not creativity anymore. Thousands of photographers are shooting that same image not because they envisioned it the same way but because they saw someone else’s work and just went there to do the same. They reverse the creative process, trying to understand what someone else already did to get that result. Although this approach is not new it has been growing tremendously in the past decade thanks to the social media and Instagram in particular. There are places so insta-famous that the trails are now eroded by the people walking there to take a snapshot…I digress, sorry.
Back on locations, since the accessible and easy to find ones are overseen, you must look further away. Be prepared to walk hours, to sleep outside, maybe to deal with technical difficulties to reach the place you choose. It is a lot of effort. And you have to do it timely, when the weather and conditions will create a light which is as close as possible to the one you envisioned.

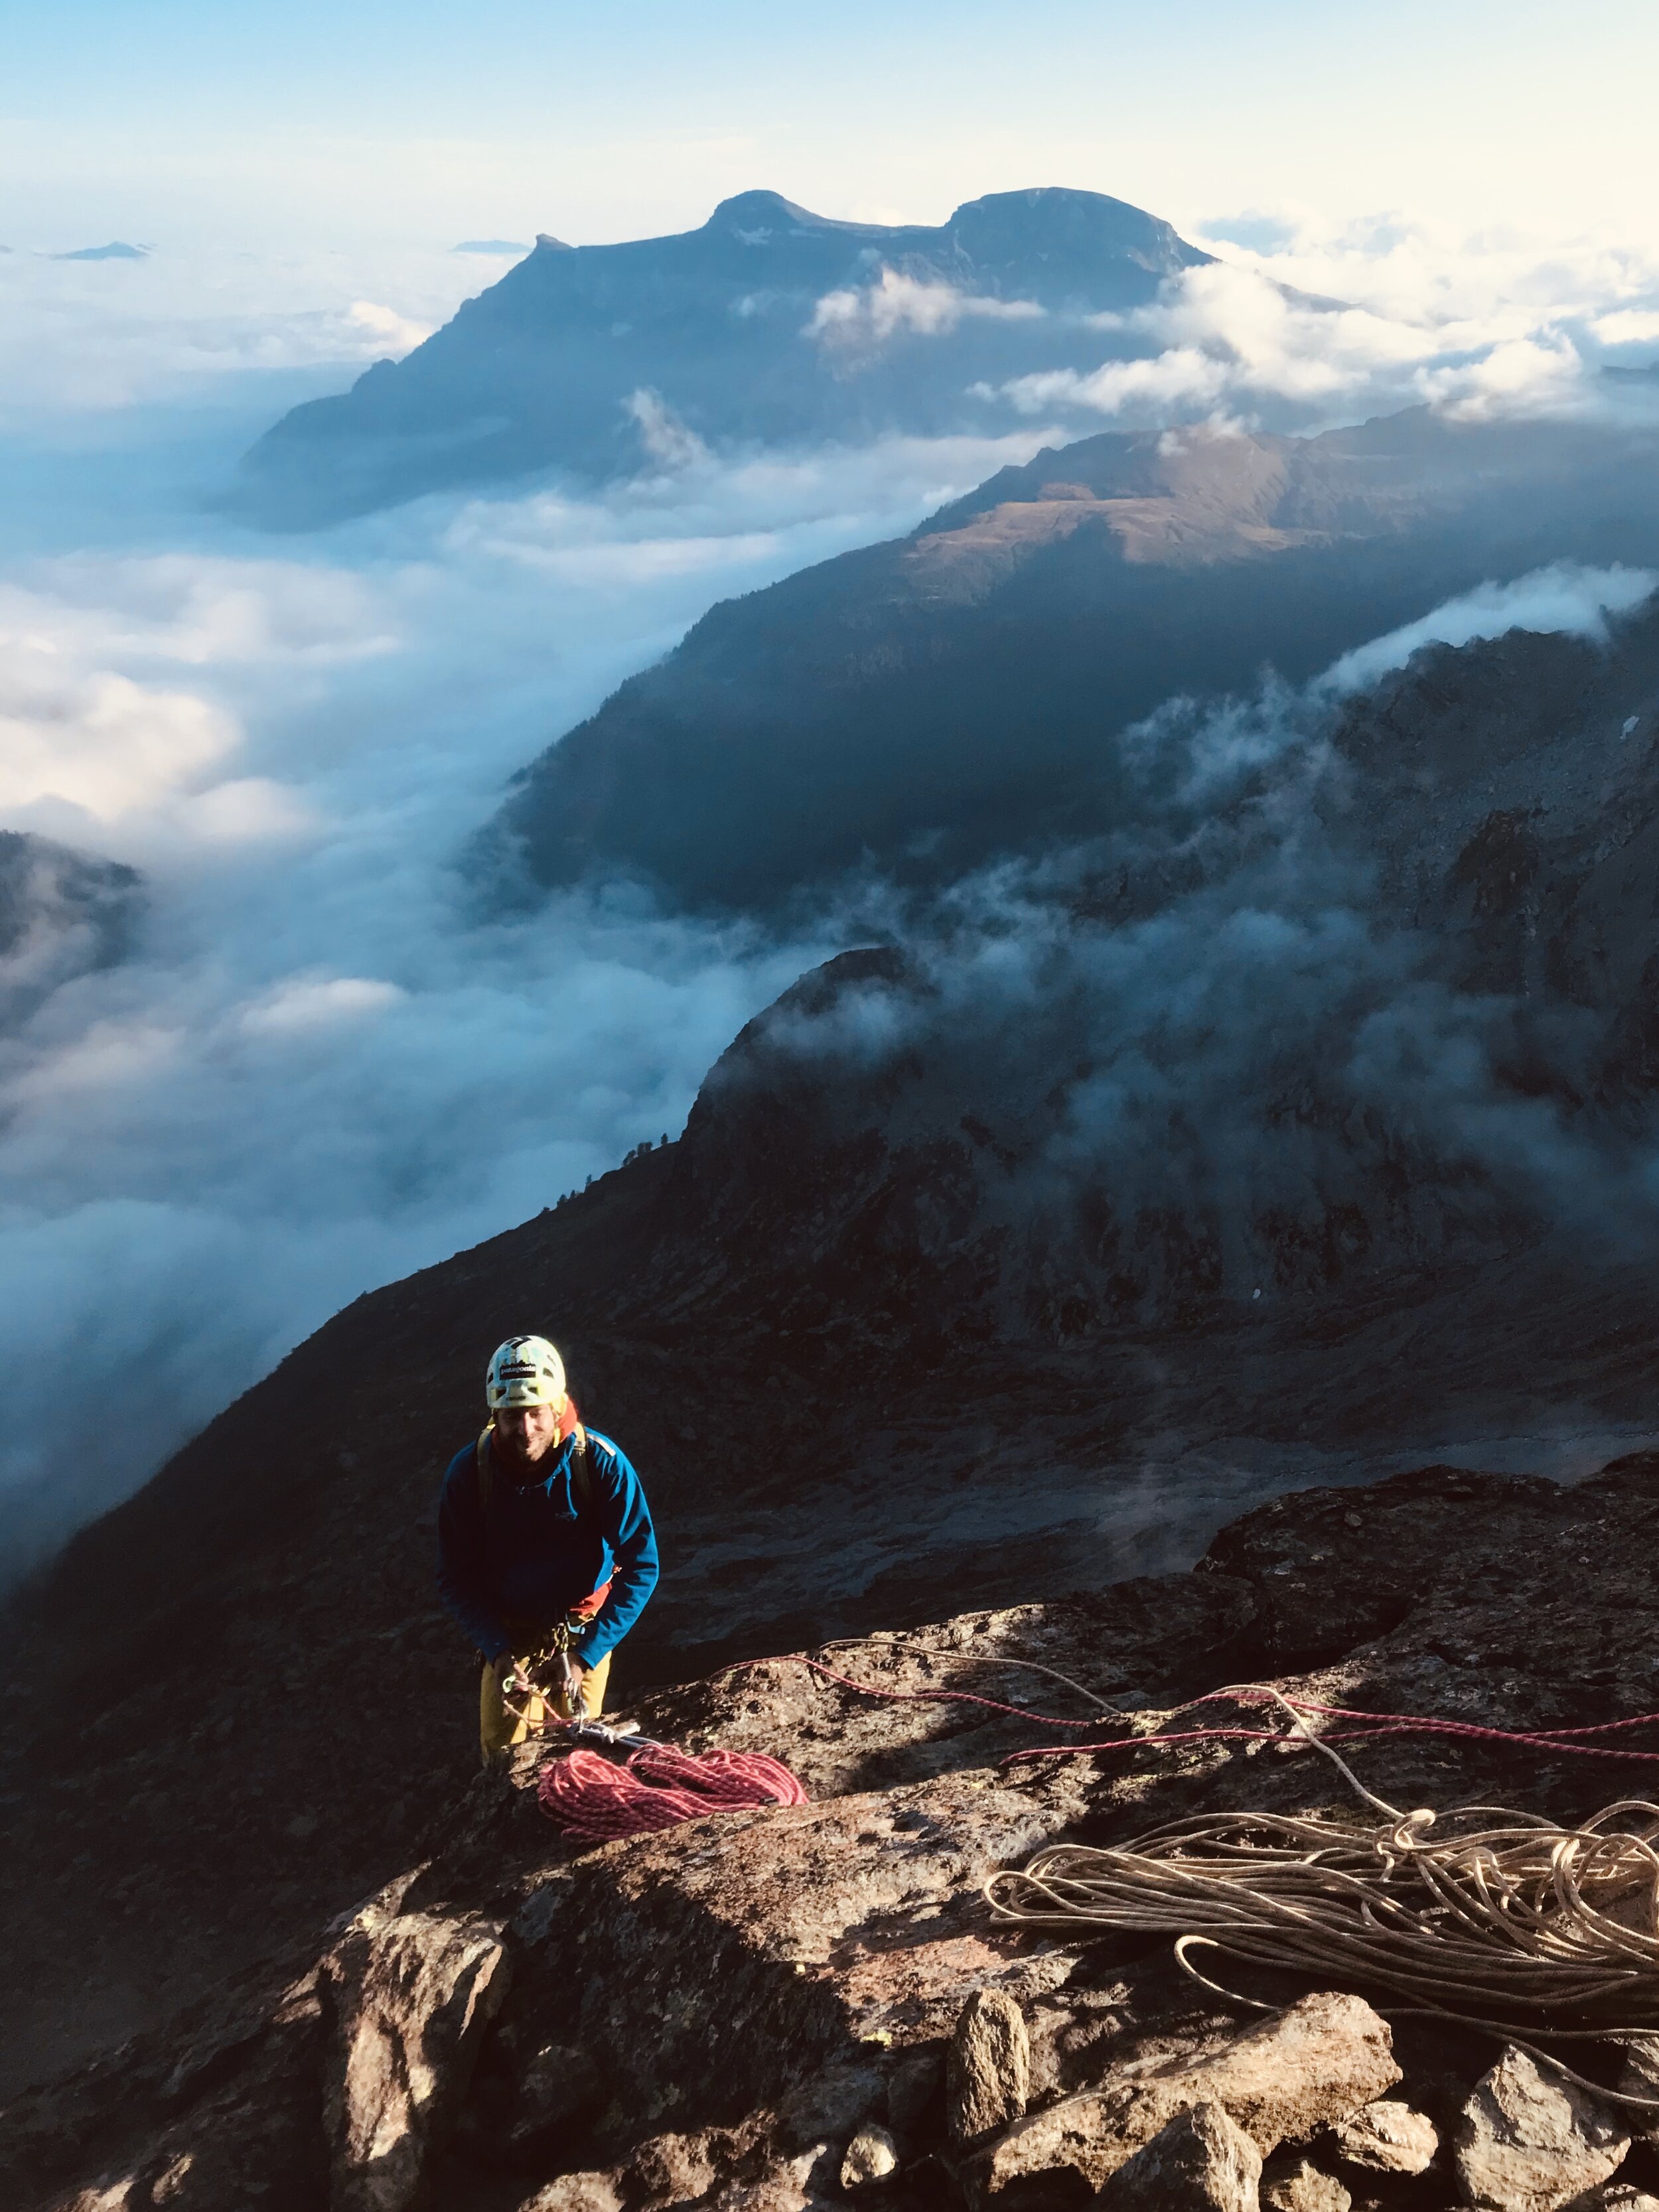
Sometimes reaching the shooting location is much more complicated than might ever look from the final photos…
Well, you did everything right and brought back some great photographs, some that you’re proud of. When you will show them to your friends and family, there will be somebody saying that “I could have done the same if I was there.” Apart the fact that this is not true, in the sense that if you place two capable photographers in the same place at the same time they will create really different pictures, the point is another one: yes, maybe you would have taken the same image, but you were not there. You didn’t thought about shooting in that place at that time, you didn’t make the effort to get there.
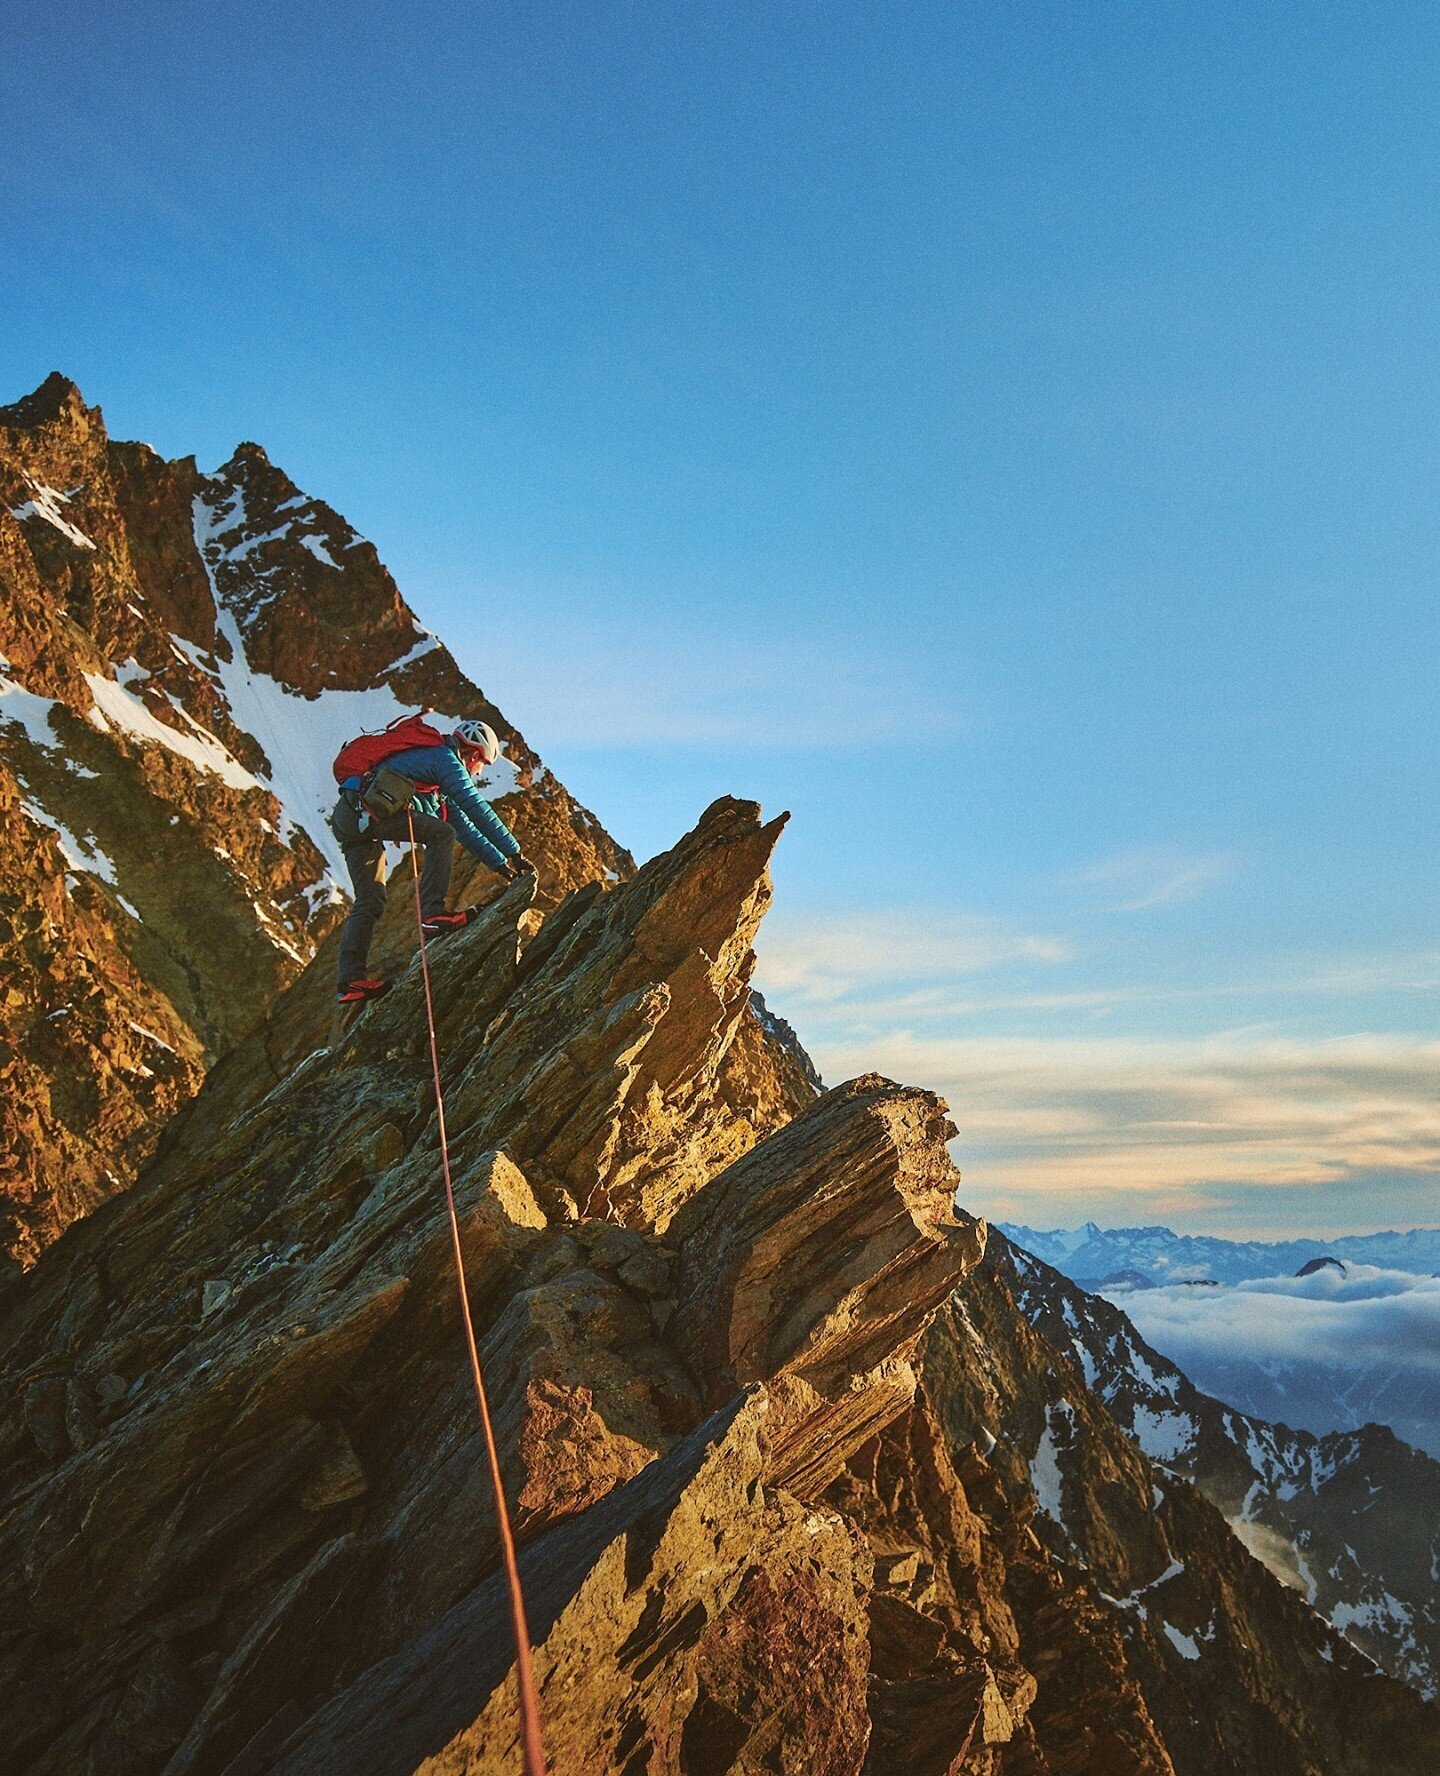
In outdoor photography to set an aperture and shutter speed and to press the shutter button is only the easiest part of the job. 90% of it is knowing where and when to be in order to take a great photograph, and then to be there.

Backlight helps defining subjects. In order to have the right angle we waited for the afternoon before getting up on the wall.

Finding balance in documentary adventure photography

One of the very few moments I could ask Petra and Luka to stop in order to take a photo. In this particular one we were still really close to the summit and trying to get as low as possible before the dark, so I had only a handful of seconds to take this shot and start walking again.
I have recently got this simple question: “How much time do you spend shooting photos on a mountain climb?”
At first I did not realize it was one of the more interesting questions I’ve got lately. As the word says, if you are on a mountain climb you are a climber first, and then a photographer; as a direct consequence you can only devote time to take photos when you have a brief break moment from your climbing duties, which vary a lot from situation to situation. There’s no quick and easy answer that question but in order to come back with some meaningful photographs the understanding of when and why you can stop to take photos during a climb is way more important than the camera model you’re shooting, at least in “real mountains” scenarios.

Luka Strazar braking trail towards the Eccles bivouacs.
Put aside those situations where the primary goal of the outing is to produce photos - usually commercial photoshoots. In these cases we pick locations relatively close and safe, we have mountain guides in charge of safety, we do location scoutings, there are often mountain huts and lifts nearby. Overall, the environment is “domesticated” and as the people with camera in hand we can focus 100% on our job, which is to take good pictures. We have done researches about location and we already know what to expect; we can take minutes to fine tune our framing or hours to walk to a different vantage point; we can study the sunlight and wait to get the sun in the right place; we can even bring in giant strobes to adjust lighting to our needs. All of this is almost mandatory if you have limited time to produce some preconceived images.
At the complete opposite we have documentary style photography. In the mountains, this happens when we commit on a real climb with the goal of documenting the ascent. In those cases we are participants and observers at the same time, trying to capture the experience as it unfolds and to keep the pace with the rest of the team. Waiting a few minutes to get a shot can translate into one more night on the mountain. There’s no time to waste and no room for errors here. It’s obvious that the photography game is completely different in this kind of scenarios.
I just told we are both climbers and photographers at the same time but this is not completely true: we are first and foremost climbers and in a serious situation we can’t slow down the team just because we need a picture. When situations gets “serious” in the mountains, they can be really serious and there’s no place for mistakes or time to waste. Unfortunately, these are usually the moments that make for the best photographs. Personally, I can’t count the shots I’ve missed when everything was perfect but we couldn’t stop, I was too cold or too tired to take the camera out. But that’s part of the game.

Evening view from the Eccles bivouac.
A perfect example of this concept is a little adventure I had the past January together with Luka Strazar and his wife Petra. They’re extraordinary strong and experienced alpinists (to understand their level is enough to know that Luka won the prestigious Piolet d’Or, the alpinism version of the Oscar Prize, not just once but twice for his groundbreaking ascents in the Himalayas). I was shooting on assignment for a climbing gear manufacturer and together with the company’s marketing department we opted for a story of a real ascent instead of yet another staged climbing photoshoot.
To get good images I wanted something long and big, with at least one night out to provide enough time and opportunities to get the content we needed, and my first choice fell on the Brouillard Integral Ridge on Mont Blanc, the highest peak of the Alps. Luka, which is much more experienced on the mountains than I will ever be, after checking snow conditions in the area decided it was too dangerous for that line and after a brief discussion we all agreed on going for the Innominata Ridge, a slightly more technical but safer line.
When we met in Courmayeur early in the morning of January 13th we found that due to previous days snow the road to Val Veny was closed, adding a few more kilometers to our already long approach towards Eccles huts. During the following three days we covered around 50km with almost 3500m vertical gain, finding our way up the immense South Face of Mont Blanc and reaching his summit at 4848m on January 14th in late afternoon. I had took some shots on the first part of the route, however when we realized we were slow and the clouds were already wrapping the upper section of the ridge, I put my DSLR in my backpack and switched to full climbing mode. At a certain point, around 4600m height, surrounded by fog and whipped by cold wind, the fear of not getting to the summit with daylight started to take place. Even if it was not super cold to be January we were not equipped and acclimated for a night out at that altitude. It was mandatory to reach the summit with daylight. I already was a few steps out of my comfort zone and we pushed to a faster pace. We were now on relatively easy but very exposed terrain, where a mistake would lead to death. At a certain point Luka, Petra and I all stopped for a couple minutes under a stone that was acting as a shield against the wind. As Luka was checking the altitude, saying that summit was somewhere close (we couldn’t see anything at all at that point) I noticed how calm and confident he was and my fear started to fade, leaving room for my photographer-self to wake up again.


I realized there was nothing to shoot there. Not only everything was white around us but we couldn’t stop for longer than a few seconds because of the cold and despite having warm hands the outer surface of my gloves was covered by ice so thick that I could barely grab my ice axe. Pressing a shutter button would have been impossible and no, I wasn't going to take my gloves off with that cold wind.

Luka near the summit.

Petra starting the long descent towards Chamonix. I took this photo without even looking in the camera, shooting blindly while paying attention to where to put my crampons.
We kept following Luka for what felt like one hour (it was probably just a few minutes). And then, boom. As we gained a few more meters to the summit the fog disappeared and the wind suddenly fade to an acceptable level. The sun was setting and we had made it just in time; the way down was much easier and we could easily descend in our headlamp lights. Anyway, we had to move fast. I snapped a few frames and got a snapshot of myself on the summit and we started walking down towards Chamonix.
I will never forget what the sky offered us in the following 10 minutes. Everything around us turned red. Everything. But we couldn't stop, we had to go down fast as the darkness was approaching and we were still in the highest point of Europe, completely alone, on a winter night. I took out my camera and started snapping frames while walking. Being careful not to stumble in my crampons I put the camera at my chest height, trying to focus on Petra and to get a decent framing. When the sunset peaked with its colors I asked Petra to stop a few seconds for a snap. Then I asked again, a couple more times, and the sun was gone. Four hours of descent in the darkness followed before reaching the Tete Rousse hut.
Right after we started descending everting turned into fire…
Well, during the whole three days I shot around 700 frames and around 250 of those where from the bursts I shot blindly while walking down at sunset. It might look a lot but when you compare that number with the around 2000 or more I shoot daily on a commercial assignment they look just a few snaps.
Getting back to the initial question, the time I can devote to shooting photos while on a real, serious mountain climb goes down to a few moments in between the action; anyway, the images I take back are much better and more compelling than anything I could do on a staged scenario, and the reason is that on a real climb my emotional involvement is immensely bigger than in controlled environments. I am sure that if I was dropped on the summit by an helicopter on that same evening just to shoot the sunset and then heli transported down, I would not have shot the same photos I took with camera on my chest while walking down, tired and cold. I guess that’s one of the reasons I love mountain photography so much. Cause you can’t fake it. You must experience it.

Best camera for mountain photography in 2020

Zinalrothorn, Obergabelhorn, Besso and Dent Blanche at dusk. 4 seconds exposure on iPhone11 Pro.
“What camera should I buy for mountain photography?”
I can’t count how many times I’ve heard this question, and I always found difficult to reply. Every setup has pros and cons, there simply isn’t a best and a worst. Usually if you want higher quality you have to carry more weight; this makes you slower on the climb/hike, maybe so slow that you will miss the perfect moment and all that gear you carried will prove completely useless. On the other hand, you can go super light, sacrificing a bit of quality but gaining efficiency.
First abseil from Punta della Rossa, Alpe Devero, Italy. Shot on iPhone7
Over the years I’ve tried a lot of different cameras, from super lightweight compacts to bulky and super expensive medium format systems. I’ve shot amazing moments on my phone and lost the good light trying to haul 10kg of glass up on a wall. After many years of trial and errors, I finally have the answer you were looking for. It might be different from your expectations, but the good news is that you don’t need to buy anything expensive. You already have it in your pocket (or maybe in your hands).
Your smartphone camera is the best one you can carry in the mountains.
I think this can apply to most of the people you’ll find on the alpine, with the only exception being the ones who want to make big prints from those photos, but they are just a few. The majority just wants to create great photos to publish on social media, to show your friends or parents or to have memories of good times in the mountains.

Sunrise from Cresta Signal, Monte Rosa, Italy. Shot on iPhone11 Pro.
I know, you are disappointed by this statement, but I have some good reasons to say it:
today’s phones have cameras that are as good (if not better) than the first generation of DSLR. They can shoot videos and stills at outstanding quality with a good amount of control over your settings; in most cases now you can even select between multiple focal lengths, including ultra wide angles. Of course you can’t mount a 70-200 f2.8 on a phone, but the advantage of having virtually no weight (because I bet you would carry your smartphone anyway) is far greater than the limitations you get
the most important pieces of gear you will use to make a photograph are your eyes and the way you look at the world. It take a lot (and I mean a lot) of practice to push these little cameras to their limit, so before spending a fortune on a new DSLR or mirrorless kit try to improve your composition, the use of light, the way you position your subject in the frame, the moment you choose to capture. A bigger camera will give you more sharpness and more megapixels but won’t help with any of these points
one of the most challenging parts of shooting on a technical ascent is to keep your camera accessible. You don’t have the time (sometimes even the space) to take your camera from your backpack, so you must have it ready, and with a DSLR isn't always easy. On the other side, you can carry your smartphone on your chest pocket, always ready without even noticing it
by limiting your options when it comes to focal lengths and settings you will be forced to be more creative, and this will make you a better photographer. You will train your eye and your brain on how to create compelling images instead of relying on your brand new, super heavy zoom. Again, with a better camera you’ll get higher quality photos, not better photos
unless you’re really fit and constantly training for the mountains, you will want to carry the less weight possible. You’ll feel every gram, and you have to carry that backpack for many hours or even days. Does it make sense to put a couple kg of camera gear, if you’ll be too tired to take it out from your backpack when the moment will come?
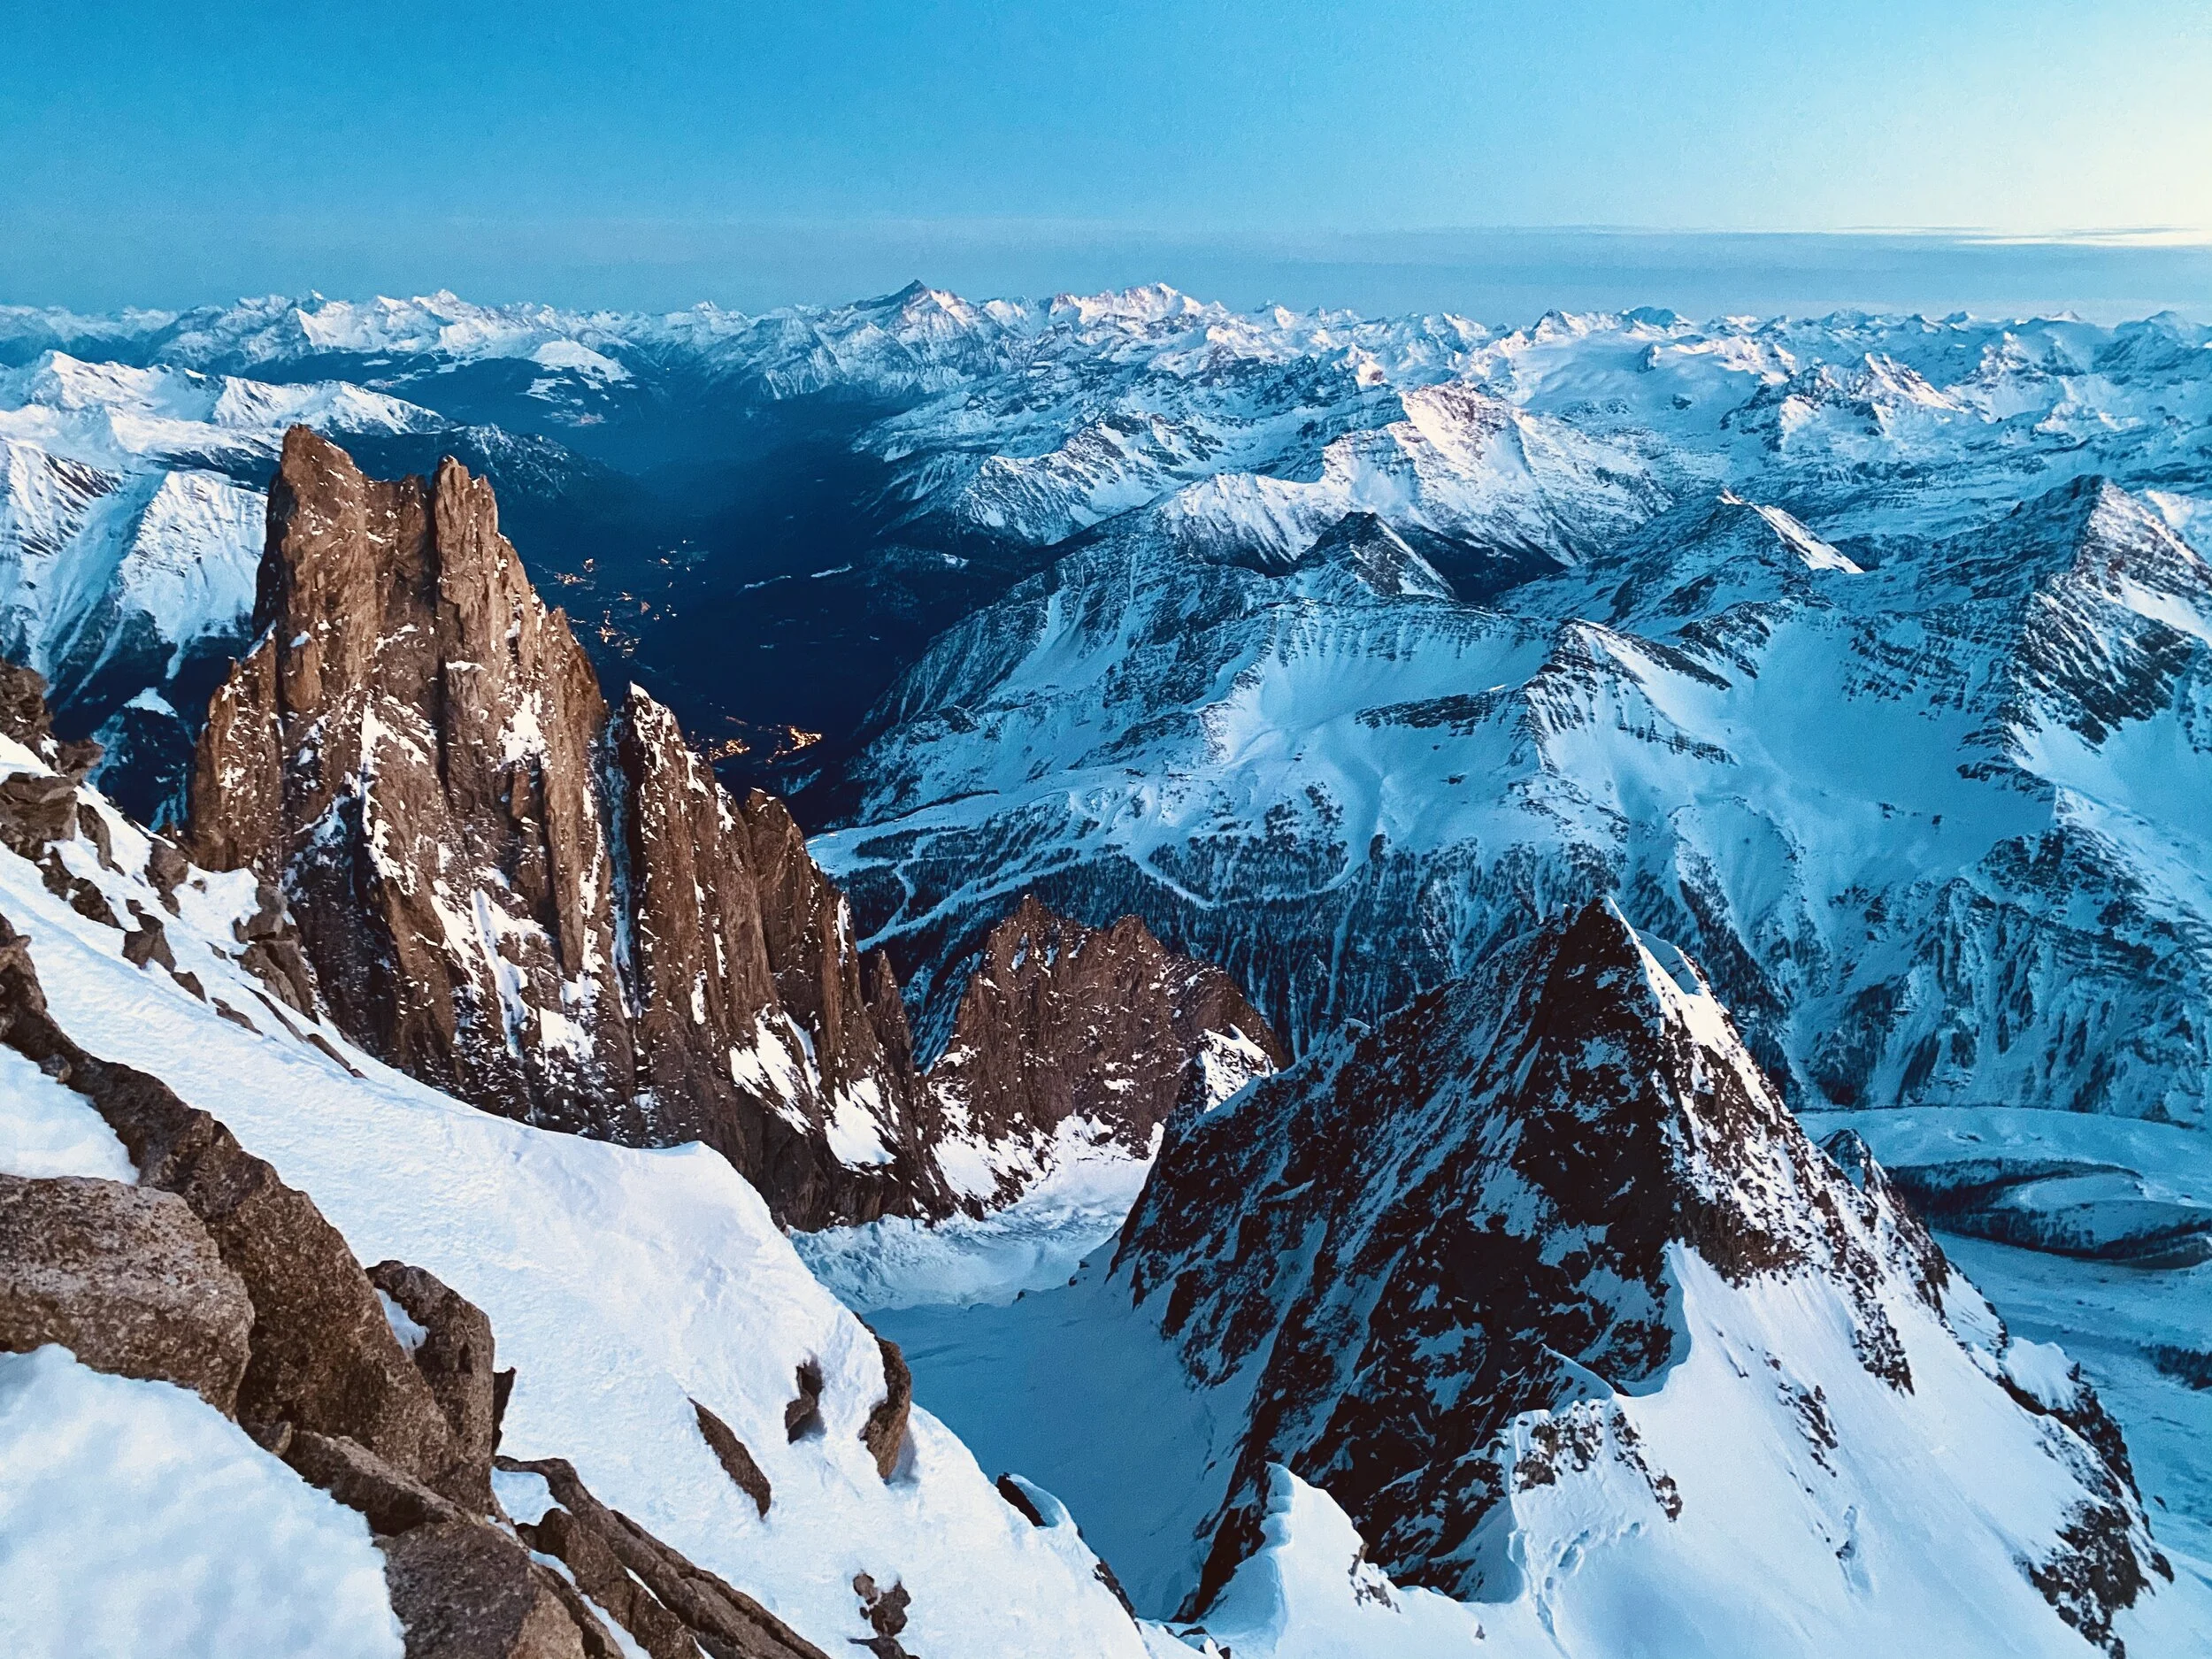
View from Eccles Bivy, Mont Blanc, Italy. Shot on iPhone11 Pro.
Next time you go for a mountain mission just take your smartphone and commit to use it. Take it out when things are getting harsh - most of the best shots happens there. Use it early, while you’re running up the ridge and the first rays of sun are hitting you. Use it late, when you’ll be tired and your brain will refuse to stop for taking pictures. Shoot a lot and try to be creative. When you’ll be happy with the photos you’re taking with your phone, you’ll be ready to evolve with a bigger photo setup.